

I was standing in my half-finished guest bathroom, covered in thinset and sweating through my favorite work shirt, when I realized I had made a massive mistake. I had spent weeks planning the floor layout and perfecting the wall tiles, but when it came to the niche, I just winged it. The result? A jagged, asymmetrical mess that looked like it was installed by someone wearing a blindfold. It was a classic case of ignoring the details that actually matter. If you are currently in the middle of an ultimate shower renovation, I am here to save you from that same sinking feeling in your gut. Today, we are talking about the Waterfall method—the secret to making your niche patterns flow seamlessly from the wall, through the box, and back out again without breaking the visual line. [IMAGE_PLACEHOLDER]
Why Your Shower Niche Looks Like an Afterthought
The problem with most DIY niches isn’t the tile itself; it is the transition. When you do not use the waterfall method, the grout lines in your niche end up fighting the grout lines on your wall. It creates a visual stutter that screams ‘amateur hour.’ I learned this the hard way during a project in 2018. I was so focused on how to hide the cut edge that I completely forgot to align the horizontal planes. The result was a shelf that sat just a quarter-inch higher than the wall row. It drove me crazy every time I showered until I finally ripped it out and started over.
Is This Waterfall Layout Actually Worth the Extra Math?
Many people ask me if spending an extra hour on layout is really necessary for a space that just holds shampoo bottles. The short answer? Absolutely. The Tile Council of North America (TCNA) emphasizes in their handbook that proper layout is as much about structural integrity as it is aesthetics, noting that misaligned tiles often lead to wider, more vulnerable grout joints that are prone to cracking. Beyond the structural side, a spa-like shower experience depends on visual calm. When the tile ‘falls’ from the wall into the niche and continues the pattern, the eye does not get stuck on mistakes.
The Day My Perfect Tile Job Turned Into a Grout Line Nightmare
One of the biggest mistakes I made early on was forgetting the slope on the bottom sill. I assumed the thinset would be enough to create a pitch, but I was wrong. Water pooled in the back corner, and within six months, I found mold growing behind the tile because the moisture had nowhere to go. Now, I always pre-slope the niche before the first tile even touches the wall. I also make sure to follow the soft joint rule for the inside corners of the niche to allow for the house to breathe without cracking my hard work. Have you ever finished a tile project only to realize the grout lines in your niche are a quarter-inch off from the main wall? It is a frustrating moment, but I promise that once you master this layout, you will never look back.
Set Your Lines with High Precision
To pull off a waterfall effect, you cannot rely on a spirit level and a prayer. You need to treat your layout like a high-stakes puzzle where every piece depends on the one before it. I always start by using the laser level hack for straight tile rows. Project a vertical and horizontal crosshair directly onto the niche opening. This acts as your ‘true north.’ If your wall tile meets the niche at the bottom, that specific grout line must continue perfectly across the bottom sill and up the back wall. Think of the tile as a piece of fabric you are draping over a box; the pattern should ‘fold’ into the recess without any shifts left or right.
Dry Fit the Entire Niche Before Opening Thinset
This is where most people fail. They start buttering tiles and hope it all lines up at the end. I remember a master bathroom project in 2021 where I was working with expensive 12×24 porcelain. I thought I could eyeball the wrap. By the time I reached the top of the niche, I was off by an eighth of an inch—which looks like a mile in a shower. Now, I use the paper template method for complex tile cuts to verify every piece fits like a glove. Layout your wall tiles on the floor first, then place your niche tiles exactly where they will live. If the veins in a marble-look tile don’t line up during the dry fit, they certainly won’t line up when you are fighting against drying mortar. 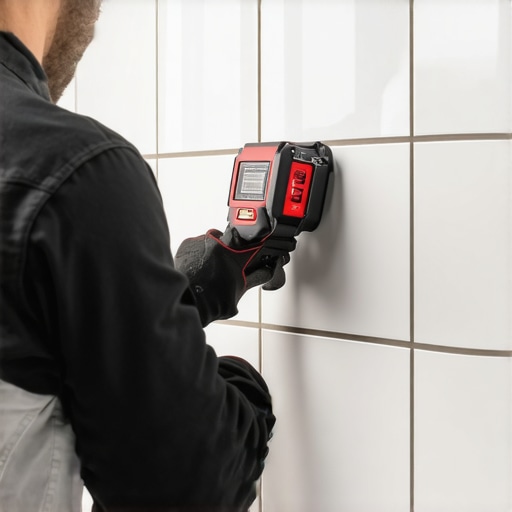
Wrap the Pattern Like a Gift Box
The ‘waterfall’ happens when the tile on the face of the wall is cut, and the remainder of that exact same tile is used for the return (the side wall of the niche). This ensures that the color and grain carry through the corner. For larger tiles, you must follow the back-buttering rule for large format wall tiles to ensure 100% coverage. If you leave voids behind the niche returns, you are asking for trouble when it comes time to drill for a glass shelf or even just during daily use.
Avoid the Peanut Butter Disaster
Consistency is everything when you are working on vertical surfaces. If your mortar is too runny, your niche tiles will sag, destroying your perfect alignment. You need to know how to mix thinset for the perfect peanut butter consistency so the tiles stay exactly where you press them. I once saw a DIYer try to use mastic in a niche because it was ‘sticky’—don’t do that. Mastic will re-emulsify in a wet environment, leading to a complete failure. Stick to high-quality thinset and use spacers on all three dimensions of the niche to maintain that waterfall flow.
Master the Symmetry Start
Before you make your first cut, look at the entire wall. Using the symmetry start secret for subway tile layouts ensures that your niche doesn’t end up with a tiny ‘sliver’ of tile on one side and a full tile on the other. A centered niche is a professional niche. If the waterfall doesn’t look intentional, it just looks like a mistake you tried to cover up. Take the time to measure the distance from the corner of the wall to the edge of the niche on both sides. If they aren’t identical, shift your entire wall layout until they are. It might mean more cuts, but the visual balance is what separates a custom build from a builder-grade hack job.
While we spent a lot of time perfecting the visual flow of a niche, the biggest mistake I see pros and DIYers alike make is being too perfect with their floor-to-wall transitions. Everyone tells you that a gap is a sign of a bad job, but in reality, if your floor does not have room to breathe, it is going to fail. According to the National Wood Flooring Association (NWFA), failing to provide adequate expansion space—usually equal to the thickness of the flooring itself—is the number one cause of cupping and buckling. I have walked into countless homes where the homeowner followed the penny gap rule for hardwood expansion space but then pinned the floor down by nailing the baseboards too tight.
Stop Chasing the Myth of the Gapless Floor
If you wedge your flooring tight against the drywall, you are creating a ticking time bomb. To prevent these flooring installation mistakes to avoid for a seamless look, you must respect the physics of the material. I learned this the hard way when I saw a beautiful laminate job turn into a disaster because the installer did not understand why your laminate floor is spongy in the corners. The floor had expanded in the summer humidity, hit the wall, and had nowhere to go but up. Now, I always insist on a proper perimeter gap, even if it looks large before the baseboards go on. 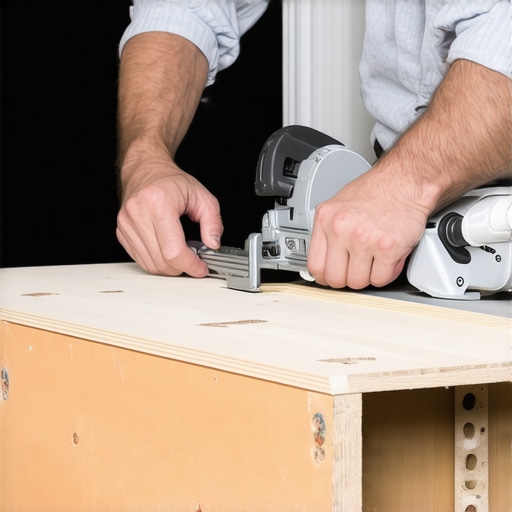
Does the ‘Tightness’ of Your Installation Actually Cause Future Failures?
Yes, especially when it comes to trim and seasonal changes. If you do not use the back-cutting secret for baseboard miters, your joints will look great for a week and then open up as soon as the heater kicks on. You might notice why your baseboard miters keep gapping in the winter; it is often because the wood is shrinking while the house settles. By back-cutting the miter, you ensure the front edge stays tight even when the wall is not perfectly square.
The Door Jamb Trap That Ruins Seamless Transitions
The most common ‘oops’ factor happens at the doorways. People get overzealous with a flat saw and end up with the door jamb saw mistake that leaves huge gaps. It looks terrible and is incredibly hard to fix without replacing the entire casing. To avoid this, always use a scrap piece of your actual flooring as a height guide. Also, in wet areas, don’t forget the silicon bead secret for waterproofing baseboards in bathrooms. Without that tiny hidden seal, moisture from your shower will wick into the MDF and blow your baseboards apart from the inside out. Have you ever fallen into this trap? Let me know in the comments.
I used to think my hands and a basic hammer were enough to conquer any flooring project. Then I turned 30, and my knees started telling a different story. If you are serious about a professional carpet install, stop relying on a knee kicker for anything other than minor positioning. I personally switched to a power stretcher years ago because it is the only way to ensure the tension is uniform across the entire room. If you skip this, you will eventually see loose carpet bubbles that are a nightmare to fix once the furniture is in. According to the Carpet and Rug Institute (CRI) 104 standards, power stretching is mandatory for all residential installations to prevent delamination and premature wear. It is not just a luxury tool; it is the standard that keeps your warranty intact and your floor flat for a decade.
Ditch the Knee Kicker for a Real Stretch
Maintenance is where the DIY dream often goes to die. I have seen beautiful durable flooring installation ruined by the wrong mop or a lack of attention to shifting joints. For modern matte finishes, I always recommend the microfiber mist rule for cleaning matte floors. Drowning your floor in water is the fastest way to swell the core of your planks and cause peaking at the seams. In the shower, your biggest enemy isn’t dirt—it is movement. You should be checking your corners every year to see why your caulk is cracking. If you see separation, scrape it out and use a high-quality 100% silicone instead of grout-in-a-tube, which lacks the flexibility to handle house settling.
How do I maintain my flooring and shower over time?
As we look toward top trends in installation for 2025, we are seeing a massive shift toward the zero grout look for large format porcelain. This means your layout and subfloor prep must be even more precise because there is no grout line to hide a 1/16th-inch error. I predict that the ‘click-lock’ era will soon give way to more advanced loose-lay systems that rely on friction and weight, making repairs easier for homeowners. Get comfortable with your laser level now, because precision is only becoming more critical as tile sizes grow.  Before you wrap up your next project, I want you to try one specific advanced trick: use the hot glue hack for holding baseboard miters. It is a absolute game-changer for those frustrating outside corners that never seem to stay shut while you are reaching for the nail gun. Give it a shot on your next room and you will never go back to fumbling with tape and prayers.
Hard Lessons from the Thinset Trenches
One of the biggest eye-openers I have had is that ‘eyeballing it’ is just another way of saying ‘I will fix this later.’ Whether you are aiming for a durable flooring installation or a complex niche, the math doesn’t lie. I used to rush the planning phase, but now I know that 90% of a great result happens before the first tile is even wet. I also learned that spending the money on a high-quality substrate is non-negotiable; you can’t build a masterpiece on a crumbling foundation. Another moment of clarity came when I stopped treating baseboards as just ‘trim’ and started seeing them as the final seal of the room. Using the inside cope method for beginners completely changed the look of my corners, making them far more resistant to the natural expansion and contraction of the house. Finally, I realized that a professional carpet install is never about speed—it is about tension. If you aren’t sweating while you stretch, it probably isn’t tight enough.
The Toolkit That Saves My Back and Reputation
I don’t leave my shop without my self-leveling cross-line laser; it is the only way to ensure those waterfall lines stay true across a six-foot span. For flooring, a Roberts power stretcher is my best friend for preventing those annoying bubbles that plague DIY jobs. I also keep a stash of heavy-duty paper for the paper template method for complex tile cuts, which has saved me thousands in wasted porcelain. Lastly, never underestimate a high-quality 100% silicone; it is the secret to a long-lasting, flexible seal in wet environments. [IMAGE_PLACEHOLDER_E]
Take the Leap into Your Next Renovation
Every project is a chance to sharpen your skills and improve your home’s value. Don’t let the technical details of a step-by-step flooring installation intimidate you. Take it one row at a time, trust your measurements, and remember that even the pros started with a single crooked tile. You have the tools and the knowledge to create something truly beautiful. If you hit a wall or need professional eyes on your project, you can always reach out to us for expert advice. Have you ever struggled with getting your shower niche to line up perfectly with the main wall? Let me know in the comments below!