

I was barefoot, carrying a steaming mug of coffee on a Tuesday morning, when my toes hit that weird, squishy hump right in the middle of the kitchen. It wasn’t there yesterday. Or was it? That’s the thing about why your vinyl floor is bubbling in one specific spot—it feels like a personal betrayal by your own home. You spent the money, you followed the guides, and now you have a miniature mountain range forming under your feet. I remember my first DIY fail vividly. I tried to just ‘walk it out,’ thinking my body weight would somehow bond the adhesive back to the subfloor. Spoiler alert: it didn’t. It just made a weird squelching sound that haunted my midnight snack runs. It’s like that one loose tooth you can’t stop poking with your tongue; once you know that bubble is there, you’ll feel it every single time you walk past. I spent weeks trying to hide mine under a strategically placed rug, but all that did was make me trip. Today, I’m going to show you exactly why that bubble is mocking you and how we can flatten it out without losing your mind.
That Growing Bump in the Kitchen Floor Needs to Go
When I first started tinkering with my own home renovations, I made the classic rookie mistake: I assumed ‘waterproof’ meant ‘invincible.’ It doesn’t. If you’re seeing a bubble, it’s usually because of trapped air, moisture, or a lack of room to breathe. I once skipped the moisture meter test for concrete subfloors because the slab ‘looked dry’ to my untrained eye. Two months later, my beautiful planks looked like a sheet of bubble wrap. It’s a common story among flooring installation mistakes to avoid. A surprising fact from the Resilient Floor Covering Institute (RFCI) is that nearly 80% of all resilient flooring complaints are related to subfloor moisture or improper site conditions rather than the product itself. If you didn’t leave enough of a perimeter expansion gap for vinyl planks, that floor has nowhere to go but up when the temperature changes.
Will I Have to Rip Out the Whole Floor?
That’s the underlying fear that keeps most homeowners awake at night, isn’t it? You see one little bubble and immediately start calculating the cost of a dumpster and a brand-new pallet. I’ve been there, staring at a hump by the baseboard styles I worked so hard to install, wondering if I should just call a pro and admit defeat. But here’s the reality: most localized bubbles are fixable without a total demo. Whether it’s a spot where you forgot to use the block and hammer hack for tight joints or a tiny structural shift, we can usually perform a ‘surgical’ fix. It might be as simple as releasing a pinch point under the trim or addressing how you stagger vinyl plank ends to distribute stress better. Have you ever stepped on a soft spot and felt that sickening ‘give’ under your weight? Before you go grabbing a crowbar, let’s talk about the simple checks that save you thousands. Have you ever noticed your floor behaving differently when the seasons change?
Look for the Hidden Pressure Points First
Most people assume a bubble is just air, but usually, it is the floor crying for space. Think of your vinyl floor like a large sheet of paper on a humid day; if you tape all four edges down tight and the paper expands, it has nowhere to go but up. I remember a job in a sun-drenched sunroom where the owner had installed the planks tight against the drywall. By mid-afternoon, the floor looked like a rolling wave. We had to pull up the baseboard styles that elevate your interior design just to find that there wasn’t a millimeter of breathing room. The first thing you need to do is check your edges. You must ensure you have a why you need a perimeter expansion gap for vinyl planks strategy in place. If the floor is hitting the wall, it will pivot at the weakest joint and create that hump. Use a oscillating multi-tool to trim back the edges of the planks where they meet the wall or door frames. You’d be surprised how often a floor flattens out the second it stops fighting the studs.
Release the Pressure Without a Sledgehammer
If your edges are fine but the bubble persists in the center of the room, you might have a ‘pinch point’ caused by heavy furniture or cabinetry. I once spent three hours scratching my head over a bubble near a sink until I realized the why your kitchen island needs a specialized floor layout was the issue. The installers had built the heavy island directly on top of the floating floor, effectively pinning it to the subfloor. Floating floors need to move as a single unit. To fix a localized air bubble in glue-down vinyl, you can sometimes use a ‘surgical’ approach: a tiny needle to inject fresh adhesive and a heavy weight to bond it back down. For click-lock floors, you might need to disassemble a small section. This is why it is so critical to how to stagger vinyl plank ends for maximum strength; a proper stagger allows the floor to distribute weight and tension more evenly, preventing these localized stress fractures from turning into permanent peaks.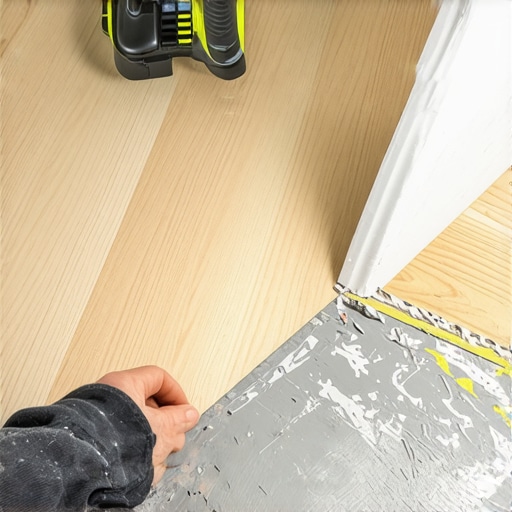
Fixing Moisture Issues from the Bottom Up
If you feel ‘squish’ rather than just ‘air,’ you’re likely dealing with a the vapor trap mistake that peels your geist garage coating equivalent in your living room—moisture coming up from the slab. I’ve seen beautiful floors ruined because someone skipped why your concrete subfloor needs a calcium chloride test before laying the underlayment. If moisture is trapped, it turns into a gas and pushes the plank upward. In these cases, you have to address the source. If it’s a small area, you might pull up the affected planks, let the subfloor dry completely, and apply a the floor prime move for porous concrete subfloors treatment to seal it. While you have the floor open, check for any the self leveler mistake that creates new high spots that might be acting as a pivot point. Sometimes a bubble isn’t air or water at all—it’s a high spot in the concrete that you didn’t see during the step-by-step flooring installation from planning to perfect finish phase. Flattening that hump with a grinder before clicking the floor back together is the only way to ensure it stays flat for good.
Use Transitions to Break Up Large Spans
Large open-concept rooms are the biggest offenders for bubbling. A floor that spans 40 feet without a break is under immense internal pressure. I always tell DIYers to avoid the t-molding mistake most vinyl installers make by actually using the transitions in doorways. It might look ‘seamless’ to run the floor through every room, but you’re creating a giant sail that catches the wind of thermal expansion. Adding a transition strip allows each room to expand and contract independently, which usually kills those stubborn bubbles in their tracks.The nuances of why your vinyl floor is bubbling in one specific spot usually go beyond just ‘oops, I forgot the gap.’ Let’s dig deeper into the science of why these issues persist even when you think you’ve done everything right. Most beginners assume the ’48-hour rule’ for acclimation is a magic timer that guarantees success, but time is actually a secondary factor to the ambient environment. According to the National Wood Flooring Association (NWFA), successful installation only happens when the flooring has reached its Equilibrium Moisture Content (EMC) relative to the room’s permanent conditions. If you skip the moisture meter test for concrete subfloors because the planks have been ‘sitting out’ for two days, you’re missing the actual data needed to prevent future buckling. I’ve seen installers make the mistake of using too much adhesive, creating a ‘hydraulic cushion’ that traps air and gas as the glue cures—another one of those flooring installation mistakes to avoid that leads to the very bubbles we’re trying to fix.
Why does your floor still move after 48 hours of acclimation?
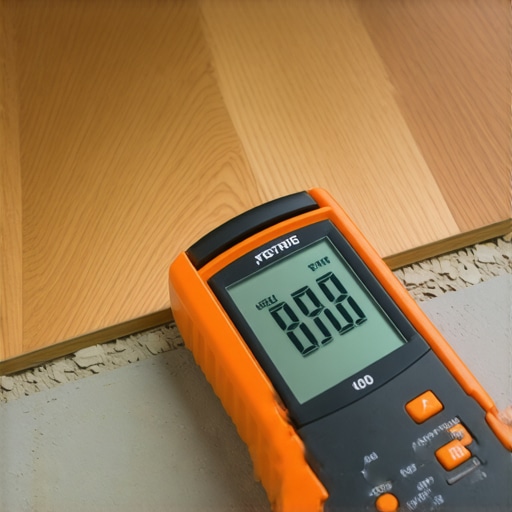
It’s usually because the home’s HVAC system wasn’t operational during the process. Acclimating planks in a house without climate control is like a runner training for a marathon in a swimming pool—the conditions simply don’t translate. This isn’t just a vinyl problem; if you’re transitioning to other materials, you might find why your carpet seam looks like a speed bump because of similar subfloor height discrepancies that weren’t feathered out properly. To fix these transitions without the bulk, I highly recommend the low-profile transition trick for wheelchair access even for non-accessible homes—it creates a much smoother visual line. 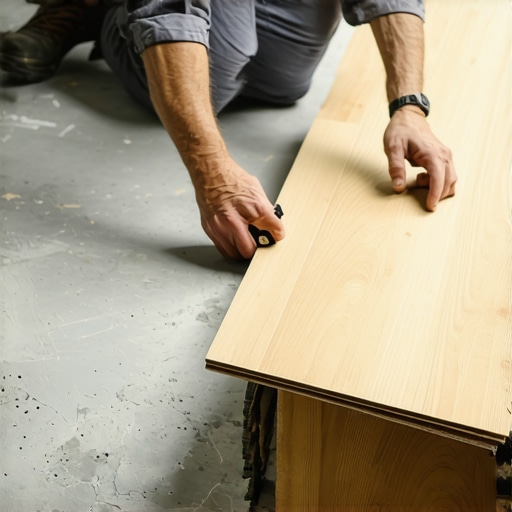 Another advanced ‘trap’ involves the baseboards. I’ve often seen homeowners nail their trim tight against the floor to hide an uneven cut. This effectively pins the ‘floating’ floor to the subfloor, preventing the necessary expansion and forcing the floor to hump in the center of the room. You’re much better off learning the back-cutting secret for baseboard miters to get that tight fit against the wall without compressing the floor. You should also check out why you should paint your baseboards before installing so you can focus on a loose, perfect fit later. It’s similar to how why your shower pan is making a popping sound—it’s often a result of being pinned or unsupported in a way that creates tension. Don’t overlook the tape you use on your underlayment, either. Using a non-breathable duct tape on a vapor-permeable underlayment creates a localized moisture trap, similar to the vapor trap mistake that peels your geist garage coating, which forces the planks upward. For those looking for a professional finish throughout the home, checking out carpet install secrets achieving flawless results every time can help balance the texture and height of your new floors. Have you ever fallen into this trap of thinking a floor was ready just because the clock said so? Let me know in the comments.I’ve found that the real difference between a ‘weekend warrior’ look and a professional finish is the willingness to buy that one tool you think you’ll only use once. For me, it was a high-end moisture meter. I’m not talking about the cheap $20 prongs from the big-box store; I’m talking about a non-invasive pinless meter. The ASTM F2170 standard for in-situ relative humidity is the industry bible for a reason—if you’re ignoring the science of the slab, you’re just gambling with your materials. I also swear by the heat gun trick for removing old floor adhesive 2 when I’m doing localized repairs. It allows you to soften the vinyl just enough to manipulate it without causing permanent warping or snapping the brittle click-lock edges. If you’re dealing with a subfloor that has minor ridges, using the feather edge tactic for smoothing subfloor seaming is the only way to prevent those humps from telegraphing through your thin vinyl later. It’s all about the prep work you can’t see once the floor is down.
How can I maintain my vinyl floor for years to come?
Keeping that floor flat and beautiful isn’t just about the initial fix; it’s about environmental control. I always tell my clients that a floor is a living part of the house. You need to keep your home’s humidity between 30% and 50% year-round. If you let the house bake in the summer with the AC off, those planks will expand and fight each other again. For daily care, stop using steam mops. I know the commercials make them look like magic, but they force moisture into the seams, which is the fastest way to trigger a new bubble. Stick to a PH-neutral cleaner and a damp microfiber. If a plank does get damaged, don’t panic. Knowing how to replace a single broken tile without total demo is a skill that translates directly to vinyl planks—you can often cut out the damaged piece and drop in a new one if you have the right adhesive. I predict that in the next few years, we will see ‘smart’ underlayments with built-in sensors that alert your phone if moisture levels under the floor spike, preventing bubbles before they even form. For now, we have to rely on our tools and our eyes. I highly recommend following a step-by-step flooring installation from planning to perfect finish guide even if you are just doing a small repair. My best advice? Grab a digital hygrometer for your living room today—it’s the cheapest way to monitor the air that’s trying to lift your floor.
Lessons from the Trenches: What I Wish I Knew Before the Bubbles Started
I learned the hard way that a floor is only as good as the prep you cannot see. First, do not ignore the underlayment tape move for moisture barriers; if you use the wrong tape, you are basically inviting air pockets to take up residence under your planks. Second, I realized that weight is a double-edged sword. While it helps bond glue, a heavy appliance can pin a floating floor in place, which is why your kitchen island needs a specialized floor layout and why it should never be built directly on top of the flooring. Lastly, those tiny gaps you cut around door frames matter more than you think. If you find why your door jamb undercuts are too high or too tight, the floor will eventually buckle against the wood. It is always better to have a slightly larger gap hidden by trim than a floor that looks like a topography map.
The Gear That Actually Makes a Difference
When I am tackling a repair or a fresh install, three things are always in my truck. A high-quality oscillating multi-tool is non-negotiable for trimming edges that were cut too tight without pulling up the whole floor. I also trust a non-invasive moisture meter to give me the real story of the slab before I even open a box of planks. For those small, pesky air pockets in glue-down vinyl, a simple medical-grade syringe for injecting adhesive and a 100-lb floor roller are my secret weapons. Finally, I always keep a copy of the step-by-step flooring installation from planning to perfect finish guide handy to ensure I am not skipping the boring—but vital—prep steps like checking for subfloor flatness.
Taking Control of Your Homes Foundation
Fixing why your vinyl floor is bubbling in one specific spot does not have to be a multi-day nightmare. Most of the time, the floor is just asking for a little room to breathe or a dry environment to sit in. By taking a surgical approach and focusing on pressure points and moisture control, you can restore that sleek, high-end look without a professional price tag. Do not let a small hump discourage you from the joy of a DIY project. Your home is a work in progress, and every fix is just another tool in your belt. Have you ever discovered a mystery bump under your floor after a humid weekend? Tell me how you fixed it—or if you are still fighting it—in the comments below!