

The first time I heard the wood groan in my new kitchen, I thought it was just the house settling. I was wrong. I had just finished a massive renovation, plopping a heavy, marble-topped island directly onto a floating floor without a second thought. Six months later, during a humid July, that beautiful floor buckled three inches high because it was pinned down by the island’s weight. It was a heart-wrenching, expensive mistake that taught me a vital lesson: your kitchen island is not just a piece of furniture; it is a structural anchor that dictates exactly how your floor must be laid. Today, I’m going to show you how to avoid my early failures and why a specialized floor layout is the only way to protect your investment.
Your Heavy Island is Secretly Trying to Move Your Floor
Most homeowners think of their kitchen floor as a single, static surface, but it actually behaves like a living thing that breathes. When you install a floating floor—whether it is laminate or luxury vinyl—the entire surface needs to move as temperature and humidity change. If you place a five-hundred-pound island on top of it, you’ve essentially nailed the floor to the subfloor in one spot. This leads to the most common flooring installation mistakes to avoid for a seamless look, where the planks pull apart or peak because they have no room to shift. You have to treat the island as a separate entity, often installing the flooring around it or using specific fastening techniques that allow for movement. This is why a step-by-step flooring installation plan must account for the island’s footprint before the first plank is even unboxed. According to the National Wood Flooring Association (NWFA), wood flooring can exert several hundred pounds of pressure per square inch as it expands, which is more than enough to lift a heavy cabinet or snap a locking joint if the layout isn’t specialized.
Is all this extra planning actually worth the effort?
Many people wonder if they can just cut corners and hope for the best, especially if they are doing a DIY job. I’ve been there, thinking I could save a few hours by just laying the floor straight through. But the reality is that without a perimeter expansion gap for vinyl planks specifically tailored to the island’s base, you are essentially setting a ticking time bomb. Have you ever walked through your kitchen and felt a soft, spongy spot near the breakfast bar? That’s often the first sign that your floor is struggling against the weight of the island. Have you faced this kind of floor buckling or gapping in your own home? It’s a common frustration, but one that is completely preventable with the right strategy.
Why You Should Build Your Island on the Subfloor
Think of your floating floor like a massive, interconnected puzzle. If you press a heavy thumb down on one piece, the rest of the puzzle can’t expand when the sun hits it. This is why you must secure your kitchen island directly to the subfloor before the flooring even arrives. By doing this, you create a static anchor that doesn’t interfere with the movement of your planks. On a job last spring, a client insisted we lay the floor first because they hadn’t picked their island color yet. I warned them, but we went ahead. Two months later, the floor buckled so hard near the dishwasher it looked like a mini-mountain range. We had to rip it out and start over. Now, I always insist on the ‘island-first’ rule. If you are working with wide planks, you might also consider the glue assist strategy for wide plank hardwood installs to ensure the areas around heavy cabinetry remain rock-solid without compromising the floating nature of the rest of the room.
The Frame-In Method Protects Your Floor and Your Cabinets
Once the island is set, you treat it like a wall. You aren’t installing ‘under’ it; you are installing ‘to’ it. You need to maintain a strict 1/4-inch to 1/2-inch space between the flooring planks and the island base. This is the golden rule of the why you need a perimeter expansion gap for vinyl planks. If you skip this, the floor will eventually push against the island and force the joints to snap. When you are clicking your planks together, use the rubber mallet rule for locking vinyl planks to ensure every joint is seated perfectly before you move to the next row. This prevents small gaps from growing into major structural weaknesses near the island’s corners. 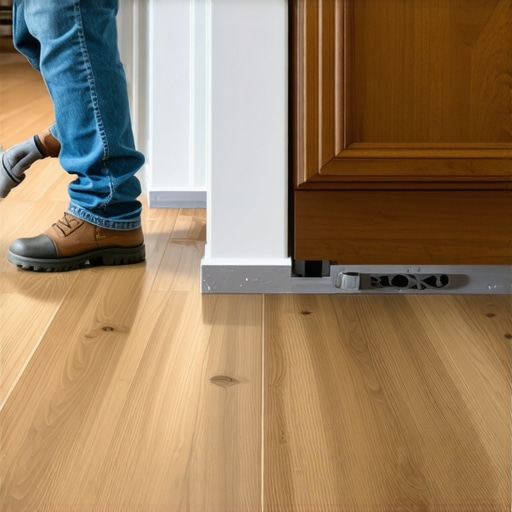
How to Scribe and Cut Around Complex Island Bases
Most islands aren’t just flat boxes; they have decorative end panels or toe kicks. This is where the work gets technical. You’ll need to scribe the flooring to follow the contour of the island base. I use a simple compass to trace the island’s profile onto my plank, then use a jigsaw for the precision cuts. It’s vital to learn how to stagger vinyl plank ends for maximum strength as you approach the island, so you don’t end up with a line of short ‘cheater’ pieces right where the foot traffic is heaviest. I remember a particularly tricky hexagonal island where I spent three hours just on the scribing. The result was a floor that looked like it grew out of the cabinetry rather than being forced around it.
Finish the Look with Precision Trim Work
The gap you left around the island shouldn’t be visible once you’re done. This is where shoe molding or quarter-round comes into play. You must nail the trim to the island base, never to the floor itself. If you nail it to the floor, you’ve essentially pinned the floor down, defeating the entire purpose of the expansion gap. For the corners of the island, don’t just miter them; try the inside cope method for beginners to get a professional, gap-free fit that handles house settling much better. Adding a fresh baseboards makeover around the island can unify the entire kitchen’s aesthetic, making the island look like a custom-built architectural feature rather than an afterthought.I see it every week: a DIYer or even a ‘pro’ who thinks they can outsmart the seasons. Most people believe that once you’ve laid the floor and the island is set, the job is done. But the real expertise comes in how you handle the transition to the walls and the base of your cabinets. There is a persistent myth that the tighter the fit, the better the craftsman. In reality, a tight-fitting baseboard in a high-humidity area is a sign of someone who hasn’t seen what happens to a home in February. Everyone tells you to jam those miters together, but in my experience, using the back-bevel move for tight baseboard miters is what actually keeps those joints from exploding when the house settles. Have you ever fallen into this trap where your beautiful summer install turned into a gapping nightmare by winter? Let me know in the comments.
Stop Treating Your Baseboards Like Decorative Afterthoughts
If you are working in a bathroom or near a kitchen island where spills are common, you cannot just slap on some MDF trim and call it a day. The ‘Oops’ factor here is huge. Most people caulk the top of the baseboard but leave the bottom open, or worse, they caulk the bottom to the floor. If you caulk the bottom of a floating floor, you’ve just pinned it down, leading to why your baseboard miters keep gapping in the winter. Instead, you should be using the silicon bead secret for waterproofing baseboards in bathrooms which protects the wood without bonding it to the moving floor. When you’re dealing with long runs, stop using simple overlap cuts; settle the butt joint vs scarf joint debate for baseboards by always opting for the scarf joint to hide those expansion movements.
Why do your perfectly mitered corners always open up after the first freeze?
It usually comes down to the moisture content of the wood at the time of installation and the lack of a proper gap behind the trim. High-level pros know that the house is a living organism. According to the Tile Council of North America (TCNA), even the substrate under your floor moves at a different rate than the finish material. This is especially critical when your flooring meets a wet area like a walk-in shower.
Your Tile is Not Actually Waterproof
This is the hill I will die on: tile and grout are decorative, not functional water barriers. One of the most dangerous myths in home renovation is that a well-tiled shower won’t leak. If you aren’t performing the flood test secret for guaranteed leak-proof showers before a single tile is laid, you are essentially gambling with your subfloor. I’ve seen thousand-dollar tile jobs ripped out because the installer skipped the 24-hour water test. If you find yourself constantly debating shower repairs: when to fix vs replace for longevity, it’s usually because the underlying waterproofing membrane was compromised or non-existent. Specialized flooring layouts around islands and wet zones aren’t just about the ‘look’; they are about managing the physics of your home. 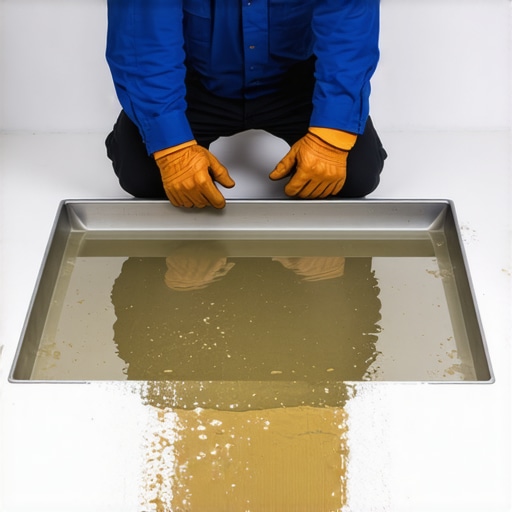 Every Pro Tool Kit Starts with This One Device. After years of chasing mysterious floor buckles, I finally realized that my eyes were lying to me. Now, I never start a job without a professional-grade pinless moisture meter. If you skip the moisture meter requirement for basement flooring jobs, you are essentially flying blind. I use the Wagner Meters Orion series because it gives me a deep-scan reading of the subfloor without poking holes in the material. It tells me if the concrete is actually ready for a vapor seal requirement for luxury vinyl on concrete or if I’m about to trap moisture that will rot the planks from the bottom up. Stop Fighting Your Carpet and Use a Power Stretcher. I see so many DIYers trying to use a knee kicker for an entire room. That is a recipe for a sore back and a wrinkled floor within six months. According to the Carpet and Rug Institute (CRI) 104 installation standards, a power stretcher is mandatory for all residential installations to prevent the delamination and premature wear that comes from loose backing. If you are seeing ripples, you need the power stretcher move to fix loose carpet bubbles immediately. I personally won’t even step on a carpet job without my Roberts 10-254; the leverage it provides ensures that the carpet is under the exact tension needed to stay flat for twenty years.
How do I keep my new floors looking fresh for years?
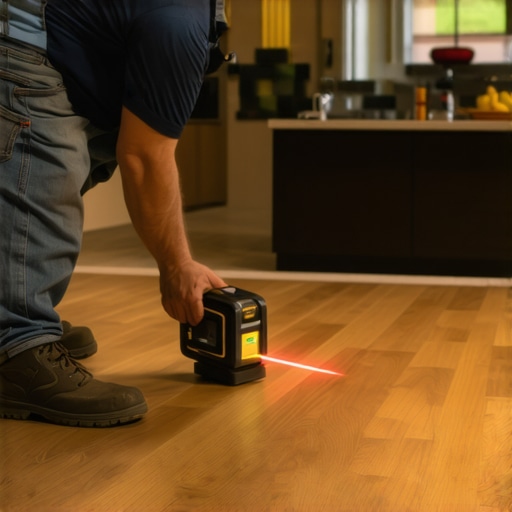
The secret isn’t a magic chemical; it is consistency. I tell every client that the first thing they need to buy is a high-quality microfiber mop and a ph-neutral cleaner. For those trendy low-sheen finishes, you have to follow the microfiber mist rule for cleaning matte floors to avoid those annoying streaks that show up in the afternoon light. You also need to be proactive with furniture. I have a literal bin of heavy-duty felt pads in my truck, and I apply them to every chair leg before I leave a job site. It is the only way to stop hardwood scratches with the felt pad routine. If you have a heavy sofa that left a mark on your rug, don’t panic—I always use the iron and towel trick for fixing carpet dents to bring those fibers back to life. What the 2025 Home Reno Scene Looks Like. We are moving toward a future where precision is automated. I’m already seeing a massive shift in transform your flooring top trends in installation for 2025 toward integrated smart-home sensors under the subfloor that can detect leaks before they reach your baseboards. In the meantime, I am relying more on technology like the laser level move for perfectly horizontal shower tiles to ensure that even the most complex layouts are geometrically perfect. The margin for error is shrinking, and the tools are getting better to meet that demand. If you want to take your skills to the next level, I challenge you to go out and buy a moisture meter today; it is the single biggest upgrade you can make to your workflow. If you have questions about which model to buy, feel free to contact us for my personal recommendations.
Hard-Won Truths from My Years on the Knee Pads
If there is one thing I have learned after installing thousands of square feet of flooring, it is that the environment is your biggest ally or your worst enemy. Never trust a plank straight out of the box; always perform the acclimation test for avoiding hardwood floor gaps to ensure the wood has settled into your home’s unique climate. Another surprise for many homeowners is how the sun affects their layout; I’ve seen beautiful installs ruined because someone ignored why your vinyl floor is fading in front of the patio door, failing to use UV-resistant coatings or proper window treatments. Finally, remember that your subfloor is the foundation of your reputation. If you skip the subfloor screw routine for stopping floor squeaks, no amount of high-end material will hide those annoying chirps in the middle of the night.
The Gear That Keeps Me Sane on Site
People often ask what is in my must-have bag. Beyond the basics, I never leave home without a high-quality coping saw for the inside corner cope for perfect baseboard installs—it is the only way to get those tight, professional joints in older homes with wonky walls. I also swear by a self-leveling laser, specifically for the laser level move for perfectly horizontal shower tiles, because a sixteenth of an inch off at the bottom can mean a disaster at eye level. For carpet work, do not even think about it without a power stretcher; it is the difference between a floor that stays flat and one that requires the power stretcher move to fix loose carpet bubbles a year later.
Build Something That Outlasts the Seasons
Stepping into a renovation can feel overwhelming, but when you treat your flooring installation as a structural craft rather than a quick cosmetic fix, the results speak for themselves. You aren’t just laying planks; you are creating the stage where your life happens. Whether you are tackling a shower renovation or wrapping up a custom island layout, take the extra hour to measure twice and account for the house’s natural movement. Have you ever found a mysterious gap in your floor months after a project was finished? Let me know in the comments below and let’s troubleshoot it together.