

I still remember the smell of fresh oak and the pride I felt after finishing my first real hardwood floor. It was flawless. But then, I decided to install the baseboards raw, thinking I’d just ‘be careful’ with the paintbrush later. Two hours into painting, I was hunched over like a question mark, my knees were screaming, and despite three rolls of expensive painter’s tape, a glob of ‘Swiss Coffee’ white had found its way onto my walnut planks. It was a heart-sinking moment that taught me a lesson I’ll never forget: the floor should be the finish line, not the starting block for a messy paint job. If you are currently [avoiding common flooring installation mistakes to avoid for a seamless look](https://tilecraftsmens.com/flooring-installation-mistakes-to-avoid-for-a-seamless-look), believe me, painting your trim before it hits the wall is the single best favor you can do for yourself.
Stop Crawling on Your Knees
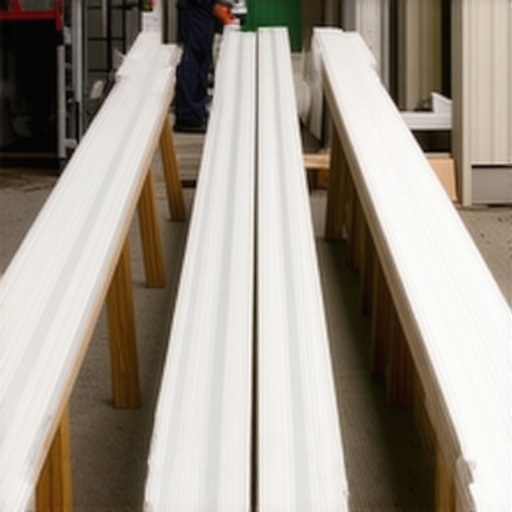
Painting baseboards while they are already nailed to the wall is an ergonomic nightmare. I once spent an entire Saturday trying to get a perfect edge against a plush carpet, only to realize that [why your painted baseboards are peeling at the floor line](https://tilecraftsmens.com/why-your-painted-baseboards-are-peeling-at-the-floor-line) often comes down to the fact that you can’t actually reach the bottom properly when it’s installed. When the boards are across two sawhorses, you are working at waist height. Your back stays straight, your lighting is better, and you can see every drip before it dries. Beyond just saving your joints, you are also protecting your investment. Whether you are following [step-by-step flooring installation from planning to perfect finish](https://tilecraftsmens.com/step-by-step-flooring-installation-from-planning-to-perfect-finish) or just refreshing a room, keeping wet paint away from your new floors is common sense. Professional data backs this up; the Painting and Decorating Contractors of America (PDCA) notes that painting trim in a controlled, horizontal environment can cut labor time by nearly 40% compared to painting in place. Have you ever spent more time cleaning paint off your floors than actually painting the walls?
Is it really worth the extra space in the garage?
I know what you’re thinking: ‘I don’t have room to lay out twenty pieces of 12-foot molding!’ It’s a valid fear. But the alternative is a slow, agonizing process of taping off every inch of your room. When you paint beforehand, you can use a sprayer or a high-quality roller to get a factory-smooth finish that brushes just can’t replicate while you’re cramped in a corner. Even if you’re looking at [baseboard trends in 2025](https://tilecraftsmens.com/baseboard-trends-in-2025-fresh-styles-for-every-room), the most stylish trim looks cheap if there are brush marks or floor-caulk bleeds. Once you’ve picked the right profile—perhaps after reading [how to choose the perfect baseboards for your homes style](https://tilecraftsmens.com/how-to-choose-the-perfect-baseboards-for-your-homes-style)—painting them in bulk saves days of work. You’ll still need to do some touch-ups, sure, but we’ll get into [the pin nail secret for delicate baseboard moldings](https://tilecraftsmens.com/the-pin-nail-secret-for-delicate-baseboard-moldings) later to show you how to keep those final marks to a minimum.
Run Your Own Assembly Line
I call my garage the production line during a remodel. If you have twenty pieces of trim to prep, do not treat them as individuals; treat them as a single job. Set up a series of sawhorses—or even just scrap 2x4s balanced on buckets—to create a continuous waist-high workbench. This setup is your best defense against the ‘leaning tower of trim’ that usually ends with a wet board falling into the dirt. If you’re still in the selection phase and wondering how to choose the perfect baseboards for your homes style, keep in mind that flatter, modern profiles are significantly easier to prep in bulk than complex, multi-beaded designs.
Why Scuff Sanding Saves Your Finish
Even if you bought pre-primed MDF or pine, never skip the scuff sand. Manufacturers often use a high-wax primer that feels smooth but actually repels topcoats. I learned this the hard way on a living room project where the paint started flaking off in sheets three months later. Take a 220-grit sanding sponge and give every surface a quick once-over. You aren’t trying to remove the primer; you are just ‘keying’ the surface so your paint has something to grab onto. It’s the same logic as the trowel notch secret for better tile adhesion—texture creates a mechanical bond that prevents failure down the road.
Roll Like a Pro to Avoid Drips
While the boards are flat, use a 4-inch high-density foam roller rather than a brush. This allows you to apply a uniform thickness without the heavy ridges left by bristles. Work in long, continuous strokes from one end of the board to the other. If you see a drip forming on the edge, catch it immediately with a dry brush. This horizontal orientation is the only way to achieve a ‘factory’ look without owning a five-thousand-dollar spray booth. Once the first coat is dry, flip the boards and address the top edge, ensuring you don’t leave a ‘bead’ of paint that will crack later when you’re trying to fit the trim against the wall.
Beat the Wavy Wall Blues
The biggest challenge of installing pre-painted trim is that your walls are almost certainly not straight. When you push a rigid piece of wood against a bowed drywall surface, gaps appear. Instead of filling those gaps with massive amounts of caulk—which eventually shrinks and cracks—you need to bring the wood to the wall. I use the razor scribe method for baseboards on wavy drywall to shave away the back of the board where the wall bulges. It’s like tailoring a suit; you’re trimming the fabric to fit the body it’s actually covering, not the body you wish it had.
Cut Better Corners Every Time
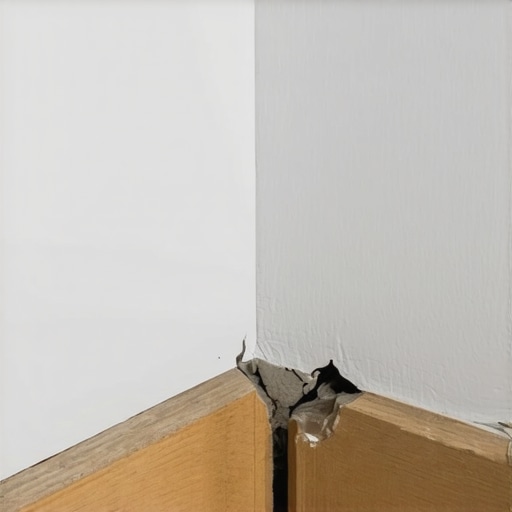
Forget standard 45-degree cuts. Most corners in modern homes are slightly ‘out,’ meaning they might be 91 or 93 degrees. If you cut two perfect 45s, the front of the joint will open up, exposing a dark line. To fix this, I always employ the back bevel move for tight baseboard miters. By angling the blade slightly toward the back of the wood, you ensure the front edges touch first. I once spent an entire afternoon fighting an outside corner in an old Victorian home. Every time I nailed it, the miter would ‘grin’ at me. It wasn’t until I back-beveled the cut that the two pieces finally snapped together like magnets. For those long stretches where one board isn’t enough, remember the scarf joint rule for long baseboard runs. Overlap your joints at a 45-degree angle rather than butting them square; it makes the seam virtually invisible once you apply your final touch-up. Finally, when it’s time to nail, use the pin nail secret for delicate baseboard moldings to minimize the size of the holes you have to fill later.
Stop Smearing Caulk Like Spackle
The most common advice you’ll hear in DIY circles is to just ‘caulk the gap.’ While caulk is a miracle worker for the top edge against the wall, using it at the floor line is often a recipe for disaster. Most people assume that sealing the baseboard to the floor provides a cleaner look, but why your caulked baseboards are cracking within weeks usually comes down to the fact that floors are dynamic surfaces. They bounce, they settle, and they expand. If you’ve glued the trim to the floor with a bead of latex, that seal will tear the moment someone walks near it. In wet areas, you should use the silicon bead secret for waterproofing baseboards in bathrooms, but for your living room hardwoods, less is definitely more.
The Moisture Trap You Never Saw Coming
Here is a contrarian view: I never suggest installing trim the same day you bring it home. Most ‘pro’ installers will tell you it’s fine if the house is climate-controlled, but in my experience, wood needs at least 72 hours to acclimate to your home’s specific humidity levels. If you rush it, you’ll find out why your baseboard miters keep gapping in the winter. The National Wood Flooring Association (NWFA) explicitly states that failure to acclimate materials is the leading cause of post-installation separation. When the air dries out in January, your perfectly tight 45-degree cuts will shrink, leaving behind ugly black lines. By respecting the penny gap rule for hardwood expansion space behind the trim, you give the wood room to move without destroying your finish work.
How do you handle those awkward carpet-to-wood transitions?
This is where the ‘Oops’ factor usually hits during a full home remodel. You finish the hardwood in the hallway and the carpet in the bedroom, and then you realize the baseboard doesn’t know which height to follow. Many homeowners make the mistake of ‘stair-stepping’ the trim, which looks amateur. Instead, you need to understand carpet install secrets for achieving flawless results, which often involve setting your baseboards at the ‘finished’ height of the hard floor and tucking the carpet underneath. If the height difference is too extreme, learning how to hide a transition strip between carpet and tile or wood will keep the visual line continuous. Avoiding these flooring installation mistakes to avoid for a seamless look is what separates a weekend warrior project from a high-end renovation. Have you ever fallen into this trap and ended up with gaps you couldn’t hide? Let me know in the comments.
Level Up Your Layout with Better Tech
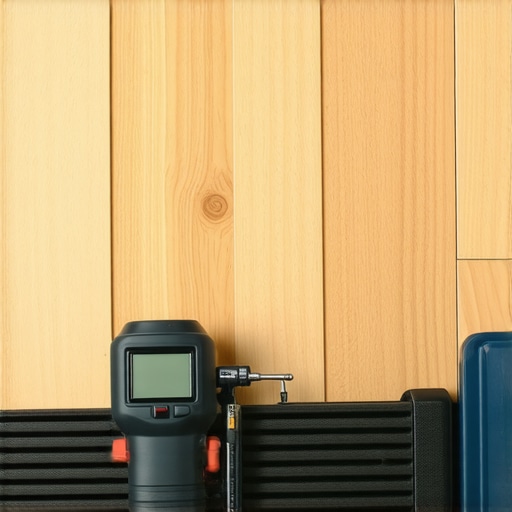
If you are still relying on a chalk line and a prayer for your layouts, you are working harder than you need to. I’ll be the first to admit I was a luddite about lasers until I had to tile a floor-to-ceiling bathroom. Now, I don’t move a single board or tile without my 360-degree green beam laser. It’s the difference between a project that looks ‘okay’ and one that looks like a high-end architectural digest spread. For instance, the laser level move for perfectly horizontal shower tiles ensures that your grout lines wrap around corners with mathematical precision. But tech isn’t just about straight lines; it’s about what’s happening underneath. I never start a basement project without my Lignomat moisture meter. Ignoring the moisture meter requirement for basement flooring jobs is like building a house on sand. If the slab is too wet, your expensive luxury vinyl or engineered wood will fail, and no amount of glue will save it.
How can I keep my floors and trim looking new for a decade?
Maintenance isn’t just about cleaning; it’s about a proactive defense strategy. For hardwood and matte finishes, throw away the bucket of soapy water. Excess moisture is the enemy of wood and laminate seams. I strictly follow the microfiber mist rule for cleaning matte floors to prevent streaks and swelling. If you have carpet, your biggest threat isn’t just dirt; it’s furniture crushing. I use the iron and towel trick for fixing carpet dents to lift fibers back to life after moving a heavy sofa. For showers, longevity comes down to the integrity of the sealant. You need to know shower repairs when to fix vs replace for longevity because waiting too long on a cracked grout joint can lead to catastrophic subfloor rot. The Tile Council of North America (TCNA) Handbook specifically recommends checking expansion joints annually, as these ‘soft joints’ are the first line of defense against structural movement.
The Digital Shift in DIY Renovations
I predict that by 2030, we won’t be using tape measures for complex flooring layouts. We are already seeing the rise of Augmented Reality (AR) apps that allow you to visualize baseboard trends in 2025 directly on your walls before you make a single cut. This tech will eventually integrate with CNC-cut materials, allowing for a ‘perfect fit’ every time. However, even with digital help, the physical prep remains king. You can’t hide a bad subfloor with a fancy app. Understanding why your floor leveler is cracking over plywood is usually a matter of neglecting the primer or using the wrong mesh. I always use the feather edge secret for smoothing subfloor transitions to ensure that there are no ‘click-clack’ sounds when you walk across a doorway. If you want your guide to durable flooring installation for a stylish home to actually hold up, you have to embrace both the new tech and the old-school prep rules. I challenge you to try one ‘pro’ tool on your next project—rent a power stretcher for your carpet or buy a digital moisture meter—and see how much it changes your confidence level.
Hard Truths from a Decade of Dust
If there is one thing a thousand square feet of hardwood has taught me, it’s that the smallest oversight creates the biggest headache six months later. First, never trust your eyes in dim construction lighting; always use a high-lumen work light held at an angle to find subfloor humps that will eventually cause your planks to squeak. Second, remember that your house is a living, breathing thing that expands and contracts with the seasons. Following a step-by-step flooring installation from planning to perfect finish is vital, but so is the intuition to wait when the humidity isn’t right. I’ve seen perfectly installed floors buckle because the owner was in a rush to move furniture in before the wood settled. Finally, always buy 10% more material than you think you need—dye lots change, and that ‘one last board’ might not exist in the warehouse next month.
Gear That Saved My Sanity
You don’t need a warehouse full of tools, but a few specific items are non-negotiable for a professional result. I personally swear by the Lignomat moisture meter; it’s the only way to truly verify if your subfloor is ready for a durable flooring installation that won’t fail within a year. For smoothing out those pesky dips in the plywood, I keep a bag of Ardex Feather Finish on hand at all times—it’s the backbone of the feather edge secret for smoothing subfloor transitions. I also recommend picking up the TCNA Handbook if you are diving into tile work; it’s the ‘bible’ of the industry and has saved me from making costly waterproofing errors in dozens of bathroom projects.
#IMAGE_PLACEHOLDER_E#
Make Your House Feel Like a Home
There is a unique kind of tired that comes from a long day of flooring and trim work, but it’s followed by an even deeper sense of pride when you see the results. When you walk through your hallway and see those tight miters and smooth transitions, you aren’t just looking at wood and paint—you’re looking at your own craftsmanship. Whether you are tackling carpet install secrets or perfecting your baseboard corners, don’t rush the process. Your home deserves that extra hour of prep and attention to detail. You’ve got the knowledge and the right approach, so take a deep breath and start that first cut with confidence. Your future self, lounging on those beautiful new floors, will thank you. What’s the one part of flooring installation that still feels a bit intimidating to you—is it the wavy walls or those tricky transition strips? Let me know in the comments below!