

I stared at the “hairy band-aid” in the middle of my hallway and sighed. It was supposed to be a simple fix for a permanent ink stain, but instead, it looked like I had glued a piece of a different species onto my floor. I’ll never forget the first time I tried to save a room from a giant iron burn. I cut out a perfect square of donor carpet from the back of the closet, slapped some adhesive down, and stood back. It was a disaster. It looked like a different color entirely, even though it came from the same roll. That was my introduction to the soul-crushing reality of carpet pile direction and sun fading. If you have ever felt that sinking feeling in your gut after a quick fix went sideways, you are in the right place. We are not just going to cover the hole today; we are going to make it disappear so well even your mother-in-law won’t spot it.
Why Most DIY Carpet Patches Look Like Sore Thumbs
The truth is, most people treat carpet like a piece of paper, but it is more like a field of grass. Every single fiber has a lean to it. Early in my DIY journey, I completely ignored the orientation of the fibers. I once installed a patch backward, and in the morning light, it looked dark gray while the rest of the room looked light beige. It was humiliating. This happens because the morning light hits the fibers at an angle, highlighting every tiny mistake in the seam. Whether you are dealing with a burnt carpet spot or a pet-related disaster, the prep work is what separates the pros from the frustrated homeowners.
Is it actually possible to make a patch invisible?
I get the skepticism. You are looking at a frayed hole and thinking the only solution is a multi-thousand dollar bill for a full replacement. It isn’t. The secret lies in the tools and the donor source. According to the Carpet and Rug Institute (CRI), professional-grade seam sealing is the only way to prevent edge fraying, or “zippering,” which is what usually gives a patch away over time. We are going to use the double-cut method to ensure the new piece and the old one share a DNA-level bond. Have you ever tried to hide a stain only to make the fix look ten times worse? If you are currently staring at a hairy band-aid of your own, let me know your biggest hurdle. Before you go ripping out the baseboards for a full renovation, let us talk about how to get that donor piece ready for its big debut without leaving a trace.
Where to Source Your Donor Piece Without Buying New Rolls
The biggest mistake I see homeowners make is buying a ‘close enough’ remnant from a big-box store. Unless that carpet came off the same manufacturing run on the same day, it will look like a different color once it’s under your LED lights. I learned this the hard way when I tried to patch a small burn with a scrap from a neighbor’s renovation. Even though both were ‘beige plush,’ my hallway ended up looking like a checkerboard. Your best bet is always the back corner of a closet or the space under the stairs. Use a sharp utility knife to harvest a square that is slightly larger than your damaged area. If you find yourself needing to patch a carpet seam that is coming apart while you’re at it, now is the time to assess the surrounding tension.
How to Match the Fiber Direction Like a Pro
Before you even think about glue, you must identify the ‘nap.’ Carpet fibers don’t stand straight up; they lean. I usually take a scrap of paper and slide it across the carpet. In one direction, it glides; in the other, it catches. Your donor piece must lean in the exact same direction as the floor it is moving into. If you flip it 180 degrees, the light will reflect off the sides of the fibers instead of the tips, making your patch look permanent-marker dark or ghostly white. This is one of the most critical carpet install secrets for achieving that high-end look without a full replacement.
The Secret to Perfect Geometry with Double-Cutting
Forget measuring with a ruler. Human error is too high for that. Instead, use the ‘overlay’ method. Place your donor piece directly over the damaged spot. Ensure the nap matches. Then, using a fresh, surgical-grade blade, cut through both the donor piece and the original carpet at the same time. This is the double-cut method for invisible carpet seams that professional installers swear by. By cutting both layers simultaneously, any wobble in your hand is mirrored in both pieces, resulting in a microscopic fit that literally vanishes once the fibers are brushed over the seam.
Secure the Bond to Prevent Zippering
Once you have your perfect cut-out, remove the old, damaged piece. You will be left with a clean hole and a perfectly sized replacement. But do not just throw glue in there. You need a specialized adhesive or carpet seaming tape. If you are dealing with an iron burn repair, the surrounding fibers might be slightly melted, so trim any hard ‘crusty’ bits before applying the adhesive. I remember a job where I rushed the drying process with a hair dryer—bad move. The heat caused the adhesive to shrink unevenly, creating a visible ridge. Let it cure naturally. Press the edges firmly together and use a carpet tractor or a clean star-wheel roller to blend the fibers together. This ensures the edges do not ‘zipper’ or fray when the vacuum runs over them later. If you have ever wondered why your carpet seams are visible in morning light, it is usually because the edges were not sealed tight enough to prevent shadows from forming in the gap.
Once you have mastered the carpet patch, you might think you are ready to tackle the whole floor, but here is where the professional facade usually cracks.
Stop Chasing the Perfect Zero-Gap Fit
Most DIYers think a job looks professional when every board or carpet edge is jammed tight against the wall. In my early years, I prided myself on those zero-tolerance cuts, but I was wrong. Forcing a tight fit is actually one of the most common flooring installation mistakes to avoid if you want a floor that lasts more than one season. Whether it is hardwood, laminate, or even certain vinyls, these materials are breathing. If you do not leave a gap, they will find the space they need by buckling upward in the center of your room. You specifically need to understand why you need a perimeter expansion gap for vinyl planks to avoid that dreaded ‘hollow’ sound when you walk.
Why Your Summer Floor Might Explode in Winter
The biggest nuance beginners miss is the seasonal shift. As the National Wood Flooring Association (NWFA) points out, wood is hygroscopic, meaning it constantly gains or loses moisture to match its environment. I once saw a beautiful oak floor installed in a humid July with zero gaps. By the time the dry January heat kicked in, baseboard miters began gapping and the floorboards developed cracks large enough to swallow a credit card. Conversely, if you install too tight in the winter, the summer expansion will cause the boards to ‘tent.’ If you are working on a concrete slab, ignoring the vapor seal requirement for luxury vinyl is a recipe for trapped mold and adhesive failure.
Can your choice of baseboard actually ruin your new flooring?
It sounds dramatic, but I have seen it happen. If you pin your baseboards down too hard against the floor, you create a ‘pinch point.’ This prevents the floor from sliding naturally underneath the molding as it expands and contracts. Instead of a healthy floating floor, you have created a locked system that will eventually snap its own tongue-and-groove joints. To avoid this, use the pin nail secret for delicate baseboard moldings and aim specifically for the wall studs, leaving a hair’s breadth of space between the molding and the floor. Have you ever fallen into this trap and watched your beautiful floor start to peak at the seams? Let me know in the comments. Before you call it a day, make sure you check for any loose floor tiles or carpet ripples that could ruin your hard work.
The One Tool That Saves You from Ripping it All Out
I used to think I had a ‘calibrated thumb’ for moisture. I would touch a concrete slab or a subfloor, feel that it was dry to the touch, and start laying down planks. That hubris cost me a four-figure repair bill on a basement job three years ago. If you are doing any kind of below-grade work, you absolutely cannot skip the moisture meter requirement for basement flooring jobs. These days, I don’t move a single box of material into a room until my Wagner meters give me a green light. It isn’t just about the floor; it is about the chemistry of the adhesive. High moisture levels can emulsify even the strongest glue, turning your expensive vinyl into a sliding mess of gray goo. If you are serious about professional results, invest in a pinless meter—it will tell you the truth about what is happening three-quarters of an inch deep, where your eyes can’t see.
Why Your Shower Needs a 24-Hour Bath Before You Finish
In the world of bathroom renovations, the biggest fear is the ‘slow leak’—the one that rots out your floor joists over five years without ever showing a puddle. To prevent this, I follow the Tile Council of North America (TCNA) guidelines to the letter, specifically regarding the flood test. Before a single tile touches the mortar, you must plug the drain and fill the shower pan with water. I mark the water level with a piece of tape and leave it for a full day. This is the flood test secret for guaranteed leak-proof showers that separates the weekend warriors from the masters. If that water level drops even an eighth of an inch, you have a puncture in your liner or a failure in your waterproofing membrane. Finding that out now costs you twenty dollars in materials; finding it out in two years costs you a whole new bathroom. 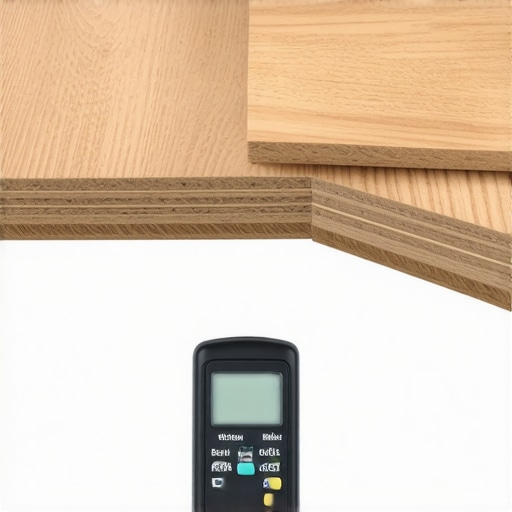
How do I keep my floors and shower looking brand new for years?
Maintenance is where most homeowners drop the ball. For your tile, it isn’t just about scrubbing; it is about the seal. I always advise people to evaluate their shower repairs: when to fix vs replace for longevity, because often a simple re-sealing of the grout can prevent a total failure. For carpets, the secret isn’t just a vacuum; it is the pile grooming. If you have chosen the best carpet types for high traffic areas in 2025, you still need to rotate your furniture periodically to prevent permanent crushing of the fibers. Also, keep a small bottle of professional-grade silicone cleaner on hand. When you see a bead starting to peel, use the blue tape trick for cleaning up silicone beads to replace it immediately. That ten-minute fix prevents water from getting behind your baseboards and causing the paint to bubble.
Where Home Renovation is Headed in 2025
Looking ahead, I see a massive shift toward hybrid materials that prioritize extreme durability over pure aesthetics. We are moving toward ‘smart’ underlayments that can actually detect moisture and alert your phone before a pipe burst ruins your flooring. As you look into transforming your flooring with top trends in installation for 2025, expect to see more waterproof wood composites that handle the expansion issues I mentioned earlier far better than traditional oak ever could. My challenge to you: don’t just finish the job—test it. Go buy a moisture meter today and check three different spots in your home. You might be surprised by what your subfloor is hiding. If you run into a reading that looks scary, reach out to me and we can troubleshoot it together.
The Brutal Reality of Being One Millimeter Off
I used to think a perfect fit meant zero space. I spent hours shaving down baseboards to meet the floor with surgical precision, only to watch months of work buckle because I didn’t respect the laws of physics. Now, I prioritize the penny gap rule over my own ego. One of the biggest lightbulb moments in my career was realizing that your eyes will lie to you about color, but the morning light never will. I’ve learned that a patch isn’t finished until it passes the ‘7:00 AM test’ when the sun hits the floor at its most punishing angle. If you can’t see the seam then, you’ve actually succeeded. Furthermore, I discovered that trying to save ten dollars on a cheap adhesive is the fastest way to double your workload later. Always choose the high-tack professional options if you want the fibers to stay locked in place for the long haul.
The Gear I Actually Use Every Single Day
If you are building your repair kit, start with a high-quality moisture meter. It is the only way to meet the moisture meter requirement for basement flooring jobs without simply crossing your fingers and hoping for the best. I also swear by the pin nail secret for delicate baseboard moldings; it keeps your trim secure without creating those ugly, oversized holes that require a gallon of wood filler. Finally, keep a fresh roll of painter’s tape on hand for cleaning up silicone beads in the shower. It is a five-dollar item that makes a massive difference in the final aesthetic. These tools don’t just make the job easier; they provide a safety net for the inevitable human errors that occur during complex projects.
Take the Leap and Fix It Yourself
Repairing a home can feel like a never-ending battle against wear and tear, but every successful flooring installation starts with the courage to make that first cut. Whether you are tackling a small iron burn repair or a full room renovation, remember that the professional look comes from patience and following proven methods. You now have the techniques and the insider knowledge to make your home look flawless once again. Have you ever tried to patch a carpet only to have it look like a “hairy band-aid”? Let me know your biggest DIY disaster in the comments below!