

I’ll never forget the morning I walked into my kitchen, coffee in hand, and felt that heart-sinking clack. It wasn’t just a noise; it was a physical shift. One of my favorite slate tiles was moving under my feet like a loose tooth. My first instinct? Panic. I pictured a full-scale demolition, dust covering every surface of my home, and a bill that would make my eyes water. Earlier in my DIY journey, I actually made a classic flooring installation mistake by trying to ignore it. I thought maybe if I just didn’t step on it, the problem would go away. Spoiler alert: it didn’t. It got worse. The grout around it started to crumble, and eventually, the tile next to it started to wiggle too.
Stop That Wobbly Tile Before It Cracks Everything Else
The truth is, a loose tile is more than just an annoyance. It’s a threat to the integrity of your entire floor. When a tile loses its bond, it creates a hollow spot that is incredibly prone to cracking under pressure. I learned the hard way that you can’t just squirt some wood glue in the cracks and hope for the best. Back then, I didn’t understand the thinset comb secret for preventing tile lippage, which is usually why these things happen in the first place—poor coverage during the initial install. Today, we are going to fix that zombie tile once and for all without the drama of a total teardown. I’m going to show you how to stabilize the subfloor and re-bond that tile so it feels as solid as a rock.
Does Injecting Adhesive Actually Work or Is It Just a Gimmick?
I know what you’re thinking. You’ve seen those late-night commercials for miracle glues and you’re skeptical. I was too. My first attempt at a no-demo fix involved a generic hardware store epoxy that ended up making the tile sit noticeably higher than the rest of the floor. It was a tripping hazard and an eyesore. But when you use the right specialized floor repair adhesives—the kind designed to flow into the voids—it’s a game changer. The Tile Council of North America (TCNA) notes that bond failure is frequently caused by spot bonding, where thinset is only applied to the corners, leaving a hollow center. By filling that void, you’re not just gluing it; you’re finishing the job the original installer skipped.
Save Your Sanity and Your Subfloor
Before you grab the pry bar, you need to determine why it’s loose. Sometimes it’s just a bad bond, but other times you might need to reinforce a bouncy subfloor before tiling anything else. If your floor has too much give, even the best adhesive in the world won’t hold that tile for long. I remember spending a whole weekend fixing three tiles in a laundry room, only to have them pop loose again two weeks later because the plywood underneath was sagging. It was a humbling lesson in checking the foundation first. Have you ever spent hours on a home repair only to have it fail almost immediately? It’s the worst feeling in the world, and I’m here to make sure that doesn’t happen to you today. Let’s get into the actual tools you’ll need to make this fix permanent.
Clear the Debris Before You Even Think About Glue
A loose tile is essentially a sandwich where the mayo has dried out and turned into sand. Before you apply new adhesive, you have to get rid of that “sand.” Take a carbide-tipped grout saw or a multi-tool and carefully remove the grout around the loose tile. I remember one job in a small bathroom where I thought I could skip this. I injected the adhesive directly through a tiny hole, and within a week, the tile was crunching again. Why? Because the adhesive bonded to the old, dusty grout instead of the tile and subfloor. Use the vacuum seal trick for cleaning dust out of floor grooves to suck every last bit of grit from the void. If you don’t, the new bond will be about as strong as wet tissue paper.
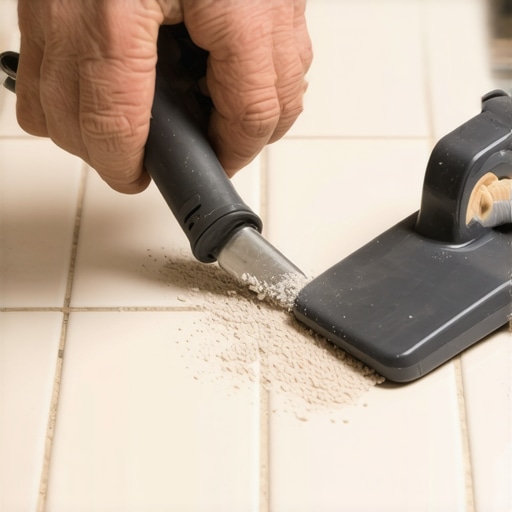
Inject the Solution Directly into the Void
Now comes the surgical part. You’re looking for a specialized floor tile repair adhesive. These are much thinner than standard thinset, allowing them to flow into those hollow spots like water into a dry sponge. If the tile is completely loose, you can lift it, but if it’s just wobbly, you’ll want to use the drill and fill method. Use a masonry bit to drill small holes in the grout lines (since you’ve already removed the grout, this is easy). I once used a standard wood bit by mistake and ruined the bit in five seconds—masonry bits are non-negotiable here. Slow and steady wins the race; you don’t want to crack the tile itself. Once the holes are clear, use the applicator tip to squeeze the adhesive in until it starts to resist.
Weight It Down Like Your Floor Depends on It
This is where most DIYers fail. They inject the glue and then walk away. You need to apply pressure to ensure that the adhesive spreads evenly and makes full contact with both surfaces. I usually grab a couple of five-gallon buckets filled with water or some heavy gym weights. Wrap them in a towel first—you don’t want to trade a loose tile for a scratched one. This constant pressure is what prevents the “hollow sound” that plagues many repairs. In fact, learning how to fix a hollow sound under your vinyl plank floor involves similar pressure principles, though the materials differ. Let it cure for at least 24 hours. No stepping on it, no “just checking” to see if it’s solid yet. Patience is your best tool here.
Finish with a Grout That Actually Stays Put
Once the tile is rock-solid, it’s time to regrout. Match your color carefully. If your old grout is several years old, the new stuff will look brighter, so you might need to feather the new grout into the surrounding joints to blend it in. If you find your grout is consistently failing, it might be due to a larger issue, much like why your shower grout is crumbling just months after install, which usually points to movement or moisture. By using a high-quality polymer-modified grout, you’re adding a layer of flexibility that can handle the micro-movements of your home. It’s the difference between a repair that lasts a season and one that lasts a decade.
Wait, doesn’t everyone say a floor should be as rigid as possible? Not quite. In my years of fixing supposedly ‘professionally installed’ floors, I’ve found that many people mistake rigidity for strength. If you lock your tile in too tightly against the walls, you’re essentially creating a ticking time bomb. Houses breathe, wood expands with humidity, and without a dedicated movement joint, your tiles will eventually ‘tent’ or pop. I’ve seen this happen in massive open-concept rooms where an installer ignored the expansion gap rule for heavy kitchen islands on laminate or tile. You need that perimeter relief, or you’ll be doing this repair all over again in twelve months.
The Rigid Installation Trap Most People Fall Into
The contrarian truth is that the most ‘solid’ floor is actually the one that can move. Most DIYers—and even some pros—think grout is a structural filler. It isn’t. It’s a porous, rigid material that fails under the slightest tension. This is why I always use 100% silicone in the changes of plane (where the floor meets the wall or the tub). If you use grout there, it will crack every single time. It’s the same principle behind why your shower grout is crumbling just months after install. Movement is inevitable; the key is to manage it, not fight it.
Why does your thinset coverage fail even when you use a larger trowel?
Many advanced readers ask if a bigger notch on the trowel is the secret to a better bond. It’s a common misconception. You can use the biggest trowel in the world, but if you don’t ‘back-butter’ the tile or collapse the ridges correctly, you’ll still have hollow spots. According to the Tile Council of North America (TCNA) Handbook, you need 95% mortar contact in wet areas like showers. If you just drop the tile on the ridges without sliding it to collapse them, you’re only getting 50% contact. This is exactly why we emphasize the full bed mortar rule for large format shower tiles. It’s not about the quantity of the mud; it’s about the air you’re removing from beneath it.
The Subfloor Shadow You Can’t Ignore
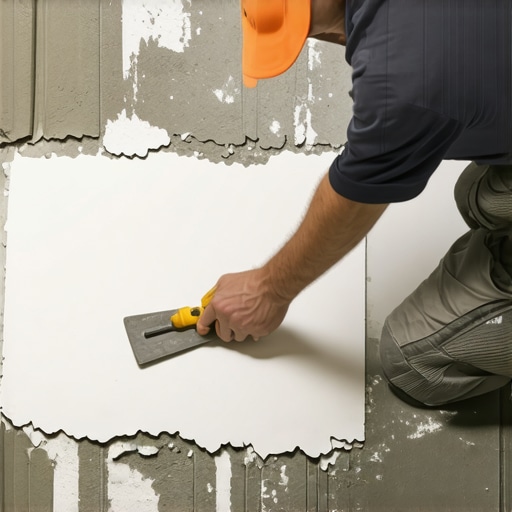
Another nuance people overlook is ‘telegraphing.’ This is especially common with modern luxury vinyl plank (LVP). You might think a 1/8-inch dip in your subfloor is fine because the plank is thick, but over time, that plank will flex into the dip, stressing the locking mechanism until it snaps. I always tell my clients that if you can feel a bump through your socks, you’ll see it in your floor within two years. Implementing the self leveler move for perfectly flat vinyl installs is the only way to prevent why your vinyl plank floor is telegraphing subfloor bumps later on. The ‘Oops’ factor here is usually failing to prime the wood before pouring the leveler; without primer, the dry wood sucks the moisture out of the leveler too fast, causing it to crack and crumble.
One final pro-tip: the ‘slake.’ When you mix thinset or grout, you must let it sit for about 10 minutes to allow the polymers to fully hydrate, then remix it. If you skip this, the chemical bond is significantly weaker. Have you ever fallen into this trap or noticed your floor making strange clicking sounds months later? Let me know in the comments below, and let’s troubleshoot it together.
Those clicking sounds are usually the death rattle of a floor that wasn’t acclimated properly or wasn’t laid on a flat subfloor. If you’re hearing them, you might already be facing a correction rather than just maintenance. To avoid this from the jump, you absolutely must use the acclimation test for avoiding hardwood floor gaps. I’ve seen beautiful white oak planks shrink so much they looked like a series of toothpicks because the installer was in too much of a hurry to wait for the wood to settle into the home’s humidity level.
Keep Your Floors From Aging Faster Than You
Maintenance isn’t just about cleaning; it’s about protecting the structural integrity of the installation. For example, if you have hardwood, you can’t just assume your vacuum won’t hurt it. I always tell my clients to stop hardwood scratches with the felt pad routine on every single piece of furniture. It’s the easiest, cheapest way to extend the life of your finish by years. For carpet, the maintenance actually begins during the install. The Carpet and Rug Institute (CRI) specifically states in their 104/105 standards that power stretching is mandatory for residential carpets. If your installer only uses a knee-kicker, you’re looking at a floor that will look like a wavy ocean in three years. That’s why we always hammer home the power stretcher rule for large living room carpets.
How do I keep my high-traffic floors looking brand new for years?
The secret is a combination of proper initial tension and consistent, gentle cleaning. For carpet, this means deep cleaning every 12 to 18 months to maintain the manufacturer’s warranty. For hard surfaces, it means dealing with transitions before they become a hazard. If you notice a strip getting loose, learn how to fix a loose carpet transition that trips everyone before it pulls the fibers out of the primary backing. These small interventions are what differentiate a house that looks lived-in from one that looks neglected.
The Tool That Separates Amateurs From Pros
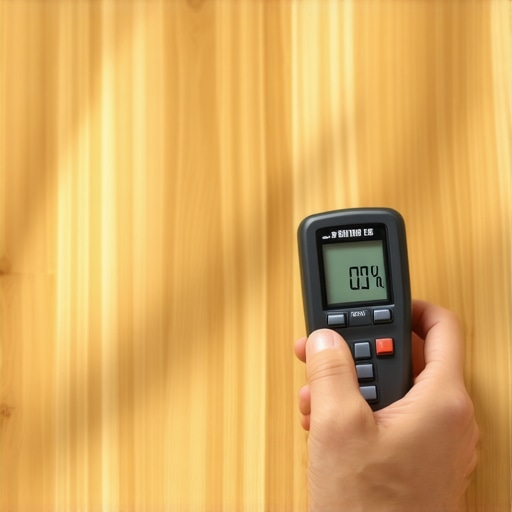
If you’re serious about DIY or starting a flooring business, get a professional-grade moisture meter. It is non-negotiable. I use mine on every single job, from checking concrete slabs to verifying the moisture content of subfloor plywood. Without it, you are literally guessing. When you follow a step-by-step flooring installation from planning to perfect finish, the moisture reading is your first and most important data point. I’ve had to walk away from jobs where the subfloor was too wet, and while the client was frustrated at the delay, they were a lot happier than they would have been with a warped floor six months later.
Why You Should Care About the Future of Smart Subfloors
Looking ahead, I predict a major shift toward moisture-sensing technology built directly into our underlayments. We’re already seeing early versions of this in high-end commercial builds, where sensors can alert a building manager to a leak before it even touches the finished floor. In the residential world, we’ll likely see more sustainable, carbon-neutral composites that offer the warmth of wood with the durability of stone. Regardless of the material, the fundamentals like the inside corner cope for perfect baseboard installs will always remain the mark of a true craftsman. My advice? Go grab a moisture meter today and test three different areas of your home. You might be surprised at what your floors are trying to tell you.
Lessons That Only a Squeaky Subfloor Can Teach
After years in the field, I’ve realized the biggest mistake isn’t a crooked tile—it’s a lack of respect for what’s underneath. I once thought I could outsmart a humid basement by using extra adhesive, but moisture always wins in the end. That’s why I’ve become obsessed with the moisture meter requirement for basement flooring jobs; it is the only way to know for sure that your floor won’t buckle in six months. Another lightbulb moment? Realizing that silence is the ultimate sign of quality. If a floor clicks, a shortcut was likely taken. Whether it’s skipping the slake time or ignoring why your vinyl plank floors are making a clicking sound, those small misses always come back to haunt you. True craftsmanship is about the 95% of the work that remains invisible once the baseboards are installed.
The Toolset That Separates Amateurs From Pros
I never show up to a job site without a few specific items that have saved my back and my reputation. First, a high-quality carbide-tipped grout saw is non-negotiable for those surgical repairs. Second, I always keep professional-grade levelers on hand. If you’re dealing with uneven surfaces, following a step-by-step flooring installation from planning to perfect finish requires a flat base, or you are simply building on a shaky foundation. For finishing touches, I swear by 100% silicone for changes of plane. It is the only way to avoid the heartbreak of seeing your hard work crack. If you want to take your skills further, I recommend diving into the TCNA Handbook for the latest expert flooring installation tips for 2025. #IMAGE_PLACEHOLDER_E#
Create a Foundation You Can Be Proud Of
Flooring is more than a surface; it’s the stage for your family’s life. Don’t be afraid to take your time and get the details right. When you master techniques like the inside corner cope for perfect baseboard installs, you aren’t just finishing a room—you’re elevating the entire aesthetic of your home. Your future self will thank you every time you walk across a floor that is silent, solid, and stunning. Have you ever encountered a flooring repair that seemed impossible to solve? Let me know in the comments below, and let’s figure it out together!