

I still remember the first time I tackled my narrow upstairs hallway. I was cocky. I thought, ‘Hey, it’s just a straight shot, right?’ I started with a full-width plank against the longest wall and worked my way across. By the time I reached the other side, I was staring at a pathetic, half-inch-wide sliver of flooring that refused to stay put. It looked like a total amateur job, and every time I walked past it, that tiny strip mocked me. It was the kind of mistake that haunts you every time you pick up a vacuum, reminding you that your house is just a series of slightly tilted boxes. [image_placeholder_1]
Why Your Hallway Looks Crooked Even When the Planks are Straight
The problem wasn’t my tools or the quality of the vinyl; it was my math. Most homeowners jump into a flooring installation without realizing that hallways are rarely perfectly square. If you start with a full board on one side, you’re betting everything on the wall being perfectly parallel to your finish line. Spoiler alert: they never are. Today, I’m going to show you how the ‘Row-Start’ tactic—a method where we calculate the first and last rows to be roughly equal—will save your sanity and make your home look like a pro did the work. We’re going for that symmetrical, high-end feel that makes a narrow space feel wider and more intentional rather than cramped and lopsided.
Is This Extra Measuring Really Worth the Effort?
I get it. You just want to get the planks down, snap them together, and move on to choosing the right baseboards to hide the edges. But skipping the layout phase is one of those classic flooring installation mistakes to avoid if you want a floor that actually lasts. A balanced layout isn’t just about the ‘look’; it’s about structural integrity. According to guidelines from the National Wood Flooring Association, thin perimeter strips under two inches wide are significantly more prone to shifting and joint failure because they lack the necessary weight and surface area to stay locked. I learned this the hard way when I tried to force a sliver into place and made a tapping block mistake that snapped the delicate tongue of the plank. Trust me, spending ten minutes with a tape measure now beats spending two hours ripping up your hard work later. Have you ever finished a room only to realize the last row is a tiny, ugly gap you can’t quite fill? You aren’t alone, and it’s exactly what we’re going to fix today.
The Math That Makes or Breaks Your Hallway Layout
Grab your tape measure and find the width of the hallway at three different points: both ends and the middle. Walls are like people; they have curves and quirks you don’t notice until you’re looking for them. If your hallway is 40 inches wide and your planks are 7 inches, simple math says you need five full planks and a 5-inch remainder. But wait—you have to account for the expansion gap on both sides. I always use the penny gap rule for installing laminate near drywall to ensure the floor has breathing room without the gaps being visible. Once you subtract those gaps, your 5-inch remainder might drop to 4.5 inches. That is a safe width, but if your remainder was only 1 inch, you’d be in the ‘danger zone’ for shifting boards.

Calculate Your Remainder Before Clicking Anything Together
To avoid a lopsided look, you want your first and last rows to be roughly the same width. Take that leftover measurement, add one full plank width to it, and divide the total by two. That number is the width of your very first row. I once spent a Saturday morning fighting a 38-inch hallway in a 1920s bungalow. The walls looked straight, but my tape measure told a story of a hallway that tapered by nearly two inches. If I had started with a full plank, my last row would have disappeared into the wall halfway down. By calculating the start width first, I was able to use the scribing tool every diyer needs for tight baseboards to trace that taper onto my first row of planks, making the entire floor look perfectly parallel even though the house was crooked as a dog’s hind leg.
Why Your First Row Should Never Be a Full Plank
Starting with a full-width plank is the most common mistake in step-by-step flooring installation. It feels intuitive, but it leaves you zero room for adjustment. When you cut that first row down, you’re essentially creating a custom foundation. Think of it like a tailor-made suit; you’re trimming the fabric to fit the actual body of the room, not a generic box. As you lock the pieces in, use the block and hammer move for tight vinyl floor joints to ensure the short ends are fully seated. A hallway is a high-traffic runway, and any gap in those joints will eventually become a dirt trap or a trip hazard.
Get Those Planks Under the Door Casing for a Flawless Transition
The biggest giveaway of a DIY job isn’t the planks themselves—it’s how they meet the doors. Don’t try to cut the flooring around the door trim; it looks messy and leaves gaps that caulk can’t hide. Instead, use the under cut move for fitting flooring perfectly under door casings. Lay a scrap piece of your flooring upside down against the trim and use a jamb saw to cut through the wood. This allows the new floor to slide right underneath. It’s the difference between the floor looking like it was thrown into the room and looking like it was built with the house. Once the planks are tucked in, you can focus on choosing the right baseboards to cap off the edges for a clean, professional finish.
The Click Trap That Fools Even Pros
Most DIYers think that hearing the ‘click’ means their job is done, but that sound can be a siren song. In my experience, relying solely on the audible snap is a massive mistake. You can have a plank that clicks but isn’t actually seated flush, leaving a microscopic gap that will collect moisture and grit over time. This is where the ‘Oops’ factor kicks in: if you don’t use the dead blow hammer secret for flat floor seams, you might find your floor developing a bounce within six months. This hollow sensation is often blamed on the product, but it’s usually one of the subfloor prep mistakes that make new vinyl planks sound hollow. You need to verify every joint with your fingertips, not just your ears.
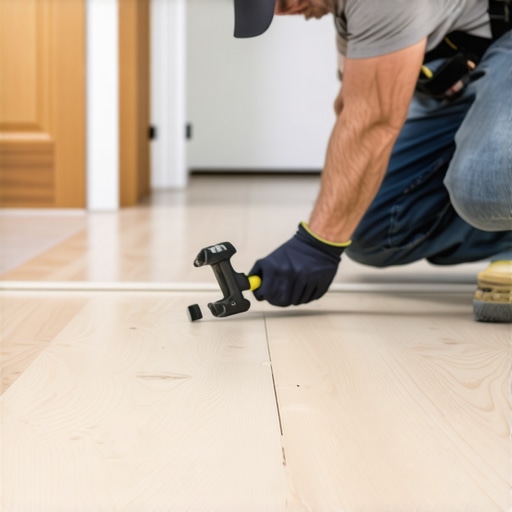
Contrary to the common belief that ‘tighter is better,’ over-tapping your planks is actually one of the most dangerous flooring installation mistakes to avoid. When you hammer a joint too hard, you’re often pre-stressing the locking mechanism. The North American Laminate Flooring Association (NALFA) warns that excessive force during the ‘locking’ phase can lead to ‘edge peaking’—where the edges of the planks lift upward—months after the installation is complete. I’ve seen beautiful hallways ruined because the installer thought they were being thorough, when in reality, they were just crushing the delicate tongues of the vinyl. Have you ever fallen into this trap? Let me know in the comments.
Is your staggering pattern actually compromising the locking system?
Advanced installers know that the visual ‘stair-step’ look isn’t just an aesthetic choice; it’s a structural requirement. A common myth is that as long as the joints are offset by a few inches, you’re safe. In reality, failing to maintain at least 8 to 12 inches between end joints across adjacent rows is the stair step pattern mistake that weakens vinyl joints. In a narrow hallway, where foot traffic is concentrated in the center, a weak staggering pattern acts like a perforated line on a piece of paper—eventually, the floor will unzip. Before you lay your first board, use the moisture meter test every flooring pro uses to ensure your subfloor isn’t going to fight your adhesive or locking system later. Finally, if your hallway exceeds 30 feet, don’t ignore the t-molding secret for long runs of laminate flooring. Many homeowners skip it for a ‘seamless’ look, only to watch their floor buckle when the seasons change.
The Specialized Gear That Saves Your Back and Sanity
After years of DIY struggles, I’ve realized that the ‘standard’ install kit you buy at the big-box store is often just a starter pack. If you want a result that doesn’t look like a weekend hack job, you need to upgrade your arsenal. For example, I never touch trim anymore without the pry bar secret for removing baseboards without damaging the drywall. It’s a small investment that saves hours of mudding and sanding later. Similarly, when I’m trying to anchor those heavy, decorative pieces, I rely on the magnet hack for finding wall studs behind thick baseboards. It’s faster and more reliable than electronic finders that get confused by dense MDF or solid oak. These tools don’t just make the job easier; they ensure that the expert flooring installation tips for 2025 actually result in a floor that stays flat and quiet.
How can I keep my new floors and trim looking fresh for years?
Maintenance is where most people drop the ball. You’ve spent three days on your knees installing vinyl or laminate, but within a year, you’re seeing issues. Often, this is a climate problem. The National Wood Flooring Association (NWFA) Technical Publication No. C200 specifies that for most wood-based products, interior relative humidity should be maintained between 30% and 50%. If your house gets too dry in the winter or too humid in the summer, you’ll see why your vinyl plank floor is buckling at the windows as the material expands beyond its limits. I also keep a close eye on my baseboards; if you notice the finish failing, it’s usually because of mopping habits. Understanding why your baseboard paint is peeling off at the bottom early on can save you from a full sanding and repainting job three years down the line.

Looking ahead, I predict we’re going to see a massive shift toward ‘smart’ underlayments that can detect moisture leaks before they ruin your subfloor. We are already seeing this in high-end shower renovation guide techniques where the liquid membrane rule for zero leak shower niches is becoming the standard for preventing mold. For those of you who prefer a softer touch underfoot, choosing the best carpet types for high traffic areas in 2025 will increasingly involve synthetic fibers that are literally fused to be waterproof. Whether you are dealing with tile, vinyl, or carpet, the goal is longevity. If you want to elevate your next project right now, I highly recommend you try the blue tape secret for professional shower silicone lines every time—it’s the single most satisfying finish-work trick I know.
The Hard Truth About Those ‘Quick’ Weekend Projects
After years of wrestling with planks and pull bars, I’ve realized that a hallway isn’t just a connector—it’s the backbone of your home’s flow. If that backbone is even slightly out of alignment, the whole house feels ‘off.’ The biggest lesson I’ve learned is that patience is a physical tool. It’s better to spend two hours measuring than two years looking at a gapped seam. I used to think I could outsmart a crooked wall, but the house always wins unless you use a layout strategy that respects the room’s quirks. Don’t be the DIYer who hides mistakes under massive amounts of caulk; be the one who plans for perfection from the first row.
The Gear That Separates Rookies from Pros
If you’re serious about your result, stop relying on the basic kits. I personally swear by a few specific items. First, don’t overlook why your floor is bouncing and how to stiffen the joists before you even open a box of flooring—structural prep is everything. For the actual laying process, utilizing the dead blow hammer secret for flat floor seams prevents the micro-fractures that lead to early failure. And when it comes to the finishing touches, I always keep my trim tight by using the back bevel secret for inside baseboard corners to ensure every joint looks like it was cut by a master carpenter. These aren’t just tools; they are your insurance policy against a ‘weekend warrior’ look.
[image_placeholder_wrapup]
Walk Down Your Hallway with Pride
There is a specific kind of satisfaction that comes from walking down a long hallway and seeing lines that are perfectly parallel to the walls. It makes the space feel larger, cleaner, and more expensive. Your next flooring installation doesn’t have to be a source of stress. By taking the time to calculate your remainder and using the ‘Row-Start’ tactic, you’re not just laying boards; you’re building lasting value into your home. Take a deep breath, grab your tape measure, and start that first row with confidence. Have you ever encountered a hallway that was so out of square it made your head spin? Let me know how you handled the layout in the comments below!