

I was three hours deep into a project, staring at a piece of scrap oak that looked like it had been attacked by a muddy toddler. I had spent the entire morning obsessively measuring ratios of ebony and walnut stain, trying to get that perfect weathered but warm vibe for my new floor. But the moment the rag hit the wood? Blobs. Splotches. Ugly, dark streaks that would not blend no matter how hard I rubbed. It was a classic flooring installation mistake that almost cost me a very expensive stack of lumber. I realized then that mixing custom stains isn’t just about the color; it’s about the chemistry and the preparation. If you have ever felt that sinking feeling when your hard work looks amateur, stick with me.
Ditch the Splotches and Get the Color You Actually Wanted
Most of us jump straight into the fun part, mixing the colors, without realizing that different wood species drink up liquid at different rates. Back when I first started, I thought I could just shake the can and go. I did not know that pigments like to clump together at the bottom, creating those nasty blobs that ruin a finish. If you have ever seen a case where a hardwood floor finish is clouding over or looking uneven, you know exactly what I am talking about. Today, I am going to show you how to blend your own signature shades without the drama, ensuring your flooring installation looks like a million bucks. We are going to cover everything from the right stir sticks to the essential pre-stain secrets.
Is mixing your own stain actually worth the headache?
You might be thinking, why not just buy a pre-mixed can of Provincial and call it a day? I get it. It is easier. But pre-mixed stains rarely account for the lighting in your specific room or the way your baseboard styles play against the floor. According to the National Wood Flooring Association, wood is a natural, hygroscopic material, meaning it is constantly reacting to its environment. A custom mix is often the only way to get a truly seamless match. Have you ever tried to match wood grain when patching old hardwood floors and ended up with a glaringly different color? That is where custom mixing saves your skin. I want to hear from you—have you ever spent a weekend staining only to realize the espresso looked more like purple once it dried? If you’ve faced that nightmare, let me know on our contact page. We have all been there, and I promise there is a better way.
Master the Science of the Custom Mix
To get a professional result, you have to treat your stain like a high-end cocktail, not a bucket of paint. The goal is to highlight the grain, not hide it. I learned this the hard way on a renovation in 2022. I was rushing through a step-by-step flooring installation and thought I could eyeball the ratio of Weathered Oak to Early American. Halfway across the room, the color shifted because I hadn’t stirred the “mother” can properly. It looked like two different rooms met in the middle. Stirring is the only way to ensure the heavy pigments at the bottom distribute evenly throughout the liquid.
Test Your Recipe on Sanded Scrap Only
Do not test your stain on the subfloor or a hidden corner of the actual room. Grab the offcuts from your lumber stack. Wood is like a sponge; it has a limit on how much it can absorb. If you use a piece of pine to test a stain meant for oak, you are looking at a color profile that is miles apart. This is especially true when you are trying to match wood grain when patching old hardwood floors. Different species have different tannin levels, which react chemically with the pigments.
Condition the Wood to Prevent Blotching
Softwoods like pine or fir are notorious for “grabbing” stain in some spots and rejecting it in others, creating a blotchy mess. I like to think of wood conditioner as a primer for your skin—it fills the thirsty pores just enough so the stain sits evenly. If you skip this, your guide to durable flooring installation for a stylish home will end up looking like a DIY disaster. 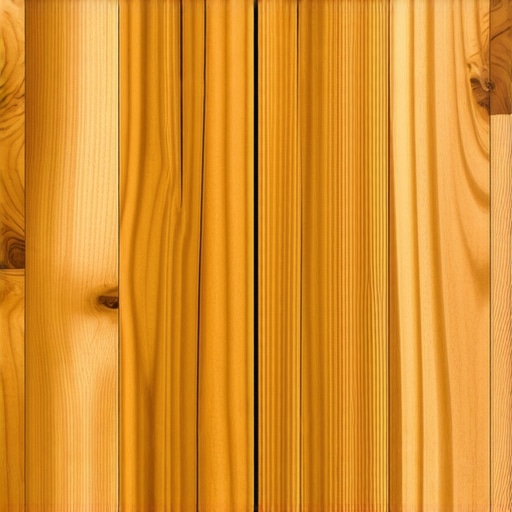
Control the Depth with Sanding Grits
The grit of your sandpaper acts as a valve for the stain. If you sand with 80-grit, the wood fibers are torn open and will hold a massive amount of pigment, resulting in a very dark, rich color. If you sand up to 220-grit, you are essentially polishing the wood closed, meaning it will only take a light tint. This is a common flooring installation mistake that people make when they try to go for a dark “Espresso” look but sand the wood so smooth the stain just slides off.
Measure with Precision Using Syringes
When you find the perfect ratio—say, three parts Silvered Gray to one part Ebony—write it down. I use plastic syringes from the local hardware store to measure by the milliliter. This ensures that if you run out of your custom blend three-quarters of the way through the project, you can recreate it exactly. This level of detail is what separates a standard house from one with baseboard styles that elevate your interior design.
Don’t Forget the Transitions
As you move from the main floor to the bathroom or kitchen, remember that your stain color interacts with your tile and fixtures. If you are planning a shower renovation, ensure the wood tone does not clash with the grout or stone. I once installed a beautiful warm walnut floor only to realize it made the cool marble in the adjacent shower look like cheap plastic. Keeping an eye on how a baseboards makeover ties these rooms together is the final piece of the puzzle.People often tell you that a high-end floor should be “tight as a drum.” In my experience, that is the fastest way to watch your investment buckle when the humidity hits 60%. I have seen $20,000 wide-plank projects ruined because the installer ignored the penny gap rule for hardwood expansion space. Wood is a living thing; it needs room to breathe. If you do not give it that 1/2-inch perimeter, it will find that space by pushing against your walls or, worse, crowning in the middle of your living room. Have you ever fallen into this trap and blamed the wood quality instead of the gap? Let me know in the comments—I have made that mistake myself.
The Real Reason Your Luxury Floor Fails
One of the biggest “oops” factors I see is people trusting the “acclimation period” listed on the box. Pro-tip: a calendar is not a moisture meter. I have seen wood sit in a house for two weeks and still be too wet because the HVAC was not running. The National Wood Flooring Association (NWFA) explicitly states that wood should only be installed once it reaches the “equilibrium moisture content” (EMC) of its specific environment. If you skip this step, your hardwood floor finish is clouding over or the boards will shrink, leaving gaps you can lose a dime in. This is a common flooring installation mistake that separates the pros from the amateurs. 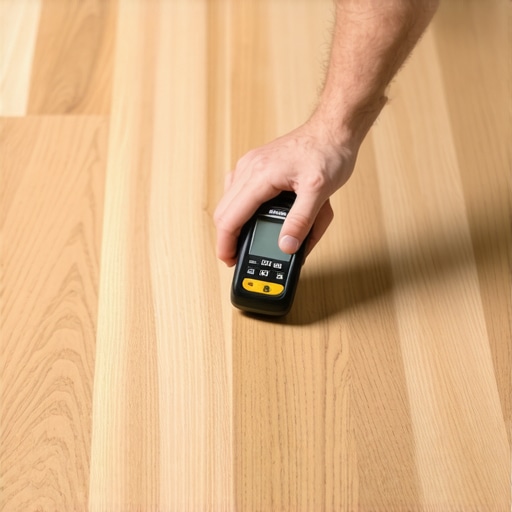
Small Nuances that Save Your Carpet and Showers
Let us talk about the stuff you cannot see—the subfloor. Everyone wants to talk about the finish, but if you do not do the subfloor screw routine for stopping floor squeaks, that floor will sound like a haunted house within a year. It is the same with showers. People think a pretty tile job is waterproof. It is not. Tile and grout are porous. The real magic (and the real failure point) is the membrane underneath. I never sign off on a project without performing the flood test secret for guaranteed leak-proof showers. If you are not plugging the drain and filling that pan for 24 hours, you are just hoping for the best. Even in the world of soft flooring, most homeowners think a visible line in a new carpet is a defect, but if the seam itself is showing, it is likely because the installer did not use the double-cut method for invisible carpet seaming. Achieving a flawless carpet install requires matching the nap direction perfectly—a nuance often missed by budget contractors.
Why do your miter joints split when the furnace kicks on?
This is the most common frustration with baseboard styles. You spend hours getting a perfect 45-degree cut, only for it to gap by January. The secret is not more wood glue; it is understanding that wood shrinks across the grain. This is why your baseboard miters are opening at the top. To fix this, I always suggest using a cope joint on inside corners instead of a miter. It allows the wood to move without opening the seam. For outside corners, try the corner clamping secret for pre-assembled baseboards to ensure a bond that actually holds against seasonal shifts.Even the most beautiful installation will fail if you treat it like a ‘set it and forget it’ project. I used to think that once the last nail was driven into the baseboard, my job was done. I was wrong. The real work begins with the maintenance and the precision tools you use to keep everything from shifting. If you really want to elevate your home, you need to stop guessing and start measuring.
The One Tool I Refuse to Start Without
If you walk into a job site and don’t see a high-quality moisture meter, turn around and walk out. I personally use the Wagner Orion series because it gives me a non-destructive look deep into the wood. According to the Tile Council of North America (TCNA) Handbook, moisture is the number one killer of structural integrity in home renovations. Without knowing the exact moisture content of your subfloor, you are essentially gambling with your bank account. Using this level of precision is the only way to ensure expert flooring installation tips for 2025 actually work in your specific climate. 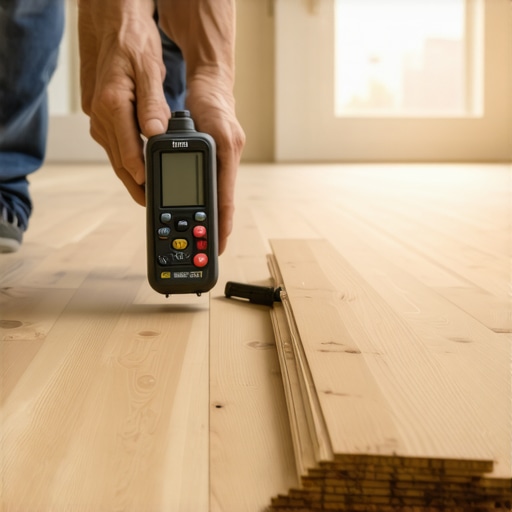
How can I keep my custom floors looking brand new for years?
Maintenance isn’t about deep scrubbing; it’s about smart habits. For my matte-finished floors, I live by the microfiber mist rule for cleaning matte floors. Never, and I mean never, use a steam mop on hardwood. It forces moisture into the grain and will eventually cause that beautiful custom stain we talked about to peel or cloud. For showers, the key to longevity is preventing the buildup of minerals that eat through grout. If you’ve invested in a shower renovation, you need to be proactive. I always apply the deep seal tactic for porous natural stone showers every six months to keep water from migrating behind the tile.
Stop Guessing Where Your Shower Tiles Go
When I’m working on a vertical surface, I don’t trust a bubble level—I trust light. Using the laser level hack for straight tile rows ensures that even if your floor is slightly sloped for drainage, your eye sees perfectly horizontal lines. This is critical when you are looking for modern designs for a luxury feel. If your grout lines are off by even a sixteenth of an inch at the bottom, they will look like a staircase by the time you reach the ceiling. This level of detail is also why you should consider shower repairs: when to fix vs. replace before the damage becomes structural.
What 2025 Means for Your Home Design
Looking ahead, I see a massive shift toward integrated technology and hyper-customization. We are moving away from generic transitions and toward things like the flush mount vent secret for high-end wood floors where the HVAC registers are made of the same wood as the floor. I also expect baseboard trends in 2025 to lean heavily into ‘shadow gaps’—a minimalist look that eliminates the traditional profile altogether. Whether you are looking for best carpet types for high traffic areas in 2025 or a sleek new shower, the focus is on durability and seamless transitions. I challenge you to try one advanced move this weekend: grab a laser level and check the squareness of your current baseboards. You might be surprised at what you find. If you need help troubleshooting a wonky corner, reach out through our contact page.
Three Hard Truths My Toolbelt Taught Me About Renovation
After decades of dust and sawdust, I have realized that the most expensive tool you own is your patience. First, wood is a living organism; it will move, and if you fight it, you will lose. Second, the finish is only as good as the subfloor underneath—never ignore the subfloor screw routine for stopping floor squeaks. Lastly, lighting changes everything; what looks like a perfect match at noon might look like a disaster at 6 PM. These lightbulb moments are what separate a house that looks “okay” from one that feels truly custom. #IMAGE_PLACEHOLDER_E#
- A moisture meter is not an option; it is a requirement to avoid buckling.
- Coping your baseboards is always better than mitering for long-term durability.
- Testing your custom stain on actual scrap is the only way to avoid a mid-project panic.
The Sources I Trust When the Blueprints Get Messy
I didn’t learn these expert flooring installation tips for 2025 overnight. I rely heavily on the National Wood Flooring Association (NWFA) for technical data and the Tile Council of North America (TCNA) for anything involving water. For tools, I never step onto a job without my Wagner Orion moisture meter and a Bosch self-leveling laser. If you are diving deep into a shower renovation, check out the Schluter-Systems technical guides—they are the gold standard for waterproofing and ensuring your modern designs for a luxury feel actually last.
Take the Leap and Build Something That Lasts
It is easy to get paralyzed by the fear of making a mistake, especially when you are mixing custom stains or tackling a step-by-step flooring installation for the first time. But remember, every pro was once a beginner staring at a splotchy piece of oak. Armed with the right chemistry, a bit of precision, and the courage to measure twice, you can create a space that looks like it belongs in a magazine. Your home is worth the extra hour of prep work, and so is your peace of mind. Let’s get that flooring installation done right this time. Have you ever struggled with getting your custom stain to match across different rooms or wood species? Let me know in the comments below, I would love to troubleshoot it with you!