

I still have nightmares about my first big bathroom remodel back in 2010. There I was, knee-deep in thinset, trying to force a beautiful porcelain tile over the massive, rounded edge of a heavy cast iron tub flange. I thought I could just glob on some extra mortar and call it a day. Boy, was I wrong. Within six months, the bottom row of tiles was cracking, and the grout was crumbling into the tub like dry crackers. It was an expensive, humbling lesson in why you can’t just ignore the physics of a cast iron lip. If you’ve ever felt like your tiles are “kicking out” at the bottom of the wall, you know exactly the frustration I’m talking about.
Get Your Walls Flush Before the First Tile Touches the Wall
The biggest mistake I made early on was assuming the studs were my friends. In reality, studs are almost never perfectly aligned with the lip of a cast iron tub. To get a professional finish, you have to shim your wall studs so your backer board hangs slightly over the flange without actually resting on the tub surface. This is the foundation of any successful project, whether you are looking for expert shower renovation tips or just trying to survive a weekend DIY session. Today, I’m going to show you how to bridge that gap so your tile stays flat, looks intentional, and—most importantly—stays waterproof for the next thirty years. Have you ever tried to tile a wall only to realize the bottom is sticking out two inches further than the top?
Is Tiling Over the Flange Actually Going to Leak?
This is the number one question I get from neighbors. The fear is that by shimming out the wall, you’re creating a cavity for mold. However, the opposite is true. By creating a proper plane, you allow the tile to shed water directly into the basin. According to the Tile Council of North America (TCNA), maintaining a movement joint at the tub-to-tile transition is non-negotiable for preventing structural cracks. You need to make sure you mix your thinset for the perfect consistency to ensure that the bottom row, which takes the most stress, is fully supported. If you don’t respect the flange, you’re just waiting for a leak to happen. We also need to talk about the soft joint rule for shower wall corners, because if you grout that bottom seam instead of caulking it, you’re asking for trouble. Let’s dive into how to prep those walls so you don’t end up with a “ski jump” tile disaster like I did.
Shim Your Studs to Clear the Lip
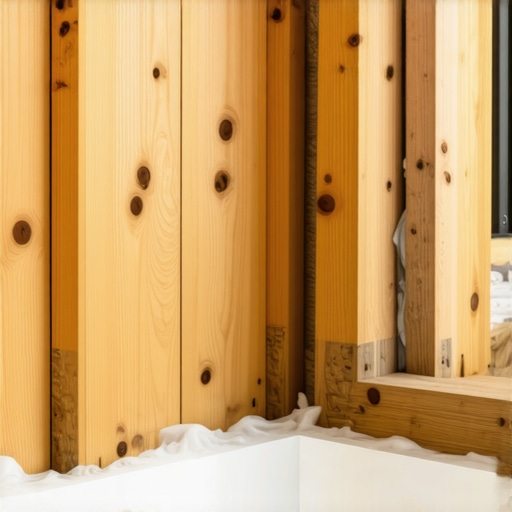
Think of your wall studs like an old fence; they are rarely straight and never where you need them to be. When you are dealing with a heavy cast iron tub, that vertical flange (the lip that keeps water from going behind the tub) usually sticks out about 1/8 to 1/4 of an inch past the face of the studs. If you screw your backer board directly to those studs, the board will hit the flange and bow outward. To fix this, you need to rip down some thin plywood or use cardboard lath shims. I remember a job in a 1950s ranch where the tub was so thick I had to double-stack shims on one side just to keep the wall from looking like a funhouse mirror. By shimming the studs, you create a new, perfectly vertical plane that allows the backer board to hang just over the flange, leaving a tiny gap for movement. This is a critical step in any step-by-step flooring installation or wall prep project to ensure your finish is flush.
Install Your Backer Board with a Strategic Gap
Once your shims are in place, hang your cement board or foam board so that it stops about 1/8 to 1/4 inch above the tub deck. Never let the board rest directly on the cast iron. If the house settles, that heavy tub will push up into the board and crack your bottom row of tile. This is one of those flooring installation mistakes to avoid that people overlook because they think the grout will hide it. It won’t. I usually use a few plastic spacers or even pennies to hold the board up while I’m driving the screws. This gap ensures that the wall and the tub are two independent units that won’t fight each other when the temperature changes.
Waterproof the Transition Zone Like Your Life Depends on It
The flange is the most common failure point for leaks. Even if your tile looks great, water can wick behind it if you haven’t sealed the gap between the board and the tub. Use a high-quality waterproofing membrane over the seams and screws. I prefer a liquid-applied membrane that I can paint right over the transition and down onto the flange itself. When you are looking for an ultimate shower renovation guide, the pro secret is always in the layers. You want the water to hit the tile, run down to the flange, and be forced back into the tub basin, not into your subfloor.
Set Your First Row with Precision
When you finally start setting tile, you need to mix your thinset for the perfect peanut butter consistency to prevent sagging. Because the bottom row is hovering slightly over that flange gap, you need a mix that has enough grip to hold the weight without sliding. For larger tiles, always follow the back buttering rule for large format wall tiles to ensure 100% coverage. If there are voids behind the bottom row, that’s where moisture will collect and eventually pop the tile off. Finally, remember the soft joint rule for shower wall corners: that bottom horizontal line where the tile meets the tub must be filled with 100% silicone caulk, never grout. Grout is rigid and will crack; silicone is flexible and stays waterproof.
While mastering the tub flange is a huge win, it’s only the tip of the iceberg. I often see homeowners get so focused on the visible surfaces that they neglect the physics happening beneath their feet. Take carpet, for example. There is a persistent myth that the thicker the padding, the more luxurious the feel. I once visited a house where the owner had installed a 1/2-inch, high-density pad under a plush saxony. It felt like walking on a cloud for two weeks, then the seams started pulling apart. The reality is that your carpet pad can be too thick for the tack strip, preventing the teeth from properly gripping the backing. According to the Carpet and Rug Institute (CRI), using a pad thicker than 7/16 of an inch for most residential carpets can actually void your warranty because it creates too much vertical movement, eventually breaking down the carpet’s primary backing.
Stop Treating Baseboards Like Static Trim
Another area where I see even seasoned DIYers stumble is at the floor line. Most people install baseboards tight against the floor and call it done. But wood and even some composites are living, breathing materials. If you don’t understand why your baseboard miters keep gapping in the winter, you’ll spend every February with a tube of caulk in your hand. The secret isn’t more nails; it’s proper acclimation and the use of back-cuts. I’ve learned the hard way that if you don’t allow for seasonal expansion, that beautiful trim will eventually pull away or, worse, buckle your floor. This is especially true in open-concept designs where the t-molding mistake that ruins open concept floors often involves pinning the flooring down too tightly with the baseboard, leaving it no room to slide.

Why does your perfect shower niche still grow mold?
This is the question that keeps bathroom remodelers up at night. You can have the most beautiful subway tile layout, but if the shelf isn’t sloped slightly toward the shower, water sits in the corners. I’ve seen 5-star hotels where the shower niche is growing mold behind the tile because the installer forgot that gravity is the only true waterproof measure. To avoid this, I always use a pre-sloped niche or build one with a slight 1/8-inch pitch. It’s also vital to ensure your subfloor is rock solid; I always recommend the floor prime move for porous concrete subfloors to ensure your thinset actually bonds. Without that primer, the dry concrete sucks the moisture out of the mortar too fast, leading to a weak bond that will eventually crack your grout lines. These are the flooring installation mistakes to avoid if you want a result that lasts thirty years instead of three. Have you ever fallen into this trap of over-engineering one part of a project while ignoring the basics? Let me know in the comments, and we can troubleshoot your specific setup together.
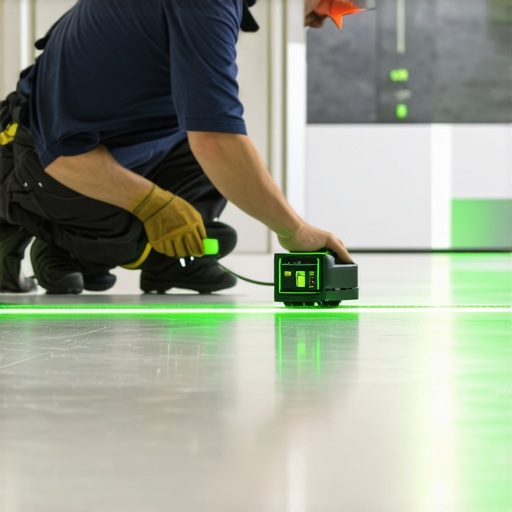
If you want to move from being a weekend warrior to a genuine expert, you have to stop eyeballing your layouts. My personal breakthrough happened when I stopped trusting my old bubble level and invested in a high-quality green beam laser. I am telling you, the laser level hack for straight tile rows changed my entire workflow; it reveals every dip in the floor and every curve in the wall before you even open a bag of mortar. For carpet, I never step onto a job site without a power stretcher. Most guys use a knee kicker and call it a day, but according to the International Certified Flooring Installers (CFI), a knee kicker is only intended for positioning—not for the actual stretch. If you don’t use a power stretcher to achieve the correct tension, you are basically guaranteeing loose carpet bubbles within three years. It is about having the structural tension to fight off the heavy traffic of a busy household.
How do I keep my new floors and showers looking fresh for a decade?
Maintenance is not just about cleaning; it is about the right chemistry and early intervention. I always tell my clients to ditch the harsh bleach and acidic cleaners that eat away at grout. For modern matte finishes, I swear by the microfiber mist rule for cleaning matte floors because it prevents that hazy residue that builds up over time. If you notice even a hairline crack in your shower grout, do not wait for a leak to manifest. You need to know when to fix vs replace for longevity. A tiny crack is a highway for water to reach your subfloor and rot the wood beneath. Even when choosing materials for the next project, I am looking ahead to the best carpet types for high traffic areas in 2025, specifically focusing on triexta fibers that offer permanent stain resistance built into the fiber itself rather than a topical coating that wears off.
Looking toward the future, I see the flooring industry moving rapidly toward augmented reality (AR) for layout planning. Imagine putting on a headset and seeing exactly where your tile cuts will land on the wall or floor before you even buy the thinset. It is going to eliminate the ‘oops’ factor for DIYers and pros alike. For now, my best advice for scaling up your home projects is to perfect your trim game. If you can handle a complex room with curved features, installing baseboards on a curved wall is the ultimate test of patience and precision. It is these high-difficulty tasks that truly separate the pros from the amateurs. Go grab a green-beam laser level before you start your next layout; it is the single biggest upgrade you can make to your toolkit to ensure everything remains perfectly plumb and square.
I still have nightmares about my first big bathroom remodel back in 2010. There I was, knee-deep in thinset, trying to force a beautiful porcelain tile over the massive, rounded edge of a heavy cast iron tub flange. I thought I could just glob on some extra mortar and call it a day. Boy, was I wrong. Within six months, the bottom row of tiles was cracking, and the grout was crumbling into the tub like dry crackers. It was an expensive, humbling lesson in why you can’t just ignore the physics of a cast iron lip. If you’ve ever felt like your tiles are “kicking out” at the bottom of the wall, you know exactly the frustration I’m talking about.
Get Your Walls Flush Before the First Tile Touches the Wall
The biggest mistake I made early on was assuming the studs were my friends. In reality, studs are almost never perfectly aligned with the lip of a cast iron tub. To get a professional finish, you have to shim your wall studs so your backer board hangs slightly over the flange without actually resting on the tub surface. This is the foundation of any successful project, whether you are looking for expert shower renovation tips or just trying to survive a weekend DIY session. Today, I’m going to show you how to bridge that gap so your tile stays flat, looks intentional, and—most importantly—stays waterproof for the next thirty years. Have you ever tried to tile a wall only to realize the bottom is sticking out two inches further than the top?
Is Tiling Over the Flange Actually Going to Leak?
This is the number one question I get from neighbors. The fear is that by shimming out the wall, you’re creating a cavity for mold. However, the opposite is true. By creating a proper plane, you allow the tile to shed water directly into the basin. According to the Tile Council of North America (TCNA), maintaining a movement joint at the tub-to-tile transition is non-negotiable for preventing structural cracks. You need to make sure you mix your thinset for the perfect consistency to ensure that the bottom row, which takes the most stress, is fully supported. If you don’t respect the flange, you’re just waiting for a leak to happen. We also need to talk about the soft joint rule for shower wall corners, because if you grout that bottom seam instead of caulking it, you’re asking for trouble. Let’s dive into how to prep those walls so you don’t end up with a “ski jump” tile disaster like I did.
Shim Your Studs to Clear the Lip
Think of your wall studs like an old fence; they are rarely straight and never where you need them to be. When you are dealing with a heavy cast iron tub, that vertical flange (the lip that keeps water from going behind the tub) usually sticks out about 1/8 to 1/4 of an inch past the face of the studs. If you screw your backer board directly to those studs, the board will hit the flange and bow outward. To fix this, you need to rip down some thin plywood or use cardboard lath shims. I remember a job in a 1950s ranch where the tub was so thick I had to double-stack shims on one side just to keep the wall from looking like a funhouse mirror. By shimming the studs, you create a new, perfectly vertical plane that allows the backer board to hang just over the flange, leaving a tiny gap for movement. This is a critical step in any step-by-step flooring installation or wall prep project to ensure your finish is flush.
Install Your Backer Board with a Strategic Gap
Once your shims are in place, hang your cement board or foam board so that it stops about 1/8 to 1/4 inch above the tub deck. Never let the board rest directly on the cast iron. If the house settles, that heavy tub will push up into the board and crack your bottom row of tile. This is one of those flooring installation mistakes to avoid that people overlook because they think the grout will hide it. It won’t. I usually use a few plastic spacers or even pennies to hold the board up while I’m driving the screws. This gap ensures that the wall and the tub are two independent units that won’t fight each other when the temperature changes.
Waterproof the Transition Zone Like Your Life Depends on It
The flange is the most common failure point for leaks. Even if your tile looks great, water can wick behind it if you haven’t sealed the gap between the board and the tub. Use a high-quality waterproofing membrane over the seams and screws. I prefer a liquid-applied membrane that I can paint right over the transition and down onto the flange itself. When you are looking for an ultimate shower renovation guide, the pro secret is always in the layers. You want the water to hit the tile, run down to the flange, and be forced back into the tub basin, not into your subfloor.
Set Your First Row with Precision
When you finally start setting tile, you need to mix your thinset for the perfect peanut butter consistency to prevent sagging. Because the bottom row is hovering slightly over that flange gap, you need a mix that has enough grip to hold the weight without sliding. For larger tiles, always follow the back buttering rule for large format wall tiles to ensure 100% coverage. If there are voids behind the bottom row, that’s where moisture will collect and eventually pop the tile off. Finally, remember the soft joint rule for shower wall corners: that bottom horizontal line where the tile meets the tub must be filled with 100% silicone caulk, never grout. Grout is rigid and will crack; silicone is flexible and stays waterproof.
While mastering the tub flange is a huge win, it’s only the tip of the iceberg. I often see homeowners get so focused on the visible surfaces that they neglect the physics happening beneath their feet. Take carpet, for example. There is a persistent myth that the thicker the padding, the more luxurious the feel. I once visited a house where the owner had installed a 1/2-inch, high-density pad under a plush saxony. It felt like walking on a cloud for two weeks, then the seams started pulling apart. The reality is that your carpet pad can be too thick for the tack strip, preventing the teeth from properly gripping the backing. According to the Carpet and Rug Institute (CRI), using a pad thicker than 7/16 of an inch for most residential carpets can actually void your warranty because it creates too much vertical movement, eventually breaking down the carpet’s primary backing.
Stop Treating Baseboards Like Static Trim
Another area where I see even seasoned DIYers stumble is at the floor line. Most people install baseboards tight against the floor and call it done. But wood and even some composites are living, breathing materials. If you don’t understand why your baseboard miters keep gapping in the winter, you’ll spend every February with a tube of caulk in your hand. The secret isn’t more nails; it’s proper acclimation and the use of back-cuts. I’ve learned the hard way that if you don’t allow for seasonal expansion, that beautiful trim will eventually pull away or, worse, buckle your floor. This is especially true in open-concept designs where the t-molding mistake that ruins open concept floors often involves pinning the flooring down too tightly with the baseboard, leaving it no room to slide.
Why does your perfect shower niche still grow mold?
This is the question that keeps bathroom remodelers up at night. You can have the most beautiful subway tile layout, but if the shelf isn’t sloped slightly toward the shower, water sits in the corners. I’ve seen 5-star hotels where the shower niche is growing mold behind the tile because the installer forgot that gravity is the only true waterproof measure. To avoid this, I always use a pre-sloped niche or build one with a slight 1/8-inch pitch. It’s also vital to ensure your subfloor is rock solid; I always recommend the floor prime move for porous concrete subfloors to ensure your thinset actually bonds. Without that primer, the dry concrete sucks the moisture out of the mortar too fast, leading to a weak bond that will eventually crack your grout lines. These are the flooring installation mistakes to avoid if you want a result that lasts thirty years instead of three. Have you ever fallen into this trap of over-engineering one part of a project while ignoring the basics? Let me know in the comments, and we can troubleshoot your specific setup together.
If you want to move from being a weekend warrior to a genuine expert, you have to stop eyeballing your layouts. My personal breakthrough happened when I stopped trusting my old bubble level and invested in a high-quality green beam laser. I am telling you, the laser level hack for straight tile rows changed my entire workflow; it reveals every dip in the floor and every curve in the wall before you even open a bag of mortar. For carpet, I never step onto a job site without a power stretcher. Most guys use a knee kicker and call it a day, but according to the International Certified Flooring Installers (CFI), a knee kicker is only intended for positioning—not for the actual stretch. If you don’t use a power stretcher to achieve the correct tension, you are basically guaranteeing loose carpet bubbles within three years. It is about having the structural tension to fight off the heavy traffic of a busy household.
How do I keep my new floors and showers looking fresh for a decade?
Maintenance is not just about cleaning; it is about the right chemistry and early intervention. I always tell my clients to ditch the harsh bleach and acidic cleaners that eat away at grout. For modern matte finishes, I swear by the microfiber mist rule for cleaning matte floors because it prevents that hazy residue that builds up over time. If you notice even a hairline crack in your shower grout, do not wait for a leak to manifest. You need to know when to fix vs replace for longevity. A tiny crack is a highway for water to reach your subfloor and rot the wood beneath. Even when choosing materials for the next project, I am looking ahead to the best carpet types for high traffic areas in 2025, specifically focusing on triexta fibers that offer permanent stain resistance built into the fiber itself rather than a topical coating that wears off.
Looking toward the future, I see the flooring industry moving rapidly toward augmented reality (AR) for layout planning. Imagine putting on a headset and seeing exactly where your tile cuts will land on the wall or floor before you even buy the thinset. It is going to eliminate the ‘oops’ factor for DIYers and pros alike. For now, my best advice for scaling up your home projects is to perfect your trim game. If you can handle a complex room with curved features, installing baseboards on a curved wall is the ultimate test of patience and precision. It is these high-difficulty tasks that truly separate the pros from the amateurs. Go grab a green-beam laser level before you start your next layout; it is the single biggest upgrade you can make to your toolkit to ensure everything remains perfectly plumb and square.
Hard-Won Truths from a Decade in the Trenches
Over the years, I’ve realized that the most expensive part of a remodel isn’t the marble or the high-end fixtures; it’s the time spent fixing mistakes that could have been avoided with ten minutes of extra prep. First, gravity is your only absolute guarantee. If you don’t build a slope into your niche or shower floor, no amount of sealant will save you from mold. Second, never trust a ‘straight’ wall or a ‘level’ floor in an old house. They are myths. Always assume you need to shim, plane, or level before you start your flooring installation. Third, the difference between a DIY look and a pro finish is usually found in the transitions. Whether it’s the way a baseboard meets a door casing or how your tile interacts with a tub flange, the edges tell the whole story. Finally, products fail because of prep failure 90% of the time.
The Gear That Saved My Sanity
If you’re serious about getting results that look like they belong in a magazine, you need to move beyond the basic hammer and tape measure. I never start a bathroom project without a Flood Test; checking the flood test secret for guaranteed leak-proof showers is the only way to sleep soundly after a job. For trim work, I rely heavily on the back-cutting secret for baseboard miters to ensure tight joints even when the walls are wonky. I also highly recommend the TCNA Handbook for anyone doing tile—it’s the industry standard for a reason. Lastly, for carpet, stop relying on a knee-kicker and read up on carpet install secrets for achieving flawless results every time using a power stretcher.
Start Your Next Project with Confidence
Remodeling can be overwhelming, but every expert started exactly where you are: standing in a half-demolished room with a tool they weren’t quite sure how to use. The key is to slow down, respect the physics of the materials, and never skip the prep. By following a guide to durable flooring installation, you ensure your home stays stylish and functional for decades. If you are feeling stuck on the design phase, check out these expert tips for modern shower enclosures to get the inspiration moving again. You have the tools and the knowledge—now it’s just time to get your hands dirty. Have you ever encountered a tub flange or a wonky stud that nearly ruined your project? Let me know in the comments below!