

The moment the last wall came down, I thought I’d finally achieved the dream. My kitchen, dining area, and living room were finally one giant, sun-drenched space. I’d spent weeks picking out the perfect wide-plank flooring, imagining it flowing like a single, unbroken river from the front door to the back patio. But then, I followed the ‘standard’ advice. I started snapping in T-molding transitions at every former doorway. Suddenly, my expensive flooring job looked like a series of disconnected rectangles. It was heartbreaking. I had fallen for the biggest trap in modern home design, and today, I’m going to help you avoid that same ‘speed bump’ finish and keep your floor looking truly high-end.
[IMAGE_PLACEHOLDER]
The Day My Grand Entrance Looked Like a Construction Site
I remember staring at that first transition strip. It sat about a quarter-inch higher than the rest of the floor, and in the afternoon light, it cast a long, ugly shadow across the threshold. Every time I walked over it, I felt it under my socks, a constant reminder of a broken design. Many homeowners think these strips are just a fact of life, much like how people assume certain baseboard styles are mandatory until they see a custom flush-mount job. I was terrified that if I didn’t use them, my entire floor would buckle like a mountain range during the first humid summer. I prioritized ‘playing it safe’ over the very aesthetic I had worked so hard to create, and it ended up looking like a DIY disaster. It’s a common regret, but it stems from a misunderstanding of how modern materials actually work.
Wait, isn’t the T-molding there to save my floor from buckling?
This is the big fear, right? We’re told that floating floors need to move, and they absolutely do. According to the National Wood Flooring Association, wood-based products can expand and contract significantly based on ambient humidity levels. However, the secret that most big-box retailers won’t tell you is that you can often avoid those clunky middle-of-the-room breaks if you master the perimeter expansion gap instead. When I first started, I didn’t realize that the gap hidden under your drywall or baseboards is ten times more important than a gap in the middle of your walkway. Have you ever tripped over a transition strip in your own home and thought, ‘There has to be a better way to do this’?
Why Your Open Concept Floor Needs to Breathe Without the Plastic Speed Bumps
The entire goal of an open concept is visual continuity. When you break that line, you’re essentially putting the walls back up—just on the floor instead of the ceiling. Avoiding flooring installation mistakes like over-using T-moldings requires a bit more planning during the step-by-step flooring installation process, but the payoff is a home that feels twice as large. I’ve learned the hard way that a truly professional finish isn’t about following the instructions on the box to a T; it’s about knowing when those instructions are just a safety net for the manufacturer rather than a requirement for a beautiful home. In the next section, I’ll show you exactly how to calculate your maximum run lengths so you can ditch the T-molding for good and finally get that seamless look you were promised.
Calculate Your Room’s Limits Before the First Plank Drops
The biggest mistake I ever made was assuming that ‘unlimited flow’ meant I could just keep clicking planks together until I hit the far wall of the house. Every flooring material, whether it’s laminate or luxury vinyl, has a maximum run length specified by the manufacturer. If you exceed this—usually around 30 to 40 feet—without a break, you are begging for the floor to peak or separate. Before you start your step-by-step flooring installation, measure the longest straight line in your home. If you are close to that limit, you don’t necessarily need a T-molding, but you do need to be surgical about your strategy.
Know the magic number for your specific material
Different materials behave like different personalities. Wood-based laminates are like sponges; they expand in width more than length. Stone plastic composite (SPC) vinyl is more stable but can still move in extreme temperature shifts. I once tried to run a cheap laminate 50 feet through a hallway and into a master suite. By August, the floor had risen two inches off the subfloor in the middle of the hall because I didn’t respect the expansion limits. If you’re pushing the boundaries, you must ensure your perimeter expansion gap is generous—I’m talking a full half-inch—hidden under thick baseboards.
A Perfectly Level Subfloor is the Only Way to Skip T-Moldings
If your subfloor looks like a rolling sea, you can forget about a seamless look. T-moldings are often used to hide the fact that two rooms are at slightly different heights or that a doorway has a significant dip. When I was working on a 1920s farmhouse renovation, I found a 3/4-inch drop between the kitchen and the dining room. If I had just laid the floor over it, the locking mechanisms would have snapped within a week. I had to learn how to level a subfloor dip without removing the old subfloor by using a high-quality compound. However, you have to be careful with the self-leveler mistake that creates new high spots, which is basically just trading one problem for another.
The 1/8-inch rule you can’t afford to ignore
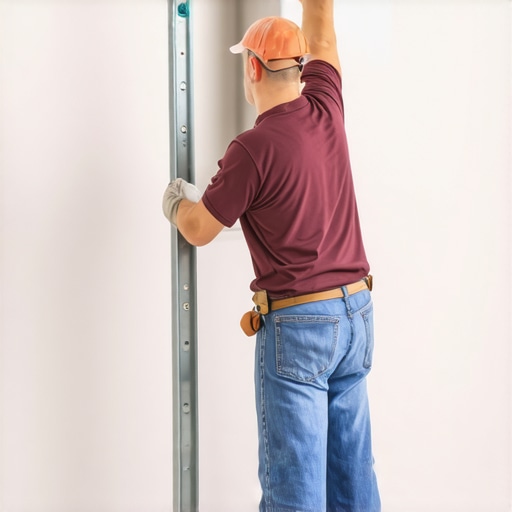
Check your floor with a 6-foot straight edge. Any deviation more than 1/8 of an inch over a 6-foot span is a disaster waiting to happen. In that farmhouse, I used the feather edge secret for smoothing subfloor transitions to create a ramp so gradual the eye couldn’t detect it. This allowed the flooring to flow over the transition area without any physical break. It took an extra day of drying time, but the result was a floor that felt solid as concrete rather than a ‘bouncy’ surface that clacked every time the dog walked across it.
Master the Lock and the Glue-Assist for Maximum Stability
When you are doing a massive continuous run, the weight of the floor itself becomes a factor. In some cases, especially with wide planks, the floor can become so heavy that it ‘locks’ itself in place, preventing the very expansion it needs. This is where the glue-assist strategy for wide plank hardwood installs comes into play for certain engineered products. For floating vinyl, I always rely on the rubber mallet rule for locking vinyl planks to ensure every joint is fully seated. If even one joint is 90% closed instead of 100%, that tiny gap will compound over a 30-foot run, eventually resulting in a massive gap at the other end of the house that no baseboard can hide.
Let’s dig deeper into the nuances that separate a ‘good’ DIY job from a professional-grade masterpiece. One of the most common myths I hear is that if you just follow the box instructions, your floor will be fine. But here is a contrarian take: the installation manual is often written by the manufacturer’s legal team to minimize warranty claims, not to help you achieve the most beautiful result. For example, many manuals demand a T-molding every 20 feet. While this protects the manufacturer, it can ruin the flow of a modern home. If you’ve invested in expert flooring installation tips for 2025, you know that with a perfectly flat subfloor and an extra-wide perimeter gap, you can often push those limits—but you have to be prepared to own the risk.
Don’t Let Your Kitchen Island Hold Your Floor Hostage
One ‘oops’ factor that catches even experienced renovators is the heavy furniture trap. You can have the perfect expansion gap around the edges, but if you drop a 600-pound granite-topped kitchen island right in the middle of a floating floor, you’ve essentially nailed the floor to the subfloor. The planks are now pinned, and when the house breathes, the floor will buckle at the weakest point—usually a doorway or a joint a few feet away. This is exactly why your kitchen island needs a specialized floor layout. I always recommend installing the island first on the subfloor and flooring around it, or at least using a modified glue-down method for that specific zone.
#IMAGE_PLACE_HOLDER_C#
Can You Really Skip the T-Molding in a 40-Foot Room?
This is the ultimate question for the seamless-look enthusiast. According to the Tile Council of North America (TCNA) handbook (specifically Method EJ171), movement joints are mandatory for large tile installations every 20 to 25 feet. For vinyl and laminate, the physical principles are similar. However, if your home’s climate is strictly controlled with a high-end HVAC system that keeps humidity between 35% and 55% year-round, you can sometimes stretch these runs. The secret is that stability comes from the environment as much as the installation. If your humidity swings wildly, no amount of flooring installation mistakes avoidance can save a 50-foot continuous run without a break.
The Hidden Nuance of Transitioning Between Materials
It’s not just about the big open spaces; it’s where different worlds collide. I see people spend thousands on luxury planks and then use a cheap, plastic-wrapped transition to meet their bedroom carpet. It looks terrible. Instead of the standard ‘speed bump,’ look into the carpet install secrets for achieving a flush finish. Using a Z-bar or a tuck-and-roll method allows the carpet to meet the hard surface at the same height, creating a high-end look you’d typically only see in custom-built mansions. Have you ever fallen into the trap of pinning your floor down with heavy furniture or using a transition strip you hated? Let me know in the comments below, and let’s figure out how to fix it together.
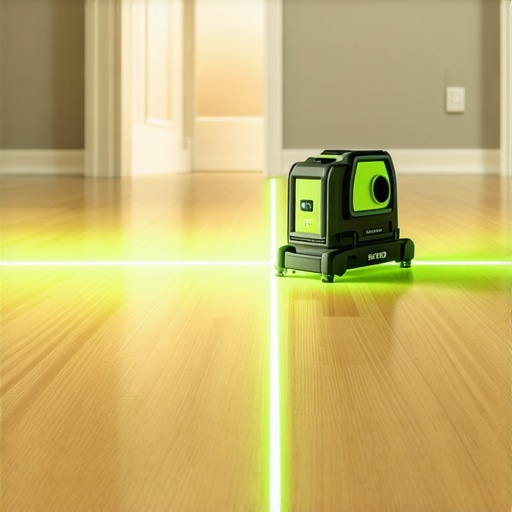
I’ve seen DIYers try to level a 30-foot room with a 4-foot bubble level and a prayer. It never works. If you want that high-end, high-gloss look, you need to adopt the laser level hack for straight tile rows and apply that same precision to your flooring layout. I personally use a 360-degree green beam laser because it reveals every high spot in the subfloor before I even open a box of planks. This tool is how I identify exactly where I need to apply the feather edge secret for smoothing subfloor transitions. Without it, you’re just guessing, and guessing leads to bouncy floors and broken click-locks within the first year.
The Tools I Refuse to Step on a Job Site Without
Accuracy isn’t just about the tools you use for the visible parts of the job; it starts deep in the prep. I never start a job without my Delmhorst moisture meter. According to the National Wood Flooring Association (NWFA) Technical Publication No. C100, professional installers must document moisture content in both the subfloor and the flooring material to avoid catastrophic failures. It’s a tool that saves a $10,000 floor from warping. This is especially true if you’re dealing with shower repairs when to fix vs replace for longevity, where moisture management is the difference between a spa-like retreat and a structural nightmare.
Humidity Control is Your Only Real Insurance Policy
You can have the most expensive luxury vinyl or engineered hardwood in the world, but if your home’s air is bone-dry in the winter and a swamp in the summer, those seamless joints will eventually separate. For those of us chasing the perfect aesthetic, we have to treat the home like a living organism. I predict the next big shift in home maintenance will be integrated subfloor sensors that alert your smartphone the second moisture levels spike. Until then, you need to be the sensor. This includes taking care of the small details, like knowing why you should paint your baseboards before installing to ensure no wet paint or moisture from the brush seeps into the expansion gap of your fresh floor.
How do I keep my seamless floor looking new for a decade?
Maintenance is where most homeowners fall off the wagon. They spend weeks on a perfect install and then ruin the finish with a steam mop. High heat and pressurized moisture are the absolute enemies of floating floors. I always tell my clients to follow the microfiber mist rule for cleaning matte floors. Use a pH-neutral cleaner and a barely damp pad. For your bathroom transitions, don’t skip the silicon bead secret for waterproofing baseboards in bathrooms. This prevents mop water from migrating under the baseboards and swelling the edges of your flooring—a tiny, five-minute task that prevents a massive headache down the road.
Stop the Squeaks Before the Planks Go Down
If you have the subfloor exposed, do not miss your chance to secure it properly. I make it a habit to perform the subfloor screw routine for stopping floor squeaks every 8 inches along every single joist. It adds maybe an hour to the project but provides a lifetime of silence. I challenge you to try the laser level method on your next project—it will fundamentally change how you see the flatness of your home. It’s the difference between a floor that just ‘looks’ good and one that feels structurally superior for decades.
The Expansion Secrets Professionals Keep Under the Baseboard
After years of trial and error, I’ve realized that manufacturer guidelines are often defensive—designed to prevent warranty claims rather than maximize the aesthetic beauty of your home. One of the biggest lightbulb moments in my career was realizing that a floor doesn’t just need room to move; it needs predictable room to move. If you have a massive open-concept area, you have to compensate with a significantly larger perimeter gap. I’ve found that a half-inch gap at the walls, safely hidden under a proper baseboard, is worth more than five clunky transition strips in the middle of a hallway. When you follow your guide to durable flooring installation for a stylish home, you begin to see that planning the ‘exit’ of each room is just as vital as the entrance.
- The ‘Locked’ Floor Reality: Even without T-moldings, a floor can ‘pin’ itself under heavy cabinetry or kitchen islands, causing joints to pull apart on the opposite side of the room.
- Humidity is the True Boss: No amount of perfect clicking can overcome a 40% swing in indoor moisture; climate control is your best friend for a seamless look.
- Material Temperament: SPC vinyl moves much less than laminate, making it the superior choice for those long, unbroken runs.
[IMAGE_PLACEHOLDER]
Tools That Turn a DIY Job Into a Masterpiece
I don’t believe in buying every gadget at the hardware store, but three specific items changed how I approach every project. First, a 360-degree green beam laser level is the only way to truly verify if your subfloor is flat across a 40-foot span. Second, a high-quality pinless moisture meter like a Delmhorst; it tells me if the subfloor is ready without damaging the expensive planks. Finally, I never start without heavy-duty locking spacers that won’t slip when you are tapping the boards together. Combining these with expert flooring installation tips for 2025 is what separates a weekend project from a high-end renovation that lasts a lifetime.
Bring Your Seamless Vision to Life
Walking into a home where the floor flows like water from the front door to the back patio is a feeling that never gets old. It’s the difference between a house that feels ‘assembled’ and a home that feels ‘architected.’ Don’t let the fear of potential buckling stop you from achieving the design you deserve. By mastering the subfloor prep and respecting the physics of expansion, you can avoid the most common flooring installation mistakes and create a space that looks like it was done by a master craftsman. Your dream of a seamless flooring installation is completely within reach if you take it one plank at a time. Have you ever had a transition strip that drove you crazy, or are you planning to go completely seamless on your next project? Let me know in the comments below and let’s troubleshoot your layout together!