

I remember standing in the doorway of my first studio apartment, holding a box of vinyl planks and feeling like I was trying to solve a Tetris puzzle that was already lost. The room was tiny, barely big enough for a bed and a desk, and every design choice I made seemed to make the walls close in even further. I did what most people do: I laid the flooring parallel to the longest wall. It was a disaster. The straight lines acted like a measuring tape for my eyes, screaming exactly how narrow the room was. It felt like a hallway that happened to have a pillow in it. That was the moment I realized I had to break the rules. I ripped it all up—a painful, dusty lesson—and started again at a 45-degree angle. The change was nothing short of magic. Suddenly, the eye was drawn to the widest part of the room rather than the narrowest. Today, I’m going to share exactly why this ‘diagonal-lay’ technique is the ultimate cheat code for small spaces and how you can pull it off without losing your mind.
Stop Letting Straight Lines Shrink Your Living Space
When you lay flooring or tile in a standard grid, you’re basically creating a cage for your furniture. Those parallel lines lead the eye directly to the walls, highlighting the boundaries of the room. It’s one of the most common flooring installation mistakes to avoid if your goal is an open, airy feel. By shifting the perspective to a diagonal, you trick the brain into following the longest line possible across the floor—the hypotenuse of the room. According to research from the Interior Design Society, diagonal lines create a sense of movement and energy that 90-degree patterns lack, effectively ‘pushing’ the walls outward visually. I learned this the hard way after that first studio flop, and now I never look at a small bathroom or narrow hallway the same way. Whether you are looking at expert flooring installation tips for 2025 or just trying to fix a cramped guest room, this one change makes a world of difference.
Is diagonal flooring actually worth the extra cuts and hassle?
I know what you’re thinking because I thought it too: ‘Won’t this take twice as long and waste a mountain of material?’ It’s a valid fear. When I first tried this, I ended up with a pile of scrap that looked like a woodchipper’s breakfast. The truth is, you do need to plan for about 15% more waste compared to the usual 10% for straight runs. But the payoff is a custom, high-end look that usually costs a fortune in professional design fees. If you are working with tile, you’ll also want to master the thinset comb secret to keep everything perfectly level, as diagonal lines can make small height differences more obvious. Once the floor is down, finishing it off with some fresh baseboard trends for 2025 can really seal the deal. Have you ever finished a project only to realize it made your room feel even smaller than before? I’d love to hear if you’ve ever felt stuck in a ‘grid’ and if you’re brave enough to try the 45-degree tilt on your next weekend warrior mission.
Find Your North Star Before Making the First Cut
Most people think you start a diagonal floor in the corner of the room. That is a trap that will leave you with a crooked mess by the time you reach the opposite wall. Think of your first row like the spine of a book; if it is even slightly curved, the whole story falls apart. I learned this the hard way in a cramped guest bathroom in Long Island. I tried to eyeball the starting row, and by the time I hit the toilet flange, my planks were veering off like a drunk sailor. I had to rip it all up and start over. Now, I always use the chalk line move for keeping long tile rows perfectly straight or for aligning my vinyl planks. You need to find the exact center of the room and snap two perpendicular lines to create a crosshair. Then, you bisect those angles at 45 degrees. This ensures that your pattern stays balanced as it radiates outward toward the walls. For a truly professional result, following a step-by-step flooring installation from planning to perfect finish is non-negotiable. 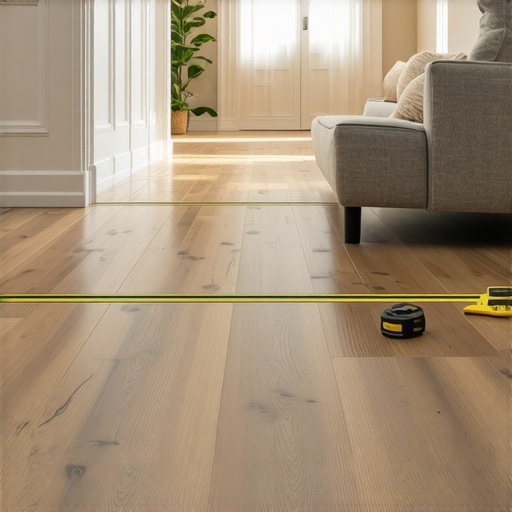
The Mathematics of the 45-Degree Miter
Once your center lines are snapped, the real work begins at the edges. Every single piece that touches a wall is going to require a miter cut. If you are working with luxury vinyl or laminate, the stay-sharp blade rule for cutting luxury vinyl is your best friend. A dull blade will chew through the wear layer and leave you with jagged edges that even the thickest baseboard cannot hide. I treat my saw blades like a chef treats a paring knife—the second I feel resistance, I swap it out. When you are measuring for these cuts, remember that you are cutting the hypotenuse. You are not just shortening a board; you are creating a precise angle that must sit exactly 1/4 inch away from the drywall to allow for expansion. If you are doing this with tile, don’t forget the thinset comb secret for preventing tile lippage, as diagonal layouts make ‘toeing’ or uneven edges much more obvious to the naked eye.
Clean Up Your Perimeters for a Seamless Look
The hardest part of a diagonal lay is the finish. Because every board ends in a point, you have a lot of small, triangular gaps along the walls. This is where most DIY projects start to look amateur. You cannot just slap on some standard trim and call it a day. I always recommend the back-cut secret for tight baseboard outside corners to ensure those tricky angles meet perfectly. If your walls aren’t perfectly square—and let’s be honest, they never are—you’ll likely need the inside-corner cope for perfect baseboard installs to mask those gaps. It takes an extra twenty minutes, but it prevents the floor from looking like it was forced into the room. Instead, it looks like the room was built around the floor. If you are transitioning into a different material, like a plush bedroom, knowing how to hide a transition strip between carpet and tile will keep the visual flow of the diagonal pattern from being interrupted by a bulky metal bar.
Stop Trusting Your Grout to Block Water
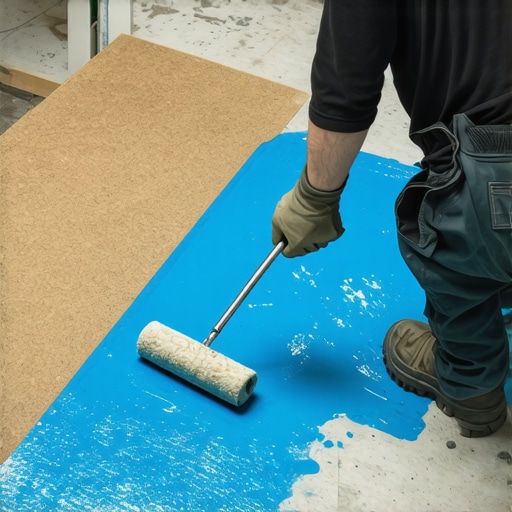
The biggest misconception I see in the DIY world—and even among some questionable contractors—is the belief that tile and grout are waterproof. They aren’t. Grout is inherently porous, and according to the Tile Council of North America (TCNA), it is designed to manage aesthetics and joint stability, not to serve as a primary moisture barrier. If you rely solely on grout, you are inviting disaster. I once consulted on a project where the homeowner couldn’t understand why your shower grout is crumbling just months after install, only to find that moisture was wicking into the backer board and pushing the grout out from behind. To truly protect your home, you must implement the liquid membrane move for fail-proof shower pans before the first tile ever touches the floor. This creates a contiguous rubberized seal that stops water in its tracks. Failing to do this is often why your shower curb is always the first part to fail, as water finds its way into the wooden framing and causes rot that is invisible until it’s too late.
Is a thicker carpet pad always better for comfort?
It sounds logical: more padding equals more comfort. However, this is a dangerous trap for your wallet and your floor’s lifespan. I’ve seen homeowners insist on a thick, soft pad for their bedroom, only to call me back two years later because their expensive carpet is rippling like a disturbed pond. When a pad is too thick or too soft, it allows the carpet backing to flex excessively every time you step. This over-stretching leads to permanent buckling. If you notice why your carpet pad feels crunchy under your feet, it might be because the cells in the foam are breaking down under the stress. Instead of chasing thickness, professional carpet install secrets for achieving flawless results suggest focusing on density. Furthermore, many high-end carpets will actually void their warranty if the pad exceeds a certain height. To avoid these headaches, always follow the power stretcher rule for large living room carpets to ensure the tension is set correctly from day one, rather than relying on the knee kicker mistake that ruins luxury carpets.
The Concrete Moisture Trap You Might Be Ignoring
One nuance that separates the pros from the amateurs is the moisture test. Most people assume that because a concrete slab looks dry and is twenty years old, it is safe to install vinyl or hardwood over it. This is a gamble I never take. Moisture can migrate from the ground through the slab via capillary action, and if you trap it under your new floor, you will face mold or adhesive failure. This is why we never skip the subfloor moisture test on concrete regardless of the age of the home. I’ve walked into beautiful renovations only to find the floors warping because the installer didn’t realize the slab was breathing out vapor. Have you ever fallen into this trap of skipping the boring prep work for the exciting finish? Let me know in the comments if you’ve ever had a ‘dry’ floor surprise you with a moisture problem.
The Gear That Separates Weekenders from Pros
I used to think that a steady hand and a sharp pencil were enough to get by. I was wrong. If you want your home to look like a custom build rather than a DIY disaster, you need to invest in the right ‘cheat codes.’ For me, that starts with an oscillating multi-tool. It is the only way to achieve the zero-clearance cut for flooring around stone fireplaces or to undercut door jambs without sweating through your shirt. When I’m working on a bathroom, I don’t even touch the first tile until I’ve set up my self-leveling laser. Using the laser level move for perfectly horizontal shower tiles ensures that your grout lines don’t start ‘stair-stepping’ as you move around the room. It’s about removing the guesswork. Even for something as seemingly simple as trim, I’ve switched entirely to a 23-gauge pin nailer. Using the pin nail secret for delicate baseboard moldings allows you to secure small pieces of wood without the nail head ever showing, which means less wood filler and a much cleaner finish. 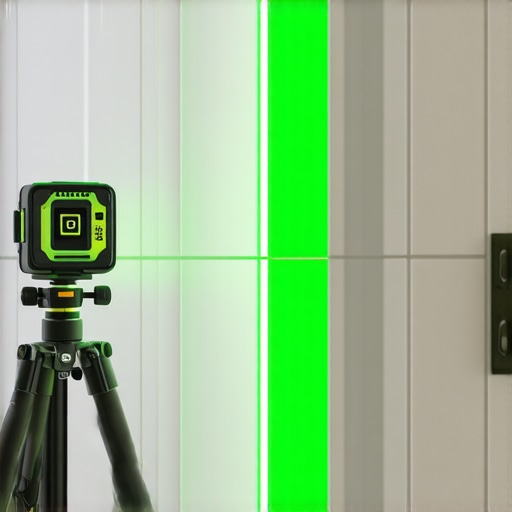
How do I maintain my flooring and shower over time?
Installation is only half the battle; the real test is how everything looks three years later. For hardwood and luxury vinyl, I am a zealot about the felt pad routine. I have seen beautiful floors ruined in weeks by a heavy sofa or a kitchen chair with a missing foot. According to the National Wood Flooring Association (NWFA), over 90% of finish failures are caused by abrasive debris or lack of floor protection. For your wet areas, you must stop shower grout from staining with the pre-seal move. Most people wait until the grout is bone dry to seal it, but I’ve found that applying a high-quality sealer immediately after the curing window protects the color from hard water and soap scum from day one. If you’ve gone the carpet route, don’t neglect the tension. The Carpet and Rug Institute (CRI) 104/105 standards explicitly state that power stretching is mandatory for residential installs. If your installer only used a knee kicker, you’re eventually going to need to know how to stretch carpet in a room full of furniture because it will inevitably ripple.
The Shift Toward Smart Surfaces and Sustainable Layouts
Looking ahead to 2025, the industry is moving away from the ‘fast-fashion’ of cheap laminate. We are seeing a massive surge in expert flooring installation tips for 2025 that focus on acoustic-rated subfloors and high-definition textures that mimic real stone. People want surfaces that feel organic but perform like armor. I’m also seeing a move toward fresh baseboard trends for 2025 that favor minimalist, square profiles over the traditional colonial curves. It makes for a much more modern, architectural look that is surprisingly easy to keep clean. My best advice for your next project? Don’t just aim for ‘done.’ Aim for ‘durable.’ Try the back-bevel move for tight baseboard miters on your next corner; it’s a small technical tweak that will make your joints look professional-grade even if your walls are a mess. If you’re feeling overwhelmed by the choices, take a look at our guide to durable flooring installation to find the right balance between style and longevity.
Hard Truths from the Subfloor Trenches
After years of wrestling with planks and tile, I’ve realized that the most expensive mistake isn’t a bad cut—it’s rushing the invisible work. First, never underestimate the power of your home’s climate; the acclimation test for avoiding hardwood floor gaps is the only way to ensure your wood doesn’t shrink or swell the moment you finish. Second, always look at your layout under ‘grazing light’ at sunrise or sunset. This reveals every bump and hump, which is why I now swear by the self leveler move for perfectly flat vinyl installs. Finally, remember that your transitions are the handshake of the room. A poorly executed threshold ruins the flow, so mastering the transition strip move for carpet to bathroom tile is just as important as the floor itself.
#IMAGE_PLACEHOLDER_E#
The Gear That Actually Earns Its Keep
I don’t believe in buying every gadget in the hardware aisle, but these four are non-negotiable for my personal projects. I always have an oscillating multi-tool for the zero clearance cut for flooring around stone fireplaces; it’s the only way to get that ‘built-in’ look. For showers, I never trust my eyes alone and rely on the laser level move for perfectly horizontal shower tiles to prevent a slanted mess. I also keep a copy of the TCNA Handbook nearby to remind me of the trowel notch secret for better tile adhesion. Lastly, if you are tackling carpet, rent a power stretcher; following the power stretcher rule for large living room carpets is the difference between a floor that lasts decades and one that ripples in two years.
Your Blueprint for a Floor That Lasts a Lifetime
Taking on a complex flooring project can feel like a mountain to climb, but the reward of a custom, diagonal-lay finish is worth every drop of sweat. By focusing on durability and following expert flooring installation tips for 2025, you aren’t just updating a room—you’re building a foundation that will stand up to the chaos of daily life. Don’t be afraid to break the straight-line habit and give your home the movement it deserves. If you need more help deciding on materials, check out your guide to durable flooring installation for a stylish home to ensure your vision matches your lifestyle. Have you ever tried a diagonal layout and run into a corner that just would not align? Let me know your biggest installation headache in the comments below!