

I was staring at a piece of PVC that was exactly three-eighths of an inch from where it needed to be, and my heart was sinking faster than a lead weight in a bucket of mortar. I had already applied the purple primer and the cement. It was setting. I tried to twist it, but it was like trying to move a mountain. I ended up having to cut out a section of my brand-new subfloor just to fix a mistake that would have taken two minutes to spot if I’d just bothered to dry-fit the assembly first. We’ve all been there—trying to rush through the boring parts of an upgrade your bathroom project because we want to see that beautiful tile go down. But if your drain isn’t perfectly centered and level, you’re setting yourself up for a world of pain. I’m talking leaks, mold, and having to tear everything out six months down the line. Today, I want to share my hard-earned wisdom on how to avoid that disaster. We’re going to walk through the ‘Dry-Fit’ test together. It’s the single most important step in any step-by-step flooring installation that involves plumbing. By the time we’re done, you’ll feel like you’ve got a pro standing right next to you. Have you ever jumped the gun and glued something before you were 100% sure? Drop a comment and let me know I am not alone in my past blunders!
Get the Alignment Perfect Before You Reach for the Glue
I used to think my eyes were as good as a laser level. Spoiler alert: they aren’t. Early in my career, I made the classic mistake of assuming the waste pipe was perfectly vertical. It wasn’t. Because it leaned just slightly to the left, the drain flange sat at an angle, making it impossible to get a flush finish with the tile. This is exactly why the dry-fit is your best friend. It allows you to simulate the entire installation—from the pipe to the linear drain setup—without the commitment of adhesive. According to data from the International Association of Plumbing and Mechanical Officials (IAPMO), faulty drain connections are a leading contributor to residential water damage, often costing homeowners thousands in remediated mold and structural repairs. You want to ensure that every component sits exactly where it should, with the proper slope to the waste line.
Is this extra step just for beginners?
Some folks think that once you’ve done a few showers, you can just wing it. That is the quickest way to end up with a puddle on your bathroom floor. Even the pros use a dry-fit to check for clearance against floor joists and to verify the height of the drain body relative to the planned dry pack method. If your drain is too high, your tile won’t sit flat. If it’s too low, you’ll have a dip that collects grime and hair. Once you’re confident in the fit, don’t forget to mark your pipes with a Sharpie so you can re-align them exactly the same way when the glue is actually wet. This preparation is what separates a DIY-look from a professional finish that lasts for decades, especially if you follow it up with the flood test secret to be absolutely certain of your success.
Assemble the Pieces Like a Jigsaw Puzzle
Once you have your subfloor prepped and your pipes cut to a rough length, it is time to treat this like a high-stakes puzzle. I remember a guest bathroom project in 2019 where I was so confident in my measurements that I skipped the full dry-fit of the trap assembly. When I finally dropped the pan in, the drain was off-center by half an inch. Because I’d already glued the sub-assembly, I spent four hours in a crawlspace with a hacksaw and a very foul mood. To avoid that, place your drain body into the cutout without any adhesive. This is your chance to verify that the pipe is not just centered, but vertically plumb. If the pipe is leaning, even slightly, your drain flange will be tilted, creating a lip that catches water. Think of it like a golf cup; if the rim isn’t perfectly level with the green, the ball—or in this case, the water—isn’t going where it belongs. 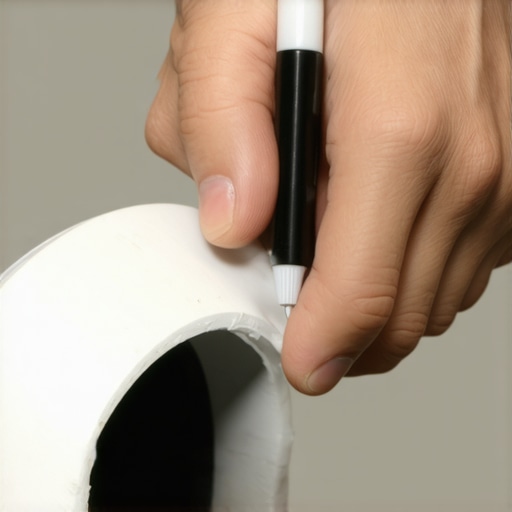
Mark Your Connections with Precision
The most common mistake during a step-by-step flooring installation is losing your alignment the second you apply that slippery cement. PVC cement acts like a lubricant for the first few seconds, and pipes have a tendency to ‘push out’ or rotate. Take a permanent marker and draw a straight line across every joint—from the pipe onto the fitting. This creates a visual fail-safe. When you go for the final install, you simply line up the marks. This is especially critical for a the flush mount secret for integrated shower drains, where even a three-degree rotation can prevent the grate from sitting square with your tile rows. It’s the same logic used in high-end carpentry, like when you’re trying to find carpet install secrets for tight corners; if you don’t have a reference point, you’re just guessing.
Dial in the Height and Slope
Gravity is the only thing that makes a shower work, so you need to respect the pitch. Your waste line must slope at exactly one-quarter inch per foot. During your dry-fit, use a small torpedo level to verify this slope remains consistent once the weight of the drain body is added. If you are using the dry pack method for a level shower base, the height of your drain flange is the most important variable in the room. It needs to sit at a height that accounts for the thickness of your mortar bed and the tile itself. If it’s too high, you’ll have a ‘speed bump’ in the middle of your shower; too low, and you’ll have a puddle. I like to use a scrap piece of the actual tile I’m planning to use as a spacer during the dry-fit. This ensures the the linear drain setup sits perfectly flush. If you’re working in a tight bathroom space, don’t forget to check that your baseboard height will clear the new floor height; checking baseboard styles that elevate your interior design now can save you from a trim nightmare later. Once every mark is lined up and your levels are perfect, you are finally ready for the ‘purple stuff’.Wait! Before you slap that glue on, let’s talk about the biggest lie in home renovation: the idea that ‘tighter is always better.’ Early in my DIY journey, I thought I was a genius for scribing my baseboards so tight to the floor they didn’t even need a nail. Fast forward to February, and those beautiful miters had blown apart. Why? Because houses breathe. If you aren’t leaving room for movement, you’re building a structural disaster. Why your caulked baseboards are cracking within weeks is usually a symptom of this exact issue—lack of expansion room. Have you ever fallen into this trap? Let me know in the comments because I’ve spent plenty of nights recutting trim that I thought was ‘perfect.’
Why Your Tight Joints are Actually a Ticking Time Bomb
Many beginners obsess over making every joint airtight, but seasoned pros know about the ‘sacrifice gap.’ Whether it’s the penny gap rule for hardwood expansion space or the expansion joint rule for large tile floors, you must respect the physics of the material. According to the Tile Council of North America (TCNA) Handbook, specifically detail EJ171, movement joints are essential for any tile installation exceeding 20 feet in any direction. If you ignore this, your floor will eventually ‘tent’ or crack. It’s not a matter of ‘if,’ but ‘when.’
Does a Perfectly Flat Subfloor Even Exist?
No, it doesn’t. And if you think your thinset will bridge a massive dip, you’re in for a bad time. One of the most common flooring installation mistakes to avoid for a seamless look is skipping the prep work. If you’re laying large format tile, you need a subfloor that varies no more than 1/8 inch over 10 feet. I see so many people buy the most expensive tile only to have it fail because they didn’t use the self leveler mistake that creates new high spots—which is a whole different disaster if you don’t use it right. You have to be meticulous with the feather edge tactic for smoothing subfloor seams before the first plank or tile even touches the ground. #IMAGE_PLACE_HOLDER_C#
The Hidden Nuance of Carpet Seams
Let’s pivot to the soft stuff. If you’ve ever walked into a room and the carpet looked like it had a scar running down the middle, someone missed a nuance. People often blame the quality of the carpet, but why your carpet seam looks like a speed bump usually comes down to the sub-flooring prep or the direction of the nap. A pro knows the double cut method for invisible carpet seams is the only way to go for high-traffic areas. Even high-end best carpet types for high traffic areas in 2025 will look amateurish if you don’t use the power stretcher move to fix loose carpet bubbles from the start.
Can You Hide High-Tech Features Behind Simple Trim?
Absolutely. This is where you move from ‘DIYer’ to ‘Craftsman.’ If you’re doing a baseboards makeover, don’t just think about the aesthetic. Think about utility. For example, knowing how to hide electrical wires behind tall baseboards can save you from cutting into your drywall. This level of planning is what makes a upgrade your bathroom project truly feel like a luxury spa rather than just a weekend chore. Always remember that the finish line is won in the planning stages, not the finishing nails.
Speaking of finishing nails, let’s talk about the gear that actually makes those details look intentional. I’ve spent thousands on tools over the years, and while I love a shiny new saw, the real ‘pros’ are the ones that prevent disasters. If you are doing a flooring installation, you need to stop guessing about moisture. I never lay a single plank until I’ve checked the subfloor with a pinless moisture meter. The National Wood Flooring Association (NWFA) in their Technical Publication No. A100 specifically warns that moisture levels in a wood subfloor should be within 4 percentage points of the flooring for strips and 2 percentage points for planks. If you ignore this, you’re just waiting for your floor to buckle.
Stop Using Your Hammer for Everything
One tool I cannot live without is the oscillating multi-tool. It is the absolute king of precision. I used to use a handsaw to undercut my casing, but why your door jamb undercuts are too high is usually because of human error with manual tools. A multi-tool allows you to lay a scrap piece of your flooring down and cut the trim perfectly flush to the new height. It’s also my go-to for clearing out dried thinset in grout lines before it becomes a permanent eyesore. If you’re tackling carpet install tasks, don’t skimp on a high-quality knee kicker, but for anything larger than a closet, a power stretcher is mandatory to prevent those annoying ripples. #IMAGE_PLACE_HOLDER_D#
How do I maintain my flooring and shower for the long haul?
Maintenance isn’t about scrubbing harder; it’s about scrubbing smarter. For tile and stone, stop using bleach—it eats your grout. I always tell my clients to follow the microfiber mist rule for cleaning matte floors, which keeps the finish from becoming hazy. When it comes to your shower, check the silicone every year. The moment you see a tiny black spot or a peel, you need to address it. Knowing shower repairs: when to fix vs. replace for longevity can save you from a full-blown mold remediation. I always use the blue tape trick for cleaning up silicone beads to ensure the new seal looks factory-perfect and remains watertight.
Why I Think Modular Systems Will Change Everything
Looking ahead, I predict we are moving away from traditional ‘wet’ installations. The industry is pivoting toward transform your flooring top trends in installation for 2025, which heavily features click-lock waterproof systems and pre-waterproofed foam shower pans. These systems reduce the margin for error significantly. While a how to choose the right carpet for a cozy living space will always involve classic comfort, the structural side of the home is becoming more like a Lego set—engineered for speed and durability. My best advice? Try using the ‘blue tape’ method on your next bathroom caulking job. It’s a small, advanced tip that will make your DIY work look like it was done by a twenty-year veteran.
Hard-Earned Lessons from My Worst Installation Disasters
Looking back at my early projects, I realize that the mistakes weren’t caused by a lack of effort, but a lack of patience. First and foremost, the expansion gap isn’t a suggestion; it’s a structural requirement. I’ve seen beautiful floors buckle because someone wanted a ‘tight’ look against the wall. Always respect the penny gap rule for hardwood expansion space to allow your home to breathe.
Second, trust your Sharpie more than your memory. Marking those dry-fit lines during a step-by-step flooring installation saves you from the panic that sets in the moment the PVC glue starts to cure. Third, moisture is the silent killer. A simple meter is the difference between a floor that lasts thirty years and one that fails in three. Finally, always buy 10% more material than you think you need. Running out of a specific dye lot of carpet or a specific batch of tile mid-project is a nightmare that even the best carpet install secrets can’t fix.
The Gear That Rescued My Projects
If you want to move from ‘amateur’ to ‘craftsman,’ you need to stop fighting your tools. I never start a bathroom job without consulting the TCNA Handbook; it is the industry standard for any upgrade your bathroom project. For precision cuts, an oscillating multi-tool is my secret weapon. It allows you to fix mistakes you didn’t even know you’d make, like trimming a door jamb after the floor is already down. To avoid the door jamb saw mistake that leaves huge gaps, use a scrap piece of your actual flooring as a guide for the blade.
#IMAGE_PLACEHOLDER_E#
Additionally, I highly recommend investing in a self-leveling laser. It is much more reliable than a standard bubble level for keeping your baseboard styles perfectly horizontal across a long room. And for the final touches, keep a roll of blue painter’s tape handy for the blue tape trick for cleaning up silicone beads—it’s the easiest way to get a professional, mess-free seal.
Take the First Step Toward Your Dream Floor
Every professional you see today was once a beginner staring at a messy subfloor and a pile of confusing instructions. Don’t let the fear of a small mistake stop you from starting your next **flooring installation**. Whether you are mastering the double cut method for invisible carpet seams or choosing a new baseboards makeover, the pride of doing it yourself is worth every drop of sweat. You now have the roadmap to avoid the common pitfalls and build something that lasts. What is the one part of the flooring process that makes you the most nervous? Let’s talk about it in the comments below!