

I remember the smell of fresh sawdust and the pride I felt as I laid down those last few planks in my hallway. I was convinced I was a DIY god. Then, I reached the bathroom door. I grabbed my oscillating tool, slid a scrap piece of flooring under the jamb to guide my blade, and zipped through the wood. When I pulled the scrap out and tried to slide the actual plank in with its underlayment, my heart sank. There was a quarter-inch of empty air between the new floor and the bottom of the casing. It looked like the door was hovering. I had made the classic mistake of not accounting for the actual thickness of the finished assembly. I thought I was following a step-by-step flooring installation perfectly, but I missed the most crucial detail.
Stop Over-Cutting Your Door Casings Before It’s Too Late
The problem usually starts with a simple oversight: forgetting that your floor isn’t just the plank itself. You’ve got underlayment, moisture barriers, and sometimes a bit of subfloor prep that adds height. When I made that first cut years ago, I didn’t realize why your door jamb undercuts are too high until the entire row was locked in. By then, the damage was done. Most flooring installation mistakes to avoid are fixable with a bit of trim, but a butchered door casing is a permanent eyesore. It draws the eye every single time you walk through the house. I’ve learned the hard way that you need to simulate the full thickness—pad and all—before that blade ever touches the wood. According to the National Association of Home Builders, finish carpentry details are the primary metric homeowners use to judge the overall quality of a renovation. If the jambs look bad, the whole floor looks cheap.
Is a tiny gap really worth stressing over?
You might think a little sliver of space won’t matter once the furniture is in. Trust me, it does. It collects dust, pet hair, and it screams to every guest that you rushed the job. We want your home to look like a high-end showroom, not a botched weekend project. Today, I am going to show you exactly how to gauge your cut height and the specific “shimmy” technique that ensures your planks slide in tight and flush. Have you ever made a cut and immediately thought, “Oh no, I can’t undo that”? Drop a comment and share your most painful DIY mistake; I promise I won’t judge! Getting a durable flooring installation right means respecting the small details just as much as the big ones.To get that factory-finish look, you have to treat your door jamb like a puzzle piece that hasn’t been cut yet. The most common of all flooring installation mistakes to avoid is using just the plank as a guide. Instead, create a ‘Sample Sandwich.’ Take a 6-inch scrap of your flooring, a piece of the exact underlayment you’re using, and—if you’re working over concrete—a snippet of your vapor barrier. Tape them together. This is your true height. I remember a laundry room project where I skipped the vapor barrier in my stack; that tiny 6-mil plastic difference was enough to make the plank catch on the wood fibers of the casing, nearly ruining the tongue.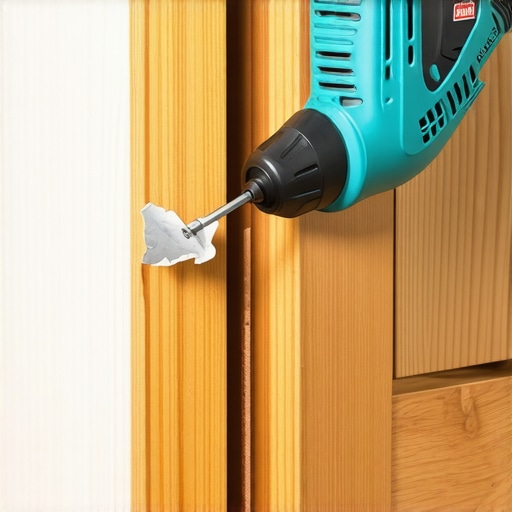
Master the Sample Sandwich Technique
The goal is to create a guide that matches the finished floor height down to the millimeter. Place your taped stack against the door casing. Use a sharp pencil to mark the top of the stack onto the wood. If you’re feeling confident, you can skip the pencil and use the stack itself as a physical platform for your oscillating tool blade. This ensures the blade stays perfectly level. Think of it like a train on a track; the stack is your track, and the blade is the train. If the track is steady, the train won’t derail and chew up your door frame.
Let the Tool Do the Heavy Lifting
When you start the cut, don’t force it. Pushing too hard causes the blade to flex, which leads to those slanted, ugly gaps. Keep the tool’s speed high but your hand pressure light. You want to cut through the casing and the “hidden” part of the jamb behind it. I once rushed this in a narrow hallway and only cut the decorative casing. When I tried to seat the plank, it hit the main door frame and stopped cold. You need to clear the entire path so the plank can slide underneath. Always keep a vacuum handy; sawdust trapped in that narrow gap will prevent your flooring from sitting flush.
Slide and Lock Without Breaking the Tongue
Once the wood is cut and the debris is cleared, it’s time for the ‘shimmy.’ You aren’t just dropping the plank in; you’re often sliding it horizontally while trying to engage the locking mechanism. This is where how to stagger vinyl plank ends for maximum strength becomes vital. You need enough room to maneuver. If the fit is tight, don’t reach for a heavy hammer. Use the block and hammer hack for tight tongue and groove joints to gently persuade the plank into the undercut. A tapping block distributes the force so you don’t mushroom the edges of your expensive new floor.
The Secret to a Gap-Free Finish
If you find the plank won’t quite go all the way under, check for a hidden nail. Builders often drive nails near the bottom of the jamb. If your blade hits one, it might not cut through, leaving a tiny steel nub that blocks your flooring. A pair of end-cutting nippers or a metal-rated blade on your multi-tool will save your sanity here. Once clear, follow the rubber mallet rule for locking vinyl planks to ensure the seam is invisible. The sound should change from a hollow ‘clack’ to a solid ‘thud’ when it’s seated correctly. Remember, the underlayment needs to be flat, so use the underlayment tape move for moisture barriers to keep things from bunching up as you slide the plank home.Let’s dig deeper into the nuances of professional finishes. Most homeowners assume that the plushest, thickest padding leads to a high-end feel. I’ve seen people spend thousands on premium wool only to insist on an 8lb, half-inch pad that actually causes the carpet to fail within months. The nuance here is the ‘shear’ force on your tack strips. If the pad is too tall, the carpet cannot properly ‘bite’ into the pins, leading to unsightly ripples. The Carpet and Rug Institute (CRI) recommends specific thickness limits—typically no more than 7/16 of an inch for most residential installs—to ensure the stretch remains permanent. I’ve walked into homes where the carpet was literally floating off the floor because why your carpet pad is too thick for the tack strip was the one detail the DIYer overlooked. This is one of those carpet install secrets achieving flawless results every time that pros respect: the pad must be slightly thinner than the tack strip’s height profile once compressed. 
Stop Using Caulk to Hide Bad Miters
Then there is the trim work. We’ve all been tempted to ‘caulk and walk’ when a joint doesn’t quite meet. But here is the expert trap: caulk has zero structural integrity and shrinks over time. If your walls aren’t a perfect 90 degrees, a standard 45-degree cut will open up as soon as the humidity drops. Instead of reaching for the tube, I use the back-cutting secret for baseboard miters. By shaving the back of the wood at a slight angle, you allow the front ‘point’ to make tight contact even if the corner is wide. This prevents that seasonal heartbreak where why your caulked baseboards are cracking within weeks becomes a permanent eyesore in your living room. Have you ever fallen into this trap of relying on filler rather than the cut? Let me know in the comments.
How do you handle baseboards on a wavy floor?
If you just nail a straight piece of trim to a subfloor that dips or peaks, you will end up with gaps that scream ‘amateur.’ The pro move is scribing. You hold the board level against the wall, use a compass to track the floor’s exact profile onto the wood, and then plane it down to fit. It is tedious, but for a baseboards makeover elevate your interior with simple updates, it is the difference between a builder-grade look and a custom home. You might even need the block scribe secret for baseboards on brick walls if you are finishing near a masonry hearth. Expertise isn’t just about making the first cut; it is about predicting how the materials will react long after the tools are packed away.If you are serious about your home looking professional, you have to stop relying on a knee kicker alone for your carpets. I have seen too many homeowners end up with ripples because they did not use a power stretcher. It is the difference between a floor that lasts twenty years and one that needs a redo in two. When you use the power stretcher move to fix loose carpet bubbles, you are not just smoothing things out; you are tensioning the backing to its engineered limits. For tile, accuracy is non-negotiable. I stopped using a tape measure for my starting lines years ago. Instead, I rely on the laser level hack for straight tile rows. It gives you a 360-degree reference point that does not smudge or disappear under thinset. 
How do I maintain these surfaces over the long haul?
Maintenance is not about deep cleaning once a year; it is about the daily chemistry you introduce to the room. I have watched beautiful finishes disintegrate because someone used a generic all-purpose cleaner that was too acidic. To protect your investment, I always advocate for the microfiber mist rule for cleaning matte floors. This prevents streaks and keeps the factory seal from becoming porous. In wet areas, maintenance starts before the first shower. You need to verify why your shower valve is leaking behind the tile wall by performing a pressure test before the backer board goes up. If you miss a pinhole leak now, no amount of surface scrubbing will save your bathroom from mold later.
The next decade of flooring technology
I suspect we are moving toward intelligent subfloors. We are already seeing materials that integrate better moisture management directly into the core. However, the basics remain king. The National Wood Flooring Association (NWFA) Technical Manual Section V states that subfloor moisture content must be within 2 to 4 percent of the flooring material’s moisture content before installation. This is why you must understand why your concrete subfloor needs a calcium chloride test. No matter how advanced the planks get, the foundation dictates the success.
Try this advanced tip today
Do not just take my word for it. Go grab a scrap of your baseboard and try the back-cutting secret for baseboard miters. Once you see that tight, hair-line seam, you will never go back to standard 45-degree cuts again. Your future self will thank you when the seasons change and your corners stay closed.
What I Discovered After My Third Botched Casing
Experience is just the name we give to our mistakes, and I have plenty. One thing I’ve learned is that ‘close enough’ never is. Whether you are following a step-by-step flooring installation or just winging it, the transition points are where the battle is won or lost. I used to rush the subfloor prep, but now I know that a flat floor makes the trim work ten times easier. Also, never underestimate the power of the right environment; I always let my materials acclimate for at least 72 hours now to avoid those heart-wrenching flooring installation mistakes to avoid later on.
My Gear List for a Lifetime of Better Floors
If you are serious about your home, stop borrowing tools and invest in these three. First, a high-quality oscillating tool with a wood-and-metal blade is essential for door jambs. Second, for anyone tackling bedrooms, learning the double cut method for invisible carpet seams is a game changer, but you need a sharp row-cutter to do it right. #IMAGE_PLACEHOLDER_E# Lastly, for baseboards, a simple scribe compass will help you navigate those pesky wavy walls that every older home seems to have. I trust these because they remove the guesswork and help you achieve carpet install secrets achieving flawless results every time.
Take the Leap into Your Next Renovation
The difference between a house and a home is often found in these small, tactile details. Don’t let the fear of a bad cut keep you from starting. By paying attention to the ‘Sample Sandwich’ and respecting your expansion gaps, your flooring installation will look like it was done by a crew of seasoned pros. You have the guide, the hacks, and the mindset. Now, go create something you are proud to walk on every single day.
Which part of your floor is giving you the most trouble right now—the door jambs or the baseboards? Let me know below!