

I spent three weeks tiling my master bath, only to realize I’d built a trip hazard. That clumsy three-inch curb was the “standard,” but every time I stepped over it, I felt like I was entering a bathtub, not a sanctuary. My “lightbulb moment” happened when I visited a friend who’d just finished an ultimate bathroom upgrade. Their floor was one continuous sheet of large-format tile, sloping perfectly into a sleek, stainless steel channel. No curb. No awkward envelope cuts on the tile. Just pure, unobstructed floor. I felt like a dinosaur for sticking with the old center-drain tech. Today, I’m showing you why this setup is the future of home design.
Stop Fighting the Four-Way Slope
Traditional drains are a pain because they force you into a bowl shape. You’re stuck using tiny mosaic tiles because large ones simply won’t bend to that multi-directional slope. I made the classic rookie mistake of trying to use 12×24 tiles with a center drain once; the lippage was so bad it looked like a miniature flight of stairs. By switching to a linear setup, you only have to slope the floor in one direction. It’s a game-changer for anyone looking for a spa-like shower experience. It simplifies the plumbing and the tile work simultaneously, provided you understand how to manage the subfloor height.
But Don’t These Drains Clog Way Faster?
This is the first thing my neighbor asked when I told him to switch. The fear is that a long, thin slot will trap hair and soap scum like a magnet. Honestly? It’s often easier to clean than a standard grate. Most high-quality units come with a removable hair basket. If you use the flush mount secret for integrated drains, maintenance becomes a thirty-second job every few weeks rather than a deep-scrub nightmare. Barrier-free living isn’t just for luxury hotels anymore; it’s a practical move for long-term home value. According to data from the AARP, roughly 77% of adults age 50 and older want to remain in their homes as they age, and a zero-entry shower is a top-tier modification for safety. To get there, you need a rock-solid shower subbase ready for that specific pitch. Have you ever tripped over your own shower curb or spent hours scrubbing grout lines that wouldn’t exist if you had a flat floor? Drop a comment and let me know your biggest bathroom renovation fear!
Build a Slide Not a Funnel
Getting the pitch right is where most DIYers lose their minds. Think of a traditional center drain like a funnel—water flows toward it from every direction, forcing you to create a complex bowl shape. A linear drain turns your shower floor into a playground slide. You are creating one consistent, flat plane that slopes toward a single wall or channel. I remember my first attempt at this in a tight guest bath; I didn’t check if the existing floor joists were level first. Halfway through the mud set, I realized the entire house was leaning three-quarters of an inch away from the drain. I had to rip out the entire bed and start over. To avoid my pain, you must master the dry pack secret for rock-solid shower subbases before the first bag of mortar is even opened. Use a long level to ensure your slope maintains a steady 1/4-inch drop per foot. If that slope isn’t a perfect plane, your large-format tiles will rock and pivot, leading to those 12×24 ‘stairs’ I mentioned earlier.
Sink Your Drain at the Absolute Lowest Point
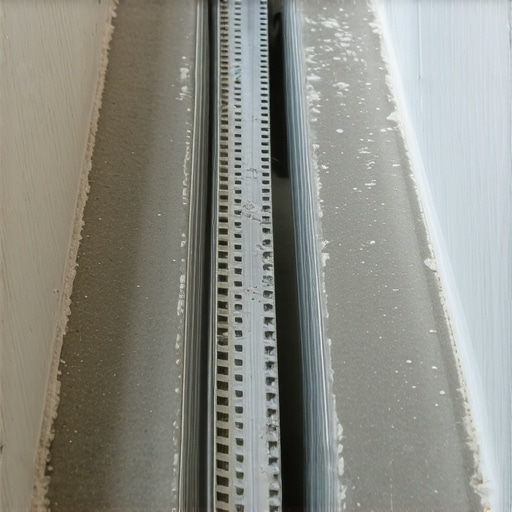
Placement is everything. Most people tuck the linear drain against the back wall, which is aesthetically pleasing and keeps your feet off the grate. However, you have to ensure the drain flange sits perfectly flush with or slightly below your subfloor level. If the drain is even a hair too high, you’ll end up with a ‘lip’ that holds back a quarter-inch of water forever. When I installed a sleek stainless unit last summer, I used the laser level move for perfectly horizontal shower tiles to project a line across the back wall. This gave me a visual ‘datum’ to measure down from, ensuring the drain was the literal valley of the room. It’s much easier to adjust the drain height during the rough-in than it is to try and build up tile thinset later to hide a mistake.
Flood Testing is Your Only Real Insurance
Once your slope is set and the drain is integrated, the waterproofing membrane is what stands between your luxury shower and a rotted subfloor. You cannot skip the curing times here. I’ve seen pros rush the liquid membrane application and end up with pinholes that let moisture seep into the plywood. This is one of those flooring installation mistakes to avoid for a seamless look and a long-lasting build. Once the membrane is dry, plug the drain and fill the pan with two inches of water. Mark the water line and wait 24 hours. If that water level drops even a fraction, you have a leak. It’s annoying to wait, but the flood test secret for guaranteed leak-proof showers is the only way to sleep soundly at night.
The Secret to Laying Large Tile on a Slope
The beauty of a linear drain is that you can finally use those massive 24×48 porcelain slabs. But because the floor is one continuous slope, any minor bump in your mortar bed becomes an enemy. You need to use the full bed mortar rule for large format shower tiles to ensure there are no hollow spots underneath. Air pockets under the tile lead to cracks when you drop a heavy shampoo bottle. I always use the thinset comb secret for preventing tile lippage, dragging the trowel in straight lines rather than swirls. This allows the air to escape as you press the tile down, giving you that flat, professional finish that makes the zero-entry look so high-end.
Why Your “Perfect” Tight Fit is Actually a Ticking Time Bomb
Common wisdom says that a gap-free installation is the hallmark of a master craftsman. I used to believe that myself, until I saw a client’s $10,000 porcelain floor literally ‘tent’—popping up six inches off the subfloor in the middle of the night. The culprit? He hadn’t left a perimeter gap. Everyone thinks tile is static, but the National Tile Contractors Association (NTCA) notes that every structure moves. If you don’t respect the expansion joint rule for large tile floors, you are essentially building a pressure cooker. You need that 1/4-inch space at the edges, hidden by your baseboards, to allow for the natural expansion and contraction of the building envelope.
#IMAGE_PLACE_HOLDER_C#
Why do my perfect miter joints always open up in January?
This is the question that haunts every perfectionist. You spent hours with the miter saw, but six months later, there’s a 1/8-inch gap staring you in the face. It’s usually because you’re fighting the wood’s moisture content rather than working with it. Understanding why your baseboard miters keep gapping in the winter is about more than just glue. The pro-level fix is to utilize the back bevel move for tight baseboard miters, which allows the visible face of the joint to stay tight even if the back of the wood moves slightly. Additionally, in wet areas like a bathroom, skipping the silicon bead secret for waterproofing baseboards leads to wicking that rots the trim from the bottom up—a mistake that costs thousands in ‘invisible’ damage over time.
The Carpet Ripple Trap
In the world of soft flooring, the ‘oops’ factor usually comes down to the tools. Most DIYers and low-bid ‘pros’ rely solely on a knee kicker. Here is the contrarian truth: a knee kicker is a positioning tool, not a stretching tool. If you want a floor that doesn’t develop waves in three years, you have to follow carpet install secrets that involve a power stretcher. Without that mechanical tension, the backing will eventually relax, and your ‘flawless’ carpet will look like an unmade bed. Have you ever fallen into this trap where a ‘perfect’ install looked terrible six months later? Let me know in the comments!
Building for the long haul means stopping the ‘it’s good enough’ mindset before you even pick up a hammer. If you’re serious about a professional-grade finish, you need to invest in the heavy artillery. I don’t care how steady your hand is; you cannot beat a self-leveling cross-line laser for accuracy. It’s my go-to for everything from setting tile rows to ensuring baseboards aren’t following a sagging floor. When I’m doing a bathroom, the laser level move for perfectly horizontal shower tiles is what separates a $5,000 look from a $20,000 masterpiece. It gives you a constant reference point that doesn’t smudge or shift. Before laying any wood or LVP, I also religiously use a pinless moisture meter. According to the National Wood Flooring Association (NWFA), subfloor moisture content should be within 2-4% of the flooring material’s moisture level. Ignoring the moisture meter requirement is a recipe for cupping and crowning that no amount of sanding can fix. 
How do I keep my custom shower looking brand new for years?
Maintenance isn’t just about scrubbing; it’s about preventative sealing and joint care. People often ask why their shower looks dingy after six months. It’s usually because they skipped the bead and smooth strategy for shower corners or failed to re-seal. You should be checking your silicone beads annually. If you see peeling, it’s time to strip it and use the blue tape trick for cleaning up silicone beads to get that factory-fresh seal again. For the tile itself, stop shower grout from staining by applying a high-quality penetrative sealer before the first drop of water hits the floor.
The Future is Waterproof and Curb-Free
Looking ahead, I see the industry moving toward fully integrated systems where the baseboards, flooring, and wall panels are designed to move as one unit. We’re already seeing this with hybrid LVP products that click into waterproof baseboard channels. It simplifies step-by-step flooring installation for the DIYer while providing a level of water protection we could only dream of a decade ago. If you want a home that survives the next twenty years, focus on durable flooring installation that prioritizes expansion and moisture management over just aesthetics. For carpeted areas, long-term success is about keeping that original tension. If you skipped the power stretcher, you’ll be dealing with waves by year three. I always recommend a yearly check of transition strips; if they start to wiggle, you’re looking at a trip hazard and a fraying edge. Following carpet install secrets regarding edge tucking will save you from a full replacement later. Try this today: Grab a tube of high-quality silicone and refresh one corner of your shower using the blue tape method. You’ll be amazed at how much younger the whole room looks.
Hard Truths from the Thinset Trenches
Looking back at my first dozen bathroom builds, the biggest lesson wasn’t about the tile itself, but what happened beneath it. I used to think I could ‘eyeball’ a slope, but precision is your only friend in a wet room. I learned the hard way that the dry pack secret for rock-solid shower subbases is the absolute foundation of a floor that doesn’t bounce or crack. Mosaics are forgiving because they conform to uneven mud beds, but large format slabs are brutal; they will teeter on the slightest bump. If you’re going big, you must master the thinset comb secret for preventing tile lippage to ensure every edge is perfectly flush. Finally, never gamble on your waterproofing. It might feel like a waste of time to wait, but performing the flood test secret for guaranteed leak-proof showers is the only way to know for sure that your hard work isn’t rotting the joists below.
Gear That Saves My Sanity Every Job
If you’re serious about DIY, stop relying on a bubble level for the big stuff. A self-leveling cross-line laser is my ‘heavy artillery.’ I use the laser level move for perfectly horizontal shower tiles to ensure my layout is dead-on from the first row to the ceiling. For the floor, I never skip the moisture meter requirement; knowing the subfloor’s hydration level prevents wood flooring from buckling later. When it comes to finishing the look, a sharp coping saw is indispensable for the inside corner cope for perfect baseboard installs, giving you tight joints that won’t open up when the seasons change.
Claim Your Sanctuary One Tile at a Time
Stepping into a shower you built yourself—one that flows seamlessly into the rest of the room—is a reward that lasts for years. It’s about more than just the visual impact; it’s the peace of mind that comes from a durable flooring installation executed with professional-grade techniques. Whether you are following a step-by-step flooring installation guide for the first time or you’re a seasoned pro, the secret is in the prep. Take the extra hour to verify your slope, test your drain, and double-check your measurements. Your home is your sanctuary, and you deserve a finish that reflects that. Have you ever faced the ‘lippage’ nightmare with large format tiles, or are you planning your first curbless conversion? Let me know your biggest hurdle in the comments below!