

I walked into the guest room, coffee in hand, ready to admire my weekend handiwork. The sun was streaming through the windows, highlighting the new carpet install secrets I’d finally mastered. But then, I saw it. My beautiful, bright white trim looked like it belonged in a 1970s smoking lounge. It wasn’t dust. It wasn’t a shadow. My baseboards were turning a gross, buttery yellow right before my eyes. If you’ve ever scrubbed a spot for ten minutes only to realize the color is coming from *inside* the paint, you know my pain. It feels like your house is aging prematurely, and no amount of cleaning can fix it.
The Day My Pristine White Trim Turned Dingy
Most of us pick white baseboards because they make everything feel clean and sharp. They provide that perfect frame for a baseboards makeover that elevates the whole room. But when that white starts to turn, it has the opposite effect. It makes the walls look dingy and the floors look neglected. I spent years thinking I just needed a better mop or a different brand of cleaner. I’ll be the first to admit a huge mistake I made early on: I used an old-school oil-based paint in a windowless hallway. I thought it would be more durable against vacuum cleaners and dog paws. I was wrong. Within six months, that hallway looked like it had a jaundice problem. The lack of light combined with the chemical makeup of the paint created a yellowing disaster that I eventually had to sand down and redo. Today, I’m going to show you exactly why this is happening in your home and how you can prevent it—or fix it—without losing your mind.
Does cheap paint actually ruin your home’s value?
You might be wondering if this is just a cosmetic annoyance or something that actually affects your home’s appeal. When you’re looking at baseboard styles that elevate your interior design, the last thing you want is a color shift that screams “low-quality materials.” Yellowed trim often signals aged oil-based products or cheap resins that don’t hold up to modern standards. According to the experts at the Paint Quality Institute, light deprivation is a primary trigger for yellowing in alkyd (oil-based) paints. It sounds counterintuitive, but while sunlight yellows some materials, oil-based paints actually yellow faster in the dark, like behind furniture or in closets. Have you ever moved a couch only to find the baseboard behind it looks five years older than the rest of the room? It’s a total “aha!” moment—and a frustrating one at that.
Why This Happens When You Least Expect It
It’s not just about the paint you chose, though that’s a big part of it. Sometimes, it’s about what’s happening around the baseboard. For instance, if you didn’t follow the painter caulk vs silicone guide, you might be seeing bleed-through where the oils from certain caulks interact with your topcoat. Or perhaps it’s environmental factors like tobacco smoke, cooking greases, or even the type of topcoat you used on your nearby floors. I’ve seen beautiful homes where the step-by-step flooring installation was flawless, but the baseboards looked like an afterthought that went sour. It’s all about the chemistry. We’re going to dive into the specific culprits—from UV rays to chemical off-gassing—so you can finally get that crisp, clean look back and keep it that way for good. Before we move on to the solutions, I have to ask: have you noticed your trim turning yellow only in specific rooms, or is it happening everywhere at once?To stop the yellowing cycle, you have to break up with oil-based alkyd paints. Think of oil paint like a piece of fruit; over time, it oxidizes and changes color, especially when it’s kept in a dark room. Water-based acrylic paints, on the other hand, are like high-quality plastics—they don’t have those same organic compounds that rot into a yellow hue. When you’re looking for baseboard trends in 2025, you’ll notice that almost every professional recommendation leans toward 100% acrylic latex. It’s flexible, it cleans up with soap and water, and most importantly, it stays white.
Switch to high-quality acrylic resins
If you want to avoid the ‘jaundice’ look, you need a paint that uses non-yellowing resins. I remember a bathroom renovation where I insisted on using a heavy oil-based gloss for ‘durability’ near the shower. Within months, the humidity and lack of direct UV turned the trim into a sickly cream color. I ended up spending three days on my knees with a scraper to get back to square one. Don’t make that mistake. Modern acrylics are incredibly durable and won’t betray you when the lights go out.
Sand down the previous failure
You can’t just slap new paint over yellowed trim and expect it to stick. That yellowing is often a chemical change on the surface. You need to scuff-sand the old finish to give the new paint ‘teeth’ to grab onto. Use a 120-grit sanding sponge. It’s like exfoliating your skin before a tan; if the surface is flaky or slick, the result will be a mess. 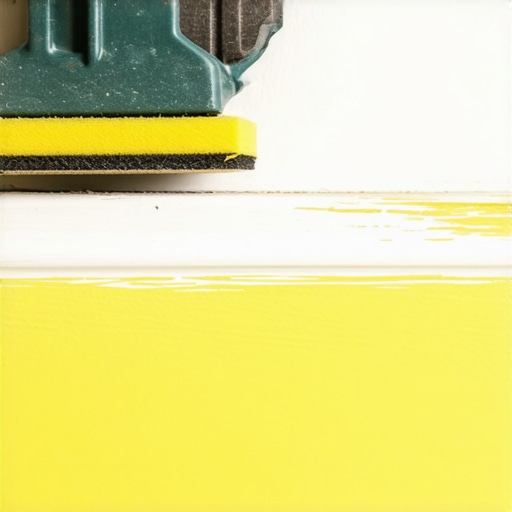
Seal the surface with a stain-blocking primer
Once you’ve sanded, don’t skip the primer. If the yellowing was caused by tannins or old oil-base bleeding through, a standard cheap primer won’t stop it. Use a dedicated stain-blocker. This is a crucial part of avoiding flooring installation mistakes to avoid for a seamless look because your trim and floors need to contrast perfectly. If the trim bleeds, the whole project looks amateur.
Paint your trim before the final install
One of my favorite time-savers is a strategy many pros use: why you should paint your baseboards before installing. It allows you to get a perfect, even coat without worrying about getting paint on your new carpet or hardwood. Speaking of floors, if you’ve noticed your wood changing color too, you might want to look into why your white oak floor is turning yellow, as the causes can sometimes overlap with your trim.
Choose the right sheen for the job
Semi-gloss or satin are the gold standards for baseboards. Flat paint on trim is a recipe for disaster; it catches every scuff and is impossible to wipe down properly. When you research how to choose the perfect baseboards for your homes style, remember that the finish is just as important as the profile. A higher sheen reflects more light, which actually helps disguise minor imperfections and keeps that ‘bright white’ pop for years. Lastly, ensure you are using the right gap-fillers by checking the painter caulk vs silicone guide, because the wrong caulk will also yellow and attract dust, ruining your hard work.Everyone tells you to buy the thickest, softest pad available because it feels like walking on a cloud. But in my experience, that ‘cloud’ often leads to a carpet catastrophe. If the pad is too tall, the carpet’s backing never fully engages with the pins on the tack strip. This is exactly why your carpet pad is too thick for the tack strip and can lead to ripples within a year. You think you’re upgrading, but you’re actually sabotaging the mechanical bond. According to the Carpet and Rug Institute (CRI), residential cut-pile carpet should generally have a pad no thicker than 7/16 of an inch. Going beyond that puts too much leverage on the seams every time you step.
The padding myth that is killing your carpet
I have seen homeowners spend thousands on high-end materials only to ignore the technical specs. When the pad is too squishy, the carpet flexes too much. This constant movement pulls at the joins. Have you ever wondered why your carpet seam looks like a speed bump even though it looked flat on day one? It is usually the result of that excessive vertical movement breaking down the seam tape. It is a classic ‘oops’ factor where the desire for comfort outweighs the physics of the installation. 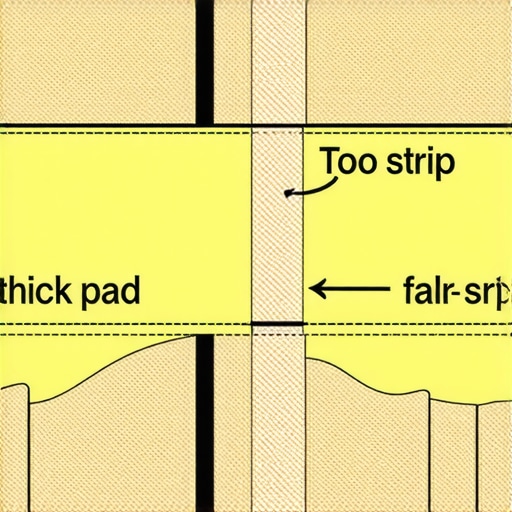
Why does my expensive carpet look like a speed bump after six months?
Beyond padding, the tension matters. Most DIYers and even some ‘pros’ rely on a knee kicker, but for a truly lasting finish, you need a power stretcher. Without it, you are just inviting carpet install secrets to turn into a nightmare of loose bubbles. This same principle of hidden failure applies to your bathroom too. People focus on the beautiful tile and the shower renovation ideas they saw on Pinterest, but they skip the boring stuff.
Don’t let your shower renovation rot from the inside out
One of the most common mistakes is assuming that grout is waterproof. It is not. Grout is a filter, not a barrier. If you are not using the flood test secret for guaranteed leak-proof showers, you are basically playing Russian roulette with your subfloor. I have seen gorgeous walk-in showers that had to be gutted after eighteen months because the installer skipped the pre-slope or the waterproofing membrane behind the tile. It is a devastating flooring installation mistake to avoid for a seamless look that goes far beyond aesthetics. When I work on a upgrade your bathroom project, I tell my clients that the stuff they never see—the membranes, the slope, and the drain integration—is what they are actually paying for. Have you ever fallen into this trap of prioritizing the ‘pretty’ over the ‘permanent’? Let me know in the comments. Let’s keep those white baseboards and plush carpets looking like they belong in a magazine, not a renovation horror story.
Invest in tools that do the heavy lifting
I have learned the hard way that a DIY spirit can only take you so far without the right gear. If you are serious about a professional-grade finish, you have to stop relying on hand tools for precision work. For example, when I am working on a step-by-step flooring installation, my red-line laser level is my best friend. It takes the guesswork out of layout and ensures that every piece of trim or tile follows a perfectly straight path. I always use the laser level hack for straight tile rows to avoid that heartbreaking moment when you realize your room is slightly out of square and your grout lines are drifting. Similarly, if you are tackling a bedroom, do not just kick the carpet into place. You absolutely need the power stretcher move to fix loose carpet bubbles. A knee kicker is fine for small adjustments, but only a power stretcher provides the mechanical tension required to keep the backing flat for the next decade.
Stop the rot before it reaches your subfloor
We spend so much time looking at the surface that we forget what is happening underneath. This is especially true in wet areas. If you start seeing cracked grout or a tiny bit of movement in your tile, you need to decide on shower repairs when to fix vs replace for longevity immediately. Waiting even a month can lead to catastrophic subfloor damage. The Tile Council of North America (TCNA) Handbook states that a failure in the waterproofing membrane is the leading cause of structural rot in residential bathrooms. This is why I am such a stickler for the flood test secret for guaranteed leak-proof showers. It is a simple 24-hour test that proves your pan is water-tight before you ever lay a single tile. It is the ultimate peace-of-mind insurance policy for your home. 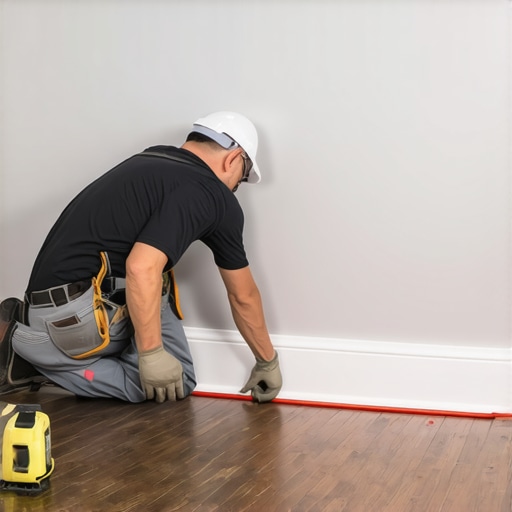
How do I maintain my flooring and trim over time?
Maintenance is not just about cleaning; it is about environment management. To keep your wood and trim stable, the National Wood Flooring Association (NWFA) recommends keeping your home’s relative humidity between 30% and 50%. If the air gets too dry, you will quickly see why your baseboard miters keep gapping in the winter. I also swear by the silicon bead secret for waterproofing baseboards in bathrooms. By adding a tiny, invisible bead of high-quality silicone at the floor-to-trim junction, you prevent mop water from seeping into the MDF core of the baseboard, which is the number one cause of swelling and peeling. For your high-traffic zones, refer to your guide to durable flooring installation for a stylish home to ensure you are using the right cleaners that won’t strip the protective factory finish.
Expect smarter materials by 2025
Looking ahead, the industry is moving toward “intelligent” materials. We are already seeing the beginning of this as we transform your flooring with top trends in installation for 2025. Expect to see more hybrid rigid-core products that offer the warmth of real wood with the absolute waterproof nature of stone-polymer composites. These materials are becoming so stable that the old rules about massive expansion gaps are being rewritten. However, no matter how advanced the material gets, the foundation remains king. I highly recommend you try the subfloor screw routine for stopping floor squeaks before you lay any new surface. It is the most effective advanced tip I can give: take three extra hours to secure the plywood to the joists now, or listen to that squeak for the next twenty years. It is your choice.
Three Myths About Home Renovation That Almost Cost Me a Fortune
I used to think that waterproof meant waterproof, but the hardest lesson I learned is that grout and tile are just the pretty faces of a much more complex system. If you want a spa-like shower experience, you have to realize that the magic happens behind the wall with membranes and proper slopes. Another lightbulb moment was realizing that thicker carpet padding is actually a trap. I thought I was being fancy by buying the thickest foam, but I was really just setting myself up for ripples. Real quality comes from the tension provided by a power stretcher, not the squishiness under your feet. Finally, I stopped chasing tough oil-based paints for my trim. Modern acrylic resins are far superior because they do not oxidize into that nasty yellow shade. It took a full weekend of sanding to learn that lesson, but now my white baseboards stay white regardless of the sunlight.
My Go-To Toolkit for Flawless Results
If you are planning to transform your home with expert tips, you need more than just a hammer. I never start a project without my red-line laser level. It ensures that every line is true, especially when the walls are wonky. I also swear by a high-quality power stretcher for any carpet work; it is the only way to avoid the dreaded speed-bump look. For trim, I always keep the hot glue hack for holding baseboard miters in my back pocket to ensure tight, seamless corners every time. I trust these tools because they eliminate human error in high-stakes areas like alignment and tension.
Stop Planning and Start Building Your Dream Home
It is easy to get paralyzed by all the technical details, but the best way to learn is by doing. Start with a small room, focus on the subfloor first, and choose materials that are built to last. When you get the flooring installation right, the rest of the room falls into place. Whether you are aiming for a how to choose the right carpet for a cozy living space or a modern, sleek bathroom, the effort you put into the foundation today will pay off for years to come. Don’t be afraid to pull up that old carpet or sand down that yellowing trim; the home you want is just a few projects away. Have you ever had a renovation project reveal a yellow surprise you did not expect? Let me know in the comments below!