

I remember the first time I pulled up a nasty, beige shag carpet in my 1970s fixer-upper. I was excited, thinking a fresh roll of frieze would solve all my problems. Then, I saw it—a jagged, six-inch hole where an old radiator pipe used to live, surrounded by some questionable repairs involving a flattened tuna can and a prayer. I made the classic rookie mistake of thinking, “Eh, the high-density padding will cover it.” I was wrong. Two months later, every time someone walked near the guest bed, there was a sickening dip that felt like the house was trying to swallow their foot.
Your New Carpet Needs More Than Just Luck Underneath
Fixing that hole correctly before the new carpet goes down isn’t just about aesthetics; it’s about protecting your investment for the long haul. If you’ve ever felt that weird, soft spot in a hallway, you know exactly how unsettling it is. Today, I am going to show you how to bridge that gap permanently so you don’t end up with carpet padding that feels crunchy or a floor that squeaks like a haunted mansion. We are going beyond the “quick fix” to ensure a level, silent, and safe surface.
Will a little hole really ruin my expensive new padding?
You might be tempted to just throw a piece of sheet metal over the gap and call it a day. I’ve been there, and I’ve seen the consequences. According to the Carpet and Rug Institute’s CRI 105 installation standards, any subfloor depression exceeding one-eighth of an inch can lead to premature delamination of the carpet backing. In short, the carpet literally starts to pull itself apart because it isn’t supported correctly from below. I once ignored a small knot-hole in a plywood subfloor while trying to rush a step-by-step flooring installation, and within a year, the carpet had a permanent, ugly dimple that no vacuuming could lift. It is one of those subfloor prep mistakes that haunts you every time you walk across the room. Have you ever pulled back an old carpet only to find a “surprise” hole waiting for you? Drop a comment and let me know I am not the only one! Before we grab the circular saw, let’s talk about why a flat surface is the real secret to achieving flawless results every single time.
Cut Back to the Joists for a Real Foundation
The most common mistake is trying to screw a patch into thin air. If you have a hole, you need to expose the floor joists—the heavy-duty 2×8 or 2×10 beams that hold your house together. Use a circular saw set to the exact depth of your subfloor (usually 3/4 inch) and cut a square around the damaged area. You want your patch to sit halfway on a joist so it has something to bite into. When I was working on my first rental property, I tried to “float” a patch using just construction adhesive and some hopes and dreams. The first time a heavy dresser was moved across the room, the patch snapped like a cracker. Now, I always reinforce a bouncy subfloor before I even think about bringing in the padding.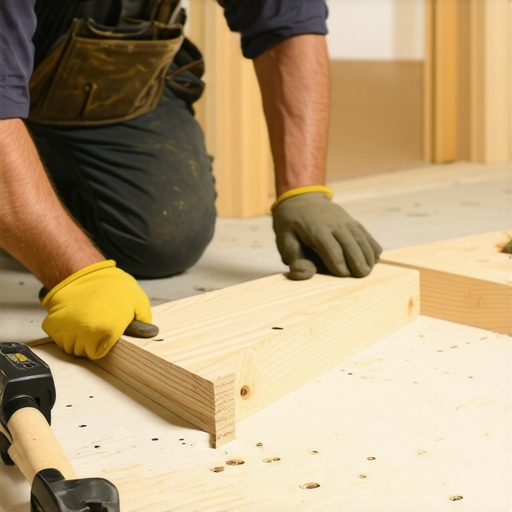
Bridge the Gap with Support Cleats
If your hole is between joists and you can’t reach the next one without tearing up half the room, you need to install “cleats.” These are just scraps of 2×4 that you screw into the side of the existing joists to create a ledge for your patch. It is like adding a shelf bracket to the skeleton of your floor. Make sure to use wood screws, not nails, because nails will eventually pull loose and cause that annoying “crunch” or squeak. This is one of those flooring installation mistakes to avoid if you want a silent home and a professional finish.
Seal the Seams for a Silent Surface
Once your patch is screwed down every six inches, you might notice a tiny gap between the old floor and the new wood. If you leave this, the carpet pad will eventually “telegraph” that line through to the surface. I use a high-quality floor patch compound—basically a specialized mud for wood—to skim over the joints. This ensures you won’t have to deal with a hollow sound under your floor or a visible ridge. It is the same logic we use when we stop floor tiles from cracking over a concrete expansion joint; you have to bridge the movement to keep everything flat.
Don’t Ignore the Moisture Test
Before you lock everything away under a fresh layer of best carpet types for high-traffic areas, check for the source of the original damage. If that hole was caused by rot, and you haven’t fixed the leak, your new patch is just tomorrow’s compost. In bathrooms or kitchens, we never skip the subfloor moisture test, even on wood. A dry subfloor is a stable subfloor, and taking five minutes to check now prevents a thousand-dollar headache in two years.I remember the first time I pulled up a nasty, beige shag carpet in my 1970s fixer-upper. I was excited, thinking a fresh roll of frieze would solve all my problems. Then, I saw it—a jagged, six-inch hole where an old radiator pipe used to live, surrounded by some questionable repairs involving a flattened tuna can and a prayer. I made the classic rookie mistake of thinking, “Eh, the high-density padding will cover it.” I was wrong. Two months later, every time someone walked near the guest bed, there was a sickening dip that felt like the house was trying to swallow their foot.
Your New Carpet Needs More Than Just Luck Underneath
Fixing that hole correctly before the new carpet goes down isn’t just about aesthetics; it’s about protecting your investment for the long haul. If you’ve ever felt that weird, soft spot in a hallway, you know exactly how unsettling it is. Today, I am going to show you how to bridge that gap permanently so you don’t end up with carpet padding that feels crunchy or a floor that squeaks like a haunted mansion. We are going beyond the “quick fix” to ensure a level, silent, and safe surface.
Will a little hole really ruin my expensive new padding?
You might be tempted to just throw a piece of sheet metal over the gap and call it a day. I’ve been there, and I’ve seen the consequences. According to the Carpet and Rug Institute’s CRI 105 installation standards, any subfloor depression exceeding one-eighth of an inch can lead to premature delamination of the carpet backing. In short, the carpet literally starts to pull itself apart because it isn’t supported correctly from below. I once ignored a small knot-hole in a plywood subfloor while trying to rush a step-by-step flooring installation, and within a year, the carpet had a permanent, ugly dimple that no vacuuming could lift. It is one of those subfloor prep mistakes that haunts you every time you walk across the room. Have you ever pulled back an old carpet only to find a “surprise” hole waiting for you? Drop a comment and let me know I am not the only one! Before we grab the circular saw, let’s talk about why a flat surface is the real secret to achieving flawless results every single time.
Cut Back to the Joists for a Real Foundation
The most common mistake is trying to screw a patch into thin air. If you have a hole, you need to expose the floor joists—the heavy-duty 2×8 or 2×10 beams that hold your house together. Use a circular saw set to the exact depth of your subfloor (usually 3/4 inch) and cut a square around the damaged area. You want your patch to sit halfway on a joist so it has something to bite into. When I was working on my first rental property, I tried to “float” a patch using just construction adhesive and some hopes and dreams. The first time a heavy dresser was moved across the room, the patch snapped like a cracker. Now, I always reinforce a bouncy subfloor before I even think about bringing in the padding.
Bridge the Gap with Support Cleats
If your hole is between joists and you can’t reach the next one without tearing up half the room, you need to install “cleats.” These are just scraps of 2×4 that you screw into the side of the existing joists to create a ledge for your patch. It is like adding a shelf bracket to the skeleton of your floor. Make sure to use wood screws, not nails, because nails will eventually pull loose and cause that annoying “crunch” or squeak. This is one of those flooring installation mistakes to avoid if you want a silent home and a professional finish.
Seal the Seams for a Silent Surface
Once your patch is screwed down every six inches, you might notice a tiny gap between the old floor and the new wood. If you leave this, the carpet pad will eventually “telegraph” that line through to the surface. I use a high-quality floor patch compound—basically a specialized mud for wood—to skim over the joints. This ensures you won’t have to deal with a hollow sound under your floor or a visible ridge. It is the same logic we use when we stop floor tiles from cracking over a concrete expansion joint; you have to bridge the movement to keep everything flat.
Don’t Ignore the Moisture Test
Before you lock everything away under a fresh layer of best carpet types for high-traffic areas, check for the source of the original damage. If that hole was caused by rot, and you haven’t fixed the leak, your new patch is just tomorrow’s compost. In bathrooms or kitchens, we never skip the subfloor moisture test, even on wood. A dry subfloor is a stable subfloor, and taking five minutes to check now prevents a thousand-dollar headache in two years.
The Knee Kicker is Not a Stretching Tool
The most pervasive myth in the DIY world is that a knee kicker is a sufficient tool for stretching a carpet. I have seen countless tutorials where people just bang their knees into oblivion and call it a day. In reality, a knee kicker is meant for positioning and tucking, not for the structural tensioning required to keep a floor flat for twenty years. If you do not use a power stretcher, you are not actually stretching the carpet; you are just moving the slack around. This is a massive knee kicker mistake that ruins luxury carpets by failing to engage the secondary backing properly. According to the Floor Covering Institute, failing to achieve a 1% to 1.5% stretch in both directions is the primary cause of premature rippling. Have you ever fallen into this trap of thinking the small tool was enough? Let me know in the comments! 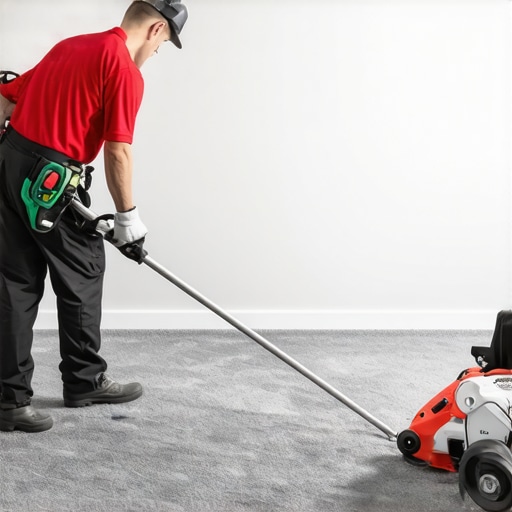
Is it possible to over-stretch a modern synthetic carpet?
While you can technically damage the latex bond of a carpet’s backing with extreme force, suffering from under-stretching is far more common. When humidity spikes, synthetic fibers relax, and if you did not follow the power stretcher rule for large living room carpets, you will be looking at unsightly carpet waves by mid-summer. This is where carpet install secrets really come into play—knowing how to balance the tension across the room to avoid putting too much stress on a single point or a weak seam.
The Invisible Trap of Improper Transitions
Another nuance people miss is the transition between different flooring heights. If you are moving from a thick pile to a thin vinyl, you cannot just slap down a generic metal strip and hope for the best. You need to know how to transition from thick carpet to thin vinyl without a lip to ensure it looks integrated. This often involves using a specialized shim under the carpet padding to gradually raise the height, preventing a permanent trip hazard. Ignoring this is one of the major flooring installation mistakes to avoid if you want your home to feel high-end. I have seen many installs fail because they used a loose carpet transition that trips everyone, ruining the flow of a beautiful renovation.
Why Seam Placement is an Art Form
Finally, stop putting your seams in high-traffic doorways or directly in front of large south-facing windows. Light hitting a seam perpendicularly will highlight every single fiber that is not perfectly aligned. I always check my layout to avoid carpet seaming errors that show up in bright daylight. It is better to waste a few square feet of material to move a seam out of a light-strike zone than to look at a visible line for the next decade. Remember: subfloor prep is the foundation, but tension and layout are the finish.
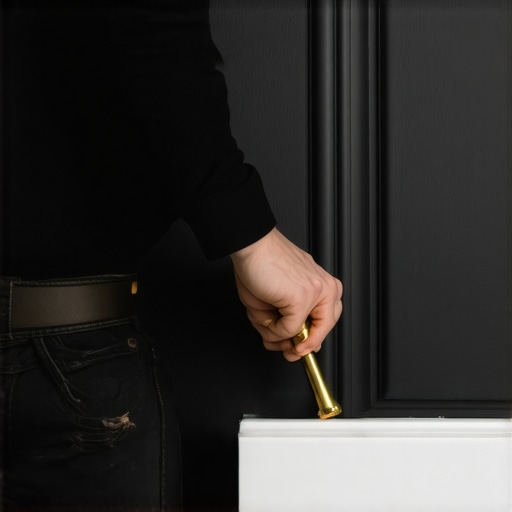
Once you have conquered the layout and tensioning, the difference between a job that looks good for a weekend and one that stays pristine for a decade comes down to your toolkit and your maintenance philosophy. I stopped buying cheap, generic tools years ago because they were costing me more in rework than the actual equipment. If you want that perfect fit against a wavy drywall, you need the scribing tool every DIYer needs for tight baseboards. I have seen pros try to eyeball a wall and end up with a half-inch gap that they try to hide with a mountain of caulk. It never works. A brass scriber allows you to follow the exact contour of the stone or plaster, ensuring your trim looks like it grew out of the wall.
How do I maintain my new flooring investment over time?
Maintenance is where most homeowners fail, usually because they are too aggressive or too passive. If you have just installed a high-end frieze or plush, do not panic when you see fuzz in your vacuum canister. Knowing why your new carpet is shedding so much is part of the normal lifecycle of synthetic fibers. For showers, the maintenance is even more critical. I always tell my clients that the silicone is the most vulnerable part of the system. According to the Tile Council of North America (TCNA) Handbook, specifically method EJ171, movement joints aren’t just a suggestion; they are mandatory for any tile run exceeding twenty feet to prevent catastrophic buckling. To keep these joints clean and functional, I always use the blue tape secret for professional shower silicone lines every time I refresh a seal. This keeps the water where it belongs and prevents the nightmare scenario of why your shower niche keeps leaking after only a few years of use.
Why Waterproofing is the Next Big Trend You Can’t Ignore
As we look toward the future, the industry is moving away from purely aesthetic choices and toward total moisture management. In my opinion, the days of “water-resistant” are numbered; we are entering the era of “water-impenetrable.” I predict that by 2026, we will see even more integrated systems where the subfloor and the finish layer are chemically bonded to prevent any moisture ingress. You can already see this shift in baseboard trends in 2025, where moisture-proof polymers are replacing traditional MDF in every room, not just the bathroom. Whether you are learning how to choose the right carpet for a cozy living space or building a custom walk-in shower, focus on the tech that protects the structure. I strongly encourage you to try the Blue Tape Secret on your next bathroom project; it is the single most effective way to elevate the look of your tile work instantly. We aren’t just building floors; we are building a legacy that shouldn’t squeak, leak, or peel for twenty years.
The Three Hardest Lessons My First Fixer-Upper Taught Me
Looking back at that tuna-can repair, I realize that most DIY mistakes come from a place of optimism rather than incompetence. First, never assume the padding will hide your sins. It is a sponge, not a structural bridge. Second, if you hear a squeak now, you will hear it for the next twenty years unless you address the joist fix today. Finally, silence is the ultimate luxury. A silent floor means you did the prep work correctly, and that peace of mind is worth every extra hour of sanding or screwing down sheets. I’ve learned that when you choose the right carpet for a cozy living space, the beauty only lasts as long as the foundation stays solid.
The Toolkit That Actually Stays in My Truck
If you are serious about moving beyond basic repairs, there are three items you cannot skip. I always carry a high-end moisture meter because ‘feeling dry’ isn’t a scientific measurement. I also swear by a professional-grade power stretcher; it’s the only way to avoid the rippling that plagues amateur installs. For those tricky edges, I never leave home without the scribing tool every DIYer needs. These aren’t just gadgets; they are the difference between a ‘good enough’ job and achieving flawless results. I trust these tools because they’ve saved me from expensive re-works on everything from luxury bedrooms to high-traffic hallways.
Time to Turn Your Blueprint into a Reality
You now have the technical roadmap to handle everything from jagged subfloor holes to complex transitions. Don’t let the fear of a ‘surprise’ under the old carpet stop you from starting. Every pro was a rookie once, and every perfect room started with a messy demolition phase. Take your time, follow the step-by-step flooring installation process, and focus on the details that others ignore. Your home deserves a foundation that is as strong as it is beautiful. Your next project is the perfect opportunity to prove that you’ve mastered the art of flooring installation. Did you find a weird ‘repair’ under your old floor like I did? Tell me about your strangest subfloor discovery in the comments below!