

I was on my knees in my cramped hallway, staring at a gap in my brand-new baseboard that was so wide it looked like I had cut it with a bread knife while blindfolded. I had spent hours at the big-box store picking out the perfect trim, convinced that a baseboards makeover would be the crown jewel of my weekend renovation. But there I was, three miters deep into the trash bin, wondering why my 45-degree angles looked more like 50s. It was a humbling moment, one that forced me to realize that walls are almost never as straight as the wood you are trying to nail to them. If you have ever tried to hide a botched corner with half a tube of caulk only to have it crack a month later, you know exactly the frustration I am talking about. Today, I am going to show you why the ‘inside-corner’ cope is the only way to get those professional, hair-line seams every single time.
Your Walls Are Never Actually Square
I used to treat my speed square like it was gospel. If I saw a 90-degree corner, I reached for my miter saw. It seems logical, right? But the reality of home construction is a lot messier. Between the house settling and the layers of mud applied during the drywall stage, your corners are likely ‘out of whack’ by several degrees. When you try to butt two mitered pieces together in a corner that isn’t a true 90, they inevitably kick out at the bottom or gape at the top. This is the exact mistake I made during my first major DIY flooring project. I spent half a day trying to choose the perfect baseboards for your home’s style, only to ruin the look with sloppy joints. I eventually learned that while miters are great for the outside, the back-cut secret and the coping saw are what actually save your sanity on the inside. According to the carpentry experts at Fine Homebuilding, drywall mud buildup often creates rounded internal corners, making traditional miters physically impossible to fit tightly without massive gaps. [image placeholder] This technique isn’t just for show; it is about durability and a finished look that doesn’t scream amateur. It allows the wood to move slightly with the seasons without opening up a visible canyon in your living room.
Is Coping Really Better Than a Simple Miter?
I know what you are thinking because I thought it too: ‘Coping sounds like a lot of extra work for something I can just fill with caulk.’ It is a fair point, but only if you do not mind fixing that same corner again in a year. When you use the coping saw technique for flawless inside baseboard corners, you are creating a joint that literally locks into place. It is far more forgiving of walls that aren’t plumb or square because only one piece of trim is actually cut to the profile. Plus, it is incredibly satisfying to watch that second piece of trim slide perfectly over the profile of the first like a puzzle piece. Have you ever spent an entire afternoon fighting with a single corner, only to give up and hide it behind a plant? We have all been there, but once you master this one simple move, you will never fear an inside corner again. We are going to break down the mechanics so you can stop guessing and start installing with total confidence.
Cut Your First Piece Square Against the Wall
The beauty of coping starts with simplicity. For the first wall in your room, you do not need any fancy angles. You just cut the baseboard at a dead-on 90-degree angle so it butts directly into the corner. I remember my first time doing this; I was so used to overcomplicating things that I actually felt guilty for not using the miter saw’s swivel feature. But this straight piece provides the ‘template’ that your next piece will hug. It is like the foundation of a house; if this first board is not seated firmly against the floor and wall, everything following it will be slightly off. If you find your floor is a bit wavy, you might need to use the scribe tool trick for baseboards against stone walls or uneven surfaces to ensure that bottom edge sits flush. Once that first piece is nailed in, you are ready for the magic trick.
Expose the Profile with a 45-Degree Miter
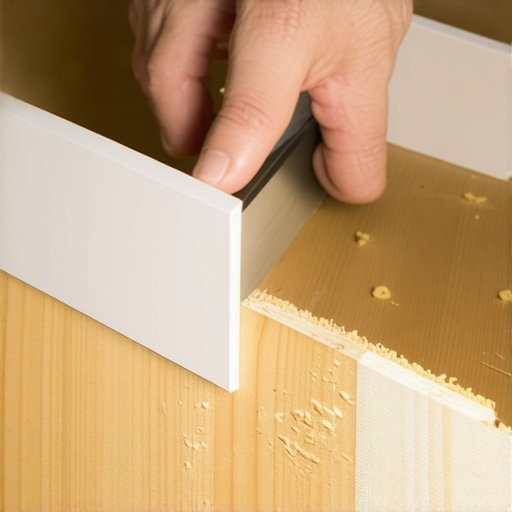
To cope the second piece, you start by cutting a standard inside miter at 45 degrees, just as if you were going to try a traditional joint. What this does is reveal the ‘profile’ or the curvy shape of the wood. This bright, raw wood edge is now your road map. This is where I usually grab a carpenter’s pencil and lightly trace that exposed edge to make it even more visible. Think of it like a ‘paint-by-numbers’ for carpentry. You aren’t guessing where to cut; the miter has literally shown you the exact path your saw needs to follow. This is one of those flooring installation mistakes to avoid for a seamless look—forgetting to highlight that line often leads to wandering saw blades and jagged edges.
Work the Coping Saw with a Heavy Back-Cut
Now comes the part that feels like high-school shop class. You take your coping saw and start cutting along that pencil line, but here is the secret sauce: you have to tilt the saw at an aggressive angle, cutting away more material from the back of the board than the front. This is known as a back-cut. By removing that extra bulk from the rear, you ensure that the thin, front edge of the wood is the only thing making contact with the first board. I once spent an hour trying to fit a cope that I had cut perfectly straight through the wood, only to find it wouldn’t sit flush because the back of the board was hitting the drywall. It was a mess of wood glue and frustration until I realized that the back-cut secret applies just as much to inside corners as it does to outside ones. It creates a ‘knife-edge’ that can compress slightly into the other board, hiding any minor imperfections in the wall’s angle.
Test the Fit Before You Reach for the Nails
Before you even think about grabbing the nail gun, dry-fit that joint. It should slide over the profile of the first board like a glove. If there is a small gap, do not panic. This is where a round file or a piece of 100-grit sandpaper becomes your best friend. You can ‘tune’ the joint by shaving off tiny amounts of wood until the light disappears from the seam. I used to be impatient and think, ‘Eh, the caulk will hide it,’ but when you are working with baseboard styles that elevate your interior design, you want that wood-to-wood contact. A well-coped joint is so tight you shouldn’t even be able to slide a piece of paper into it. If you are worried about the wood splitting during this final fitting, remember to stop baseboard splitting with this simple pre-drilling tactic when you finally go to secure it near the ends. Using the coping saw technique for flawless inside baseboard corners takes a few extra minutes per corner, but the result is a joint that looks like it grew there naturally.
Even the most perfect coped joint cannot save the day if the floor beneath it is working against you. I have seen homeowners spend a fortune on baseboard styles that elevate your interior design only to have the finished product look like a mountain range because they ignored what was happening under the trim. While most guides tell you to just ‘level the floor,’ there is a massive difference between level and flat. A floor can be slanted (not level) but still perfectly flat, and your baseboards will actually look great. However, if that floor is wavy, you are in for a world of hurt.
The Self-Leveler Trap Most DIYers Fall Into
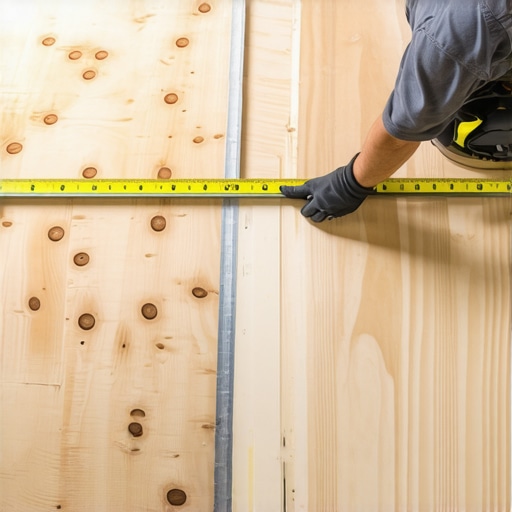
Everyone seems to think that self-leveling compound is a ‘pour and forget’ magic liquid. In my experience, that is one of the most dangerous flooring installation mistakes to avoid for a seamless look. If you do not prime the subfloor first, the thirsty wood or concrete will suck the moisture out of the leveler so fast it will clump up before it can actually level itself. You end up with ‘islands’ of hardened cement that are actually higher than the original floor. I learned this the hard way on a kitchen remodel where I ended up having to grind down the very ‘leveler’ I just poured. If you are dealing with minor dips, the self-leveler move for perfectly flat vinyl installs is a lifesaver, but only if you follow the mixing ratios to the gram. According to the National Wood Flooring Association (NWFA), a subfloor should have no more than 3/16 of an inch change in height over a 10-foot radius. Anything more, and your baseboards will show every single undulation.
Why Does My Flooring Click if the Subfloor Looks Flat?
This is the question that keeps DIYers up at night. You bought the expensive planks, you used the right spacers, and yet, every time you walk across the room, it sounds like you are stepping on bubble wrap. This usually happens because of ‘telegraphing’ or minor subfloor debris. Even a single stray drywall screw or a hardened drop of joint compound left on the subfloor can prevent a plank from seating correctly. Over time, that microscopic gap causes the locking mechanism to rub against itself, leading to that annoying sound. It is why why your vinyl plank floors are making a clicking sound even when the floor looks visually perfect from a distance. If you find yourself in this spot, sometimes the wood shim secret for baseboards on uneven slabs can help hide the visual gap, but the structural sound usually requires pulling a few planks to clear the debris.
Don’t Let Moisture Turn Your New Floor Into a Sponge
If you are working on a basement or a ground-level concrete slab, there is a nuance most people ignore until the floor starts to buckle three years later. Concrete is basically a hard sponge; it is constantly breathing out moisture. I never start a job without a calcium chloride test or an electronic moisture meter. This is why we never skip the subfloor moisture test on concrete before laying down a single inch of underlayment. If the moisture levels are too high, your baseboards will start to rot from the bottom up, and your floor will grow mold before you even realize there is a problem. Have you ever fallen into the trap of skipping the subfloor prep only to regret it later? Let me know in the comments. It is a humbling experience, but one that truly separates the amateurs from the pros.
Stop Relying on Your Knees for Carpet Jobs
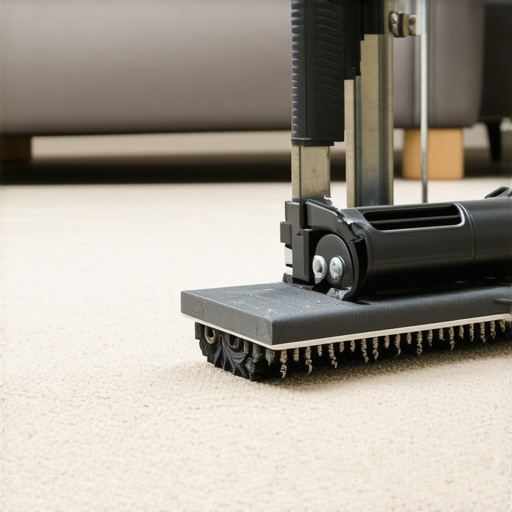
I learned the hard way that when it comes to a carpet install, sweat equity is no substitute for the right physics. For years, I used a standard knee-kicker, thinking my quadriceps were enough to get the tension right. I was wrong. Within two years, my living room looked like a series of gentle rolling hills. This is the knee-kicker mistake that ruins luxury carpets—it simply cannot provide the uniform tension needed for modern backings. Now, I never start a room without a power stretcher. According to the Carpet and Rug Institute (CRI) 105 standard, power stretching is mandatory for all residential installations to prevent ripples and premature wear. Using the power stretcher rule for large living room carpets ensures that the primary and secondary backings are actually taut, which is the only way to get those carpet install secrets to actually work for you in the long run.
How do I keep my shower from leaking or cracking later?
The honeymoon phase of a new bathroom usually ends the moment you see the first hairline crack in the corner grout. I used to think I was just unlucky, but the reality is that houses move, and grout doesn’t. If you want to know how we fixed the grout crack in the shower corner for good, the answer is simple: stop using grout in the corners. You need high-quality 100% silicone. Many DIYers struggle with messy beads, but you should use the blue tape secret for professional shower silicone lines every time. It creates a flexible, waterproof joint that can handle the expansion and contraction of your home without failing. If you notice why your shower grout is crumbling just months after install, it’s likely because the subfloor flexed and the rigid grout had nowhere to go. This attention to detail is what separates a standard step-by-step flooring installation from a professional-grade renovation.
Ditch the Guesswork with Better Diagnostic Tools
As we look toward expert flooring installation tips for 2025, the trend is moving away from ‘eyeballing it’ and toward precision diagnostics. I’ve started using thermal imaging cameras to check for hidden moisture behind shower walls and Bluetooth-enabled moisture pins for subfloors. It might seem like overkill for a weekend warrior, but when you are choosing between the best carpet types for high traffic areas in 2025, you want to be 100% sure the environment beneath them is stable. In the near future, I expect we will see smart flooring underlayments with embedded sensors that can alert your phone if a pipe starts leaking under your hardwood. Until then, my best advice is to embrace the tech we have now. Go rent a power stretcher for your next carpet job or buy a high-end silicone kit for your shower. Don’t just build for today; build for the house you want to live in a decade from now.
Hard Truths from the Renovation Trenches
Reflecting on my early mistakes, I have realized that the ‘good enough’ mindset is the fastest way to double your workload later. I once believed that a thicker bead of caulk could solve any gap, but I eventually learned that caulk is a maintenance item, while a well-cut cope is a permanent solution. Another lightbulb moment came when I stopped viewing the subfloor as just ‘the thing under the floor’ and started treating it as the most critical structural component. If you are not using a moisture meter on concrete, you are not installing a floor; you are gambling with it. Finally, I have learned that the most expensive tool you can buy is the one you have to buy twice because the first one was too cheap to do the job right.
The Gear That Saved My Sanity
If I could go back and hand my younger self a toolbox, it would look very different. First, I would insist on a high-quality power stretcher; following the tension-first rule for stretching carpet into a doorway changed my entire outlook on bedroom installs. For the bathroom, I no longer touch a project without a dedicated liquid membrane move for fail-proof shower pans, as it provides a peace of mind that standard liners just cannot match. I also swear by a high-end silicone finishing kit; using the bead and smooth strategy for shower corners turns a messy task into a professional signature. These are not just gadgets; they are the bridge between a project that looks DIY and one that looks like it was handled by a veteran. For a complete overview, check out your guide to durable flooring installation.
Build a Home That Lasts a Lifetime
The transition from a ‘weekend warrior’ to a confident home renovator does not happen when you buy your first saw; it happens when you decide that the details you cannot see are just as important as the ones you can. Whether you are following baseboard trends in 2025 or sticking to a classic aesthetic, the fundamentals of prep and precision remain the same. Take your time, trust your tools, and remember that every pro started exactly where you are right now. Your next flooring installation project is not just about the aesthetics—it is about the pride of knowing it was done right from the subfloor up. What is the one corner in your house that is driving you crazy right now? Let me know in the comments below!