

I remember staring at my living room floor after a grueling weekend of DIY work. The flooring installation was finally done, and I’d even spent hours researching baseboard styles that elevate your interior design. But as the sun hit the trim, all I could see were those hideous, dark gaps between the wood and the drywall. It looked unfinished, amateur, and—honestly—it drove me crazy every time I walked into the room. I’d made the classic rookie error of thinking the wood would sit perfectly flush against my 1950s plaster walls. Spoiler alert: walls are never straight. My first attempt at a fix was a disaster because I tried to “neatly” caulk already-painted boards. I ended up with white streaks on my gray walls and a sticky mess that attracted dust like a magnet. Today, I’m going to show you the exact ‘Caulk-and-Paint’ sequence that the pros use to get that seamless, “built-in” look without the headache.
Stop Letting Ugly Shadows Ruin Your New Floors
When you invest in a baseboards makeover, you expect a crisp, high-end finish. But those tiny black lines where the trim meets the wall act like a neon sign for “unfinished business.” I used to think my inside corner cope was the only thing that mattered for a tight fit, but even the best joinery can’t hide a wavy wall. This is where the sequence becomes your best friend. We aren’t just filling holes; we are creating a continuous visual plane that makes your trim look like it grew right out of the wall. If you’ve ever looked at your trim and felt like something was “off,” you’re likely dealing with shadow gaps. Have you ever spent a whole weekend on a project only to have a tiny 1/16th-inch gap stare you in the face? It’s frustrating, isn’t it?
Is All This Extra Prep Actually Worth the Effort?
It’s tempting to skip the full caulk-and-paint dance, especially if you’re exhausted from a carpet install or a full room renovation. You might be thinking, “Can’t I just use colored caulk and call it a day?” The answer is a hard no. According to the experts at Fine Homebuilding, standard wood-trim movement can expand and contract significantly with seasonal humidity, meaning a simple bead of caulk without the right paint seal will often crack or pull away within six months. By following the sequence—caulk first, then paint—you’re creating a flexible, bonded “bridge” that moves with your home. Early on, I thought I could save time by skipping the wood shim secret for uneven spots, but I quickly learned that prep is 90% of the battle. Let’s get into why doing things in this specific order is the only way to avoid baseboard paint peeling later on.
Master the Sequence That Hides Every Gap
I once tried to shortcut a nursery remodel by painting the trim a deep navy blue before I applied any caulk. I figured a quick white bead at the end would look crisp. I was wrong. The white caulk smeared across the navy paint like a toddler’s finger painting, and every little wobble in the wall was magnified tenfold. I ended up spending three days sanding it back down to the bare wood. The ‘Meat’ of this process is simple but strict: caulk first, then paint. This ensures the caulk acts as the flexible bridge between two materials, and the paint acts as the protective skin that binds them together. If you’ve just finished a step-by-step flooring installation, this is the final lap of the race. Don’t trip now.
Clean the Joints Before You Reach for the Gun
You cannot caulk over dust. If there is leftover grit from sanding or sawdust from your the coping saw technique for flawless inside baseboard corners, the caulk will eventually pull away. I use a stiff brush and a vacuum—specifically the vacuum-seal trick for cleaning dust out of floor grooves—to ensure the gap is hospital-clean. It’s the same logic as the liquid membrane move for fail-proof shower pans; if the substrate isn’t clean, the bond will fail. I even give the top of the trim a quick wipe with a damp microfiber cloth. If you see black specs in your white caulk as you’re smoothing it, it’s a sign you didn’t clean well enough, and those specs will show through your paint later.
The Secret to a Bead That Does Not Smear
The biggest mistake is cutting the tip of the caulk tube too far back. You want a hole about the size of a matchstick. Apply steady pressure as you move the gun, keeping a 45-degree angle. If the gap is wide because the wall bows, don’t try to fill it with one massive, messy glob; use the double-butt method for fixing wide baseboard gaps if you need extra support. Once the bead is down, use a wet finger—not a dry one—to smooth it out. This is very similar to the bead and smooth strategy for shower corners. You aren’t trying to leave a huge cove; you’re trying to push the material into the crack so it disappears. If you’ve ever used the masking tape trick for clean silicone joints, you know how satisfying that perfect line can be when everything is done correctly.
Why Your Final Coat of Paint Must Cover the Caulk
Standard acrylic caulk is a dust magnet. If you leave it unpainted, it will turn gray and fuzzy within six months as it attracts every airborne particle. The paint seals the caulk and provides a uniform sheen that matches your baseboard styles that elevate your interior design. When I paint, I carry the trim color about 1/16th of an inch up onto the wall surface. This creates a literal ‘seal’ that prevents moisture from getting behind the trim, which stops why your baseboard paint is peeling off at the bottom in bathrooms or laundry rooms. By overlapping the paint onto the wall, you create a sharp, straight line that hides the fact that your walls are actually as wavy as the ocean. This technique is just as vital as knowing how to transition from thick carpet to thin vinyl without a lip—it is all about managing the transition between two different surfaces for a high-end look.
The Subfloor Lie That Ruins Expensive Tile
Let’s dig deeper into why even a perfect flooring installation can fail within a year. Most DIYers think if the floor looks flat, it’s ready for tile. But the “Oops” factor here is subfloor deflection. You can buy the most expensive porcelain on the market, but if your joists are too far apart, that tile is going to crack. In my experience, standard 16-inch-on-center joists are often still too “bouncy” for large-format tiles without extra bracing. I’ve seen countless homeowners learn how to reinforce a bouncy subfloor before tiling only *after* their grout lines started crumbling. According to the Tile Council of North America (TCNA), the maximum allowable deflection for ceramic tile is L/360, a metric most people completely ignore until it’s too late. Have you ever fallen into this trap? Let me know in the comments.
Why Your Vinyl Planks Click and Pop
Everyone tells you that vinyl is the “easy” DIY floor, but that’s a dangerous half-truth. The nuance most people miss is “telegraphing.” Because vinyl is flexible, every tiny grain of sand or 1/8th-inch dip in your plywood will eventually show through the surface. If you don’t address why your vinyl plank floor is telegraphing subfloor bumps, you’ll end up with a floor that feels “crunchy” or makes a clicking sound every time you step. This is why why we never skip the subfloor moisture test on concrete even for “waterproof” flooring; trapped moisture can cause the subfloor to swell and push those bumps right into your new planks.
Why Does “Floating” Not Always Mean “Free-Moving”?
This is an advanced mistake I see even seasoned renovators make. Just because a floor is “floating” doesn’t mean you can pin it down with heavy objects. I once installed a beautiful laminate floor and then immediately bolted a massive kitchen island right through the planks. Three months later, the floor buckled because it couldn’t expand. You must follow the expansion-gap rule for heavy kitchen islands on laminate or your “floating” floor becomes a “trapped” floor. Similarly, in bedrooms, people often make the knee-kicker mistake that ruins luxury carpets by over-stretching the backing. Professional carpet stretching requires a power stretcher to ensure the tension is uniform, otherwise, you’ll be looking at ripples in three years.
Why Your Shower Curb Is Failing Early
When it comes to bathroom upgrades, people focus on the tile, but the real expertise is in the slope. I’ve seen many installs fail because they didn’t use why we use pre-sloped pans for custom tile showers. If the water doesn’t move toward the drain, it sits under the tile, rots the curb, and eventually creates a mold nightmare. This is why your shower curb is always the first part to fail—it’s usually the last thing people think about during the waterproofing phase. Finally, don’t overlook the transition points. Many think a standard strip works everywhere, but the double-glue method for high-traffic vinyl plank transitions is what actually keeps them from popping loose over time. If your transition feels loose underfoot, it’s not just annoying; it’s a structural failure waiting to happen. Focus on these structural nuances, and your project will outlast a job that cut corners.Once those structural foundations are solid, you need to talk about the long game. I’ve learned the hard way that a cheap utility knife is a recipe for ragged edges and wasted material. I now live by the stay-sharp blade rule for cutting luxury vinyl. If you aren’t changing your blade every few rows, you’re just begging for micro-chips in the wear layer. When I’m tackling a whole house, I don’t even bother with manual knives anymore; I use a dedicated LVP guillotine-style cutter. It’s faster, produces zero dust, and keeps my lines laser-straight without the wrist fatigue. This level of precision is exactly what I see in the transform your flooring top trends in installation for 2025, where high-tech tools are making pro-level finishes more accessible for everyone.
The Gear That Actually Makes a Difference
For baseboards, I stopped guessing and started using a digital angle finder. It takes the mystery out of those 137-degree corners that happen in older homes. If you want that high-end look, pair your tools with why we prefer felt pads over rubber for luxury vinyl. I’ve seen beautiful floors ruined in three weeks by heavy furniture legs that ‘grabbed’ the vinyl rather than gliding. It’s a five-dollar fix that saves a five-thousand-dollar floor. Looking ahead, I predict we will see more AI-driven moisture sensors embedded in subfloors, but for now, your best friend is a simple, high-quality moisture meter and a commitment to the right maintenance routine.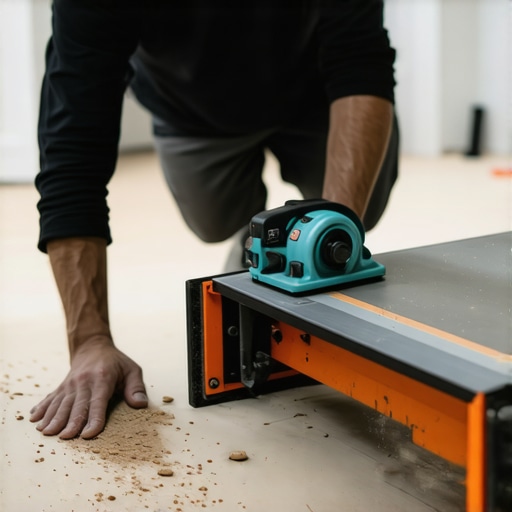
How Do I Keep Everything Looking New for the Long Haul?
Maintenance isn’t just about cleaning; it’s about environmental control. According to the National Wood Flooring Association (NWFA) technical guidelines, maintaining a consistent indoor environment—specifically a relative humidity between 30% and 50%—is the single most effective way to prevent gaps and crowning in natural materials. For hardwood, if you do get a minor surface mark, the no-sanding fix for scuffed hardwood floor finishes can work wonders without the mess of a full remodel. In the bathroom, the rules change. You should be checking your sealant annually. If you notice a change in texture, it’s time for how to seal a marble shower without changing the color to ensure that water stays on the surface where it belongs. Ignoring these small checks leads to the inevitable debate of shower repairs when to fix vs replace for longevity. I strongly encourage you to try the felt pad swap today—it’s the cheapest insurance policy you’ll ever buy for your home’s new look.
The Gaps I Missed So You Won’t Have To
I’ve spent a lot of time on my knees and elbows, and if there’s one thing I’ve learned, it’s that the smallest details often dictate how much you love a room a year later. One lightbulb moment for me was realizing that raw caulk is a magnet for every bit of pet hair and dust in the house. If you do not paint it, you will be scrubbing it forever. Another hard-earned lesson involved my pride; I used to think I could ‘eye-ball’ the fit, but using the scribe tool trick for baseboards against stone walls changed my results from ‘okay’ to ‘how did you do that?’. I also realized that rushing at the end of a long day is when accidents happen. Now, I always keep a mental map of the plumbing to know how to fix a baseboard nail that hit a water pipe immediately just in case. Finally, never underestimate the power of a pilot hole; I always stop baseboard splitting with this simple pre-drilling tactic because nothing ruins a mood like hearing that ‘crack’ on the very last piece of trim.
The Essential Kit for Pro-Level Finishes
I do not believe in buying every gadget in the store, but three things have never let me down. First, a high-quality moisture meter is vital. Before I even think about laying a single plank, I check the subfloor because the acclimation test for avoiding hardwood floor gaps is the only way to ensure the wood stays stable. Second, a dedicated LVP guillotine cutter is a game-changer. It sounds like overkill until you have to make 200 clean cuts without getting dust in your lungs. Lastly, I always keep a bag of heavy-duty felt pads ready to go; check out why we prefer felt pads over rubber for luxury vinyl to see why this tiny investment saves your finish. I trust these tools because they turn a stressful weekend into a controlled, professional process.
Your Professional Finish Starts Today
The difference between a job that looks ‘good enough’ and one that looks like a magazine spread is simply the patience to follow through on the final ten percent of the work. You have the knowledge now to handle the tricky corners and the wavy walls that frustrate most homeowners. Your next flooring installation is going to be your best one yet because you are not just covering the floor—you are building a foundation for your home’s style. Have you ever struggled with a baseboard gap that just would not close no matter how much caulk you used? Let me know in the comments below!