

I was standing in my hallway, staring at a gap between my brand-new luxury vinyl and the bottom of my baseboards that was wide enough to hide a roll of pennies. I’d just finished a long weekend of flooring installation, and instead of feeling proud, I felt defeated. The slab was uneven, the walls were wonky, and my trim looked like it was hovering. We’ve all been there—that moment where you realize the ‘perfect’ DIY project has one glaring, ugly flaw. You step back to admire your work, but all your eyes can focus on is that dark, cavernous void where the wood meets the floor. It makes even the most expensive materials look cheap. Today, I’m going to show you how to stop hiding those gaps with strategically placed plants or area rugs and start fixing them with the ‘Double-Butt’ method. This isn’t just about covering up a mistake; it’s about creating a finish that looks intentional, high-end, and absolutely seamless.
Stop Staring at Those Ugly Floor Gaps
When I first started out, I made the classic rookie mistake of thinking a fat bead of caulk could fix anything. I remember one specific guest bathroom where I pumped half a tube of white sealant into a 3/4-inch void. It looked okay for about twenty minutes—long enough for me to clean up and grab a beer. Two weeks later? It had shrunk, cracked, and collected every bit of cat hair and dust in the house. It was a disaster. The reality is that flooring installation mistakes are part of the learning process, but trying to mask them with ‘liquid wood’ or massive amounts of caulk is a recipe for long-term frustration. According to Fine Homebuilding, wide gaps in trim are often the result of significant floor deflection or slab settling, and standard flexible fillers simply cannot handle that level of movement over time. That is why the Double-Butt approach—which involves layering a specific type of base shoe or quarter round directly against the main trim—is such a game-changer. It provides a structural solution that moves with the house while keeping your lines razor-sharp.
Is This Method Too Much Work for a Simple DIY Project?
You might be worried that adding an extra layer of molding sounds like overkill or a waste of money. I used to think so too, especially when I was already exhausted from the main floor install. But once you see how it bridges the space between various baseboard styles and an uneven floor, you’ll never go back to the ‘one-and-done’ approach. It’s the difference between a house that looks like a ‘handyman special’ and one that looks like a high-end custom build. This technique is actually much more forgiving than trying to scribe every single piece of heavy baseboard to a wavy concrete slab. Have you ever finished a room only to realize the floor looks like a roller coaster and your baseboards are floating in mid-air? Let me know in the comments, because I’ve definitely been there! We’re going to combine this with the wood shim secret to ensure that even the nastiest gaps disappear for good.
Execute the Layered Trim Method for a Flawless Finish
Think of your baseboard assembly like the suspension on a mountain bike. The main baseboard is the frame—it needs to stay straight and true—while the secondary molding is the shock absorber that flexes to meet the uneven terrain of your floor. If you try to force a stiff, five-inch baseboard to follow a dip in a concrete slab, you’ll either break the wood or end up with a wavy mess at eye level. This is where most people fall victim to common flooring installation mistakes that ruin the aesthetic of the entire room. Instead, we keep the main board level and let a smaller, more flexible piece do the heavy lifting. This structural separation is the only way to ensure your trim looks like a professional millwork job rather than a DIY patch.
Set Your Primary Level Line First
Before you reach for the nail gun, you have to find the highest point in your floor. I once spent six hours in a basement remodel trying to scribe baseboards before I realized I was fighting a battle I couldn’t win because the concrete floor was shaped like a bowl. I eventually used the wood shim secret for baseboards on uneven slabs, which changed everything. By setting the baseboard at a consistent height based on the floor’s high point and using cedar shims to hold it there, I created a perfectly straight top edge against the wall. The gap at the bottom looked like a dark cavern initially, but that was part of the plan. 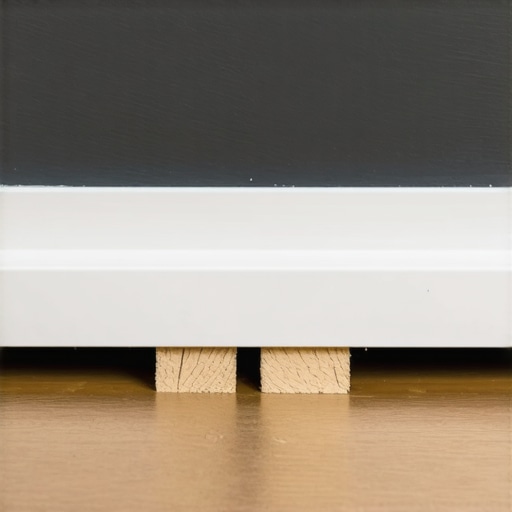
Install the Shoe Molding as Your Flexible Bridge
This is the ‘second butt’ of the method. You want to choose a profile that complements your home—some prefer a standard quarter-round, but many modern designs call for the quarter-round alternative for modern baseboard looks like a thin, square-edge shoe molding. Because this piece is much thinner and more pliable than your heavy baseboard, you can actually push it down to meet the floor while the main baseboard stays level. When I applied this in a wonky hallway last spring, the transformation was instant. The shoe molding ‘hugs’ the floor, effectively hiding the void created by the shims while the main baseboard remains a constant height from the ceiling.
Protect Your Materials from Splitting
Precision is key here, especially when you are dealing with thin decorative strips that are prone to cracking under pressure. There is nothing more frustrating than getting to the final piece of a room only to have the wood snap under the pressure of a finish nail. You can stop baseboard splitting with this simple pre-drilling tactic, especially near the ends of your runs or at mitered corners. Always nail the shoe molding directly into the baseboard, not down into the floor. This allows the floor to expand and contract freely, which is vital for any flooring installation project involving floating luxury vinyl. If you pin the trim to the floor, you’re inviting the planks to buckle and peak the first time the humidity shifts.One of the biggest contrarian views I hold in this industry is that ‘waterproof’ is often a marketing distraction rather than a structural guarantee. Many DIYers and even some contractors believe that because luxury vinyl or laminate is water-resistant, the condition of the subfloor is secondary. This is a massive mistake. In my experience, even the most expensive materials will fail if you ignore what is happening underneath the surface. The Resilient Floor Covering Institute (RFCI) notes that moisture vapor emission from concrete slabs is the leading cause of adhesive failure and dimensional instability in floating floors. This is why we never skip the subfloor moisture test on concrete. If you trap moisture under a ‘waterproof’ floor without a proper vapor barrier, you are not protecting your home; you are creating a petri dish for mold that will eventually force a full tear-out.
Can You Actually Install Heavy Islands Over Floating Floors?
This is the ‘Oops’ factor that catches almost everyone off guard during a kitchen remodel. Standard wisdom suggests you can just lay the floor and set the cabinets on top. However, if you place a heavy kitchen island directly on a floating floor, you have essentially anchored it to the earth. When the humidity shifts, the rest of the floor wants to expand and contract, but the island’s weight pins it down. This leads to the floor gapping at the short ends or buckling in the center of the room. To avoid this, you must follow the expansion gap rule for heavy kitchen islands on laminate and vinyl, which involves leaving a gap around the island feet and covering it with decorative trim. 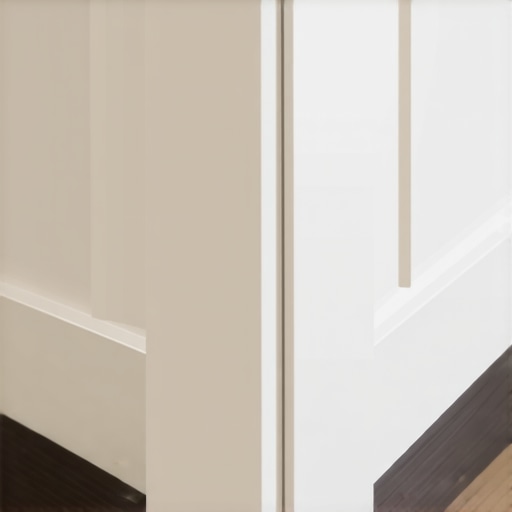 Another common nuance is the way people secure their trim. When executing the layered trim method we discussed, the most frequent of all flooring installation mistakes is nailing the shoe molding or quarter-round directly into the floor planks. This ‘locks’ the floor in place, preventing the very movement that floating floors require. You must always nail into the baseboard at a slight angle. If you don’t, you’ll start hearing a clicking sound every time you walk across the room as the planks struggle against the trim. Choosing the perfect baseboards for your home style is about more than just looks; it is about choosing a profile that allows for this mechanical independence. Have you ever fallen into this trap where your floor started ‘talking’ to you after the trim went in? Let me know in the comments! For those looking at a total refresh, these expert flooring installation tips for 2025 will help you stay ahead of the technical curve and ensure your high-end finish lasts for decades.To really bridge the gap between a ‘good enough’ job and one that adds tens of thousands to your home’s value, you need to think about the long game. I’ve seen too many beautiful installs fall apart because the homeowner didn’t have the right maintenance routine or used the wrong tools from the jump. When it comes to the finish line, I swear by my oscillating multi-tool for the under-cut move for fitting flooring perfectly under door casings. I used to try and ‘notch’ the flooring around the wood, but it always looked like a hack job. By cutting the casing instead, the floor slides underneath, creating a look that’s absolutely factory-perfect. If you’re dealing with carpet in the adjacent room, you cannot skip the power stretcher rule for large living room carpets. A simple knee-kicker won’t give you the long-term tension needed to prevent ripples, which is often why your carpet is buckling only three years later.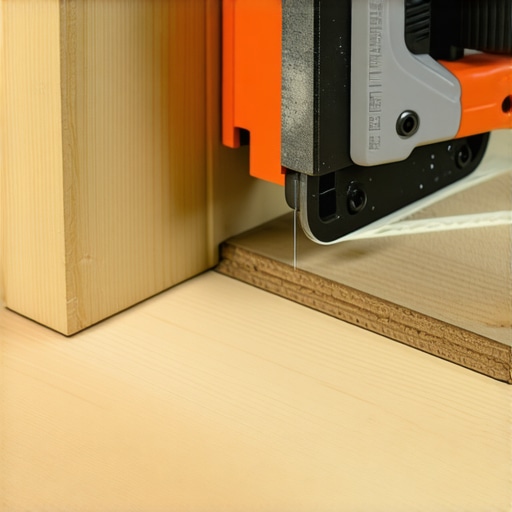
How Can You Keep Your New Floors and Trim Looking Fresh for Decades?
Maintenance isn’t just about a vacuum; it’s about monitoring the environment. According to the National Wood Flooring Association (NWFA) Technical Publication No. C200, subfloor flatness must be within 1/8 inch over a 6-foot radius to prevent joint stress, but once the floor is down, humidity control becomes your best friend. If you ignore the moisture levels in your home, you’ll quickly find out why your vinyl plank floor is gapping at the short ends. For those of you with custom tile, keep an eye on your wet areas. If you notice why your shower grout looks patchy and uneven in color, it might be time for a deep clean and reseal before you have to look into shower repairs: when to fix vs replace for longevity.
The Future of Integrated Flooring and Trim Systems
I predict we are heading toward a world where trim and flooring are much more ‘modular.’ We’re already seeing the rise of magnetic baseboard systems and pre-finished, moisture-proof moldings that snap into place. These innovations will make the expert flooring installation tips for 2025 more about assembly and less about ‘fighting’ the materials. However, the foundational skills—like knowing how to choose the perfect baseboards for your home style—will always be the most important part of the design process. If you want to elevate your space right now, I challenge you to try the ‘Double-Butt’ method on your next room refresh; it’s the single best way to mask those annoying floor waves without spending a fortune on self-leveler.
Hard Truths About DIY Trim That Most Pros Keep Secret
After years of wrestling with wavy slabs and wonky drywall, I’ve realized that perfection is an illusion. The pros aren’t actually better at making floors flat; they are just better at hiding the fact that they aren’t. Using the layered trim method we discussed is a perfect example of working with the house instead of fighting against it. Another lightbulb moment for me was realizing that time spent on prep—like performing a subfloor moisture test—is worth ten times the effort of a mid-project repair. If you want a real baseboards makeover, you have to accept that your house moves, breathes, and shifts. It is about creating a visual bridge that handles the house’s natural movement without sacrificing the crisp lines of your design.
The Gear That Separates Rookies from Craftsmen
If you’re serious about moving beyond basic DIY, you need a few non-negotiable tools in your arsenal. First, throw away the cheap plastic miter box and invest in a high-quality coping saw for those inside corners. It’s the only way to get a tight joint that stays closed even when the walls aren’t square. Second, always keep a 23-gauge pin nailer handy for attaching shoe molding; the holes are so small they practically disappear. Finally, for any project involving soft surfaces, I always check back on carpet install secrets to ensure my transitions are as clean as my wood-to-tile edges. These tools aren’t just about speed; they are about giving you the confidence to tackle more complex designs like a full shower renovation.
Start Your Masterpiece Today
Installing new floors can be intimidating, but you now have the blueprint to handle the messiest part of the job. Whether you are dealing with a sagging old subfloor or a brand-new concrete slab, the ‘Double-Butt’ method gives you a professional safety net. Don’t let a few gaps or uneven lines stop you from achieving the high-end look you deserve. If you ever feel stuck or need a hand planning your next big project, don’t hesitate to contact us for expert guidance. Every great flooring installation starts with a single, level line—so grab your shims and get to work! Have you ever tried to hide a massive gap with caulk only to have it crack a month later? Tell me your floor gap horror stories in the comments!