

I was standing in a client’s brand-new shower, and I could literally fit my credit card into the gap behind the top tile. My heart sank. I’d spent forty hours on that bathroom, and because I wanted to save ten minutes a day by skipping the back-buttering, I was looking at a total redo. It’s a mistake I see all the time, especially with the trend toward massive, spa-like slabs. If you’re planning on creating a spa-like shower experience, you have to respect the weight and physics of these tiles. That visceral ‘clink’ of a tile hitting the floor is something I never want you to experience. Today, I’m going to share exactly why back-buttering is the secret sauce for a professional, long-lasting finish.
The mistake that taught me everything about adhesion
I used to think a 1/2-inch notched trowel on the wall was enough of a ‘glue’ for any tile. I was dead wrong. Early in my career, I treated large format tiles like oversized subway tiles. But here’s the thing: big tiles have more surface area and they are rarely perfectly flat. When you only apply mortar to the wall, you’re gambling on the tile being straight enough to grab every ridge. According to the Tile Council of North America (TCNA), large format tiles—anything with one side longer than 15 inches—require a minimum of 95% mortar coverage in wet areas. Achieving that without back-buttering is nearly impossible. I’ve seen plenty of flooring installation mistakes, but a falling wall tile is a safety hazard that keeps me up at night.
Is back-buttering really worth the extra mess?
I get it. You’re tired, your knees hurt, and the last thing you want to do is pick up a heavy 24×48 slab and smear more gray goop on the back of it. You might be wondering if it’s just ‘overkill’ or some industry myth. It’s not. Back-buttering creates a chemical bond that ‘keys’ the thinset into the tile’s pores. Without it, the tile just sits on top of the ridges like a person on a bed of nails. Have you ever had a tile pop off perfectly clean, with all the mortar still stuck to the wall? If so, you’ve experienced a ‘bond failure’ firsthand. Have you ever faced that sinking feeling of a loose tile just weeks after finishing a project?
Stop the lippage before it starts
Beyond just keeping the tile on the wall, back-buttering is your best defense against ‘lippage’—that annoying edge that sticks out further than its neighbor. When you use the full bed mortar rule for large format shower tiles, you’re giving yourself a cushion to adjust and level the piece. It makes the trowel notch secret actually work by ensuring there are no air pockets left behind. Think of it as insurance for your hard work. We aren’t just slapping tiles up; we’re building something meant to last decades. If you’re also upgrading your bathroom with high-end materials, don’t let a shortcut here ruin the whole aesthetic. I’ve learned that taking the time to learn how to prevent tile lippage starts with that very first layer of thinset on the back of the stone. Let’s look at the actual technique that will save your walls.
Get your hands dirty with the proper back-buttering method
You cannot just throw mud on a wall and hope for the best. First, you need to ensure the back of your tile is cleaner than your kitchen counters. I use a damp sponge to remove that fine white factory dust common on porcelain. If you skip this, the mortar sticks to the dust rather than the tile itself, and you will eventually be searching for how to fix a loose floor tile without a full demolition. Once the tile is clean, grab your trowel. We are going to use the ‘burn-in’ method. Take the flat side of your trowel—not the notched side—and scrape a thin layer of thinset across the entire back of the tile. You are not building up thickness here; you are forcing the mortar into the microscopic pores of the porcelain. It is exactly like applying primer to a wall before painting. Without this ‘scratch coat,’ your main mortar bed has nothing to bond with. 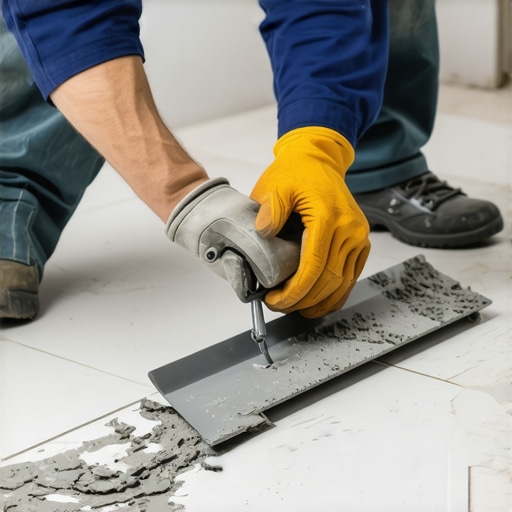
Why the flat side of the trowel is your best friend
This initial layer acts as the bridge between the rigid tile and the flexible mortar bed. I remember a job in a cramped master bath where I was wrestling with a porcelain slab that cost more than my first car. I got lazy and didn’t wipe the factory dust or ‘burn’ the thinset into the back. When I went to adjust the placement, the tile literally slid right off the wall because the thinset hadn’t actually grabbed the stone. I spent the next hour cleaning a $400 slab. Now, I never skip the wipe-down. This simple step is vital whether you are working on a shower or a step-by-step flooring installation.
Locking the tile into place forever
This is where most DIYers and even some pros mess up: the ridge orientation. When you apply the mortar to the wall with your notched trowel, the ridges must all run in straight, parallel lines—usually horizontally on a wall. Then, when you back-butter the tile, if the tile is large enough to require additional notches on the back, those ridges must run in the same direction. When you press the tile into the wall, you move it slightly perpendicular to the ridges to collapse them. If you cross-hatch or swirl the mortar, you trap air pockets. Trapped air means weak spots and eventual cracks.
The heavy lift and the wiggle
Making sure the thinset comb secret for preventing tile lippage actually works requires physical effort. I use a beat-in block or a heavy-duty grout float to vibrate the tile into the bed. You want to feel the tile ‘suck’ into the wall as the air escapes the ridges. Once it is firmly set, use the spacer block move for perfect tile alignment to keep those grout lines crisp while the mortar cures. If you are in the middle of a major upgrade your bathroom project, this mechanical bond is the only thing standing between a luxury finish and a renovation nightmare.
Everyone tells you that more mortar equals a stronger bond, but in my twenty years on the tools, I’ve found that the ‘more is better’ philosophy is the quickest way to a cracked floor. It sounds counterintuitive, right? You’d think a thick, juicy bed of thinset would act like a pillow for the tile. In reality, thinset is designed to be just that—thin. When you exceed the manufacturer’s recommended thickness, the mortar undergoes significant shrinkage as the water evaporates. This creates internal tension that can literally pull the tile away from the substrate or, worse, cause the tile to ‘tent’ and crack right down the middle. If you are currently upgrading your bathroom, remember that precision beats volume every single time.
How do you calculate if your subfloor can actually handle large format slabs?
This is the question that separates the weekend warriors from the true artisans. Most people check if a floor is ‘level,’ but they forget to check if it’s ‘stiff.’ Large format tiles are incredibly unforgiving. While standard building codes often allow for a deflection of L/360 (the span divided by 360), the ANSI A108.1 standards and the Tile Council of North America (TCNA) suggest that for heavy natural stone or massive porcelain slabs, you should aim for L/720. If your floor has even a fraction of a ‘bounce,’ your grout will be the first thing to go. You’ll find yourself looking for reasons why your shower grout is crumbling just months after install. Before you lay a single trowel of mud, perform a deflection test or consider using the dry pack secret for rock solid shower subbases to ensure your foundation is as rigid as the stone going on top of it.
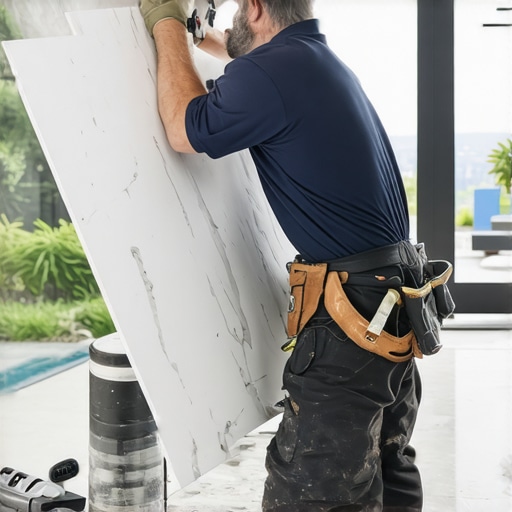
The biggest ‘oops’ factor I see today is a technique called ‘spot bonding’ or ‘dot troweling.’ It’s the lazy man’s way to level a tile: you put five big globs of mortar on the corners and the center, then press it down. It makes the tile look level, but it leaves massive air voids underneath. In a wet environment, those voids become reservoirs for mold and stagnant water. More importantly, those hollow spots are structural weak points. The moment someone drops a shampoo bottle or steps heavily on a corner, the tile will snap because it has zero support underneath. This is a common culprit behind many flooring installation mistakes that lead to expensive tear-outs. If you want a floor that lasts, you must collapse those ridges and achieve 95% coverage, especially when following a step-by-step flooring installation guide.
Another nuance often ignored is the ‘skinning’ of the mortar. In a hot room, thinset can develop a dry skin in as little as five minutes. If you trowel out a huge area and then spend ten minutes cutting your baseboards, you’re essentially laying tile on dust. Always ‘key’ the mortar back into the wall with the flat side of your trowel right before the tile goes up to break that skin. This attention to detail is what prevents the need for how to fix a loose floor tile without a full demolition later on. Have you ever fallen into this trap and had a tile pop up perfectly clean? Let me know in the comments below.
If you’re serious about precision, you need to ditch the bubble level for anything more complex than a picture frame. I personally won’t step onto a job site without my 360-degree green-beam laser. It is the only way to accurately execute the laser level move for perfectly horizontal shower tiles in a room where nothing is actually square. When you’re dealing with walls that are rarely plumb, that green line provides a ‘truth’ that doesn’t lie. For trim work, I have moved away from standard miters for interior corners entirely. I exclusively use the inside-corner cope for perfect baseboard installs because houses breathe. A mitered joint is a ticking time bomb for gaps during the winter, but a coped joint remains tight even as the wood expands and contracts.
How do I maintain these high-end finishes over time?
The secret to longevity isn’t just about the weekly scrub; it’s about the chemical barrier you establish during the build. I tell every client that if they want their creating a spa-like shower experience to last, they must stop shower grout from staining with the pre-seal move. This isn’t just about aesthetics; it’s about structural defense. Water sitting in grout pores eventually migrates to the substrate, leading to mold. I also swear by the use of a digital moisture meter. According to the The Carpet and Rug Institute (CRI) 104 Standard for Installation, maintaining a controlled environment is vital for the stability of all textile floor coverings. 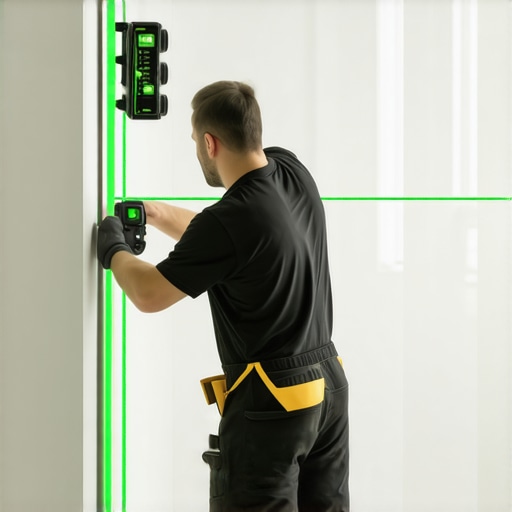 Beyond the tile, I’ve seen countless flooring installation mistakes that simply come down to poor finishing touches. For instance, if you are following baseboard trends in 2025, you will notice a shift toward taller, flat-stock profiles. These catch more dust and are more prone to vacuum-cleaner impact. I always suggest applying the silicone bead secret for waterproofing baseboards in bathrooms to prevent the swelling that ruins a luxury look. Looking toward the future, I predict we are going to see a massive surge in ‘smart’ underlayments. We are already seeing the development of embedded sensors that can detect a sub-leak before it ever reaches your carpet install secrets. In a few years, your floor might literally notify your phone if the humidity levels under the subfloor start to spike. If you’re ready to elevate your craftsmanship, I challenge you to try a coped joint on your next baseboard project instead of a miter. It is a skill that takes an afternoon to learn but provides a lifetime of professional results.
Lessons from a Shower I Had to Tear Out Twice
I’ve learned the hard way that the most expensive part of a renovation isn’t the stone—it’s the labor of doing it twice. If I could go back to my younger self, I would emphasize that dust is a silent bond-killer. Even if a tile looks clean out of the box, that microscopic factory residue acts as a release agent. Always wipe. Secondly, the sound a tile makes when you tap it should be a solid thud, never a hollow ‘clink.’ If you hear air, you didn’t collapse the ridges properly. Finally, remember that large format tiles are actually quite fragile until they are fully bonded. While you are upgrading your bathroom, treat those slabs like glass until that mortar is cured. These aren’t just technical details; they are the difference between a job you’re proud of and a liability that could fail in two years.
Tools That Stop Call-Backs Before They Happen
If you want to move from ‘good’ to ‘elite,’ your toolkit needs to evolve. I never start a step-by-step flooring installation without a high-quality vibrating suction cup for large slabs; it ensures 100% coverage by vibrating the air out of the mortar bed. I also recommend the Tile Council of North America (TCNA) Handbook. It is the industry bible, and if you follow its standards, you are legally and structurally protected. For layout, a 360-degree green laser level is non-negotiable for creating a spa-like shower experience where lines must be perfectly horizontal across multiple walls. Lastly, invest in a premium digital moisture meter. Knowing the exact saturation of your subfloor prevents the heartbreak of tile tenting or grout failure later on.
Your Path to a Professional-Grade Bathroom
The transition from a DIY enthusiast to a master craftsman is found in the steps you take when no one is watching. Back-buttering isn’t a flashy technique, but it is the invisible foundation of every luxury bathroom. When you take those extra ten minutes to burn mortar into the back of a tile, you are choosing longevity over convenience. As you wrap up your project, don’t forget to stop shower grout from staining with the pre-seal move to keep that stone looking pristine for a lifetime. Whether you are tackling a simple floor or a complex walk-in shower, remember that excellence is a habit of small, correct choices. Have you ever pulled up a tile and found that the mortar ridges hadn’t collapsed at all? Let me know your biggest installation ‘lightbulb moment’ in the comments below.