

I remember the sound vividly—a sharp clack followed by the sickening crunch of ceramic. I had dropped my favorite heavy stoneware mug, and while the mug survived, my kitchen floor did not. There it was: a jagged, ugly spiderweb crack right in the high-traffic golden triangle between the stove and the sink. My heart sank because I immediately started tallying the cost of a full floor demo in my head. I have seen enough flooring installation mistakes to avoid for a seamless look to know that quick fixes usually end in disaster. But then I realized I did not need to rip it all out.
You Do Not Have to Rip Out the Whole Floor
Working as a flooring enthusiast for years has taught me one big thing: most homeowners over-complicate repairs. You see a crack and think renovation, but I want you to think replacement. We are going to solve this today by treating the broken tile like a surgical extraction. No sledgehammers, no massive dust clouds, just a few tools and a bit of patience. We will walk through exactly how to fix a cracked tile without removing the whole floor so you can save your weekend and your budget. This approach is perfect for those of us who appreciate the details but hate the mess of a total demo. [image]
Can You Really Match the Grout and Texture?
This is the biggest fear I hear from neighbors and friends. They are terrified the repair will stick out like a sore thumb. Early in my DIY journey, I made a massive mistake—I tried to use some old, half-dried adhesive I found in the garage instead of fresh mortar. The tile popped loose within a week, and I had to start over. I eventually learned that how to mix thinset for the perfect peanut-butter consistency is the absolute secret sauce for a permanent bond. According to the Tile Council of North America (TCNA), achieving at least 80% mortar contact in dry areas is the industry standard for a repair that actually lasts. If you take the time to match your grout and prep the subfloor, no one will ever know there was a repair. Have you ever stared at a single cracked tile and felt like your whole kitchen was ruined? Let me know your dropped pan horror story. Now, let us get into the actual tools you will need to get this done right.
Extract the Broken Piece Without Damaging the Neighbors
Before you even touch a hammer, you have to isolate the victim. If you start swinging while the tile is still bonded to its neighbors by grout, the vibration will travel through the floor like a shockwave, potentially cracking three more tiles in the process. I learned this the hard way during a kitchen remodel in my first fixer-upper. I thought I could just pry the broken piece up, but I ended up chipping the corner of a perfectly good adjacent tile. It was a classic example of why step-by-step flooring installation from planning to perfect finish matters even in the repair phase. You need to break the connection entirely.
Cut the Grout Barrier First
Use a manual grout saw or an oscillating multi-tool with a diamond blade to carefully remove the grout around the perimeter of the cracked tile. You want to see the gap between the tiles clearly. This creates an ‘expansion joint’ of sorts that prevents force from transferring. Speaking of gaps, always remember the expansion joint rule for large tile floors to prevent future stress cracks from movement. Once the grout is gone, the tile is officially on an island.
Shatter from the Center Outward
Now you can bring in the force. Tape off the edges of the surrounding good tiles with blue painter’s tape to protect them from flying shards. Use a center punch or a masonry nail to tap a hole right in the middle of the crack. From that center point, use a small hammer and a cold chisel to break the tile into manageable pieces. Work from the center toward the edges. It feels destructive, but it is the only way to avoid prying against the edges of the tiles you want to save. 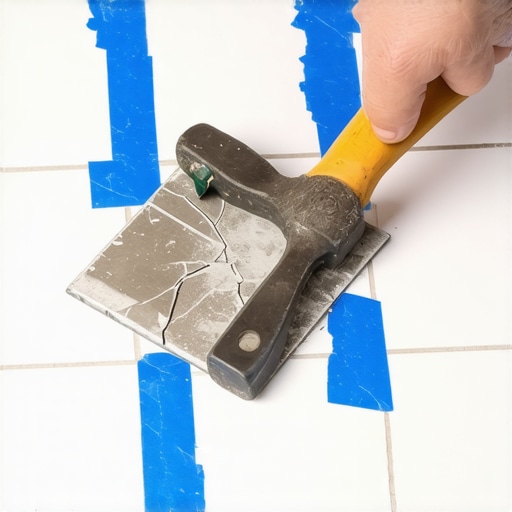
Prep the Subfloor for a Flush Finish
The biggest mistake I see DIYers make is trying to glue a new tile onto old, lumpy mortar. If the surface isn’t perfectly flat, your new tile will sit too high, creating a trip hazard. Use your chisel to scrape away the old thinset until you see the backer board or concrete. If you are working on a wooden subfloor and notice the area feels a bit bouncy, this is the time to use the subfloor screw routine for stopping floor squeaks to stabilize the base. If the surface is uneven, you might need the feather-edge tactic for smoothing subfloor seams to get everything level before the new piece goes in.
Butter the Back for a Solid Grab
Vacuum out every speck of dust. If there is debris, the bond will fail. When you are ready to set the replacement, don’t just put mortar on the floor. Use the back-buttering rule for large format wall tiles—even for floor tiles—by spreading a thin layer of mortar on the back of the tile itself. Ensure you have followed the guide on how to mix thinset for the perfect peanut-butter consistency so it doesn’t slump. Press the tile into place, wiggle it slightly to collapse the ridges, and check it with a straightedge against the surrounding floor. If you’re debating whether the rest of the floor is worth saving, check out our guide on shower repairs: when to fix vs replace for longevity for a similar perspective on structural integrity.Once you have mastered the surgical extraction of a tile, you start to realize that the floor is not an isolated system. It is part of a larger structural ecosystem that includes the subfloor, the adhesive, and the often-overlooked trim. Most beginners assume that once the tile is down, the job is done, but seasoned pros know the real work is managing the environmental physics of the room.
Stop Treating Baseboards Like an Afterthought
There is a common belief in the DIY community that baseboards are purely decorative, a simple way to hide the gap between the wall and the floor. In reality, your baseboards are the first line of defense for your floor’s integrity. I have seen countless homeowners finish a beautiful installation only to wonder why your baseboard miters keep gapping in the winter. The trap here is failing to account for the humidity cycles of your home. If you just butt the boards together and hope for the best, you are asking for trouble. Instead of a standard butt joint, I always recommend following the scarf joint rule for long baseboard runs. Overlapping the ends at a 45-degree angle allows the wood to move slightly without creating a visible chasm. [image]
Why Does My Rigid Core Floor Sound Hollow When I Walk?
This is a question that plagues many who switch from traditional tile to modern luxury vinyl. You might have the perfect layout, but if the floor sounds like a drum, you likely skipped the subfloor prep. According to the National Wood Flooring Association (NWFA), subfloor flatness should not deviate more than 3/16-inch over a 10-foot radius. If you ignore this, you’ll find why your rigid core floor sounds hollow when you walk the hard way—every step echoing the void beneath the planks. I’ve seen people try to fix this by adding more underlayment, but that usually just makes the floor feel ‘spongy.’ The real expert move is to use a self-leveling compound before the first plank ever touches the ground.
The Myth of the ‘Eternal’ Caulk Bead
Another nuance that separates the pros from the amateurs is the choice of sealant. People often think all white tubes are created equal. This is the ‘Oops’ factor that leads to mold or peeling. For instance, in a bathroom, using a standard painter’s caulk at the floor line is a recipe for disaster because it lacks the flexibility to handle the weight of a person stepping on the floor. You need to consult the painter caulk vs silicone guide for baseboards to understand which material can actually handle the moisture and movement. In high-stakes areas like concrete slabs, I often skip the standard hardware store adhesives entirely and opt for the urethane glue secret for hardwood on concrete, which acts as a moisture vapor retarder and an elastic bond simultaneously. Have you ever fallen into this trap of thinking a bit of extra caulk would hide a bad cut or a shaky subfloor? Let me know in the comments. We are all here to learn from those ‘crunchy’ mistakes so we don’t have to repeat them.Once you have moved past the panic of a cracked tile and fixed the structural basics, you start to see your home not as a static object, but as a living system that needs regular tuning. I used to think that once the last nail was driven into a baseboard, my job was over for the next decade. I was wrong. The real secret to a home that stays looking ‘renovated’ is having a proactive maintenance strategy and the right specialized kit in your garage.
Why a High-Quality Laser Level is Better than Your Best Guess
I spent years relying on a bubble level and a prayer until I finally invested in a professional-grade cross-line laser. If you are doing a step-by-step flooring installation from planning to perfect finish, you cannot afford to be off by even an eighth of an inch at the start. I use the laser level hack for straight tile rows to project a perfect grid across the entire floor. This ensures that by the time you reach the far wall, your tiles aren’t running at a diagonal. It is the difference between a job that looks ‘good enough’ and one that looks like it was handled by a high-end contractor.
How do I keep my new flooring looking pristine years later?
The biggest threat to your hard work isn’t actually heavy boots; it is the wrong cleaning products. I have seen beautiful matte finishes ruined by ‘miracle’ wax cleaners that leave a sticky residue. Now, I strictly follow the microfiber mist rule for cleaning matte floors. You want to avoid saturating the joints—especially with laminate or engineered wood—to prevent the edges from swelling. For those who prefer a softer touch underfoot, carpet install secrets for achieving flawless results often come down to how you handle the tension. The Carpet and Rug Institute (CRI) 105 standard specifically mandates power stretching during installation to prevent ripples—a step most DIYers skip because the tool is heavy and intimidating. If you notice a wave in your rug, use the power stretcher move to fix loose carpet bubbles before the backing becomes permanently creased. 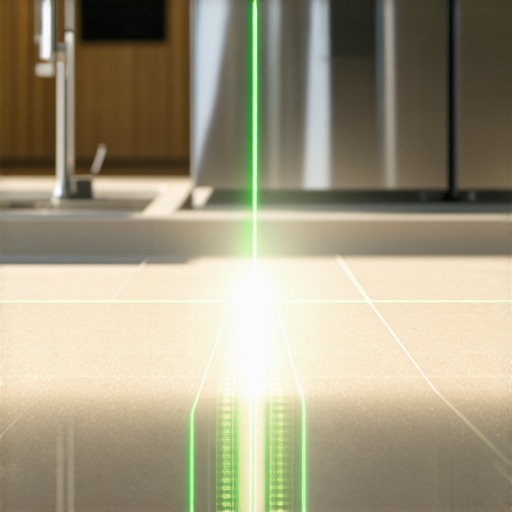
Where Flooring Technology is Heading in 2025 and Beyond
Looking at transforming your flooring with top trends in 2025, we are seeing a massive shift toward ‘repairable’ modular systems. The days of ripping up an entire room because of one bad spill are ending. We are moving toward smarter, waterproof materials that mimic natural textures so well that even pros have to touch them to be sure. My best advice? Try the ‘power stretcher’ technique on that one loose spot in your hallway this weekend. It is an advanced move that will instantly elevate your home’s feel. Mastering these tools ensures you are not just a homeowner, but a true steward of your space.
The Flooring Secrets No One Tells You Until It Is Too Late
After years of hands-on experience, I have realized that the difference between a DIY project and a professional finish often comes down to the things people skip because they seem ‘unimportant.’ First, never underestimate why you need a perimeter expansion gap for vinyl planks; I have seen entire floors buckle and ‘tent’ because the owner didn’t leave that crucial 1/4-inch space at the wall. Second, grout is never as consistent as the bag says it is. Always mix your grout in one large batch for a room to avoid subtle color shifts that scream ‘repair job.’ Third, if you are working on a large area, be wary of the t-molding mistake that ruins open-concept floors—placing a transition in the middle of a high-traffic zone rather than under a door or at a natural break point. Finally, if you notice your trim pulling away, understanding why your caulked baseboards are cracking within weeks can save you a lot of frustration; it is almost always due to using cheap painter’s caulk instead of a high-flexibility sealant that can handle seasonal shifts.
Tools That Actually Earn Their Space in Your Garage
You do not need every tool in the aisle, but you do need these four essentials to get professional results. I swear by an oscillating multi-tool with a diamond blade for grout removal; it is the only way to be surgical without damaging adjacent tiles. A contour gauge is also a lifesaver for scribing baseboards around those impossible door casings. For anyone looking at a major overhaul, following transform your home expert flooring installation tips for 2025 will keep your tool kit focused on what actually works. I also recommend a suction-cup tile puller if you are working with large format tiles; it saves your fingers and prevents chipped edges during the dry-fit phase. These are the tools I trust because they solve the problems that usually lead to a call for help halfway through the weekend.
Take Back Control of Your Living Space
Fixing a floor is about more than just aesthetics; it is about the pride of knowing your home is solid beneath your feet. Whether you are tackling a single cracked tile or a full-room upgrade, the key is to move slow and respect the prep work. Modern materials are more forgiving than ever, but they still require a steady hand and a bit of ‘insider’ knowledge. Don’t let a small crack or a squeaky board make you feel like your home is falling apart. By mastering step-by-step flooring installation from planning to perfect finish, you are not just a DIYer—you are a craftsman. Your home is your biggest investment, and every small repair you master adds to its story and its value. Have you ever attempted a floor repair and found a surprise hidden under the old boards? Let me know your biggest ‘floor reveal’ story in the comments below!