

I stood there in my wool socks, holding a cold celebratory beer, and took that first victory lap across my brand-new living room floor. Instead of the solid, premium thud I expected, I heard a sharp, hollow click-clack that echoed off the walls. My heart sank. I’d spent three days on my knees, and now my house sounded like a middle-school stage play. I realized right then that I’d fallen for the biggest myth in the industry: that rigid means you can ignore what’s underneath. Today, I want to save you from that same sinking feeling by diving into why these floors act like drums and how we can make them feel as solid as real oak.
That Hollow Clack is Driving Me Crazy
If you are hearing a bouncy or empty sound, you aren’t alone. It is the number one complaint I hear from DIYers who just finished a project. I made the massive mistake of thinking the extra-thick core would bridge the dips in my plywood subfloor. It didn’t. When there is air trapped between your plank and the subfloor, every step vibrates that air. It’s annoying, it feels cheap, and frankly, it’s a sign that something went wrong during the flooring installation mistakes to avoid for a seamless look. Have you ever walked into a room and felt like the floor was floating an inch above the ground? That’s exactly what we’re tackling.
Is rigid core actually worth the hype if it sounds this cheap?
I get the skepticism. You pay for a premium product and expect a premium feel. The truth is, rigid core (SPC) is incredibly durable, but it’s also, well, rigid. Unlike flexible vinyl, it won’t contour to a bumpy floor. If your subfloor isn’t flat within 3/16 of an inch over a 10-foot span—a standard cited by the World Floor Covering Association—you are going to get noise. I learned the hard way that skipping the self-leveler mistake that creates new high spots is a recipe for disaster. We are going to look at how to stop that vibration from happening in the first place.
The Real Reason Your Floor Sounds Like a Drum
It usually comes down to three culprits: subfloor flatness, the wrong underlayment, or a lack of an expansion gap. When I first started, I thought I could just hammer the planks together and call it a day. But if you don’t follow the rubber mallet rule for locking vinyl planks, the joints might not be fully seated, leaving microscopic gaps that amplify sound. You also have to consider your perimeter. If the floor is pinched against the wall, it bows upward slightly, creating a megaphone effect. Following a step-by-step flooring installation from planning to perfect finish ensures you leave that critical breathing room. We want a floor that stays quiet even when the house shifts. Have you noticed the sound is worse in one specific corner of your room?
Get Your Subfloor Flatter Than a Pancake
If your subfloor has the topography of a mountain range, your rigid core floor is going to sound like a drum. I once tried to ‘cheat’ on a project where the plywood had a slight dip near a doorway. I figured the 6mm plank was tough enough to span the gap. Within a week, every time I stepped through that door, I heard a sickening thwack. I eventually had to pull the planks and apply the right filler. To avoid this, you need to identify every hump and valley using a 10-foot straightedge. If you find a dip, use a high-quality patch or compound, but be wary of the self-leveler mistake that creates new high spots which can actually make the noise worse. Before you even think about laying your first row, perform the subfloor screw routine for stopping floor squeaks. A quiet floor starts with a subfloor that doesn’t move or groan under the weight of the new planks.
Stop the Bounce with Better Underlayment
Most rigid core (SPC) comes with a pre-attached pad, but that doesn’t mean you’re done with acoustic planning. If your floor feels springy, you might have too much ‘squish.’ Think of it like walking on a mattress versus walking on a yoga mat. You want the yoga mat feel—firm but dampening. Adding a second layer of soft padding is a disaster; it causes the locking joints to fail under pressure. Instead, focus on the density of what’s already there. If you are installing in a specialty area, like a sunroom where heat causes rapid expansion, you might need the perimeter glue move for stable vinyl plank in sunrooms to keep things from shifting and creating air pockets. 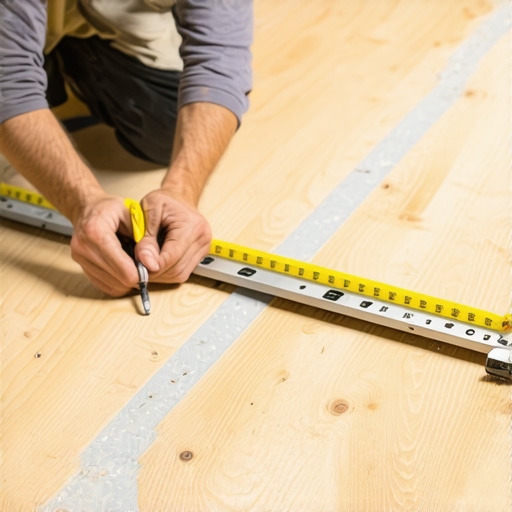
Lock Every Plank Until It Stops Fighting You
The most common source of that ‘clack’ isn’t actually the floor hitting the subfloor—it’s the planks vibrating against each other because the joints aren’t fully seated. I’ve seen DIYers think they’ve clicked a plank home just because the gap looked closed. In reality, there was a tiny 1mm lift in the tongue-and-groove. You must use the rubber mallet rule for locking vinyl planks to ensure the mechanical bond is airtight. For those stubborn end-joints, the block and hammer hack for tight tongue and groove joints is the only way to get a seamless, silent connection.
Give the Floor Room to Breathe
If your floor is tight against the drywall, it has nowhere to go when the temperature changes. It will slightly ‘peak’ at the seams, creating a hollow void underneath. This is why I always preach that why you need a perimeter expansion gap for vinyl planks is non-negotiable. I remember a client who called me because their floor sounded like it was ‘crunching.’ Turns out, they installed the planks tight against the baseboards. Once we pulled the trim and cut back the edges, the floor settled and the noise vanished. To hide that essential gap, you can how to choose the perfect baseboards for your homes style to provide a clean, professional finish that covers your 1/4-inch expansion zone. Proper layout is also key; making sure you how to stagger vinyl plank ends for maximum strength will prevent the floor from behaving like a single, giant vibrating sheet.Most marketing teams want you to believe that rigid core vinyl is essentially an indestructible plastic shield. Here is the contrarian truth: your flooring might be waterproof, but the subfloor beneath it is not. I often see seasoned DIYers skip a 6-mil poly film vapor barrier on concrete slabs because they think the SPC core can handle it. However, the National Wood Flooring Association (NWFA) emphasizes that moisture vapor transmission can still lead to major issues like mold or pressure-induced joint failure. If you skip this, you are effectively trapping moisture against your subfloor with no escape route. This is the ‘Oops’ factor that leads to a musty smell you can never quite track down until you rip the floor back up.
Stop Assuming Your Shower Tile is Waterproof
We see the same logic fail in bathroom renovations. Many homeowners think that as long as the grout looks solid, the wall is safe. That is a dangerous myth. Grout is porous; water passes through it. If you have not mastered the flood test secret for guaranteed leak proof showers, you are essentially gambling with your floor joists. This neglect is exactly why your shower niche is growing mold behind the tile. You need a continuous waterproof membrane, not just a pretty surface. Have you ever noticed a weird damp smell in a freshly renovated bathroom? That is usually the culprit. 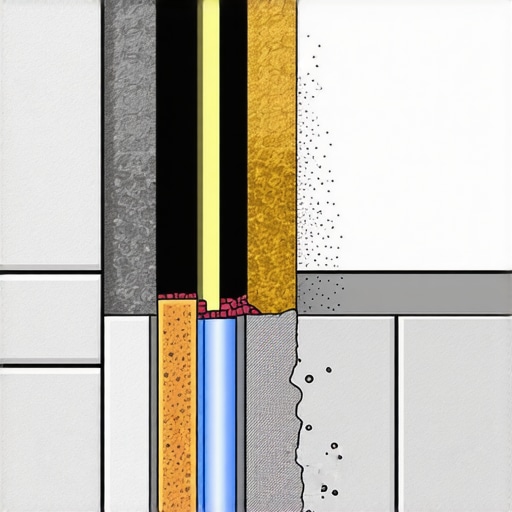
Why Your Baseboard Caulk Cracks Every Winter
Even the finishing touches have hidden nuances. I used to just grab the cheapest tube of caulk and go to town on the gaps. Then winter would hit, the house would settle, and my beautiful lines would look like a spiderweb of cracks. You have to understand the chemistry of your materials. Following the painter caulk vs silicone guide for baseboards is the only way to ensure your trim stays looking professional as the seasons change. If you are dealing with moisture-prone areas, you should even consider the silicon bead secret for waterproofing baseboards in bathrooms to prevent the bottom of your trim from rotting out.
Is it ever okay to skip the power stretcher for small rooms?
I hear this question from advanced DIYers all the time who want to save a rental fee on a 10×10 bedroom. The short answer is no. Even in a small space, knee kickers only provide localized tension. Over time, temperature fluctuations will cause that ‘loose’ carpet to ripple. It’s a common trap to think the furniture will hold it down. Instead, you end up with bubbles that require a full furniture move to fix later. If you are doing the job yourself, make sure you know why your carpet pad is too thick for the tack strip, as this is the primary reason seams fail even when stretched correctly. For those looking for a professional-grade finish, mastering the double cut method for invisible carpet seams is what separates a weekend warrior from a pro. Have you ever fallen into this trap of ‘good enough’ only to regret it six months later? Let me know in the comments.
Ditch the Bubble Level for Good
After years of squinting at a little green vial, I finally invested in a self-leveling cross-line laser. If you are doing a full-room install, the laser level hack for straight tile rows is the only way to ensure your layout doesn’t drift an inch over a twenty-foot span. It’s not just for tile; I use it to snap a perfectly level line for baseboards when the floor itself is wonky. When you are looking to how to choose the perfect baseboards for your homes style, having that laser line ensures the top edge is crisp, making even cheap MDF look like custom millwork. According to the Tile Council of North America (TCNA) Handbook, precise alignment is critical for preventing lippage, which isn’t just an eyesore—it is a trip hazard that eventually chips your tile edges.
How do I keep my floor looking new for a decade?
Maintenance is where most people fail within the first six months. You spent thousands on the material, so do not kill it with a harsh steam mop. For my rigid core and matte tiles, I strictly follow the microfiber mist rule for cleaning matte floors. Excess water is the enemy of any floor joint, even the waterproof ones. If you have a shower, do not wait for the grout to turn black; proactive sealing with the deep seal tactic for porous natural stone showers will save you from a full teardown. Knowing the difference in shower repairs when to fix vs replace for longevity can be the difference between a fifty dollar tube of caulk and a five thousand dollar insurance claim.
The Future of Flooring is Smart and Dry
I predict that within the next few years, we will see moisture-sensing underlayments becoming standard in high-end DIY kits. We are already seeing more integration between flooring and home automation. Until then, you have to be your own sensor. If your carpet starts to feel loose after a few seasons, do not ignore it. Use the power stretcher move to fix loose carpet bubbles before the backing breaks down. For the coming years, the industry is moving toward lifetime installs where we prioritize repairability over replacement. Check out these expert flooring installation tips for 2025 to see how the pros are prepping for this shift. I challenge you to try the laser level on your next project—it is the single best upgrade for your toolkit.
The Brutal Truths About Living with DIY Flooring
I’ve learned that the most expensive material in the world won’t save you from a poorly prepped room. If I could go back to my first project, I’d tell myself that the ‘rigid’ in rigid core isn’t a license to be lazy. Here are the lightbulb moments that changed my approach forever.
- Flatness over Thickness: I used to think a thicker plank would hide subfloor sins. It actually makes them louder. If your floor isn’t flat, it’s a drum—no exceptions.
- The Expansion Gap is a Safety Valve: Treating that 1/4-inch gap as optional is how you end up with buckling floors. It’s not just a suggestion; it’s the floor’s lungs.
- Moisture is Sneaky: Just because the top is plastic doesn’t mean the bottom is immune to the concrete’s ‘sweat.’ Always use a vapor barrier.
The Gear That Makes You Look Like a Pro
You don’t need a truck full of tools, but these three things moved me from ‘weekend warrior’ to ‘craftsman’ status. First, stop guessing at straight lines and use the laser level hack for straight tile rows and baseboards. It removes the human error that leads to crooked layouts. Second, I swear by a dedicated tapping block specifically for vinyl; it protects those fragile tongues better than a scrap piece of wood ever will. Finally, for anyone working on wet areas, mastering the flood test secret for guaranteed leak proof showers is the only way to sleep soundly at night. If you’re wondering about the next steps for your aesthetic, check out how to choose the perfect baseboards for your homes style to frame your hard work beautifully.
Build Something You Are Proud to Walk On
Flooring is more than just a surface; it’s the foundation of your home’s comfort. It can be intimidating to tear up a room, but when you follow a step-by-step flooring installation from planning to perfect finish, the results speak for themselves. Whether you are doing shower repairs when to fix vs replace for longevity or tackling a whole living room, take your time. You are building a space that will hold your family for years to come. For more forward-thinking advice, take a look at expert flooring installation tips for 2025 to stay ahead of the curve. Have you ever encountered a ‘mystery noise’ after finishing a flooring project that took weeks to solve? I’d love to hear how you fixed it in the comments below!