

I stood there in my hallway, staring at three hundred dollars’ worth of primed MDF and a realization that felt like a punch to the stomach: my miter saw had finally kicked the bucket, and the nearest rental shop was closed for the weekend. I was halfway through a total room refresh, the kind where you’ve already learned how to choose the perfect baseboards for your home’s style, and the thought of stopping now was maddening. I actually tried to ‘eyeball’ a 45-degree angle with a standard carpenter’s saw. I thought my steady hand would save the day. It didn’t. I ended up with a gap so wide I could have parked a bike in it, a mistake that taught me why baseboard miters keep gapping when they aren’t cut with precision from the start. Today, I’m going to show you how to bypass the expensive power tools and still get corners that snap together like a puzzle, because you shouldn’t have to put your life on hold for a piece of machinery. Have you ever been halfway through a DIY project and had a tool fail on you at the worst possible moment?
Stop Letting Tool Costs Stall Your Home Refresh
Real talk: a miter saw is a luxury, not a law. While the pros love their sliding compound saws for speed, you can achieve the exact same aesthetic using a simple manual miter box or even a coping saw if you’re feeling adventurous. I remember early on in my journey, I thought the tool made the craftsman. I was wrong. The secret lies in the measurement and the guide, not the motor. If you are working with more complex layouts, you might even find that the inside cope method for beginners is actually more forgiving than a standard miter cut anyway. Interestingly, many master carpenters still swear by hand saws for fine finishing work; according to the Guild of Master Craftsmen, manual tools allow for a level of tactile feedback that power tools simply can’t replicate, reducing the risk of over-cutting.
Is a Manual Cut Actually Going to Look Good?
It’s the biggest fear every DIYer has. You don’t want your living room looking like a middle-school woodshop project. But here’s the truth: once you apply a little bit of painter’s caulk, a hand-cut joint is indistinguishable from a power-cut one. My first successful ‘no-power’ install actually looked better than my previous attempts because I wasn’t rushing the blade. We are going to break down the manual miter box technique and the ‘scribe-and-cut’ method that works for those wonky walls that aren’t actually 90 degrees. Grab your safety glasses and let’s get to work.
Trust the Box for Dead-Straight Cuts
Think of a manual miter box as a train track for your saw. It forces the blade to follow a fixed path, which is something your hand simply cannot do when you are tired or working in a cramped corner. The key here is stability. I learned this the hard way in a tiny mudroom where I skipped the clamps. The board shifted mid-cut, and I ended up with a jagged edge that looked like it had been chewed by a lawnmower. Now, I always clamp the box to a stable work surface and the baseboard into the box itself. If you want that pro-level fit, you need to employ the back-cutting secret for baseboard miters; by slightly angling the back of the cut inward, you ensure the front faces meet perfectly even if the wall isn’t perfectly square. This is a standard trick used in a step-by-step flooring installation to keep transitions looking sharp.
Scribing Saves You from Wonky Walls
Real-world walls are never 90 degrees. They bow, lean, and curve in ways that make standard math fail. When I was finishing my guest bedroom, one corner was so far off it looked like a trapezoid. Instead of guessing the angle, I used the scribe method. You hold your baseboard against the wall, take a small scrap piece or a compass, and trace the contour of the wall onto the board. It is like tracing your hand in elementary school, but with much higher stakes. This technique is incredibly similar to the paper template method for complex tile cuts where accuracy is non-negotiable. Once traced, use a coping saw or your hand saw to follow that line. 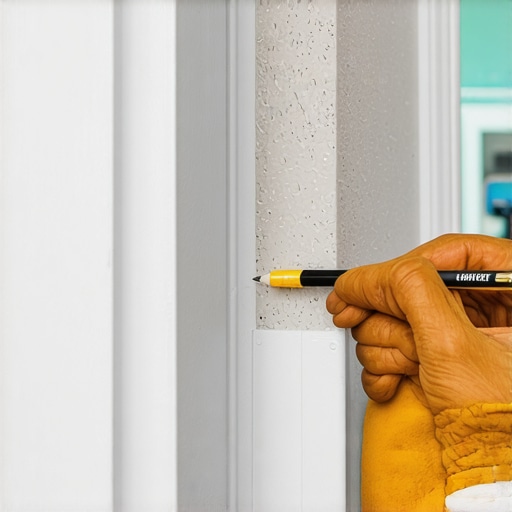
Don’t Fear the Curve
If you find yourself staring at a rounded pillar or a bay window, don’t panic. You aren’t limited to straight lines. Knowing how to install baseboards on a curved wall often involves making several small relief cuts on the back of the board to let it flex. It feels like you are breaking the wood, but it is actually the only way to get a seamless hug against the drywall.
Connect Long Runs with a Scarf Joint
When a wall is longer than your standard 8 or 12-foot piece of trim, you have to join two boards. Never use a simple butt joint because it will eventually shrink and show a gap. Instead, use a 45-degree overlapping cut known as a scarf joint. I remember my first long hallway where I just butted the ends together; by the following winter, I had a 1/8-inch gap that stared at me every time I walked by. Now, I always follow the scarf joint rule for long baseboard runs. It hides the seam by overlapping the grain, making it nearly invisible once painted. To keep these joints tight while you are reaching for your hammer, use the hot glue hack for holding baseboard miters while nailing. A few dabs of hot glue act as a temporary clamp, holding the pieces in perfect alignment while you drive in your finishing nails. This is especially helpful if you have chosen more intricate baseboard styles that elevate your interior design, as they can be trickier to hold manually.Most DIYers—and honestly, quite a few ‘pros’—get hung up on the idea that a tight joint is the only metric of success. I used to think that way too. I’d jam my baseboards tight against the floor and wall, feeling proud of that zero-gap look. But here is the contrarian truth: a joint that is too tight is often a ticking time bomb. Houses breathe. If you don’t understand the butt joint vs scarf joint debate for baseboards, you are likely setting yourself up for buckling when the humidity shifts. The National Wood Flooring Association (NWFA) explicitly states that wood needs to reach Equilibrium Moisture Content (EMC) before installation, yet I see people pulling planks straight from the garage to the living room every single day. This is exactly why your underfloor heating is making your hardwood gap later on; you didn’t account for the thermal expansion of the material itself.
Does Your Subfloor Actually Meet the 1/8-Inch Flatness Rule?
This is the ‘hidden nuance’ that separates a hobbyist from a craftsman. Most people assume their subfloor is ‘flat enough,’ but ‘flat’ and ‘level’ are two very different things. According to the Tile Council of North America (TCNA), if you are using large-format tiles or rigid core vinyl, your floor shouldn’t vary more than 1/8 inch over a 10-foot radius. If it does, your floor will feel ‘spongy’ or, worse, the locking tabs will eventually snap under the weight of furniture. I’ve seen beautiful, expensive installs ruined because the installer skipped the floor-prep stage. 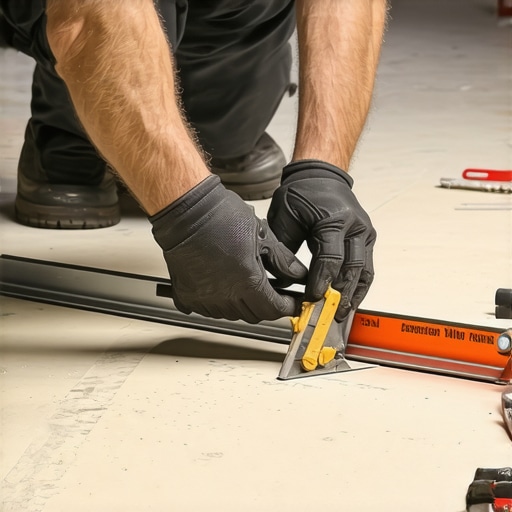 The biggest ‘oops’ factor I see in my inbox is what I call ‘The Pinning Trap.’ This happens when you install your baseboards so tight against the flooring that you effectively nail the floor in place. You have to remember why you need a perimeter expansion gap for vinyl planks; if the baseboard is crushing the plank down, that floor cannot move. When the sun hits it through a window, the floor will expand and bubble up in the center of the room because it has nowhere to go. When you are working with premium materials, always use the pre-drill rule for wide baseboard installations to ensure your nails are hitting the studs without splitting the wood or putting undue pressure on the floor. It’s these tiny, invisible decisions that prevent the most common flooring installation mistakes to avoid for a seamless look. Have you ever finished a project only to have a gap appear months later? Let me know in the comments, or contact us if you’re stuck on a tricky layout.
Stop Relying on the Knee Kicker
If you are diving into a carpet project, I need to let you in on a secret: your knees are not as strong as a mechanical lever. For years, I used a basic knee kicker, thinking it was enough for a small guest room. I was wrong. The Carpet and Rug Institute (CRI) Standard 105 actually mandates the use of a power stretcher for all residential carpet installations. Without it, the carpet simply isn’t under enough tension to stay flat over time. This is exactly how you uncover carpet install secrets achieving flawless results every time. If you skip this specialized tool, you will eventually see unsightly ripples that look like ocean waves, requiring the power stretcher move to fix loose carpet bubbles a year or two down the road. Save your joints and do it right the first time.

How can I keep my floors looking brand new for a decade?
Maintenance is the stage where most well-intentioned DIYers fail. I have seen ten-thousand-dollar floors ruined by a twenty-dollar steam mop within six months. Heat and moisture are the ultimate enemies of longevity for almost every material. For my own home, I strictly follow the microfiber mist rule for cleaning matte floors. You never want to saturate the surface; you just want enough moisture to grab the dust and oils. When it comes to the bathroom, you have to be even more vigilant about moisture. Knowing shower repairs when to fix vs replace for longevity is a skill that saves thousands. If you see a hairline crack in your grout, do not wait for the next big renovation. That crack is a highway for water to reach your subfloor and rot your framing. I predict that in the next few years, we will see ‘smart floors’ with embedded moisture sensors as a standard high-end feature, but until then, your eyes and a dry microfiber mop are your best defense.
Precision Tools That Actually Save You Money
People often ask me why I spend two hundred dollars on a high-end laser. It is because a laser doesn’t lie and it doesn’t get tired. When I am setting tile or starting a step-by-step flooring installation, using the laser level hack for straight tile rows saves me hours of snapping messy chalk lines that just get covered in thinset anyway. It is the same logic for wet areas; I never close up a wall without performing the flood test secret for guaranteed leak proof showers. It feels like a tedious extra step, but it is the only way to sleep soundly at night knowing you aren’t growing mold behind the drywall. Even for simple vinyl, I always employ the rubber mallet rule for locking vinyl planks to ensure the click-lock system is fully engaged without shattering the fragile plastic tongues. If you want to level up your DIY game, go buy a high-quality cross-line laser this weekend and use it to check your existing baseboards—you will be shocked at what you find. Give it a shot on your next small project and tell me it doesn’t change your entire perspective on accuracy.
Why I Stopped Chasing Perfection in My Corners
If there is one thing that years of dusty knees have taught me, it’s that a house is a living, breathing thing. I used to obsess over a 0.5mm gap, only to realize that by next season, that gap would move anyway. The real skill isn’t in avoiding the gap; it’s in knowing how to manage it. Always leave room for the material to expand, especially in humid months. This is a core part of your guide to durable flooring installation for a stylish home. Secondly, never underestimate the power of lighting. A joint might look great in shadows but terrible once the sun hits it. Always check your work with a bright work light before you call it finished.
The Small Kit That Delivers Big Results
You don’t need a garage full of power tools to get a professional look. For my manual projects, I swear by a heavy-duty plastic miter box—it’s cheap, portable, and surprisingly accurate if you clamp it down. I also highly recommend a high-quality cross-line laser level; it’s the single best way to ensure your baseboards makeover elevate your interior with simple updates actually looks level across a long room. Finally, if you’re tackling carpet, don’t just ‘get by’ with a kicker; rent or buy a power stretcher. These tools bridge the gap between ‘DIY-grade’ and ‘pro-grade’.
#IMAGE_PLACEHOLDER_E#
Start Your Next Room with Confidence
At the end of the day, your home is a canvas for your own creativity and effort. Don’t let the lack of a specific power tool stop you from creating a space you love. Whether you are following transform your home expert flooring installation tips for 2025 or just trying to fix a single room, the most important step is the first one. You have the knowledge now to handle the wonky walls and the tricky joints without breaking the bank. Mastering these carpet install secrets achieving flawless results every time and baseboard tricks will give you a sense of pride every time you walk through your front door. What was the most frustrating ‘wonky wall’ or tool failure you’ve ever had to overcome during a home project? Let me know below!