

I was three hours into a bathroom remodel, kneeling on a cold subfloor, staring at a $15 piece of Italian porcelain that I’d just butchered for the third time. The culprit? A stubborn, Victorian-style toilet flange that refused to play nice with my straight-edge square. I felt like a failure. My ‘measure twice, cut once’ mantra had devolved into ‘measure six times, cry once, and buy another box of tile.’ That’s when my neighbor, an old-school mason, handed me a piece of construction paper and a pencil. He didn’t say a word, but that simple gesture changed how I approached every flooring installation from that day forward. If you’ve ever felt the sting of a cracked tile or a gap so wide no amount of caulk could hide it, this is for you. Today, we’re going to master the paper-template method, a low-tech trick that ensures your cuts are dead-on every single time.
Stop Wasting Expensive Tile on Guesswork
Early in my career, I made the classic mistake of thinking my expensive wet saw and a fancy laser level could compensate for a lack of planning. I tried to ‘eye’ the curve of a door jamb, and the result was a jagged mess that looked like it had been chewed by a frustrated beaver. It was one of those flooring installation mistakes that costs you both time and pride. We often over-complicate things with digital gadgets when a simple physical trace is far more accurate. The beauty of a paper template is that it doesn’t lie; if the paper fits the gap, the tile will too. This is especially true when you are working with tile around toilet flanges or those nightmare-inducing stone fireplace hearths. Have you ever spent more money on ‘oops’ tiles than on the actual floor area? You aren’t alone, but that ends today. According to industry data from the Tile Council of North America (TCNA), material waste for complex layouts can easily exceed 20% if precise cutting methods aren’t employed, which is a massive hit to your renovation budget.
Does a Piece of Paper Really Beat a Professional Saw?
I know what you’re thinking: ‘I’m a DIYer with a decent eye, I don’t need to play with arts and crafts.’ I thought the same thing until I had to replace a single piece in a finished floor. Knowing how to fix a loose floor tile is one thing, but making a replacement piece fit into an existing puzzle with zero wiggle room is quite another. The paper-template method isn’t about lacking skill; it’s about respecting the material. When you use the spacer block move in conjunction with a perfect template, the grout lines look like they were laid by a machine. We aren’t just aiming for ‘good enough’—we are aiming for a finish that makes your guests ask which pro you hired. By taking sixty seconds to trace a shape, you save yourself twenty minutes of grinding and a lot of swearing. In the next section, I’ll show you exactly which paper to use and how to handle the ‘scribe’ that makes the difference between a gap and a glove-like fit.To start, you need a heavy-duty material like butcher paper or a flattened cardboard box. Thin paper is your enemy because it shifts under the weight of a pencil. Lay your paper flat against the wall or obstacle and secure it. If you’re dealing with tile around toilet flanges, you aren’t just looking for the center; you need the exact circumference of the bolt-down ring. Use a compass if you have one, but a simple pencil-rubbing technique works just as well. You are essentially creating a 1:1 map of the floor’s ‘terrain’ before you ever touch a tool. 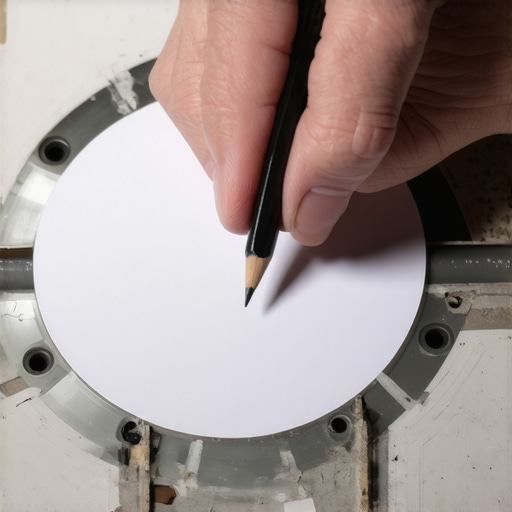
Grab the Right Paper and Start the Scribe
I remember a specific shower renovation where I was installing heavy slate. The drain was slightly offset—just enough to be a nightmare. I tried to measure with a tape, forgot to subtract the grout joint, and wasted three pieces of stone. It was one of those flooring installation mistakes that makes you want to pack up and go home. I finally went back to basics: I taped a piece of heavy construction paper to the floor, cut the hole with a utility knife until it fit perfectly over the drain, and then traced that onto the slate. The fit was so tight I barely needed grout. That’s the level of precision we’re after.
Use Friction to Your Advantage
When you press your paper into a corner or against a curved door jamb, don’t just mark the edge. Use your finger to ‘crease’ the paper firmly into the gap. This crease is far more accurate than a line drawn from two inches away. If you are working on shower repairs, this is the only way to handle the weird angles where the wall meets the pan.
Transfer Your Paper Map to the Real Tile
Once the template is cut and fits the space like a glove, place it onto your tile. This is where most people fail. They forget to account for the thickness of the blade or the necessary spacer block move that keeps your lines straight. Trace your line with a wax pencil—regular pencils often wash off under the wet saw’s spray. If you’re aiming for a perfect flooring finish, you have to cut on the ‘waste’ side of the line, not directly on it. This leaves you room to grind down for a micro-adjustment if needed.
Avoid the Drift on Complex Shapes
For L-shaped cuts or flooring around stone fireplaces, the paper might want to slide during tracing. Use blue painter’s tape to lock that template to the face of the tile. As you cut, remember that the template represents the finished edge. Before you set the piece, check the underside for burrs. Using the trowel notch secret for better tile adhesion ensures that once that perfectly cut piece is laid, it won’t shift or ‘lippage’ against its neighbors. If the template was right, the tile will drop in with a satisfying ‘thunk’—no grinding required.While a paper template solves your geometric headaches, the real ‘flooring ghosts’ haunt the technical specifications you can’t see. Let’s dig deeper into the nuances that separate a DIY weekend project from a professional-grade installation that lasts decades.
Protect Your Carpet by Avoiding Overly Thick Padding
It’s a common belief among homeowners that a thicker pad automatically equals a more luxurious feel underfoot. However, going too thick is a major trap. One of the most critical carpet install secrets that pros rarely share is that if your padding exceeds 7/16 of an inch, it can prevent the carpet from properly engaging with the pins on your tack strip. This is exactly why your carpet pad is too thick for the tack strip in many failed DIY jobs; the carpet literally floats above the grip, leading to unsightly ripples and premature seam failure. The Carpet and Rug Institute (CRI) specifically warns that excessive cushion thickness creates too much vertical movement, which can void many manufacturer warranties. In my experience, a high-density, thinner pad always outlasts a soft, ‘mushy’ one because it provides stable support for the carpet backing. Have you ever fallen into this trap? Let me know in the comments. 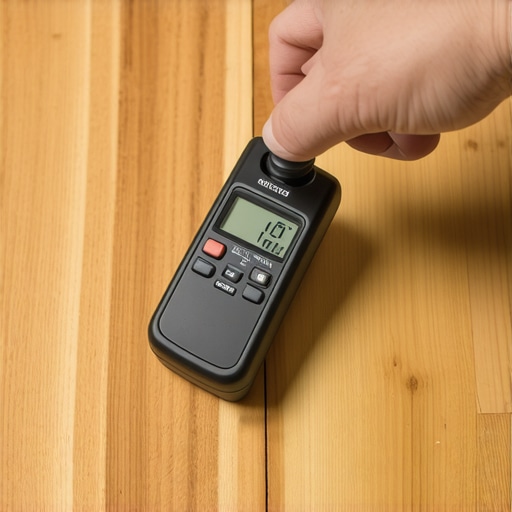
Stop Shower Curb Rot Before It Starts
The biggest ‘oops’ factor in bathroom remodels isn’t a slightly crooked tile; it’s the structural rot you can’t see until five years later. A devastatingly common mistake is nailing backer board or lath through the top of the shower curb. This creates a direct path for moisture to wick into the wooden framing. To avoid this, always utilize the sill plate shield method and ensure you never puncture the horizontal surface of your waterproofing membrane. Before you ever lay a single tile, you must perform the flood test secret for guaranteed leak-proof showers. If the water level drops even a fraction of an inch over 24 hours, you have a leak that a fancy template cannot fix.
Why do your baseboard miters keep opening every winter?
Many homeowners think their miter saw is out of calibration because their corners look perfect in July but show a gaping hole by January. The hidden nuance isn’t the saw—it’s the humidity. When you are dealing with baseboard miters gapping in the winter, you’re seeing wood contraction in real-time. To fight this, I’ve switched to the ‘pre-assembled’ corner method using wood glue and micro-pins, and I always utilize the scarf joint rule for long baseboard runs rather than simple butt joints. If you are working in a basement or on a concrete slab, ignoring the moisture meter requirement is a recipe for disaster. The National Wood Flooring Association (NWFA) emphasizes that wood flooring should ideally be within 2-4% of the subfloor’s moisture content before being nailed down. Wood is a living material; it breathes, and if you don’t account for its movement during flooring installation, your ‘perfect’ cuts won’t stay perfect for long.If you are serious about a professional finish, you have to stop relying on rental tools that have been beaten up by a hundred other DIYers. I used to think a simple knee kicker was all I needed for my guest room until I saw the carpet ripple like a lake six months later. Now, I never touch a room without a telescoping power stretcher. It is the absolute difference between a floor that stays flat for twenty years and one that eventually requires the power stretcher move to fix loose carpet bubbles.
Invest in a Real Power Stretcher or Pay Later
During my last big renovation, I realized that many people skip the prep because they are in a rush to see the final product. But if you don’t address the bones of the house, the skin will always fail. I’ve started implementing the subfloor screw routine for stopping floor squeaks as a mandatory first step before any luxury vinyl or hardwood goes down. Nothing ruins the ‘high-end’ feel of a new floor faster than a loud, chirping joist under your feet. 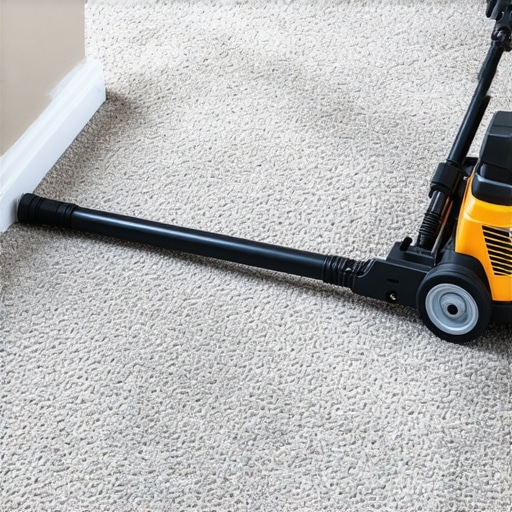
Tight Miters Require a Secret Angle
When it comes to baseboards, your miter saw is only half the battle. To get those corners to snap together without a gap, I swear by the back bevel move for tight baseboard miters. By cutting just a degree or two past the 45-degree mark, you ensure the visible front face of the molding touches first, hiding any slight imperfections in the wall’s squareness. In bathrooms, where moisture is a constant threat, I always finish with the silicon bead secret for waterproofing baseboards. It keeps the MDF from swelling and prevents that nasty black mold from creeping up from the floor line.
How do I maintain these surfaces for the next decade?
Maintenance isn’t just about a weekly mop; it is about protecting the chemistry of the materials. For natural stone or intricate tile, I always advise homeowners to stop shower grout from staining with the pre-seal move before the shower is ever used. Once that grout is saturated with oils and soap scum, it’s nearly impossible to get back to that ‘day one’ look. For modern matte finishes, you have to throw away the old-school bucket and string mop. Instead, follow the microfiber mist rule for cleaning matte floors to prevent hazy streaks and moisture infiltration into the seams.
The Future of Smart Flooring
Looking ahead into 2025, I predict we will see a massive shift toward ‘active’ subfloors. We are already seeing moisture-sensing underlayments that can alert your smartphone the second a leak starts behind a tile wall. This level of protection will become standard for creating a spa-like shower experience that is truly worry-free. According to the ANSI A108.02 standards for tile installation, subfloor deflection must be strictly controlled—often to L/360—to prevent the structural failures that lead to cracked grout. If you don’t respect the science of the subfloor, the prettiest tile in the world won’t save you. I highly recommend you try the back-bevel trick on your very next corner piece; it is a small adjustment that will change your trim game forever. If you’re ready to take your project to the next level, feel free to contact us for a professional consultation.
The Hardest Lesson I Learned About Precision Cutting
I used to think I could out-think a piece of tile with just a tape measure and a Sharpie. My biggest ‘lightbulb moment’ was realizing that a physical template is a piece of reality, whereas a measurement is just a theory. If you use the spacer block move alongside a paper template, you eliminate the mental math that usually leads to costly mistakes. Another hard truth is that your subfloor is far more important than your visible top floor. If you skip the subfloor screw routine for stopping floor squeaks, you will regret it every time you walk across the room in the quiet of the night.
The Toolbelt Staples That Saved My Sanity
I never walk onto a job site without a telescoping power stretcher anymore. It is quite literally the only way to avoid the eventual heartbreak of fixing loose carpet bubbles. #IMAGE_PLACEHOLDER_E# I also recommend picking up a digital moisture meter; it’s an absolute requirement for basement flooring jobs where invisible humidity can ruin an entire installation in weeks. Lastly, always keep a roll of blue painter’s tape nearby—it’s the best way to secure your templates and is essential for the blue tape trick for cleaning up silicone beads on your baseboards or shower tiles.
Turn Your Subfloor Into a Masterpiece
You don’t need a decades-long apprenticeship to achieve professional results; you just need patience and the right methods. By using the scribe technique, mastering the back bevel move for tight baseboard miters, and respecting the expansion needs of your wood or vinyl, you are already ahead of most contractors. Your next flooring installation doesn’t have to be a source of stress—it can be the crowning achievement of your home renovation. Have you ever struggled with a specific corner or a stubborn carpet ripple? Let me know your biggest flooring headache in the comments below!