

I stood there, staring at a sixty-dollar length of solid oak that now looked like a lightning bolt had struck it. I was halfway through a weekend project, trying to achieve those baseboard styles that elevate your interior design, and I thought I could skip the ‘fussy’ steps. I was wrong. My finish nailer, usually my best friend, had turned into a wood-splitting machine because I ignored the golden rule of wide baseboard installations. If you’ve ever felt that pit in your stomach when a piece of trim cracks right at the miter, you know exactly what I’m talking about. We spend so much time on step-by-step flooring installation that we often rush the finishing touches. But here’s the reality: those tall, chunky baseboards are much more prone to splitting than the flimsy stuff we used ten years ago. Today, I’m going to show you why the ‘pre-drill’ rule isn’t just for old-school carpenters—it’s your insurance policy against wasted money and ugly gaps.
Stop the splitting before it starts
Installing wide baseboards is a game-changer for any room, especially when you are looking for baseboard trends in 2025 that scream luxury. However, the sheer density of these larger profiles, whether they are solid wood or high-quality MDF, creates a problem. When you drive a nail into the edge of a wide board without a pilot hole, the wood fibers have nowhere to go. They compress, they stress, and eventually, they explode outward. I learned this the hard way during a baseboards makeover where I ruined three lengths of crown-grade trim in twenty minutes. To make matters worse, I was trying to avoid flooring installation mistakes, yet I created a brand new one. The Forest Products Laboratory notes that pre-drilling can increase the withdrawal resistance of fasteners while significantly reducing the risk of splitting in dense materials. This is especially true near the ends of your boards where the grain is most vulnerable. If you want the inside corner cope for perfect baseboard installs to actually look professional, you can’t have a jagged crack running through your work.
Is this extra step actually worth the headache?
You might be thinking that your nail gun is designed to be fast, and adding a drill to the mix feels like going backward. I thought so too, until I realized how much time I spent filling cracks with wood putty and sanding them down to hide my shame. Have you ever had a piece of trim split on the very last nail of the room? It’s soul-crushing. Pre-drilling, specifically for the ‘trouble spots’ like outside miters and the ends of long runs, ensures that your spring miter secret stays tight for years to come. It only takes a few extra seconds, but it saves hours of repair work later. I’m curious, have you ever had a ‘quick’ trim job turn into a disaster because the wood decided to fight back? Tell me your worst carpentry horror story! We’re going to dive into the exact tools and bit sizes that make this process seamless, so you can get back to enjoying your home without staring at that one cracked corner every time you walk by.
Pick a Bit That Plays Nice With Your Nails
Selecting the right drill bit isn’t about guessing; it’s about matching the shank of your finish nail. Think of wood fibers like a crowded subway platform—if you shove a massive nail in there, everyone gets pushed out of the way, and the platform (your trim) cracks. By pre-drilling, you’re essentially clearing a path for the ‘commuters’ to pass through without a riot. I generally reach for a bit that is slightly smaller than the nail’s diameter. If you are using 16-gauge nails for your baseboard styles that elevate your interior design, a 1/16-inch or 3/32-inch bit usually does the trick. You want enough friction for the nail to grab, but enough space so the board doesn’t feel the pressure. This is especially vital when working with hardwoods like oak or maple, which have zero patience for aggressive nailing.
Target the Fragile Ends and Miters
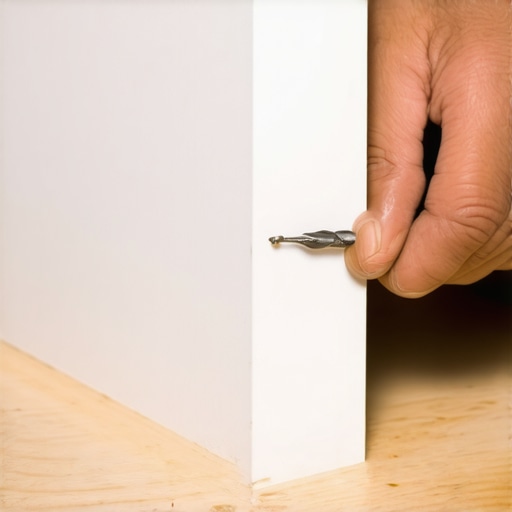
The most dangerous spot on any piece of trim is within two inches of the end. This is where the grain is most likely to separate under tension. Last summer, while working on a baseboards makeover, I rushed an outside corner. I fired a nail into an un-drilled miter, and the oak split right down the middle, ruining a 12-foot run in an instant. Now, I always pre-drill my miters. If you’re dealing with tricky corners, utilizing the corner clamping secret for pre-assembled baseboards alongside pre-drilling makes for a rock-solid joint that won’t move when the house settles or the humidity changes.
Master the Drill and Drive Sequence
It’s not just about making a hole; it’s about the angle and depth of your approach. When you are prepping for the inside corner cope for perfect baseboard installs, you want to drill at a slight downward angle toward the wall stud. This ‘toenailing’ effect pulls the board tight against both the subfloor and the drywall. If you’re worried about the visual impact of the holes, remember that the pin nail secret for delicate baseboard moldings works great for small returns, but for the heavy-duty tall profiles, pre-drilling for larger fasteners is mandatory for structural integrity.
Avoid the Common Blowout Blunders
One of the biggest flooring installation mistakes is drilling too deep into the wall framing. You only need to clear the trim itself. If you drill too deep into the stud, the nail won’t have enough solid wood to bite into, and your baseboard will eventually pull away or rattle. Also, pay attention to your bevels. Using the back bevel move for tight baseboard miters gives you a little more ‘meat’ to drill into on the front side, ensuring your pilot hole stays hidden and effective. I once spent an hour trying to fix a ‘shiner’—a nail that misses the stud and pops through the front—simply because I didn’t plan my drill path. Take the ten seconds to check your alignment before you pull the trigger on that drill; it’s the cheapest insurance policy you’ll ever find in a toolbox.
Ditch the ‘More Nails is Better’ Mentality
Common wisdom suggests that if a baseboard isn’t sitting flush, you should just fire more nails into it until it behaves. I’m here to tell you that’s a rookie mistake that leads to ‘dimpling’ and structural weakness. In my experience, over-nailing actually restricts the natural movement of the wood, which can cause the board to bow or even pull the drywall paper right off the studs. Instead of a nail-gun frenzy, I advocate for a nuanced approach. When you are working on baseboard styles that elevate your interior design, less is often more if you use a high-quality adhesive behind the board. This ‘glue-assist’ method, similar to the glue assist strategy for wide plank hardwood installs, provides a uniform bond that won’t wiggle loose or squeak over time. Have you ever fallen into this trap of over-nailing? Let me know in the comments.
Why do your miters stay tight in July but gap in January?
The most sophisticated question I get from homeowners is about seasonal movement. You finish a room in the summer, and it looks like a million bucks, but by winter, those outside corners have opened up a sixteenth of an inch. This happens because of a failure to respect the ‘Equilibrium Moisture Content.’ The National Wood Flooring Association (NWFA) notes that wood is hygroscopic, meaning it constantly gains or loses moisture to match its environment. If you install ‘wet’ trim from a big-box store into a climate-controlled home, it will shrink. This is why your baseboard miters keep gapping in the winter. To avoid this, you must run the acclimation test for avoiding hardwood floor gaps on your trim just as you would for your flooring.
Watch out for the ‘Drywall Flare’ Trap
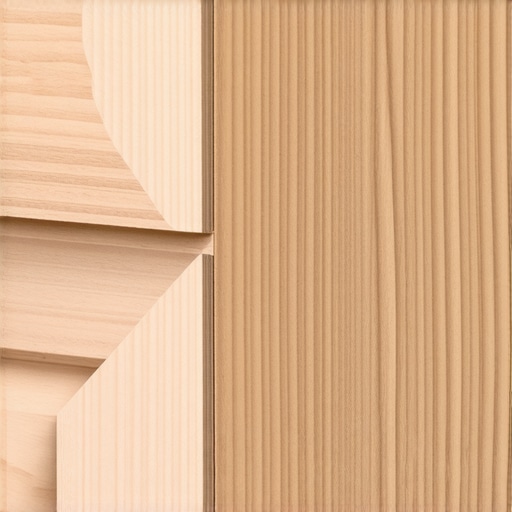
One hidden nuance that separates the pros from the DIYers is how they handle the bottom of the drywall. Drywall installers often leave a small ‘flare’ or buildup of mud at the bottom of the wall. If you just slam your baseboard against it, the top of the board will tilt outward. Most people try to fix this by nailing the top harder, but that just creates a visible wave in the trim. The real fix is to use a shim or to utilize the coping saw technique for flawless inside baseboard corners to adjust for the wall’s imperfections rather than fighting them. It’s the same level of precision required for carpet install secrets achieving flawless results every time. When you stop fighting the house and start working with its quirks, your baseboards makeover will finally look like the professional portfolios you see online. Always remember that the secret to a high-end finish isn’t just about the tools you own, but how you anticipate the materials’ reaction to the environment.
Your Toolbox Needs This Specific Power Tool
If you ask me what the single most important tool is for a successful baseboards makeover, I won’t say the miter saw. It is the oscillating multi-tool. I call it the ‘get out of jail free’ card. When you are deep into a step-by-step flooring installation and realize your door casings are just a hair too low for the new planks, this tool allows you to make an undercut with surgical precision. Without it, you are either hacking away with a handsaw or leaving an ugly gap that no amount of caulk can hide. I personally use a brushless model for the reduced vibration, which is a lifesaver when you are trimming ten door jambs in a row. It ensures that your transitions remain flush and professional, rather than looking like a DIY afterthought.
How do I maintain my flooring and trim over the long haul?
Maintenance isn’t just about cleaning; it’s about preventative care. For your carpets, the most common long-term issue is the unsightly divot left by heavy furniture. I always recommend the iron and towel trick for fixing carpet dents because it uses steam to reset the memory of the nylon fibers. For your baseboards, keep an eye on the joints. Over the first year, as your house breathes, you might see small separations. Don’t just ignore them. Using the stop-baseboard-gaps-with-the-caulk-and-paint-sequence ensures that moisture doesn’t seep into the wood, which is how warping starts. In wet areas, like the bathroom, this is even more critical for shower repairs when to fix vs replace for longevity, as a sealed baseboard prevents subfloor rot from localized splashes.

Stop Carpet Ripples Before They Start
One of my biggest pet peeves is walking into a home and seeing a carpet that looks like a calm ocean—full of waves. This almost always happens because the installer used a knee-kicker instead of a power stretcher. According to the Carpet and Rug Institute (CRI) 104 Standard for Commercial Carpet Installation, power stretching is mandatory to achieve the necessary tension to keep the backing stable. If you are doing it yourself, learn the directional pull rule for power-stretching carpet. It’s the difference between a floor that lasts fifteen years and one that needs replacing in five because the ripples caused the backing to delaminate. I never step onto a job site without my senior power stretcher; it’s a heavy beast, but the results are undeniable.
The Future of Seamless Interiors
Looking ahead, I predict we are moving toward ‘monolithic’ design. We are already seeing transform-your-flooring-top-trends-in-installation-for-2025 leaning toward ultra-large format tiles and hidden baseboard channels that sit flush with the drywall. This reduces dust collection and creates a sleek, minimalist look. We will likely see more integrated LED lighting channels built directly into the baseboard profiles, turning trim from a decorative border into a functional lighting element. For now, focus on the fundamentals. I encourage you to try the iron and towel trick on one stubborn furniture dent today—you’ll be amazed at how those crushed fibers bounce back to life with just a little heat and patience.
Hard-Won Wisdom from the Trim Carpentry Trenches
Over the years, I’ve realized that the biggest mistake is treating wood like it is a static material. It breathes, moves, and reacts to your home’s unique microclimate. One of the most vital things I learned is that pre-drilling isn’t just about preventing splits; it is about absolute control. When you pre-drill, you decide exactly where that fastener goes, rather than letting the grain dictate the path. I also discovered that you should never fight a wavy wall—instead, use the razor scribe method for baseboards on wavy drywall to make the trim follow the house’s natural lines. Finally, remember that your corners are the signature of your work. If you skip the prep and acclimation, you will likely end up wondering why your baseboard miters are opening at the top just a few months after you finish the job.
Tools That Turn DIYers Into True Craftsmen
I do not believe in owning every tool on the shelf, but I do believe in owning the right ones for high-stakes finishes. My go-to for any baseboards makeover is a high-quality coping saw with a fine-tooth blade. It allows for the surgical precision needed to master the coping saw technique for flawless inside baseboard corners. I also swear by a 23-gauge pin nailer for those tiny returns where even a 16-gauge nail would cause a disaster. For larger projects, I always keep a digital moisture meter handy to ensure my materials are ready for the environment, and I check my work against established industry standards to ensure a lifetime of stability.
Bring Your Dream Space to Life Today
The journey from a house to a home is found in these small, intentional details. When you take the time to pre-drill, to scribe, and to respect the materials, you are not just installing trim—you are building a legacy of quality and beauty. Whether you are tackling a full step-by-step flooring installation or just updating a single room for a fresh look, do not rush the finish line. Your home is your sanctuary, and it deserves the patience of a craftsman. Have you ever accidentally split a beautiful piece of trim on the very last nail of the room? Let me know your carpentry horror stories in the comments below!