

I stood in the middle of my living room, staring at a corner that looked less like a professional finish and more like a cry for help. I had spent hours measuring, double-checking, and cutting 45-degree angles on my expensive miter saw. Yet, when I pushed those two pieces of baseboard together, there was a gap so wide it looked like the wood was trying to social distance. I tried to fix my mess with a pile of wood filler, only to have it crack two months later when the heater kicked on. It looked awful. It was the classic rookie mistake, and it is exactly why I eventually fell in love with the ‘inside-cope’ method. Learning this trick changed everything for me, turning a frustrating weekend project into something I was actually proud to show off to the neighbors.
Why Miters Always Let You Down in Corners
If you are just starting out, you have probably been told that 45 + 45 equals 90. In a high school math class, that is true. In a house that has settled over twenty years? It is a total lie. Walls are almost never perfectly square; they lean, they bow, and they bulge. When you try to force a mitered joint into an out-of-square corner, you end up with those ugly gaps that even the best caulk and paint sequence cannot fully hide. My early flooring installation mistakes taught me that the environment dictates the method. I used to think my saw was broken, but the reality was simpler: I was not accounting for the house’s quirks. This is where learning the inside corner cope for perfect baseboard installs changes the game. Instead of fighting the wall’s angle, you are basically custom-fitting one piece of trim into the face of another.
Is Coping Really Worth the Extra Hassle?
You might be thinking, “Wait, I have to use a handsaw for this?” Yes, and it is actually faster than you think once you get the rhythm. While it looks intimidating at first, it is the only way to ensure that as your house expands and contracts with the seasons, your joints stay tight. In fact, the National Association of Home Builders points out that residential structures are subject to constant shifting due to soil expansion and temperature changes, which means a rigid 90-degree corner is more of a theoretical concept than a reality. When you choose the perfect baseboards for your home, you want them to stay beautiful for years, not just until the next season change. The ‘inside-cope’ method allows one board to slide slightly behind the other without showing a gap. Have you ever spent an entire afternoon fighting with a single corner only to give up and fill it with wood putty? I have been there, and I promise there is a better way.
The Secret to a Seamless Look
The beauty of this technique is that it works regardless of whether you are debating the butt joint vs scarf joint debate or just trying to finish a simple bedroom refresh. Professional trim work isn’t about having the most expensive power tools; it is about understanding how to hide the imperfections of the house itself. If you want that high-end look without the high-end price tag, you have to get comfortable with a coping saw. It is a fifteen-dollar tool that provides a million-dollar finish. We are going to walk through how to master this today, so you never have to fear a wonky corner again.
Mastering the Coping Cut Step by Step
The first step is actually simpler than you think: stop trying to cut two angles. For an inside corner, one board runs straight into the wall—this is a simple butt joint. The second board is the one that gets the surgery. I remember my first master bath renovation; I spent forty minutes trying to miter both sides and ended up with a gap large enough to lose a credit card in. Once I realized that one side stays flat, the logic clicked. This technique is a staple in any step-by-step flooring installation from planning to perfect finish because it removes half the variables from the equation.
Start With a Simple Butt Joint
Measure the first wall and cut your baseboard so it sits flush against both corners. Nail it in. This board provides the face that your second board will eventually rest against. It does not need any special angles, but if your walls are particularly wonky, you might need to use the razor scribe method for baseboards on wavy drywall to make sure that first piece is sitting perfectly plumb against the studs. If it leans forward or back, the coped joint will never sit right.
Cut the 45 Degree Angle to Reveal Your Path
Now, take your second piece of trim. Instead of cutting it square, cut a 45-degree miter as if you were making a standard corner. This is not the final cut; it is your roadmap. By cutting this angle, you expose the profile of the wood—the curvy, decorative edge that you now need to follow with your coping saw. It is like tracing a drawing; the miter cut provides the line, and your saw is the pen. Coping a joint is like the bead and smooth strategy for shower corners—you are creating a custom-fit seal where two different planes meet, ensuring that even if the house shifts, the visual integrity remains.
Back Bevel Your Way to a Perfect Fit
This is where the magic happens. Grab your coping saw and start cutting along the edge of the finish created by your miter. The secret is the back-bevel move for tight baseboard miters. You are not cutting straight through the wood. Instead, you angle the saw blade back toward the rear of the board. This removes more material from the back than the front, ensuring that the visible leading edge is the only part that touches the other board. 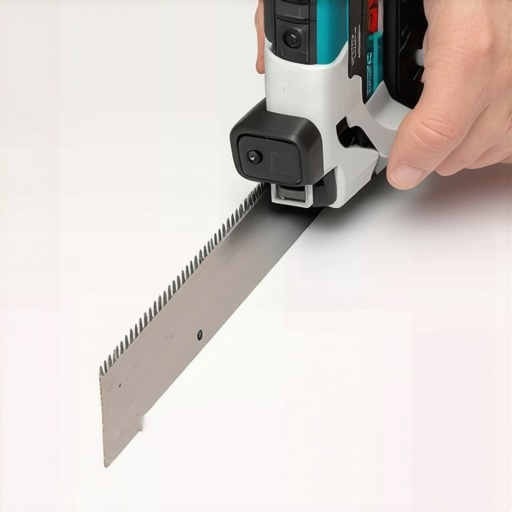 If you cut it straight, the back of the wood will hit the first board before the front does, leaving a hairline gap that will drive you crazy every time you vacuum.
Fine Tuning for a Snap-In Fit
Once the bulk of the wood is removed, use a small file or a piece of sandpaper to smooth out the bird’s mouth you have created. When you slide that second board into place, it should snap over the profile of the first board like a glove. If you are working with premium materials or baseboard styles that elevate your interior design, you will notice that hardwoods are much less forgiving than MDF. For those tougher woods, I always recommend the pre-drill rule for wide baseboard installations to prevent the end of your beautifully coped joint from splitting when you drive that final nail home. Think of it like carpet install secrets achieving flawless results every time; the prep work is invisible but determines the final quality. Finally, even a perfect cope might have a microscopic shadow line; that is when you apply stop-baseboard-gaps with the caulk and paint sequence to achieve that seamless look.
The 48-Hour Acclimation Rule is Mostly a Lie
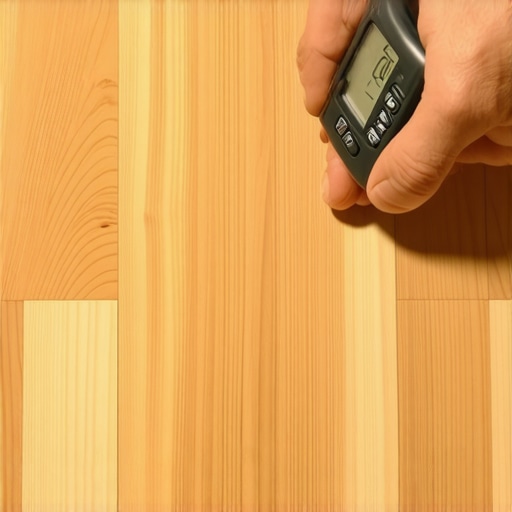
We have all heard the standard advice: just leave the boxes of wood or vinyl in the middle of the room for two days and you are good to go. In my years of fixing failed installs, I can tell you that this is one of the most dangerous myths in the industry. Time is not the metric that matters; moisture equilibrium is. If you live in a particularly humid climate or are working on a new build where the HVAC has not been running consistently, 48 hours is an arbitrary number that offers no protection. You need a dedicated acclimation test for avoiding hardwood floor gaps. According to the National Wood Flooring Association (NWFA), the materials must reach a moisture content that is within a specific percentage of your home’s average humidity. I have seen beautiful planks pull apart within six months because they were ‘acclimated’ by the clock rather than by checking the actual data. For anyone working on a lower level, ignoring the moisture meter requirement for basement flooring jobs is essentially gambling with your entire renovation budget.

Why Your Vinyl Floor Might Sound Like a Bowl of Cereal
One of the most common complaints I hear from homeowners who took the DIY route is a strange snapping or popping sound when they walk across their new floor. Usually, they blame the product quality, but the ‘oops’ factor here is almost always the subfloor preparation. If your subfloor has a dip larger than 3/16 of an inch over a ten-foot span, the locking mechanisms on your planks will flex until they eventually break. This is exactly why your vinyl plank floor is clicking when you walk. Professionals spend 70% of their time on the step-by-step flooring installation from planning to perfect finish focusing on leveling and sanding the base, not just clicking the boards together. Skipping the floor patch or self-leveler is a shortcut that you will hear every time you go to the kitchen for a midnight snack. It is one of those flooring installation mistakes to avoid for a seamless look that separates a hobbyist from an expert.
The Trap of Too Much Cushion in Your Carpet
The nuance of carpet installation is equally misunderstood, particularly when it comes to the pad. Many homeowners believe that a thicker carpet pad always equals a more luxurious feel. While it sounds logical, a pad that is too thick or too soft can actually cause the carpet to disengage from the tack strip over time. This leads to those unsightly ripples that make a room look ten years older than it is. It is one of those carpet install secrets achieving flawless results every time: the pad must be dense enough to support the backing without flexing so much that the tension is lost. If you find your carpet pad is too thick for the tack strip, you are setting yourself up for a restretch service in less than two years. Professionals know that the ‘hand’ of the carpet is about the combination of fiber and density, not just the foam underneath.
Does Your Shower Pass the 24-Hour Standing Water Test?
When it comes to wet areas, the technical requirements are even more rigid. Many DIYers and even some general contractors think that if the tile looks good and the grout is sealed, the shower is waterproof. That is a catastrophic misunderstanding. The Tile Council of North America (TCNA) emphasizes that the waterproofing layer behind the tile is what actually keeps your house from rotting. This is why I always insist on the flood test secret for guaranteed leak-proof showers. You plug the drain and fill the pan with water for 24 hours before a single tile is laid. If the water level drops even a quarter inch, you have a leak. It is much cheaper to fix it then than to deal with shower repairs when to fix vs replace for longevity down the road. Furthermore, if you are seeing grout cracking in a large room, check if you followed the expansion joint rule for large tile floors. Large spans of tile or vinyl need room to breathe, or the pressure will eventually force the joints to fail. Have you ever fallen into this trap of skipping the ‘invisible’ prep work? Let me know in the comments.
The Gear That Makes You Look Like a Pro
After years of wrestling with subpar finishes, I have learned that the difference between a DIY project and a professional masterpiece often comes down to three or four specific tools that most homeowners overlook. If you are working with trim, stop using heavy finish nails that leave huge craters to fill. I swear by the pin nail secret for delicate baseboard moldings; these tiny 23-gauge nails are nearly invisible once driven, meaning you spend less time with wood filler and more time enjoying the view. For those tackling soft surfaces, do not even think about a DIY job without a power stretcher. If you find yourself with loose areas later, you will need to master the power stretcher move to fix loose carpet bubbles to save the install from premature wear. These tools are not just ‘nice to haves’—they are the insurance policy for your hard work.
How Do I Maintain My New Floors Over the Years?
Maintenance is where most people drop the ball. You spend thousands on materials and weeks on labor, only to ruin the finish with the wrong cleaner. For matte finishes especially, I always advocate for the microfiber mist rule for cleaning matte floors. Ditch the soaking wet mop; moisture is the enemy of almost every modern floor, even the ‘waterproof’ ones. In larger rooms, remember that your floor is a living thing. According to the ANSI A108 standard for ceramic tile installation, expansion joints are not optional for large spans—they are a technical requirement to prevent the floor from ‘tented’ or cracking. If you ignored the expansion joint rule for large tile floors, you might see grout cracking within the first year. To keep things pristine, I also recommend stop hardwood scratches with the felt pad routine on every piece of furniture that touches the surface.
Where the Flooring Industry is Heading Next
Looking toward the future, I expect to see a massive shift toward ‘smart’ subfloor systems. We are already seeing the emergence of integrated sensors that can alert your phone if a leak occurs under your shower pan or behind a baseboard before you ever see a spot on the ceiling below. This makes your guide to durable flooring installation for a stylish home even more relevant, as the tech will soon back up the craftsmanship. Whether you are a weekend warrior or looking for professional help, getting the foundation right is the only way to ensure longevity. If you ever feel like you are in over your head, don’t hesitate to contact us for a consultation. I challenge you: before you lay your next tile, perform the flood test secret for guaranteed leak-proof showers. It is the single most important step for any wet-area renovation.
The Hardest Lessons From My Biggest Renovation Blunders
If there is one thing a decade of dusty knees and sore thumbs has taught me, it is that your house is actively working against your tape measure. I used to think that a gap in my trim meant I was a failure as a craftsman, but the reality is that the house simply moves. The most liberating moment in my career was accepting that walls are never flat and floors are never level. Once you stop fighting for mathematical perfection and start using techniques like the inside corner cope for perfect baseboard installs, the stress melts away. You learn that a professional look isn’t about being perfect; it is about knowing how to hide the imperfections that every house has. Another lightbulb moment was realizing that ‘good enough’ in the waterproofing phase is an invitation for disaster. Taking the time to execute the flood test secret for guaranteed leak-proof showers might feel like overkill on a Sunday afternoon, but it is the only thing standing between you and a five-figure repair bill later.
What I Pack Before Every Trim or Tile Job
I have a specific set of ‘sanity-saving’ tools that never leave my work truck, and they aren’t the ones you usually see on the big-box store endcaps. First, a high-quality laser level is non-negotiable; it is the only way to ensure your step-by-step flooring installation from planning to perfect finish stays on track across multiple rooms. I also never start a trim project without my 23-gauge pin nailer. It allows me to use the pin nail secret for delicate baseboard moldings to secure those tiny returns without splitting the wood. For anyone looking to dive deeper into the technical side, I highly recommend checking out your guide to durable flooring installation for a stylish home as a baseline for your planning. These resources and tools transform the process from a guessing game into a predictable system. If you find yourself stuck, you can always contact us for professional insight before you make that first cut.
Go Ahead and Make Your First Cut
It is easy to get paralyzed by the fear of making a mistake, especially when you are staring at a pile of expensive hardwood or tile. But remember: every expert was once a beginner who ruined a few boards. The goal of this flooring installation journey is to build a space that feels like home, not just a showroom. Whether you are tackling a luxury shower renovation or just trying to master carpet install secrets, the pride you feel when walking across a floor you laid yourself is worth every bit of the struggle. Don’t be afraid to slow down, measure a third time, and trust the process. You have the tools and the knowledge—now it is time to get to work. Have you ever wrestled with a corner that just wouldn’t close no matter how many times you cut it? Let me know about your most frustrating trim moments in the comments below!