

I stood there in my socks, staring at the floor, and I honestly wanted to cry. I had just finished a massive renovation, including a tricky shower renovation and fresh paint, but the crowning jewel was supposed to be this thick, luxurious carpet. Instead, it looked like a giant had driven a lawnmower across my living room. There were these distinct, parallel rows of lines running from one wall to the other. I was convinced the installers had botched it or the factory had sent me a “second.” It felt like a total disaster after all the work I’d put into choosing the right carpet for a cozy space.
Those Annoying Rows Won’t Stay Forever
If you’re looking at your floor right now and seeing the same thing, take a deep breath. You haven’t wasted your money. What you’re likely seeing are “roll marks” or “pressure bands,” and they are a perfectly normal part of the manufacturing and shipping process. When a massive roll of carpet sits in a warehouse for months, the weight of the roll compresses the pile in specific spots. It’s frustrating, I know. I remember my own carpet install secrets journey where I realized that even the best pros can’t prevent physics. Today, I’m going to show you why these lines happen, how to tell them apart from a bad seam, and exactly how to make them disappear.
Is my brand new carpet actually defective?
It’s easy to panic. Early in my DIY journey, I made the huge mistake of taking a stiff outdoor broom and trying to “scrub” the lines out. Big error. I ended up fraying the fibers and making it look worse. I’ve since learned that the visible line through the center is usually just temporary displacement. [IMAGE_PLACEHOLDER] According to the Carpet and Rug Institute, most of these marks disappear within 48 to 72 hours of regular foot traffic and vacuuming as the fibers “bloom.” If you’ve dealt with seams that look like speed bumps or weird lines in your new flooring, have you tried the “wait and see” method yet, or are you already calling the contractor? We are going to dive into the science of pile reversal and why the lighting in your room might be playing tricks on your eyes.
Get Rid of Those Stubborn Manufacturing Lines
Think of these roll marks like “bed head” for your floor. Your carpet has been squeezed tight for weeks, and the fibers just need a reason to stand back up. The most important tool you have isn’t a chemical or a specialized brush; it’s your own feet. Regular foot traffic is the natural enemy of pressure bands. I remember a job where the client was panicked about a line right in the middle of their hallway. Instead of calling the installers back immediately, I told them to have their kids play in that hallway for an hour. By the next morning, the “defect” was 80% gone because the heat and movement from their feet encouraged the fibers to “bloom.”
Give Your Floor a Few Days to Breathe
Before you start dragging heavy machinery across your new investment, give it a 72-hour grace period. This is the “settling” phase where the backing adjusts to the room’s temperature and humidity. If you try to force the fibers up too early, you might actually stress the primary backing. While you wait, check your carpet install secrets to ensure the rest of the room looks tight. If the lines are still there after three days, it’s time to get proactive.
Vacuum Against the Grain to Wake Up the Fibers
The real work starts with your vacuum. You need to use an upright vacuum with a beater bar (the rotating brush). Set the height just low enough that you feel a slight resistance when you push. You aren’t just cleaning; you’re performing a mechanical massage. I once spent an entire Saturday morning crisscrossing my living room in a North-South, then East-West pattern. This multi-directional agitation helps the compressed yarns “stand up and salute.” If you’re dealing with loose carpet bubbles, the vacuuming won’t help, but for roll marks, it’s the gold standard. 
Tell the Difference Between a Roll Mark and a Bad Seam
It is vital to know if you’re fighting physics or a bad installation. A roll mark will usually run the entire width of the room and look slightly darker or lighter depending on how the light hits it. A bad seam, however, looks like a structural flaw. If you see seams that look like speed bumps, that is likely an issue with the seam tape or the double-cut method not being executed properly. To test this, rub your hand across the line. If the line “moves” or changes color as you push the fibers in a different direction, it’s a roll mark. If the line stays rigid and feels like a hard ridge, you have a seam issue that needs a professional’s touch.
The Steam Trick That Saved My Sanity
When vacuuming isn’t enough, professional-grade steam is your secret weapon. But be careful—I once ruined a patch of nylon by holding a clothes steamer too close for too long. The fibers actually fused together! The right way is to hold a steamer about six inches above the carpet, letting the moist heat penetrate the yarn without soaking the backing. Once the area is warm and slightly damp, use a soft-bristled pile brush to lift the fibers. This mimics the manufacturing process in reverse. If you’ve had to blend a new carpet patch into an old room, you know how important pile direction is; the same logic applies here. You’re teaching the new carpet how to sit naturally in its new home.
Stop Obsessing Over Thick Carpet Padding
We often fall into the trap of thinking that the plushiest, thickest padding equals the most luxury. In my years on the job, I’ve found that the opposite is frequently true. While you want comfort, choosing a pad that is too high is one of the most common mistakes because of why your carpet pad is too thick for the tack strip. If the pad exceeds the height of the pins on your perimeter strips, the carpet cannot properly engage with the teeth. This results in a carpet that looks great for a week but begins to ripple and shift as soon as you walk on it. More isn’t always better; correct mechanical engagement is everything.
Your Concrete Subfloor is Hiding a Wet Secret
The biggest ‘oops’ factor I see in modern renovations involves the invisible enemy: moisture. Even if a concrete slab looks bone-dry to the naked eye, it can be exhaling water vapor that will eventually destroy your adhesives or cause mold. This is a critical step among flooring installation mistakes to avoid for a seamless look. You must understand why your concrete subfloor needs a calcium chloride test before you commit to a permanent installation. 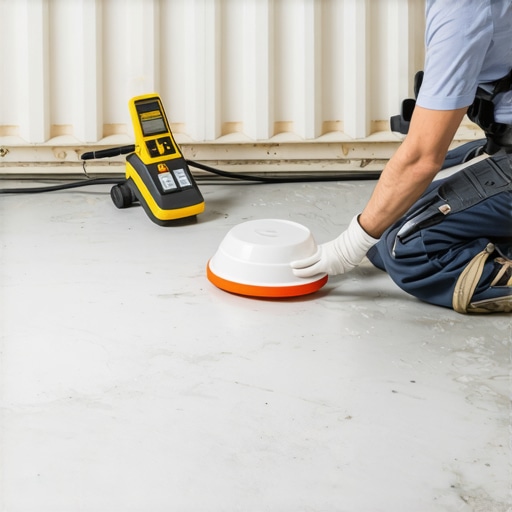 According to the National Wood Flooring Association (NWFA), moisture-related failures account for the vast majority of flooring claims. Skipping a $50 test on a $10,000 floor is a gamble you will eventually lose.
Why does my expensive shower floor keep cracking at the corners?
If you’re seeing cracks in your brand-new shower grout, it’s likely not a material defect but a physics problem. The Tile Council of North America (TCNA) Handbook EJ171 is very clear: every change of plane (where a wall meets a floor or another wall) requires a flexible sealant, not rigid grout. If your installer didn’t follow the soft joint rule for shower wall corners, the natural expansion and contraction of your home’s framing will snap that grout within months. It is the exact same principle that explains why your baseboard miters keep gapping in the winter. Houses are living, breathing structures that move; your tile installation needs to be able to move with it.
Don’t Finish Your Trim Until the Water Stays Where it Belongs
I’ve seen homeowners rush into a baseboards makeover before they’ve fully vetted their wet areas. Before you nail that final piece of trim near a bathroom, you should always insist on the flood test secret for guaranteed leak-proof showers. If there is a slow leak in the pan, the water will travel under the flooring and rot your expensive new baseboards from the back side before you even see a puddle. Have you ever fallen into the ‘thicker is better’ trap with your padding or trim, or discovered a leak after the finish work was already done? Let me know in the comments.
Stop Eyeballing Your Tile Lines
I used to think a tape measure and a chalk line were enough for a professional finish. I was wrong. If you want a result that doesn’t look like a weekend DIY disaster, you need to invest in a self-leveling green beam laser. When I first tried the laser level hack for straight tile rows, it felt like I had finally unlocked a pro-level secret. It eliminates the cumulative error that happens when you are off by just a sixteenth of an inch on the first row, which can become a full inch by the time you reach the far wall. I remember working on a 1920s Victorian where the walls were more of a suggestion than a straight line; that laser showed me exactly where the subfloor dipped so I could level it before the first tile was even buttered. This level of precision is the backbone of a step-by-step flooring installation from planning to perfect finish. I personally use the Bosch GLL3-330CG because the green beam remains visible even in bright sunlight coming through a sliding glass door.
How can I keep my flooring looking brand new for a decade?
Maintenance isn’t just about cleaning; it is about structural integrity. For carpets, that means never skipping the power stretcher. The Carpet and Rug Institute (CRI) 105 Standard for Residential Carpet Installation specifically mandates that power stretching is mandatory for all residential installations to prevent delamination and premature wear. If your installer only uses a knee kicker, they are cutting corners that will cost you thousands in three years when the carpet starts to wave like the ocean. When those ripples inevitably appear, you will need to master the power stretcher move to fix loose carpet bubbles.  For hard surfaces, please stop using heavy buckets of water and string mops. I have switched entirely to the microfiber mist rule for cleaning matte floors. Excess water is the slow killer of even the best carpet types for high traffic areas in 2025 if it seeps into the seams or backing.
The Future of Flooring is Modular and Repairable
Looking ahead, I predict a massive shift toward flooring systems that allow for localized repair rather than total replacement. We are already seeing this with high-end LVP and modular tile systems designed for quick swapping. This is why knowing shower repairs: when to fix vs replace for longevity is a skill that will save you massive amounts of money as materials become more specialized. If you have one cracked tile or a stained patch of carpet, don’t wait until the whole room is compromised. I want you to go out this weekend and pick up a high-quality contour gauge. It is a fifteen-dollar tool that will make your baseboard cuts around weird door frames look like they were done by a master carpenter. Give it a try on your next project and watch how those ugly gaps disappear.
The Hard Truths I Learned on the Job Site
After years of fixing DIY disasters, I have realized that most issues come down to rushing the process rather than a lack of raw skill. First, always remember that patience is a physical tool. Whether it is waiting for roll marks to fade or letting a subfloor dry, time is your ultimate ally. Second, never assume a new house is a straight house; walls move and floors dip, so you must plan for imperfection from the start. Finally, the flooring installation mistakes to avoid for a seamless look often start with the prep work—if your subfloor isn’t level, your finish will never look high-end regardless of the material cost.
Gear That Makes a Massive Difference
If you are serious about a professional result, there are three things I never go to a job without. A self-leveling green beam laser is non-negotiable for straight tile lines that do not drift across a large room. I also highly recommend referencing the TCNA Handbook for any wet area work; it is the industry standard that prevents leaks and grout failure. For those finishing their space, a high-quality contour gauge is the absolute secret to getting baseboard trends in 2025 to actually fit against old, wonky door casings without using a gallon of caulk.
Build Your Home Foundation with Confidence
Flooring is more than just something you walk on; it is the thermal and aesthetic anchor of your entire living space. By following these expert flooring installation tips for 2025, you are not just renovating; you are creating a durable legacy for your family. Don’t let a small line in the carpet or a tricky tile corner discourage you—every master installer was once a beginner who simply refused to quit. Your journey toward a durable flooring installation for a stylish home starts with that very first careful measurement. Have you ever discovered a hidden subfloor issue or a surprise leak only after you started your renovation? Let me know your stories in the comments below!