

I will never forget the sound of my first major flooring disaster. It was not a crash or a bang; it was a sickening, squelching pop every time I stepped near the kitchen island. Just three months prior, I had finished a stunning luxury vinyl plank installation. The concrete slab looked bone-dry, felt like sandpaper to the touch, and I was eager to get the job done. I figured if it felt dry, it was dry. Boy, was I wrong. Within ninety days, the adhesive started emulsifying, turning into a gray goo that seeped through the seams, and I was looking at a total tear-out. That was when I learned that concrete is basically a hard sponge that breathes moisture long after it looks cured. If I had just spent a few dollars on a simple calcium chloride test, I would have seen the disaster coming. Today, I am going to show you exactly why this little plastic dish of salt is the only thing standing between you and a ruined floor.
The Hidden Moisture Trap Lurking in Your Slab
Concrete is a tricky beast because it is incredibly porous. Even if a slab has been sitting there for twenty years, it can still pull ground moisture up through capillary action if the vapor barrier underneath has failed or was never installed. When you slap down a non-breathable flooring material like vinyl or certain hardwoods, you are essentially putting a plastic bag over a damp sponge. The moisture has nowhere to go, so it builds up pressure until it destroys your bond. Many homeowners make flooring installation mistakes like this because they rush the prep phase. I have seen beautiful high-traffic carpets get ruined by mold from underneath simply because the installer did not check the slab emission rate. According to the ASTM F1869 standard, a calcium chloride test is the industry benchmark for measuring the moisture vapor emission rate of a concrete subfloor. It is the only way to get a quantitative reading of how many pounds of water are escaping from 1,000 square feet of your floor every day.
Is a DIY moisture test actually worth the extra effort?
You might be thinking that your house is old and settled, so the moisture is surely gone. That is the exact trap I fell into early in my career. The reality is that environmental changes—like a heavy rainy season or a change in your HVAC settings—can pull moisture out of the slab that was never a problem before. Taking forty-eight hours to run a test is a small price to pay for peace of mind. Have you ever noticed a weird damp smell in a room even though there are no visible leaks? Drop a comment and let me know; I have likely been through it too. Whether you are planning a step-by-step flooring installation or you are just curious about why your current floor feels spongy, knowing your numbers is the first step to a project that lasts decades rather than months.
Clean the Slate Before You Test
You cannot just drop a moisture kit on a dusty floor and expect the truth. Concrete is like a skin; it has pores that get clogged with drywall dust, old paint, and adhesive residue. To get an accurate reading, you have to open those pores up. I learned this the hard way back in 2018 on a basement job in Seattle. I thought a quick sweep was enough, but a microscopic layer of old sealer was blocking the moisture from escaping into the test dish. The test came back bone-dry, but the floor failed six months later. Now, I always use a diamond grinding cup or a coarse sanding disk to reveal a fresh ‘salt and pepper’ look on the concrete. If you have recently used leveler, avoid the self-leveler mistake that creates new high spots by ensuring your test area is perfectly flat before you start. The goal is to clear a 20-by-20-inch square where the concrete is completely exposed and free of contaminants.
Why a Wire Brush Just Won’t Cut It
Many DIYers try to save time by just scrubbing the spot with a wire brush. This is one of the most common flooring installation mistakes to avoid for a seamless look because a brush often just polishes the surface instead of opening it. Think of it like trying to get water to soak into a waxed car; the moisture just beads up underneath. You need that mechanical abrasion to let the slab ‘breathe’ into the calcium chloride. This prep phase is identical to what I recommend in my carpet install secrets—if the subfloor isn’t right, the finish will never be right.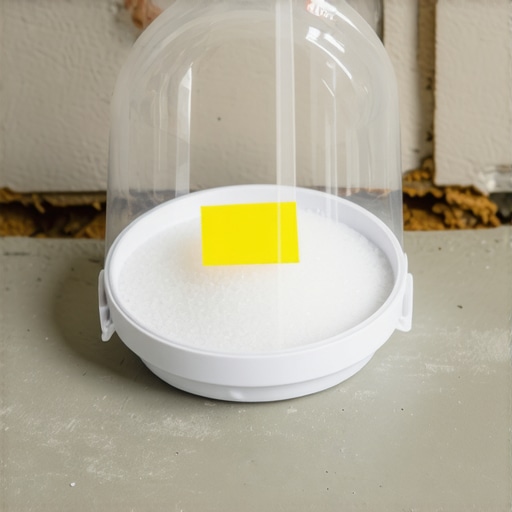
Seal the Dome Tight
Once your slab is prepped and the anhydrous calcium chloride dish is weighed and placed, you have to seal the plastic cover over it. This cover creates a micro-climate. Any air leak from the room into that dome will completely invalidate your data. Most kits come with a specialized pressure-sensitive tape. My trick? I use the back of a spoon to burnish the tape onto the concrete, ensuring there isn’t a single wrinkle where air can sneak in. This level of precision is similar to the pressure sensitive glue rule for vinyl tile, where the bond is only as good as the contact you make. Leave the test undisturbed for 60 to 72 hours. If you step on it or kick it, you’ve essentially just thrown your money away.
Interpret the Results Without the Stress
When you weigh the dish again after three days, you are looking for a number, usually expressed in pounds per 1,000 square feet. Most luxury vinyl manufacturers want to see 3 to 5 pounds. If your number is higher, you aren’t necessarily defeated, but you do need to change your strategy. For example, you might need to switch to the urethane glue secret for hardwood on concrete, which acts as its own moisture barrier. Or, if you’re sticking with planks, ensure you follow why you need a perimeter expansion gap for vinyl planks to allow for the inevitable movement that higher humidity causes. If the slab is pushing 8 or 10 pounds, you’ve discovered a major issue before it became a financial nightmare, which is the ultimate win for any home renovator.
But moisture isn’t the only ghost in the machine. I’ve seen homeowners pass their moisture tests with flying colors only to ruin the project during the finish phase because they followed ‘common sense’ instead of professional standards. Take carpet, for example. Everyone thinks a thicker pad means a more luxurious feel. I used to think that too, until I realized that a pad that is too plush is actually a leading cause of premature carpet failure. According to the Carpet and Rug Institute (CRI) 105 standard, a residential pad should generally not exceed 7/16 of an inch in thickness. If it is too thick, the carpet backing cannot properly engage with the pins on the tack strip. You will end up with a floor that feels like a trampoline and looks like a wavy ocean within a year. This is a classic example of why your carpet pad is too thick for the tack strip.
And let’s talk about the ‘waterproof’ tile myth. I cannot tell you how many DIYers—and even some ‘pros’—believe that grout is a waterproof barrier. It is not. Grout is a sieve. If you are not using a topical waterproofing membrane or a specialized foam board system, your subfloor is getting wet every time you shower. I learned this the hard way when I had to gut a three-year-old ‘luxury’ bathroom because why your shower niche is growing mold behind the tile became a structural issue. Always perform the flood test secret for guaranteed leak-proof showers before a single tile is set. It is a 24-hour waiting game that saves you a five-figure headache later down the road.
Why does my new carpet have those annoying ripples?
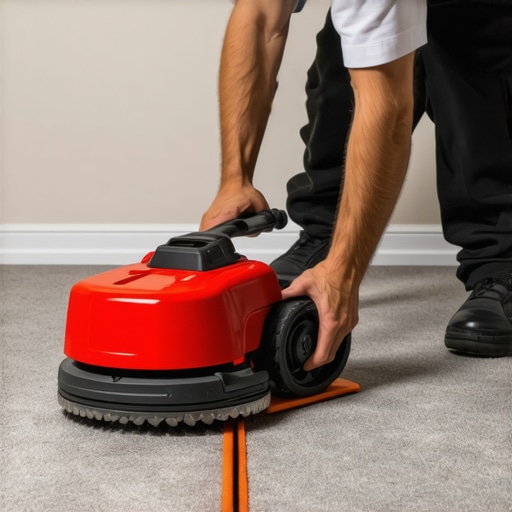
Most people blame the carpet quality, but it is almost always a failure of the ‘knee kicker.’ A knee kicker is meant for positioning, not for the actual stretch. If your installer is not using a professional power stretcher and following the directional pull rule for power stretching carpet, your carpet is not actually installed—it is just lying there. Without that mechanical tension, the latex backing will eventually relax, and those ugly bubbles will appear. It is one of those carpet install secrets that separates the weekend warriors from the lifers.
Lastly, don’t even get me started on baseboards. Most people try to miter their inside corners, but houses are rarely square. When you miter an inside corner on a 91-degree wall, you get a gap that no amount of caulk can permanently hide. Switch to the inside cope method for beginners. It allows one piece to nestle into the profile of the other, making the joint immune to the house settling or the wood shrinking in the winter. If you have ever wondered why your baseboard miters are opening at the top, it is because you are fighting geometry instead of working with it. Have you ever fallen into this trap of over-relying on caulk or picking a pad that was too soft? Let me know in the comments; I would love to hear your ‘lesson learned’ stories.
One of the biggest mistakes I see after a successful step-by-step flooring installation is homeowners treating their floors like they are indestructible. Even the toughest vinyl needs love. To avoid that hazy film that ruins the look of your room, you have to adopt the microfiber mist rule for cleaning matte floors. This isn’t just about aesthetics; it’s about preserving the factory finish from the abrasive effects of dust and grit. If you’ve gone the hardwood route, watch out for seasonal shifts. I always keep a gap gauge handy to ensure the penny gap rule for hardwood expansion space is actually doing its job during the humid months when wood naturally swells.
How can I keep my flooring looking brand new for decades?
The secret is in the ‘invisible’ maintenance. For tiled areas, specifically showers, you need to be proactive about shower repairs: when to fix vs replace for longevity. According to the TCNA (Tile Council of North America) Handbook F121-22, substrate preparation for large-format tiles requires a flatness within 1/8 inch over 10 feet—and your maintenance should follow that same level of precision. If you ignore a tiny hairline crack in the grout today, you’re inviting a full-scale moisture disaster tomorrow. For those with carpet, don’t wait for a ripple to appear. Use the power stretcher move to fix loose carpet bubbles at the first sign of slack. This tension is the only thing keeping the latex backing from breaking down prematurely.
Invest in Tools That Save Your Back and Your Budget
I used to pride myself on doing everything with a hammer and a prayer, but that’s a fast track to burnout and uneven joints. Now, my kit always includes a high-quality laser level and a specialized tapping block. Using the block and hammer hack for tight tongue and groove joints ensures your vinyl or laminate is fully seated without damaging the fragile click-lock edges. For your trim work, especially in wet areas, don’t just hope for the best; apply the silicon bead secret for waterproofing baseboards in bathrooms. This prevents moisture from wicking up the back of your trim, which is where most mold actually starts. If you’ve ever walked across a room and heard that annoying ‘click-clack,’ it’s likely because you ignored the t-molding mistake that ruins open-concept floors. Large spans of flooring need to breathe, and pushing your planks too tight against a transition strip is a recipe for buckling. I always suggest using the feather edge secret for smoothing subfloor transitions to ensure a perfectly flat plane before the first plank is laid.#IMAGE_PLACE_HOLDER_D#
The Future of High-Performance Home Surfaces
Looking ahead to 2025 and beyond, I’m seeing a massive shift toward ‘hybrid’ materials—surfaces that offer the warmth of wood with the total waterproof nature of stone-polymer composites. We are also seeing a rise in baseboard trends in 2025 that incorporate hidden channels for LED lighting and smart home wiring. The ‘set it and forget it’ mentality is dying; the future is about modular, repairable systems. If you’re ready to level up your home’s integrity, I challenge you to try the subfloor screw routine for stopping floor squeaks on your next weekend project. It’s the ultimate way to prove you’ve graduated from a basic DIYer to a home-renovation pro who builds for the long haul.
The Most Expensive Shortcuts I’ve Ever Taken
If there is one thing I have learned after years of scraping up ruined adhesive, it is that the ‘good enough’ mindset is the enemy of quality. I once skipped a moisture test on a basement remodel because the owner was in a rush. Within six months, the luxury vinyl was literally floating on a layer of condensation. Now, I tell everyone that skipping prep is just pre-ordering a failure. Whether you are dealing with moisture or just trying to figure out why your carpet pad is too thick for the tack strip, the solution is always found in the details you cannot see once the floor is down.
Another hard truth: your substrate is more important than the material you buy. You can spend $15 a square foot on the finest hardwood, but if your subfloor isn’t flat, it will squeak and gap. I always use the subfloor screw routine for stopping floor squeaks before I even open a box of flooring. It is those small, ‘unsexy’ steps that separate a DIY job from a professional-grade finish.
Tools That Keep Your Flooring Project on Track
You do not need a trailer full of equipment, but you do need the right stuff for the critical moments. I never start a layout without the laser level hack for straight tile rows. It takes the guesswork out of the equation and ensures you don’t end up with a ‘wedge’ piece at the far wall. For the physical installation, I rely on the block and hammer hack for tight tongue and groove joints to make sure every seam is airtight without mangling the locking mechanism. And if you are finishing off a room, don’t forget the inside cope method for beginners—it is the only way to get baseboard joints that don’t open up when the seasons change.
Your Next Step Toward a Perfect Finish
Starting a new flooring installation can feel overwhelming, but remember that every pro started with a single measurement and a lot of questions. Take it one square foot at a time, trust your moisture readings, and don’t be afraid to pull up a plank if it doesn’t feel right. Your home is your biggest investment, and the effort you put into the prep work today will pay off every time you walk across that floor for the next twenty years. If you hit a snag, check out my guide on step-by-step flooring installation for a deeper dive into the planning phase.
#IMAGE_PLACEHOLDER_E#
Have you ever had a flooring project go sideways because of a ‘hidden’ issue like moisture or a bad subfloor? Let me know in the comments below—I’d love to help you troubleshoot your next move!