

I remember standing in my hallway at midnight, the glow of my flashlight illuminating a gap in my brand-new floor that wasn’t there forty-eight hours ago. It was a gut-punch. My ‘perfect’ DIY floor was literally pulling itself apart at the seams. You spend days on your knees, making sure every click-lock joint is tight, only to have the floor decide to migrate toward the kitchen weeks later. I used to think I was a failure as a handyman because my planks wouldn’t stay put, especially near the expansion gaps I’d carefully left near the walls. But the truth is, vinyl is restless. It moves. And if you don’t know how to talk back to it, you’ll be staring at those trenches forever.
Stop Letting Those Gaps Ruin Your New Floor
Vinyl flooring is often marketed as ‘set it and forget it,’ but that’s rarely the reality. Whether it’s because of installation mistakes or just the natural shifts in your home’s subfloor, gaps happen. When they do, most people panic and think they need a total redo. I certainly did. In my early days, I even tried to use a screwdriver to pry the planks back together—spoiler alert: I ruined the finish and had to fix scuff marks for hours. The real answer isn’t brute force; it’s a simple, rhythmic technique involving a scrap block of wood and a rubber mallet. According to a technical study by the National Wood Flooring Association, even synthetic flooring is subject to movement caused by environmental shifts and subfloor irregularities. If you didn’t pass the straight-edge test before laying your planks, those gaps are almost inevitable. But don’t worry, we aren’t going to tear the floor up. We are going to ‘persuade’ it back into place using the block-and-mallet tactic.
Is Hitting My Floor with a Hammer Actually Safe?
I get it. You just spent thousands on materials, and the idea of whacking it with a mallet feels like playing Russian roulette with your warranty. You’re probably worried about snapping those delicate plastic tongues or permanently denting the wear layer. I had that same fear until I realized that the ‘Block’ part of this tactic is your shield. By using a sacrificial piece of flooring or a specialized tapping block, we distribute the force so the floor never actually feels the blow. Have you ever looked down and realized your planks are drifting apart like icebergs in the North Atlantic? If so, you’re in the right place. We are going to dive into the exact grip, the specific angle, and the ‘sticky tape’ secret that makes this work even if the gap is in the middle of the room.
Clear the Debris Before You Tap
The biggest mistake people make when they see a gap is immediately grabbing the mallet. But wait—think of that gap like a tiny canyon. Over weeks of walking, it has likely collected dust, pet hair, or even spilled cereal. If you try to force those planks together with gunk in the way, you risk breaking the tongue or groove, which is essentially the ‘DNA’ of your click-lock joint. I learned this the hard way in my own guest bedroom. I kept hammering away, wondering why the gap wouldn’t close, only to realize a tiny pebble was wedged in the track. Once I sucked the debris out with a vacuum and a thin needle-nose tool, the planks clicked together with a satisfying snap. Always ensure the path is clear before applying pressure.
Why Your Scrap Block is Your Best Friend
You never want to hit the vinyl plank directly with a mallet. It’s like using a sledgehammer to hang a picture frame—overkill that leads to damage. Instead, you need a ‘messenger’ to carry the force. A 6-inch scrap of the same flooring material is perfect because its tongue or groove will fit perfectly into the plank you’re trying to move. This is a core part of any step-by-step flooring installation. By locking your scrap block into the edge of the stray plank, you create a safe surface to strike. Imagine you are gently ‘talking’ the floor back into its home rather than screaming at it with a hammer.
Grab the Double-Sided Tape for Hard-to-Reach Planks
Sometimes the gap isn’t near a wall where you can easily gain leverage. When the gap is in the dead center of the room, you can’t just hook a pull bar. This is where the ‘sticky block’ method saved my sanity. I take a thick piece of scrap wood—something heavy like a 2×4—and apply high-strength double-sided carpet tape to the bottom. I stick that block directly onto the surface of the plank I want to move. 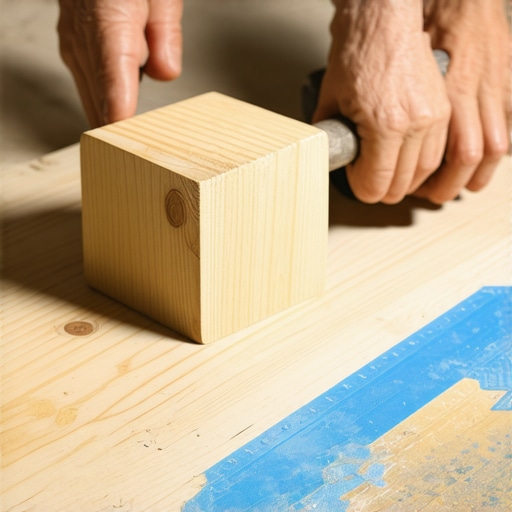 By hitting the side of the stuck-on block, you use the friction of the tape to pull the plank along with it. I remember doing this on a sprawling living room floor where a single plank had migrated two inches. My neighbors thought I was crazy taping wood to my floor, but three sharp whacks later, the gap vanished, and the tape peeled off without leaving a mark.
Keep Your Floor from Drifting Again
Once the gap is closed, you have to address the ‘why.’ Often, gaps occur because the floor wasn’t allowed to breathe properly. If you didn’t respect the expansion gap secret for summer flooring, the planks might be binding against a wall, causing them to buckle or pull apart elsewhere. Check your perimeter. If the floor is tight against the drywall, you might need to trim the edges. Additionally, ensure you followed the offset pattern rule during the initial lay; staggered seams provide the structural integrity needed to resist this kind of drifting. If your subfloor failed the straight-edge test, you might have ‘dips’ that cause the planks to uncouple when stepped on. In those cases, a tiny drop of flooring-specific adhesive in the groove before tapping it shut can act as a permanent ‘seatbelt’ for that troublesome joint, preventing common installation mistakes from ruining your aesthetic.Let’s dig deeper into the ‘floating’ myth. Most DIYers believe a floating floor needs to be completely free to move in every direction, like a raft on a pond. However, the contrarian reality is that in large open-concept areas, if you do not provide enough strategic stability, the entire floor can shift as one giant unit, slamming into the opposite wall and causing peaks or separated seams. This is where professional techniques like the perimeter glue method for large vinyl sheets or even strategic LVP anchoring can save a layout. The most common ‘Oops’ factor happens when you finally install your baseboard styles that elevate your interior design. If you drive a nail through the baseboard and accidentally catch the edge of a vinyl plank, you have created a ‘pinch point.’ That floor can no longer expand or contract, and the next time the humidity shifts, you will see the floor buckle right in the center of the room. I have seen homeowners blame the product quality when the culprit was literally one misplaced 18-gauge brad nail. 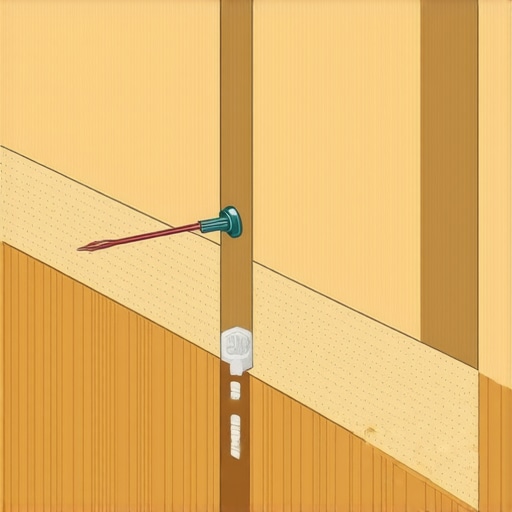
Can a Single Nail Really Ruin a Floating Installation?
The answer is a resounding yes. When a floor is pinned to the subfloor by a baseboard nail or a heavy kitchen island, it loses its ability to breathe. According to the Resilient Floor Covering Institute (RFCI), subfloor deviation must be less than 3/16 of an inch over a 10-foot span to prevent joint fatigue. If you skipped the self-leveler tactic for basement flooring fixes, those minor dips create vertical movement every time you step on the floor, eventually snapping the click-lock mechanisms. The same level of nuance applies to other surfaces, like when you are deciding on carpet install secrets. Everyone obsesses over the fiber weight, but the pad is the real hero of longevity. If you choose a pad that is too soft, the carpet’s backing will flex too much and eventually delaminate, which is why your carpet pad is crushing down too fast. To get a truly professional finish, you must move beyond basic tools. In the power stretcher vs knee kicker debate, the power stretcher is the only way to prevent those unsightly ‘waves’ from appearing two years later. Have you ever fallen into this trap where you saved money on the sub-materials only to regret it later? Let me know in the comments.I’ve learned over the years that the difference between a weekend DIY project and a professional result often comes down to the gear you’re willing to use. If you’re tackling a carpet project, I cannot stress enough why you should skip the basic knee kicker and go straight for the big guns. In the power stretcher vs knee kicker debate, the power stretcher wins every time because it applies uniform tension that your joints simply can’t replicate. It’s the difference between a carpet that stays flat and one that develops ripples within eighteen months. The same logic applies to tile. Most people grab whatever trowel is on sale, but following the trowel size rule for different tile types is what ensures your mortar actually bonds. If you aren’t getting 95% coverage on your thin-set, you’re essentially building a floor that’s destined to crack.
Stop Wasting Energy with Basic Hand Tools
Beyond the heavy machinery, your toolkit needs a few ‘cheats’ that professional installers use to hide those inevitable human errors. For example, when I’m finishing up trim work, I never leave home without a high-quality miter clamp. Using the miter clamp secret for professional baseboard corners allows you to pre-assemble your joints before they ever touch the wall, ensuring they stay tight even if your house settles. And if you’re working with tricky transitions, don’t just ‘eye it.’ Utilize the t-bar tactic for transitions between flooring types to create a flush, trip-free bridge between your luxury vinyl and that plush bedroom carpet. This level of detail is what separates a ‘renovated’ home from a ‘remodeled’ one. 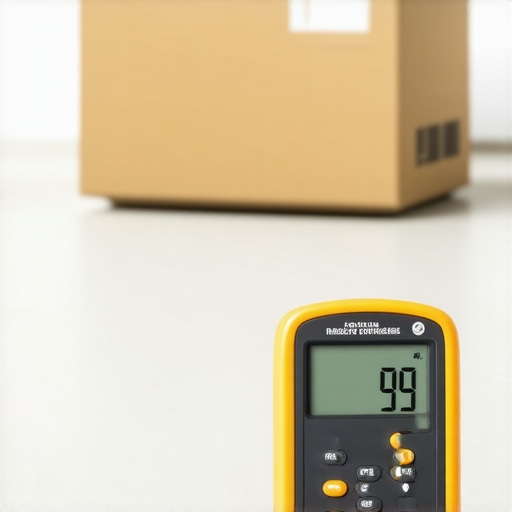
How can I keep my installation looking fresh for years?
Maintenance is the part of the story most DIY guides skip, but it’s where the real value is won or lost. For showers, the biggest threat isn’t just water—it’s the chemistry of your cleaning routine. You need to know how to clean grout without stripping the sealer, or you’ll find yourself dealing with why your shower grout is soft and sandy months later. Acidic cleaners are the enemy; they eat away at the portland cement in your grout lines until the tiles literally start to wiggle. In the world of carpet, longevity is found in the ‘tuck.’ Learning the tuck and roll secret for professional carpet stairs ensures that high-traffic areas don’t fray at the edges. According to the Floor Covering Installation Contractors Association (FCICA), subfloor preparation remains the single most important factor in installation success, specifically regarding moisture management. I always recommend performing the moisture meter test for concrete subfloors before a single plank hits the ground. If you ignore high RH (Relative Humidity) levels in your slab, your floor will fail, regardless of how expensive the planks were.
Hybrid Materials and the Future of Resilient Flooring
Looking toward 2025 and beyond, we are seeing a massive shift toward ‘smart’ resilient materials that are even more dimensionally stable than current SPC (Stone Plastic Composite) options. We are moving away from the ‘hollow’ feel of old laminates toward ultra-dense mineral cores that handle temperature swings better than ever. This means the expansion gap secret for summer flooring will become even more manageable as products become less reactive to humidity. However, the basics of a step-by-step flooring installation will always remain the foundation of a good home. If you want to elevate your game today, I challenge you to try the double-butter method on your next tile project. It’s a small extra step that guarantees a bond so strong you’ll never have to worry about a hollow-sounding tile again.
The Three Lies Every Home Center Tells You About Your Subfloor
After years of fixing my own “rookie” errors, I’ve realized that most DIY disasters start in the aisle of a big-box store. First, “flat enough” is never actually flat. If you don’t perform the straight-edge test for vinyl plank subfloors, you are essentially gambling with your joints and inviting future gaps. Second, acclimation isn’t a suggestion; it’s a structural requirement. If those planks don’t sit in your room for 48 hours, they will find their own “home” later—usually by creating a gap you can fit a coin in. Lastly, moisture is a silent killer. Even if a floor looks dry, skipping the moisture meter test for concrete subfloors is the fastest way to invite mold or adhesive failure. Most flooring installation mistakes to avoid for a seamless look are invisible until six months after the job is done.
The Toolkit That Actually Saves Your Back and Your Budget
#IMAGE_PLACE_HOLDER_E# You don’t need a warehouse full of tools, but you do need the *right* ones. For any carpet job, end the power stretcher vs knee kicker debate early and rent the stretcher; your knees will thank you in ten years. For trim, the miter clamp secret for professional baseboard corners is how you get those tight, furniture-grade joints that don’t open up in the winter. And never underestimate a simple moisture meter—it’s the only way to know if your slab is ready for a durable flooring installation for a stylish home. These aren’t just gadgets; they are the difference between a floor that feels like a DIY project and one that feels like a professional sanctuary.
Build a Home That Doesn’t Just Look Good but Lasts
Taking the leap into a major renovation is intimidating, but remember that every pro started with a single crooked plank or a messy grout line. The secret to a successful flooring installation isn’t perfection on day one—it’s the patience to prep the subfloor correctly and the willingness to use the right tools for the job. You’ve got the techniques, from sticky tape tricks to the right trowel sizes; now it’s time to stop overthinking and start building the space you deserve.
What’s the one gap or squeak in your house that’s currently driving you crazy? Let me know below!