

I’ll never forget the sound—a hollow, rhythmic click-clank every time I stepped near the kitchen sink. It was my first solo tiling job, and I had just spent three days laying a beautiful natural slate pattern. Within a month, the grout was already crumbling into grey powder. I was devastated. I’d followed a step-by-step flooring installation guide, but I’d committed the cardinal sin of DIY: I used a tiny 1/4-inch V-notch trowel for heavy, 12-inch stone. I was essentially trying to hold up a heavy brick with the equivalent of a postage stamp’s worth of glue. Today, we are going to fix that guessing game for you. Whether you are browsing shower renovation ideas or finally tackling that kitchen backsplash, the trowel you pick determines if your project lasts thirty years or thirty days. We’re going to match the notch to the tile so you never have to hear that heartbreaking hollow sound under your feet.
Does the notch shape really matter that much?
You might think a notch is just a notch, and thin-set is just thin-set. I used to think the same. But the notch is what controls the depth of the mortar bed. According to the Tile Council of North America (TCNA), you need at least 80% mortar coverage in dry areas and a whopping 95% in wet areas like showers to ensure a permanent bond (Source: TCNA Handbook). If your trowel is too small, the ridges won’t collapse and fuse together when you set the tile. This creates air pockets where moisture hides, often leading to a situation where your shower niche is growing mold behind the tile because the water has nowhere else to go.
Why Your Choice of Notch Matters More Than Tile Color
The Trowel-Size Rule isn’t just some elitist flooring jargon; it is basic physics. When you press a tile into those ridges of mortar, they need to flatten out completely to create a vacuum-like bond. If the ridges are too small, they don’t meet. If they are too big, you have thin-set oozing out of your grout lines like toothpaste, which is a nightmare to clean up later. I once spent four hours scraping dried mortar out of gaps because I went overboard on a small mosaic. It’s all about balance and coverage. Before you even pick up the tool, you have to make sure you know how to mix thinset for the perfect peanut-butter consistency. If the mud is too dry or too runny, it won’t matter what trowel you use. For those of you diving into large format porcelain, the stakes are even higher because those big slabs are less forgiving of an uneven bed. Have you ever finished a project only to have a tile come loose just a week later? Tell me I’m not the only one who has lived through that DIY heartbreak!
Pick the Right Notch Before You Start Mixing
Selecting your trowel is the most critical decision you will make before the first scoop of mud hits the bucket. Think of the trowel ridges like a series of tiny mountain ranges; they need enough height to squash down and fill the valleys, but not so much that they overflow. For a standard 12×12 ceramic tile, a 1/4-inch by 3/8-inch square-notch trowel is usually the sweet spot. If you are working on a smaller project, like a kitchen feature, you might want to look into the notch trowel tactic for even backsplash glue to keep things clean. I remember early in my career, I tried to install a subway tile backsplash using a massive floor trowel because it was all I had in the truck. By the third tile, thinset was oozing out of every joint, and I spent more time cleaning than setting. It was a mess that taught me the value of matching tool scale to material size.
Comb the Thinset at a Steep Angle
The way you drag the trowel across the substrate determines the height of your mortar bed. You want to hold the trowel at a consistent 45-degree angle. If you lay the trowel too flat, the ridges will be too short, leading to those dangerous air pockets. Always comb in one direction—straight lines only. Avoid those ‘swirl’ patterns you see in old-school videos; straight ridges allow air to escape as you press the tile down. This is especially vital when you are trying to learn the thin-set consistency secret for wall tiles, as vertical surfaces are less forgiving than floors. 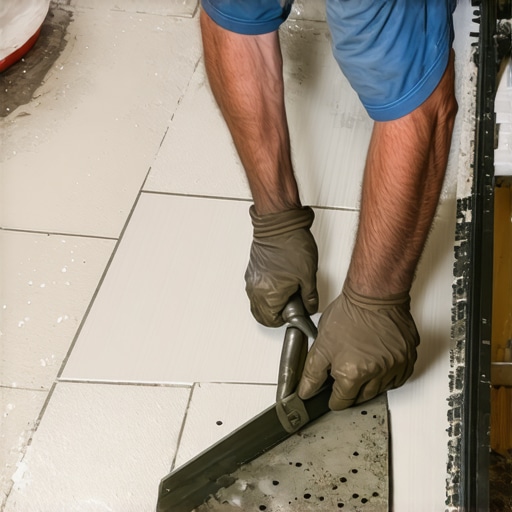
Double Buttering Is Your Best Insurance Policy
If you are working with anything larger than 8 inches, or if you are using heavy materials like slate or marble, you must use the ‘back-butter’ technique. This involves spreading a thin, flat layer of mortar onto the back of the tile itself before placing it into the combed ridges on the floor or wall. It ensures that the tile is fully ‘wet’ by the adhesive. For those working with porous materials, the double butter method for natural stone tiles is non-negotiable. Without it, the stone can suck the moisture out of the thinset too quickly, leaving you with a ‘dry bond’ that will pop loose the moment someone walks on it. Just as you wouldn’t skip the adhesive when learning carpet install secrets, you cannot skip this full-contact step in tiling.
Pull One Tile to Confirm Your Coverage
Don’t just assume your technique is perfect. After you have set your first three or four tiles, use a margin trowel to carefully pry one back up. Look at the back of the tile and the floor. Are the ridges completely collapsed? Is there mortar covering at least 80% of the surface? If you see individual ridges that haven’t flattened out, you aren’t using enough pressure or your trowel is too small. This quick check prevents the most common flooring installation mistakes to avoid for a seamless look. I once skipped this check on a large entryway and ended up having to replace twelve tiles because I realized too late that my thinset was skinning over too fast in the summer heat. For professionals, especially when following the full-bond rule for large format porcelain, this verification step is what separates a DIY hobbyist from a craftsman.
Let’s address the elephant in the room: the ‘seamless’ floor obsession. Homeowners often beg me to run 60 feet of luxury vinyl from the front door to the back kitchen window without a single break. It looks incredible for a magazine photo, but in the real world, it is a recipe for disaster. Most people assume the manufacturer is just being over-cautious, but the T-molding mistake that ruins open concept floors is the fastest way to see your expensive planks buckle or separate when the humidity spikes in mid-July. You cannot fight physics; every floating floor needs a place to breathe. Challenging the ‘no-threshold’ trend might not be popular, but it is the only way to ensure your floor doesn’t look like a mountain range in three years.
Speaking of hidden traps, have you ever noticed a carpet that looks like a series of ocean waves after just a few months? That is the result of the ‘tool of convenience’ trap. Many installers—and almost all rental-happy DIYers—rely solely on a knee kicker because it is faster and easier to carry. However, the Carpet and Rug Institute (CRI) Standard 104/105 explicitly requires the use of a power stretcher for residential installations (Source: Carpet and Rug Institute). Without that mechanical leverage, you aren’t actually stretching the backing; you are just shifting the surface tension. This is one of those carpet install secrets that separates a ten-year floor from a two-year headache. Have you ever fallen into this trap? Let me know in the comments.

Then there is the ‘grout is waterproof’ myth. I have walked into dozens of shower renovation ideas where the homeowner—or a lazy contractor—used standard grout in the vertical corners where two walls meet. Houses are dynamic; they breathe, shift, and settle. When that corner moves even a fraction of a millimeter, grout will crack. You must follow the silicone-only rule for shower corner joints to ensure the joint remains flexible and watertight. If you ignore this, why your tile grout is cracking in the corners becomes more than just an eyesore—it becomes a gateway for moisture to rot your wall studs from the inside out.
Why does my subfloor pass the level test but fail the flat test?
This is the most common nuance I see missed by those tackling a step-by-step flooring installation. ‘Level’ means the bubble is in the middle of the vial; ‘flat’ means there are no ‘dips’ or ‘humps’ greater than 3/16 of an inch over a 10-foot radius. You can have a floor that is perfectly sloped (not level) but perfectly flat, and your vinyl will click together like a dream. But a level floor with a hidden 1/4-inch dip? That is how you end up wondering why your rigid core floor sounds hollow when you walk. Always use the straight edge test for vinyl plank subfloors before you ever lay your first plank.
Finally, do not underestimate your baseboards. Most people treat them as purely decorative, but they are actually the functional guardians of your expansion gaps. If you are learning how to cut baseboards without a miter saw, be careful not to nail them directly into the flooring planks. This effectively pins the floor to the subfloor, causing it to tear itself apart as it tries to expand. If you find why your baseboards are pulling away from the wall, it is often because the floor is actually dragging the trim with it during seasonal shifts. Use a bit of finesse and the right fasteners to keep everything in its proper place.
Trust your moisture meter more than your gut
The absolute best piece of advice I can give anyone entering the home stretch of a project is this: stop guessing. I used to rely on my eyes and feel to tell me if a subfloor was ready, but after seeing a $5,000 hardwood job cup like a Pringles chip because of hidden moisture, I never work without my pinless meter. Performing the moisture meter test for concrete subfloors is the only way to be 100% sure you aren’t sealing a swamp under your luxury vinyl. I personally use a Wagner Orion meter because it doesn’t leave holes in the material, and it gives me a clear reading of what is happening two inches deep. According to the National Wood Flooring Association (NWFA), the moisture content between your planks and your subfloor shouldn’t vary by more than 4% for strip flooring (Source: NWFA Technical Guidelines). If you ignore this, you are just gambling with your bank account.
How do I keep my new installation looking fresh for years?
To keep that showroom shine, you have to rethink your cleaning kit. Most people reach for the harshest bleach they can find, but that is the fastest way to ruin your hard work. You need to learn how to clean grout without stripping the sealer; otherwise, you will be re-sealing every six months. For your planks, keep a repair kit handy so you know how to fix a scuffed vinyl plank with household items like a bit of WD-40 or a tennis ball. It is these small, proactive habits that prevent you from needing shower repairs when to fix vs replace for longevity down the road.
Precision layout tools save your back and your sanity
I have retired my old chalk lines for a 360-degree green beam laser level. While the chalk line method for centering large rooms is a classic skill, a laser allows you to see your layout on the walls and the floor simultaneously, which is a lifesaver for shower enclosures 101 expert tips for modern bathroom makeovers. It ensures your first row of tile is perfectly level across all three walls of a tub surround, preventing those awkward slivers of tile at the ceiling. #IMAGE_PLACE_HOLDER_D#
Prepare for the rise of smart subfloors and integrated trim
Looking ahead, I predict a massive shift toward smart subfloors. We are already seeing the beginning of this with integrated hydronic heating systems that sync with your phone, but the real future lies in sustainable, carbon-neutral materials that mimic stone without the weight. As you look into transform-your-home expert flooring installation tips for 2025, keep an eye on modular baseboard systems that hide wiring. Choosing the right trim isn’t just about looks; how to choose the perfect baseboards for your homes style will soon involve functionality like LED path lighting built right into the shoe mold. My advanced tip for you today? Go buy a quality pinless moisture meter and use it on every single job this month—even the ones that look dry. It will save you more money in avoided failures than any other tool in your bag.
Lessons Bought with Sweat and Lost Deposits
Looking back at my early mistakes, I realized that the hardest lessons weren’t about the tile or the wood, but about the invisible details. One ‘lightbulb moment’ for me was realizing that every material has a memory; if you don’t let your planks acclimate or if you ignore the backer board rule for tile wall stability, the house will eventually remind you of that shortcut. I also learned that patience is a physical tool—spending an extra hour on floor leveling saves ten hours of frustration during the actual layout. Finally, always trust the chemistry of your materials; mixing thinset too fast creates air bubbles that weaken the entire bond, no matter how good your trowel technique is.
The Gear That Keeps My Floors From Failing
If you want to elevate your craft, you have to stop relying on guesswork. My personal toolkit always includes a high-quality pinless moisture meter and a 360-degree laser level to ensure every line is true. For those planning a full bathroom overhaul, I highly recommend studying a comprehensive shower renovation guide before buying your first box of tile. I also stay updated on the latest baseboard trends in 2025 to ensure the finishing touches match the modern standards of the flooring. These resources are what separate a temporary fix from a legacy home improvement.
Ready to Lay Your Legacy?
There is a profound sense of satisfaction in standing back and looking at a perfectly flat, silent floor that you installed yourself. By focusing on the fundamentals of substrate prep and proper tool selection, you are doing more than just renovating; you are building a foundation for your family’s daily life. Don’t be intimidated by the technical specs—embrace the precision. Your next durable flooring installation is an opportunity to prove that you have the eye for detail that makes a house a home. Have you ever discovered a hidden subfloor issue once you pulled up your old carpet? Let me know your horror stories in the comments below!