

The wood filler was still wet on my fingers, and I was already realizing that no amount of putty and paint was going to save the mess I’d made in the guest bedroom. It was 2:00 AM, and I was staring at a outside corner that looked less like a professional finish and more like a set of hungry jaws. I’d done everything by the book—or so I thought. I bought the expensive miter saw, I measured twice, and I even picked out baseboard styles that elevate your interior design to ensure the room looked top-tier. But there it was: a gaping, ugly 1/8-inch void that mocked my efforts. That was the moment I realized that standard nailing just doesn’t cut it for high-end results.
The Day My Living Room Corners Mocked Me
For years, I believed that if I just used more nails or hit the wood harder with a hammer and a block, the joints would eventually submit. I made the classic flooring installation mistake of assuming the wall was perfectly square. Newsflash: it never is. When you try to nail two pieces of trim together on a wonky wall, the act of driving the nail actually pulls the joint apart. It’s a physics nightmare. I remember one specific job where I tried to use painter’s caulk to bridge a gap so wide I could see the drywall behind it. It looked okay for a week, then the seasons changed, the wood shrunk, and the caulk ripped right down the middle. It was embarrassing.
Is a specialized clamp actually better than a few finish nails?
You might be thinking, “Seriously? Another tool?” I was skeptical too. I thought miter clamps were for fussy furniture makers, not for a guy just trying to get some trim up so he could move his couch back. But here is the surprising fact: according to research from the USDA Forest Products Laboratory, wood is a hygroscopic material that can expand or contract significantly with humidity changes. This means your joints are under constant stress. A few finish nails into the drywall won’t hold that tension. A miter clamp, specifically the spring-style variety, applies pressure directly to the mitered faces, forcing the wood fibers to bond with the glue rather than relying on the grip of a tiny nail in a soft stud. Have you ever spent an entire day on trim only to have the corners open up a month later? Let me know in the comments, because that frustration is exactly what led me to this “secret” method.
Why Your Expensive Saw Isn’t Fixing the Gap
Even if you have a thousand-dollar saw, you are likely still fighting the wood. The real secret isn’t just the cut; it is the assembly. I started using the back-cutting secret for baseboard miters alongside these clamps, and the difference was night and day. By clamping the joint before it ever touches the wall, you create a single, solid unit. We are going to solve the “cracked corner” syndrome once and for all today. I am going to show you how to pre-assemble your miters so they stay tight through winter, summer, and everything in between.
Move the Assembly to the Workbench
Working on your hands and knees is the fastest way to a mediocre finish. I learned this the hard way while wrestling with an 8-foot piece of MDF that kept slipping every time I reached for the nailer. Instead, take your pieces to a flat workbench. Treat the corner like a piece of fine furniture rather than a piece of construction lumber. By assembling the joint on a level surface, you ensure the faces are perfectly flush. This is the same principle as the block and hammer hack for tight tongue and groove joints; it’s all about controlled force in the right direction. When you join them on the wall, you are fighting the studs, the drywall mud, and gravity all at once. On the table, you only fight the wood.
The Glue Bond That Outlasts the Wood
Yellow wood glue is your best friend, but only if you use it right. You want enough to saturate the end grain—which is porous like a sponge—but not so much that the piece ‘hydroplanes’ and slides around. I used to be stingy with glue because I hated the cleanup. That was a mistake. Now, I apply a thin layer to both sides of the miter. This prevents the ‘dry joint’ that leads to why your caulked baseboards are cracking within weeks. A solid glue bond is actually stronger than the wood itself, meaning the joint will likely never pull apart again, even as the house settles.
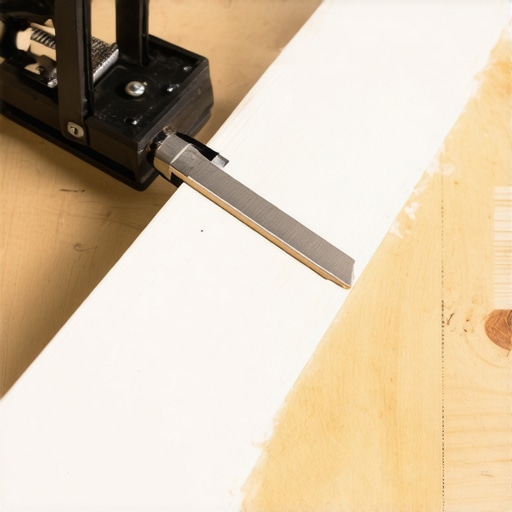
Use the Spring Clamp to Force the Fiber
This is where the magic happens. You’ve got your glue on the wood; now you snap a spring clamp over the corner. These things look like oversized jewelry pincers, and they exert massive pressure on the very tips of the miter. I remember a specific job in a drafty old farmhouse where the walls were so wavy they looked like the ocean. If I had nailed those baseboards piece by piece, the outside corners would have looked like open bird beaks. Instead, I pre-glued the miters, clamped them, and used the hot glue hack for holding baseboard miters while nailing to keep everything stable while the wood glue set. I carried a 12-foot ‘L-shape’ of pre-assembled baseboard to the wall and pinned it as one unit. The homeowner called me two years later—not for a repair, but to do the upstairs because those corners hadn’t budged a millimeter through two harsh winters.
Stop Fighting the Wall’s Curves
If you encounter a rounded corner, don’t try to force a 90-degree miter. You need to know how to cut baseboards around a bullnose corner without gaps to keep that high-end look. It’s about creating a small ‘transition’ piece that bridges the curve. When you try to skip these steps or take a shortcut, you end up with the quarter round mistake that ruins baseboard lines, where you’re forced to add more trim just to hide your errors. Pre-assembly gives you the control to check these fits before a single nail ever enters your drywall. This method ensures your step-by-step flooring installation from planning to perfect finish looks unified and intentional.
While most homeowners worry about the color of their planks or the texture of their carpet, pros know the real battle is won or lost before the first piece of trim even hits the wall. A common myth I hear constantly is that if a floor is ‘level,’ it is ready for installation. In my experience, level is a luxury, but flatness is a requirement. You can have a floor that slopes two inches across a room (level), and your luxury vinyl will still look great. But if you have a 1/4-inch hump in the middle of a ten-foot run (not flat), your floor is doomed. I’ve seen homeowners skip the straight-edge test for vinyl plank subfloors only to find that why your rigid core floor sounds hollow when you walk is due to those tiny air pockets beneath the boards. Have you ever fallen into this trap? Let me know in the comments, because it is the number one reason for clicking sounds and broken locking tabs.
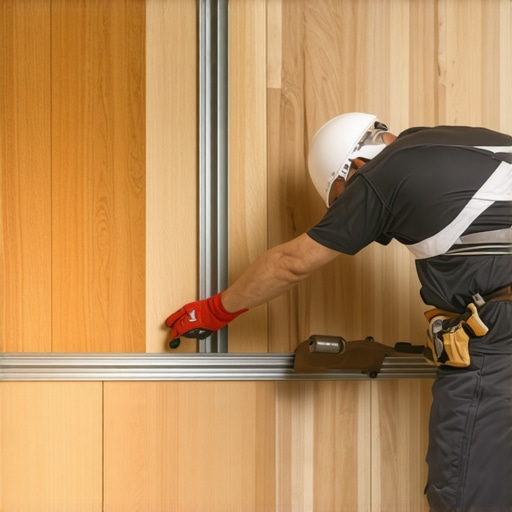
Can you really trust your subfloor without a moisture meter?
Another nuance that separates the weekend warriors from the masters is understanding vapor transmission. Many believe that a concrete slab is a solid, dry mass once it’s cured. This is a dangerous mistake. According to the National Wood Flooring Association (NWFA), concrete acts like a hard sponge, constantly pulling moisture from the earth and releasing it into your home. If you ignore the moisture meter test for concrete subfloors, you are essentially gambling with your investment. I once saw a beautiful hardwood job buckle within months because the installer didn’t use the floor prime move for porous concrete subfloors to seal the slab. The wood absorbed the rising vapor, expanded, and literally ripped the baseboards off the wall. Always check the relative humidity of the slab; ignoring it is the fastest way to trigger why your hardwood floor is gapping in the winter or cupping in the summer.
The Waterproofing Trap in Modern Showers
When it comes to bathroom renovations, the biggest ‘oops’ factor is the false sense of security provided by grout. Grout is not waterproof. It is porous. If you aren’t obsessive about what happens behind the tile, you’re just building a leak on a timer. I’ve had to perform dozens of shower repairs where the moisture had wicked up the drywall behind the baseboards. This is why I always insist that why your shower waterproofing needs to go higher than you think—at least 12 inches above the shower head. People often forget the overlap trick for waterproofing shower corners, leaving a tiny pinhole for water to travel into the studs. This leads to why your shower niche is growing mold behind the tile, a problem you won’t see until the smell becomes unbearable.
Why Your Carpet Padding Choice Matters More Than the Carpet
In the world of soft flooring, the biggest misconception is that a thicker pad equals a better feel. Actually, high-density, thinner pads often provide better support and longevity. If you choose a pad that is too soft and thick, the carpet backing will flex too much underfoot, leading to premature delamination. This is a major factor in why your carpet pad is crushing down too fast. To get that high-end feel without the future wrinkles, look for a 7/16-inch pad with at least an 8-pound density. This ensures the fibers are supported, preventing the ‘speed bump’ look described in why your carpet seam looks like a speed bump. Taking these extra steps—checking flatness, measuring moisture, and ensuring proper waterproofing—is what transforms a standard step-by-step flooring installation from planning to perfect finish into a legacy result that lasts decades.
The Tools That Saved My Sanity
If you’re still relying on a knee kicker for your entire living room, your carpet is going to look like a desert dune in three years. I moved to a power stretcher early in my career, and the difference in longevity is staggering. In the power stretcher vs knee kicker debate, the power stretcher wins every time because it literally pulls the carpet taut from wall to wall, preventing the fibers from shifting and wrinkling as the seasons change. It’s the same logic I apply to baseboards; I don’t just ‘make it fit,’ I use tools that force the material to behave for the long haul.
How do I maintain my floors and trim over time?
Maintenance isn’t just about a mop and bucket. For baseboards, keep a small container of your trim paint and a tiny brush handy for the inevitable vacuum cleaner scuffs. You can use the painters point hack for baseboard nail holes to touch up those spots without a full repaint. For your floors, especially luxury vinyl, knowing how to fix a scuffed vinyl plank with household items can save you from a costly board replacement. I always recommend a pH-neutral cleaner; anything too acidic will eat through the wear layer faster than you’d think, leaving your floor dull and unprotected.
Why My Laser Level Is My Most Trusted Employee
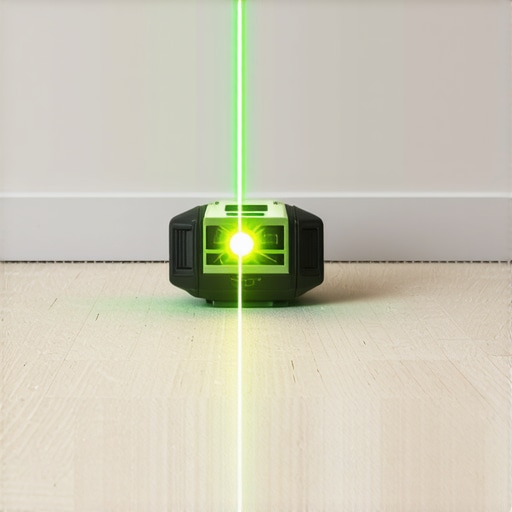
I don’t trust my eyes anymore, and neither should you. Walls lean, floors dip, and your brain is designed to lie to you to make things look ‘right’ in the moment. According to the Tile Council of North America (TCNA) Handbook, for large format tiles, the subfloor must be flat within 1/8 inch over a 10-foot span. Achieving this without a self-leveling cross-line laser is nearly impossible. I use mine for everything from setting the first row of tiles to ensuring my baseboard trends in 2025 are perfectly horizontal, even if the floor isn’t. If you want a durable flooring installation for a stylish home, you have to stop guessing and start measuring with light.
Build Showers That Outlast the House
When it comes to showers, longevity is won in the prep. If you suspect your base is moving, don’t wait for the tiles to crack. Understanding shower repairs and when to intervene is crucial. I’ve found that using the dry pack method for a level shower base creates a foundation so solid it won’t settle over decades, unlike some pre-formed pans that can flex and fail under weight. This technical approach prevents grout cracking and water intrusion, which are the silent killers of a bathroom renovation.
Looking ahead, I see a massive shift toward pre-sealed materials and smart-sensor underlayments that can alert you to leaks via your phone before they ruin your subfloor. This tech is already trickling down to the DIY market. For now, the best thing you can do is focus on the fundamentals. I want you to try one thing on your next project: go buy a 10-foot aluminum straight edge. Use it to find every hump and dip in your subfloor before you lay a single plank. It’s the difference between a floor that lasts five years and one that lasts fifty. If you’re feeling stuck or have a project that’s spiraling, check out my expert flooring installation tips for 2025 to get back on track.
3 Hard-Learned Truths That Changed My Approach to Trim
Over two decades in the trade, I’ve realized that the ‘secret’ to a perfect finish isn’t magic—it’s discipline. First, I learned that wood never stops moving. If you don’t account for seasonal expansion, your beautiful miters will fail eventually. Second, I realized that good lighting is a tool; if you can’t see the tiny gaps while you’re working, you will definitely see them once the late-afternoon sun hits the wall. Finally, I discovered that subfloor prep is 90% of the job. You can be the best installer in the world, but if you skip the straight-edge test, your floor will always feel ‘cheap’ underfoot regardless of the material cost.
My Must-Have Arsenal for Flawless Finishes
If you want to stop guessing and start succeeding, you need to curate a toolkit that supports precision. I personally never start a job without my cross-line laser level; it’s the only way to ensure your baseboard styles that elevate your interior design actually run straight across a wavy floor. I also swear by spring miter clamps—they are the specific tools that save your outside corners from opening up over time. For those tackling soft surfaces, my carpet install secrets always involve a power stretcher; it is non-negotiable for a wrinkle-free life. Lastly, I keep a digital moisture meter in my pocket because guessing at slab humidity is a recipe for a warped disaster.
#IMAGE_PLACEHOLDER_E#
Transform Your Space With One Tight Joint at a Time
It’s easy to get overwhelmed by the technical details of a full expert flooring installation, but remember that a house is just a collection of small decisions. When you choose to clamp a joint rather than just nail it, or when you take the time to level a subfloor dip, you are building quality that isn’t just seen, but felt every time you walk through the room. Don’t be afraid to slow down. The ‘pro’ look comes from the extra ten minutes most people aren’t willing to spend. If you ever feel like a project is getting away from you, feel free to contact us for guidance. You have the tools and the knowledge—now it’s time to create something beautiful.
Which of these precision steps do you think will make the biggest difference in your next project? Let me know in the comments below!