

I remember the exact moment my heart sank. It was a sunny Tuesday afternoon, and I was sliding a heavy oak dining chair just a few inches to the left to clean behind it. *Screeeech.* There it was—a nasty, bright white scuff mark right in the middle of my dark, pristine kitchen floor. I had spent weeks obsessing over expert flooring installation tips to get the room perfect, and in three seconds of laziness, I felt like I had ruined the whole vibe. If you’ve ever stared at a mark on your floor and felt that immediate pit in your stomach, please know you aren’t alone. It is incredibly frustrating because we are often told this material is practically bulletproof. Today, I am going to show you how to breathe easy again. We aren’t calling in the pros, and we certainly aren’t ripping up planks. We are going to fix those ugly marks using stuff you probably already have in your junk drawer or pantry.
Your Luxury Vinyl Isn’t as Bulletproof as the Salesman Claimed
I used to think vinyl was indestructible. I bought into the marketing hype that it could handle kids, dogs, and a wayward dragging of furniture without a flinch. But here is the cold, hard truth: even the most durable floors have their limits. Early in my DIY journey, I made a massive mistake when I tried to ‘sand out’ a deep mark with a bit of fine-grit sandpaper I found in the garage. I ended up stripping the wear layer entirely, creating a permanent dull spot that looked ten times worse than the original scuff. It is a common reason why your luxury vinyl is peeling up at the seams or looking worn out before its time—we tend to over-treat the surface when a gentle touch is what is actually needed. Most scuffs are actually just ‘transfer’ material from rubber or plastic soles, not deep gouges in the plank itself. According to industry guidelines from the Resilient Floor Covering Institute, residential vinyl is specifically engineered with a polyurethane wear layer that is tough but susceptible to ‘scuffing,’ which is essentially a molecular transfer of material onto the surface rather than a scratch. Have you ever panicked and tried a cleaning chemical that actually made the mark permanent? Drop a comment and tell me your horror stories.
Can a tennis ball really save my floor?
It sounds like a prank your grandpa would pull, but the rubber-on-rubber friction method is often more effective than any store-bought solvent. I have had neighbors ask me if this actually works or if it is just another ‘life hack’ that fails in practice. I get the skepticism; your floors were expensive, and the idea of rubbing a fuzzy yellow ball on them feels wrong. However, we are looking for friction, not abrasion. Unlike a wire brushed finish that naturally masks imperfections through texture, smooth vinyl highlights every single flaw like a spotlight. But don’t lose hope. I was a skeptic too until I saw that bright white rubber smudge vanish with just a few seconds of targeted elbow grease. If you’ve got a scuff that’s driving you crazy, let me know, and we can figure out the best approach before you reach for the heavy-duty chemicals. We are going to walk through the pantry-raid method next, so get your sneakers and some olive oil ready.
Turn a Tennis Ball Into Your Floor’s Best Friend
Think of a tennis ball as a giant, fuzzy eraser for your house. The rubber inside the ball has the perfect consistency to ‘grab’ the scuff—which is usually just a transfer of material from a shoe sole or furniture pad—and pull it off your floor without scratching the wear layer. I first tried this after moving a heavy leather sectional last Thanksgiving. Despite my careful planning and following expert flooring installation tips, I dragged one leg across the plank, leaving a four-inch black streak. I was horrified, but the tennis ball fixed it in under twenty seconds.
Mount the Ball for Maximum Leverage
Don’t just crawl around on your hands and knees trying to grip a round ball; you won’t get enough downward pressure. Take a utility knife and cut a small ‘X’ into the tennis ball, then slide it onto the end of a broomstick or mop handle. This gives you a long-reach tool that allows you to stand upright and use your body weight to buff out the mark. It works exactly like a professional floor buffer but costs about fifty cents. If you find the mark isn’t moving, check your subfloor stability; sometimes a slight bounce in the floor makes it harder to get the friction you need. This is a common issue when people skip the straight edge test for vinyl plank subfloors during the initial setup. 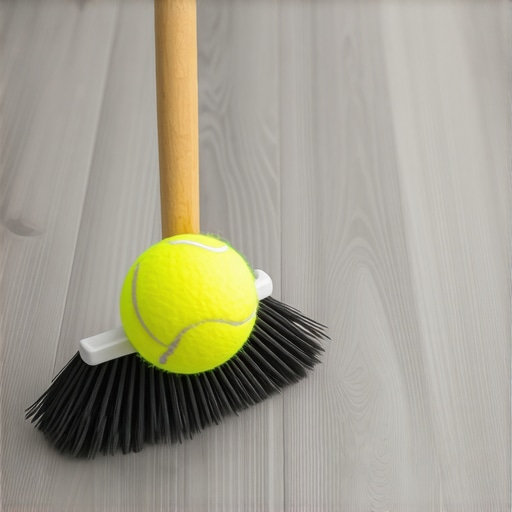
The Pantry Method for Grease and Rubber Smudges
When dry friction isn’t enough, it is time to look in your kitchen. Some scuffs are ‘greasier’ than others, especially if they come from kitchen chair legs that have collected a bit of cooking overspray. For these, a tiny bit of vegetable or olive oil acts as a natural solvent.
Why a Tiny Drop of Oil Goes a Long Way
Apply a pea-sized amount of oil to a clean microfiber cloth and rub the scuff in a circular motion. The oil breaks down the molecular bond of the rubber transfer. I used this trick on a nasty mark near my island where I had ignored flooring installation mistakes and let a chair drag without felt pads. The mark vanished instantly. Once the scuff is gone, you must wipe the area with a mixture of water and a drop of dish soap to remove the oil residue. If you leave the oil, it becomes a slip hazard and will attract dirt like a magnet. While you are down there cleaning, take a look at your perimeter; often, we focus so much on the center of the room that we miss how baseboard styles that elevate your interior design can be ruined by built-up grime or scuffs right at the floor-to-wall transition.
Be Careful With Abrasive Pads and Melamine Foam
You might be tempted to reach for a magic eraser or a green scouring pad, but proceed with extreme caution. These are actually fine abrasives—essentially very high-grit sandpaper. If you scrub too hard, you will create a dull spot in the polyurethane finish that reflects light differently than the rest of the floor. If you have a really stubborn mark, like paint over spray from hardwood floors or vinyl, use a dedicated LVT cleaner or a pink pencil eraser first. Even the t-molding mistake most vinyl installers make by leaving too small of a gap can cause shifting that creates new friction points, so keeping the surface clean and free of transfer material is your first line of defense in maintaining that showroom shine.While we’ve tackled scuffs, the real heartbreak happens when your entire installation starts to fail because of a ‘hidden’ nuance most DIYers ignore. Most people think that as long as the floor looks flat, it’s ready for vinyl or carpet. I disagree. In my years of fixing ‘pro’ jobs, I’ve found that the biggest mistake isn’t the surface—it’s the invisible ‘bounce’ or moisture. Everyone says a little play in the floor is fine, but in my experience, if you don’t address subfloor deflection and moisture early, your luxury vinyl will eventually fail. I once saw a gorgeous layout ruined because the installer skipped the calcium chloride test for concrete subfloors, leading to trapped moisture that bubbled the planks. It’s a classic trap. According to the Tile Council of North America (TCNA) Handbook, subfloor deflection is a non-negotiable metric; yet, we often ignore these standards for ‘easier’ materials like vinyl or carpet.
Don’t Let Subfloor Bounce Ruin Your Hard Work
The ‘oops’ factor usually hits about six months after the furniture is moved in. You’ll notice a click-clack sound or, worse, a seam that starts to gape. This often stems from a lack of structural support. If you aren’t sure if your floor is solid, check if your floor joists need blocking before you lay a single plank.
Why does my new carpet have those weird visible lines?
If you’ve ever noticed what looks like a row of corn in your new flooring, you’ve likely encountered why your new carpet has visible rows of lines—a phenomenon often caused by incorrect pile direction or poor stretching. People often think the carpet is defective, but it’s usually an installation error where the power stretcher vs knee kicker debate was won by the wrong tool. If you’re tackling this yourself, don’t forget the carpet tucker move for clean baseboard edges. It’s the difference between a floor that looks ‘home-made’ and one that looks like a showroom. 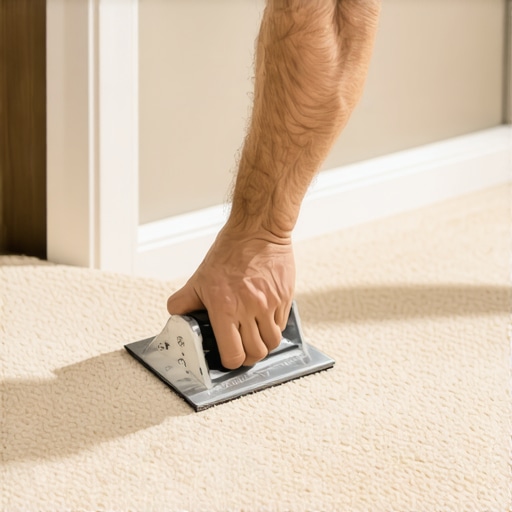
The Pre-Paint Rule You Will Thank Me For Later
Another common myth is that baseboards should be the final touch after everything is installed. While that sounds logical, it’s actually a trap for your finishes. I always argue that you should paint your baseboards before installing them. Trying to cut-in paint against brand new carpet or vinyl is a recipe for disaster and ruins that crisp line you worked so hard for. If you’ve already installed them, you’re stuck with the painstaking task of masking, which often fails anyway. Have you ever fallen into this trap or noticed why your carpet seam looks like a speed bump after a long weekend of DIY? Let me know in the comments.
The Gear I Actually Keep in My Truck
I’ve spent years testing every gadget that hits the market, and I’ve learned that the most expensive tool isn’t always the best, but the wrong tool is always a disaster. When it comes to carpet, I’ve seen countless DIYers try to save a few bucks by using only a knee kicker. Please, don’t do that. If you want to know the truth behind the power stretcher vs knee kicker debate, it comes down to physics. A power stretcher ensures the carpet is anchored so tightly it won’t ripple in three years. I also never step onto a job site without a high-quality moisture meter. Whether I’m checking if a slab is ready for luxury vinyl or verifying that a subfloor is dry enough for hardwood, this tool is my insurance policy. It’s the same logic I use when I’m trying to fix a squeaky floor through finished carpet; you need to know what’s happening beneath the surface before you apply a fix.
Stop Using Grout in Your Shower Corners
This is the hill I will die on. If you are finishing a bathroom, you must follow the soft joint rule for shower wall corners. According to the National Tile Contractors Association (NTCA) Reference Manual, any change of plane—like where two walls meet or where the wall meets the floor—requires a flexible sealant, not grout. Grout is rigid; houses move. If you use grout, it will crack within months, leading to moisture wicking behind your tiles. I personally use 100% silicone that matches my grout color. It’s a small detail that separates a ‘weekend warrior’ project from a professional-grade installation that lasts thirty years. If you’re already seeing cracks, you need to evaluate shower repairs: when to fix vs replace for longevity to ensure your framing isn’t rotting out. #IMAGE_PLACE_HOLDER_D#
How do I keep my shower and floors looking brand new for a decade?
Maintenance isn’t just about cleaning; it’s about preventative observation. For flooring, this means checking your transitions and baseboards twice a year. If you notice a gap widening, it’s a sign of a humidity issue or a failing adhesive. Applying a baseboards makeover isn’t just about aesthetics; it’s a chance to re-seal those bottom edges to prevent mop water from seeping under your planks. For carpets, the secret is a high-quality vacuum with an adjustable beater bar and professional steam cleaning every 12 to 18 months to maintain the fiber’s ‘memory.’ Following carpet install secrets like these will extend the life of your flooring by nearly 50%.
Sensors and Sustainability Are the Next Big Thing
Looking ahead, I predict a massive shift toward ‘smart’ flooring. We are already seeing the early stages of moisture-sensing underlayments that can send an alert to your phone if a leak starts under your dishwasher or shower pan. In the next few years, I expect these to become standard in high-end builds. Additionally, the industry is moving toward fully recyclable carpet tiles and PVC-free resilient flooring as consumers demand better indoor air quality. If you want to stay ahead of the curve, I strongly suggest investing in a professional-grade moisture meter for your kit; it is the one specific tip that will prevent a small leak from turning into a full-room demo. Grab one today and check the corners of your bathroom—you might be surprised by what you find.
Why My First DIY Floor Looked Great and Failed Within Months
I used to think that a pretty surface meant a job well done. I was wrong. The hardest lesson I learned is that the ‘pretty part’—the vinyl or the carpet—is only about 20% of the work. If you ignore the subfloor, you are building on sand. I once skipped the leveling process because the planks felt ‘sturdy’ enough, only to realize that the self-leveler mistake that creates new high spots was exactly what I should have been avoiding by doing a proper assessment first. I also realized that scuffs are inevitable, but a failing seam is a choice. Always trust the moisture meter test for concrete subfloors before you even open your boxes of flooring. It saves more heartaches than any tennis ball ever could. Most people focus on the visible grit, but the real longevity of your home happens in the prep work you can’t see.
The Small Gear That Makes a Massive Professional Difference
You don’t need a warehouse of tools, but you do need the right ones. For carpet, I tell everyone to stop relying on knee kickers alone; the power stretcher vs knee kicker debate isn’t even a contest if you want a wrinkle-free finish that stays tight for a decade. For your bathroom, keep a tube of high-grade silicone handy to respect the soft joint rule for shower wall corners. Finally, keep that DIY tennis-ball-on-a-stick in your utility closet. It sounds silly, but it is the most effective way to maintain that step-by-step flooring installation look long after the pros have left. These aren’t just gadgets; they are your insurance policy against a redo.
The Future of Your Home Starts Under Your Feet
Taking the time to fix a scuff or prep a subfloor isn’t just about maintenance; it is about pride in your space. Whether you are planning an upgrade for your bathroom or just trying to keep your living room pristine, remember that patience is your best tool. Your flooring installation is the foundation of your home’s aesthetic—treat it with the respect it deserves, and it will last a lifetime. Don’t be afraid to take it slow and get the details right, because those details are what turn a house into a sanctuary. Have you ever found a mysterious scuff that just wouldn’t budge? Let me know your cleaning wins (or fails) in the comments below!