

I stood there, sweat dripping off my forehead, looking at my brand new luxury vinyl planks. They were gorgeous. But then I looked at the edge. My old house has walls that aren’t exactly what you’d call ‘straight.’ There were gaps big enough to lose a remote control in. I did what everyone told me to do: I bought a stack of cheap, bulky quarter-round. I nailed it in, stood back, and my heart sank. It looked clunky, dated, and completely ruined the ‘modern’ vibe I was going for. It was a classic case of finishing a [step-by-step flooring installation](https://tilecraftsmens.com/step-by-step-flooring-installation-from-planning-to-perfect-finish) and then tripping at the finish line with the wrong trim. [image]
Why the Standard Quarter-Round Kills Your Home’s Style
It’s the default for a reason—it’s easy. But easy doesn’t always mean good. Quarter-round is essentially a 90-degree hunk of wood that screams ‘I’m covering up a mistake.’ When you’ve put in the work to [elevate your interior with simple updates](https://tilecraftsmens.com/baseboards-makeover-elevate-your-interior-with-simple-updates), the last thing you want is a trim that looks like a plastic toy. I learned the hard way that [flooring installation mistakes to avoid](https://tilecraftsmens.com/flooring-installation-mistakes-to-avoid-for-a-seamless-look) usually start with these small, finishing touches. I once tried to caulk a massive gap thinking paint would hide it, but it just created a wavy, dust-collecting mess that looked worse than the gap itself.
Is ditching the quarter-round actually worth the extra effort?
Look, I get it. You’re tired. You want the project done so you can finally put your furniture back. But according to the National Association of Home Builders (NAHB), modern interior trends are leaning heavily toward ‘minimalist trim’ and ‘clean transitions.’ In fact, well-executed trim can significantly impact the perceived value of a room by making it feel custom rather than ‘builder-grade.’ When I finally ripped out that quarter-round and used a slimmer profile, the room suddenly felt taller and more expensive. Have you ever finished a floor project only to feel like the trim made it look ‘cheap’ or unfinished?
Sleeker Ways to Hide That Gap Between Floor and Wall
The first thing I realized is that [choosing the perfect baseboards](https://tilecraftsmens.com/how-to-choose-the-perfect-baseboards-for-your-homes-style) is only half the battle. You need to know how to bridge the gap without the bulk. My favorite alternative is ‘shoe molding.’ It’s thinner and more vertical, which hides the expansion gap without sticking out two inches into the room. If you really want to go pro, you can use the [scribing tool every DIYer needs](https://tilecraftsmens.com/the-scribing-tool-every-diyer-needs-for-tight-baseboards) to fit your baseboards directly against the floor, but that takes some serious patience and a steady hand. We are going to dive into the exact tools and profiles that will give you that high-end look without the high-end price tag.
Swap the Clunky Quarter-Round for a Sleeker Shoe Molding
Shoe molding is the unsung hero of the flooring world. While quarter-round is a perfect 90-degree radius, shoe molding is taller and thinner, behaving like a slim-fit suit for your walls. It covers the same expansion gap but takes up less floor real estate, making the transition look intentional rather than like an afterthought. When I was working on a project last spring, I realized that staying current with baseboard trends in 2025 meant moving away from the heavy, rounded edges of the early 2000s and toward these sharper, more vertical profiles. Using shoe molding allows the eye to travel up the wall without being interrupted by a huge wooden bump at your feet. 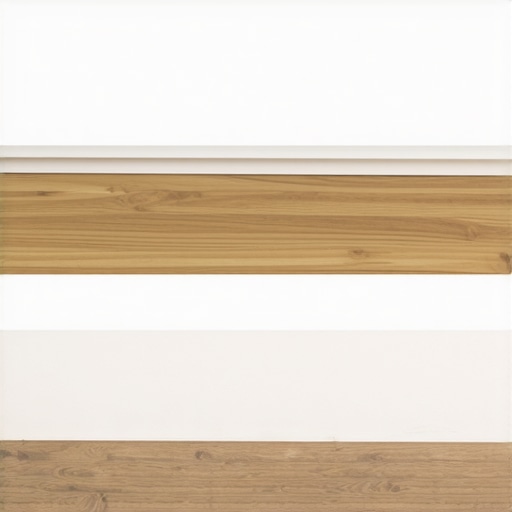
How to Secure the Molding Without Splitting the Wood
Because shoe molding is so thin, it is notorious for cracking the moment a nail hits it. I remember my first attempt at a ‘quick fix’ where I ended up wasting three whole sticks of trim because I was rushing. You need to stop baseboard splitting with this simple pre-drilling tactic: use a drill bit slightly smaller than your finish nail. It takes an extra ten seconds per hole, but it ensures the wood stays intact and the joint remains tight. Angle your nails downward into the baseboard, never into the floor itself, to allow the floor to expand and contract naturally.
Scribe Your Baseboards for a Custom Seamless Look
If you want to skip the extra layer of trim entirely, you have to master the art of scribing. This is where you literally trace the unevenness of your floor onto the bottom of your baseboard. It’s like tailoring a shirt to fit someone’s specific build. I once spent an entire afternoon in an old farmhouse where the floors dipped nearly an inch in the corners. By using the scribing tool every DIYer needs for tight baseboards, I was able to shave the bottom of the wood to follow those ‘waves’ perfectly. The result was a baseboard that looked like it grew right out of the floor.
Master the Tightest Corners with the Back-Bevel Trick
Even with perfect scribing, your corners can still fail you if you just do a standard 45-degree cut. If your walls are even slightly out of square—and they always are—the front edge of the miter will open up. The pro move is the back bevel secret for seamless baseboard corners. By cutting the miter at a slight inward angle on the back side, you ensure the front ‘tips’ of the wood touch first. This creates a hairline joint that stays closed even if the wall is wonky.
Fix Existing Gaps Without Ripping Up Your Trim
Sometimes, you aren’t starting from scratch and just need to deal with the gaps you already have. If you see daylight between your trim and the floor, don’t immediately reach for the crowbar. You can often learn how to fix baseboard gaps without replacing the trim by using high-quality flexible caulking or even small slivers of ‘shoe’ material. However, be careful with the type of filler you choose. I’ve seen many DIYers use standard painters’ caulk that dries rigid, only to see it pull away a month later. Knowing why your baseboard caulk is cracking and the flex-fill fix is the difference between a repair that lasts a decade and one that lasts a week. Choosing baseboard styles that elevate your interior design requires a balance between the right profile and the right installation technique.
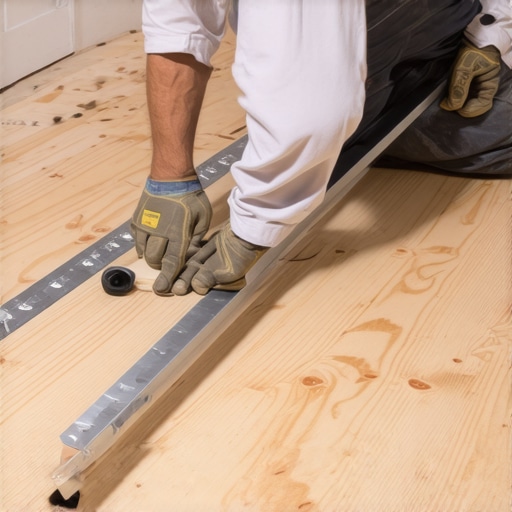
Let’s dig deeper into the technical nuances that separate a weekend warrior project from a professional-grade finish. Everyone tells you to level your floor before you even think about laying a plank. It sounds like common sense, right? But here’s the contrarian truth that most pros won’t tell you: a level floor is a luxury, but a flat floor is a non-negotiable requirement. I’ve seen homeowners spend hundreds on self-leveling compound to get a room perfectly level with the horizon, only to realize the compound itself created waves or high spots because it wasn’t worked correctly. The National Wood Flooring Association (NWFA) guidelines explicitly state that subfloors must be flat to within 3/16 of an inch over a 10-foot radius. If your whole house has a slight, natural tilt, your floor can safely follow that slope, but it cannot handle sudden hills and valleys. If you ignore this, you will inevitably run into those 4 subfloor prep mistakes that make new vinyl planks sound hollow or, even worse, cause the locking mechanisms to snap under daily foot traffic.
Then there’s the Oops factor in the world of soft flooring. Most people assume that to get a tight, wrinkle-free fit, you just need to exert more force with a knee kicker. This is a massive trap that can ruin a high-end investment in minutes. I’ve witnessed well-meaning DIYers literally delaminate the secondary backing of a carpet because they were being too aggressive with their strikes. To get a truly professional result, you should be focusing on carpet install secrets for achieving flawless results every time, which almost always involves using a power stretcher for the primary tensioning across the room. Relying solely on a kicker is a common knee kicker mistake that ruins carpet tension, leading to those frustrating ripples that appear just a few years after the furniture is moved back in.
Is a perfectly level shower floor actually a recipe for disaster?
In almost any other room, being perfectly level is a badge of honor. In a shower renovation, it is a functional failure. I once consulted on a project where the homeowner was incredibly proud of how level his new tile floor was. Unfortunately, two months later, the grout was permanently discolored and moldy because the water simply sat there instead of draining. According to the Tile Council of North America (TCNA), a shower floor must have a minimum slope of 1/4 inch per foot toward the drain to ensure proper evacuation. If you are planning a bathroom upgrade, mastering the dry pack secret for a perfectly sloped shower floor is the only way to avoid standing water. Without that precise pitch, you will be searching for shower repairs for longevity much sooner than you expected. Have you ever fallen into this trap where perfect was actually the enemy of functional? Let me know in the comments.
Once you’ve mastered the slope, you have to think about the long game. Maintenance isn’t just about cleaning; it’s about preventing the structural failures that lead to expensive tear-outs. I’ve spent years fixing grout cracks because people forgot one simple thing: movement. If you’re seeing separations where the wall meets the floor, you need to know how we fixed the grout crack in the shower corner for good by using color-matched silicone. This is actually a formal requirement. The Tile Council of North America (TCNA) Handbook, specifically Method EJ171, emphasizes that movement joints are non-negotiable every 20-25 feet in interior spaces and at every change of plane. If you ignore this, the natural expansion of your home will pop your tiles right off the thinset.
The One Tool I Refuse to Work Without
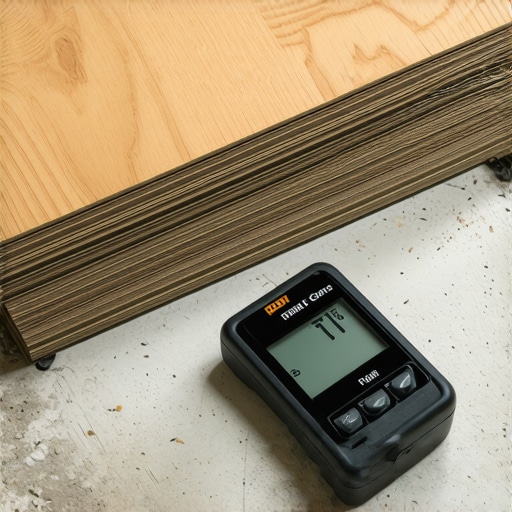
I never start a flooring job without my Tramex moisture meter. It sounds like overkill for a DIYer, but knowing if your slab is dry is the only way to ensure durable flooring installation for a stylish home. I once saw a ten-thousand-dollar hardwood floor buckle because the installer didn’t perform the concrete moisture test that saves your vinyl floor. For showers, my secret weapon is a simple laser level. It’s the only way to maintain the level line rule for starting your first row of shower tile. Without it, your tile pattern will slowly drift as you go up the wall, leaving you with ugly slivers at the ceiling.
How can I make my flooring last a lifetime?
Real longevity comes down to protecting the edges and the underlayment. For carpets, you must address ripples immediately; learning how to fix a bubbling carpet without calling a professional can save the backing from permanent creasing. For wet areas, you have to stop shower mold where the tile meets the tub with this fix: removing old caulk and applying a 100% silicone bead. I always recommend using the blue tape secret for professional shower silicone lines every time to ensure the seal is as beautiful as it is functional.
Prepare for the Smart Flooring Revolution
Looking toward top trends in installation for 2025 and beyond, we’re moving toward smart modularity. I’m already seeing prototypes for underlayments with built-in moisture sensors that sync to your phone to alert you of hidden leaks. We are also seeing a shift toward loose-lay systems that use friction rather than adhesives, making it easier to learn how to remove a single damaged floor board without ripping up the room. My advice? Go grab a tube of high-quality silicone today and swap out that cracked grout in your shower corners—it’s the single most effective way to scale your home’s maintenance routine before a small leak becomes a major renovation.
The Truth About Why My First Three Projects Failed
I used to think a tight fit was a sign of quality, but I learned that flooring installation mistakes to avoid usually involve not giving the material room to breathe. Expansion gaps are not suggestions; they are requirements for a floor that won’t buckle in the summer. Another lightbulb moment came when I realized that grout is not a structural adhesive. In wet areas, you must stop shower floor tiles from popping with the proper thinset coverage to ensure your hard work stays put for decades. Lastly, never underestimate the power of a scribe. It might take an extra hour to fit that baseboard to a wavy floor, but it saves you years of looking at a thick, dust-collecting line of caulk.
The Gear That Actually Lives in My Work Van
If you want professional results, you need a few non-negotiable tools that go beyond the basic hammer and tape measure. I never start a project without my Tramex Moisture Meter to check concrete slabs—skipping the concrete moisture test that saves your vinyl floor is the fastest way to ruin an expensive investment. For carpet, a power stretcher is mandatory; the power stretcher rule for large living room carpets is what separates a smooth, professional floor from a rippled mess that fails within three years. For tile, a high-quality laser level is your best friend to ensure your patterns don’t drift as they climb the wall.
#IMAGE_PLACEHOLDER_E#
Go Ahead and Make Your Home Incredible
You now have the technical secrets to move past “builder-grade” and into the realm of custom craftsmanship. Whether you are following baseboard trends in 2025 or finishing a complex flooring installation, the key is to prioritize the details that most people ignore. Take your time, trust your measurements, and don’t be afraid to pull a piece of trim and try again if it is not perfect. Your home is a reflection of your care, and these finishing touches make all the difference. Have you ever tried to scribe a baseboard only to realize your floor was even wonkier than you thought? Let me know your biggest DIY surprises in the comments below!