

There I was, standing in my newly finished master bath, admiring the gorgeous marble I’d just painstakingly installed. I turned on the shower to celebrate, expecting a spa-like retreat. Instead, five minutes later, I noticed a persistent, shimmering puddle near the back corner, nowhere near the drain. My heart sank. I’d done everything “by the book,” or so I thought, but I had ignored the most critical part of the foundation. That puddle wasn’t just a nuisance; it was a ticking time bomb for mold and grout failure. If you are planning an ultimate shower renovation, you cannot afford to skip the ‘Slope-Check’ Tactic. Today, I’m going to show you how to avoid the soul-crushing realization that your brand-new floor is holding water. We’re going to talk about the simple, low-tech way to ensure every drop finds the drain before you ever set a single tile. I learned this the hard way during a guest bath remodel where I assumed the plumber’s rough-in was perfect—it wasn’t, and I spent three days chipping out mortar because I was too “busy” to spend five minutes checking my angles.
Stop Your Shower From Turning Into a Mini Bathtub
The reality of flooring installation is that the prettiest tiles in the world won’t save a poorly pitched floor. Early in my career, I made the mistake of trusting a subfloor that “looked flat enough” to the naked eye. I didn’t use a dry pack method properly, and the result was a drainage nightmare that required expensive shower repairs. It’s a hard lesson to learn when you’re staring at a $5,000 mistake. According to the Tile Council of North America (TCNA), a shower floor requires a minimum slope of 1/4 inch per foot to ensure the water actually leaves the room. This slope is vital because water has surface tension; it likes to “grab” onto grout lines and textures. Without that aggressive pitch, you’ll find yourself dealing with “efflorescence”—that white crusty stuff—and eventually, a rotten subfloor. Have you ever finished a job only to realize the water was moving away from the drain instead of toward it? It’s a gut-punch that no DIYer or pro ever wants to feel.
Can a Simple Level Really Replace Expensive Tech?
It’s easy to get skeptical and think that modern waterproofing systems or pre-sloped trays do all the work for you. I’ve had neighbors ask me if they need to bother with manual checks if they bought a “perfect” foam kit. The answer is always a resounding yes. I’ve seen cases where a shower niche is collecting water simply because the installer didn’t double-check the “flatness” of their prep work before the final seal. The ‘Slope-Check’ Tactic is about verifying the reality of your floor before the mortar dries. It’s the difference between a floor that stays clean for years and one that starts smelling like a locker room within months. Before you dive into modern shower renovation ideas, you need to master this specific inspection technique. Let’s look at why this foundation work is the most important hour you’ll spend on your bathroom, even if it feels like you’re moving backwards at first.I remember a job where I rushed the dry pack method for a level shower base because the client was hosting a party in three days. I felt confident. I poured the mud, screeded it, and let it set. The next morning, I poured a cup of water on the far corner just to be sure. The water didn’t move. It sat there, staring back at me like a challenge. I had to spend four hours with a diamond cup wheel, grinding down cured mortar, creating a dust storm that took a week to clean up. That’s why the ‘Slope-Check’ isn’t optional.
Grab Your Straightest Level and a Pencil
To perform a proper check, you need a level that spans at least half the distance of your shower floor. If you’re working on a larger flooring installation project, the same principles of subfloor flatness apply, but in a shower, we’re looking for a specific pitch, not just level. Lay the level from the edge of the drain to the furthest corner. The dry fit test for shower drain alignment is your first real hurdle. If your drain is sitting too high, no amount of mud will fix the ‘lip’ that prevents water from exiting. You’ll end up with a ring of standing water right where the tile meets the metal grate.
Verify the Quarter-Inch Rule Without Guessing
According to code, you need a 1/4-inch drop for every foot of distance. If your shower is four feet wide, the perimeter should be exactly one inch higher than the drain. I use a small wood block cut exactly to one inch. I set it on the perimeter and rest my level on it, spanning toward the drain. If the bubble isn’t perfectly centered when resting on that block, the slope is off. This is a crucial part of any step-by-step flooring installation. It feels tedious, but it’s the only way to avoid expensive issues later. 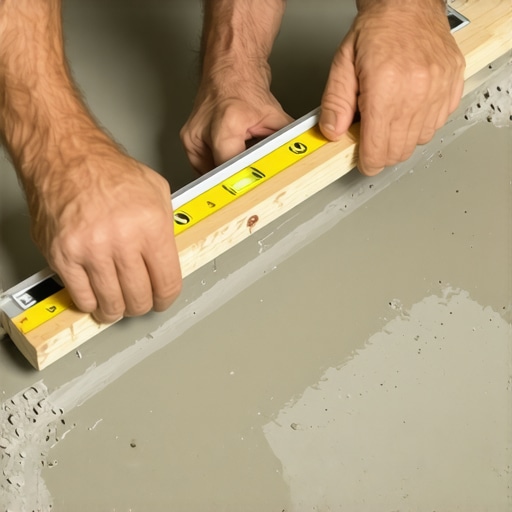
The Ping Pong Ball Trick for Real-World Testing
If you want to be 100% sure before you thinset your first tile, try the ping pong ball test. Once your mud bed is hard but before you apply your waterproofing membrane, place a ping pong ball at various points around the perimeter. It should roll directly and steadily toward the drain. If it stops or veers off toward a wall, you have a ‘birdbath’—a low spot where water will sit and eventually cause the grout to discolor. I’ve seen this happen even in professional ultimate shower renovation guide setups where the installer relied too much on a pre-sloped tray that wasn’t supported correctly from beneath.
Fix the Pitch While the Mud is Still Green
If you catch a low spot early, you can often ‘feather’ it out with a bit of extra floor patch or thinset. If you’re seeing flooring installation mistakes to avoid for a seamless look, it usually starts with ignoring these minor deviations. Use a flat trowel to pull the material from the high spot toward the low spot, effectively smoothing out the valley. Think of it like sanding wood; you’re looking for a continuous, unbroken line from point A to point B. If you wait until the tile is down, you’re looking at a full-scale shower fix vs replacement for longevity debate that nobody wants to have.Most people assume that as long as they’ve slathered on enough waterproofing membrane, the slope is just a suggestion. I’ve heard contractors say, ‘The membrane is watertight, so a little standing water doesn’t matter.’ That is a massive misconception. Standing water on a flat membrane eventually finds a way through microscopic pinholes or, more commonly, it creates a stagnant pool that leads to ‘osmotic blistering.’ This is where water trapped under the tile creates enough pressure to pop the bond. Even the most advanced carpet install secrets won’t help you if your subfloor moisture isn’t managed, but in a shower, this ‘flat spot’ becomes a breeding ground for bacteria.
Why Standing Water Destroys Even the Best Waterproofing
The reality is that waterproofing is meant to handle moisture, not a lake. When water sits, it creates a constant hydrostatic pressure. According to the ANSI A108 standards, surfaces must be prepared to allow complete drainage. If you ignore the slope because you trust your ‘paint-on’ membrane, you’re essentially building a shallow indoor pond beneath your tiles.
Why Do Your Bathroom Corners Keep Cracking?
If you’ve ever seen the vertical grout lines in a shower corner crack and crumble, you’re looking at a violation of the ‘change of plane’ rule. The common belief is that grout belongs everywhere there is a gap. In reality, the ANSI A108.01 standard specifically mandates that any change in plane (where wall meets wall, or wall meets floor) must be a flexible movement joint. If you use hard grout in these corners, the natural expansion and contraction of your home will pulverize it. This is why you must use the soft joint rule for shower wall corners. Skipping this doesn’t just look bad; it lets moisture seep behind the tile, often explaining why your shower niche is growing mold behind the tile. 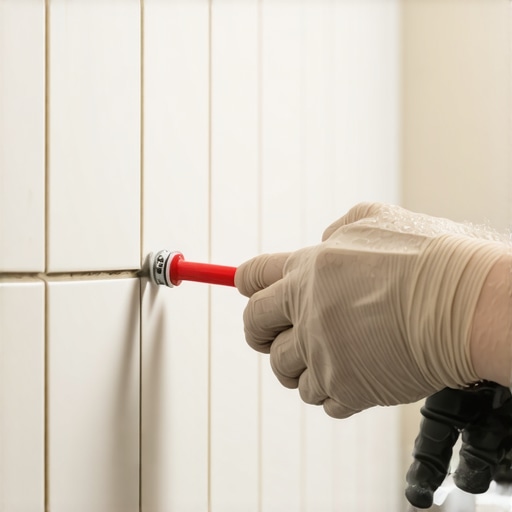
Fix Your Gaps Before the Caulk Fails
One of the biggest ‘traps’ I see involves baseboards. Many homeowners think that applying a thick bead of caulk will hide a poor fit. However, if your miters aren’t tight, you’ll find why your caulked baseboards are cracking within weeks as the house breathes. Instead of relying on caulk, pros use the back-cutting secret for baseboard miters to ensure the visible edges touch perfectly. Furthermore, understanding the painter caulk vs silicone guide for baseboards is vital. Silicone cannot be painted, yet I see people use it on baseboard tops all the time, only to realize they’ve created a permanent ‘shiny’ stripe that won’t take color.
The Power Stretcher is Not a Luxury
Moving from the bathroom to the bedroom, the biggest nuance in carpet is often ignored. A knee-kicker is for positioning, but a power stretcher is for the actual install. In the the power stretcher vs knee kicker debate, there is no contest for the professional. Without mechanical tension, your carpet will develop ripples within two years. The Carpet and Rug Institute (CRI) 104/105 standards are very clear: power stretching is a requirement, not an optional upgrade. It’s these small, technical choices—the ‘invisible’ work—that determine if your renovation lasts three years or thirty. Have you ever fallen into this trap of skipping a specialized tool and regretted it later? Let me know in the comments.Once the dust settles, most homeowners think the hard work is over. But I’ve found that the first six months are the most telling for any flooring installation. For instance, I always keep a high-quality moisture meter in my kit. I don’t just use it before the install; I check back on my personal projects every season. The ASTM F2170 standard, which governs relative humidity testing in concrete, isn’t just a suggestion for commercial sites; it’s the gold standard for anyone serious about the moisture meter test for concrete subfloors. If you aren’t checking your slab’s moisture levels periodically, you’re basically gambling with your adhesive’s life. When it comes to showers, maintenance isn’t just about scrubbing away soap scum. It’s about monitoring those soft joints we talked about earlier. I personally use a neutral-cure silicone for all my corner beads because it doesn’t shrink as much as the cheap stuff found in big-box stores. If you see even a hairline crack in a corner, don’t ignore it. That’s when you start moving from simple upkeep into the expensive territory of shower repairs vs replacement.
How can I keep my flooring and baseboards looking new for years?
The secret to longevity is often in the cleaning products you choose. Stop using those ‘all-in-one’ floor shines; they build up a waxy residue that eventually turns your beautiful wood or tile into a dull, sticky mess. For baseboards, I always suggest a semi-gloss or satin finish because they are significantly easier to wipe down. I’ve noticed a lot of people asking why white baseboards turn yellow, and it’s usually a combination of oil-based paints and a lack of natural light. If you’re looking at baseboard trends in 2025, you’ll see a shift toward more durable, moisture-resistant materials like PVC or high-density polymers in bathrooms to avoid this exact issue.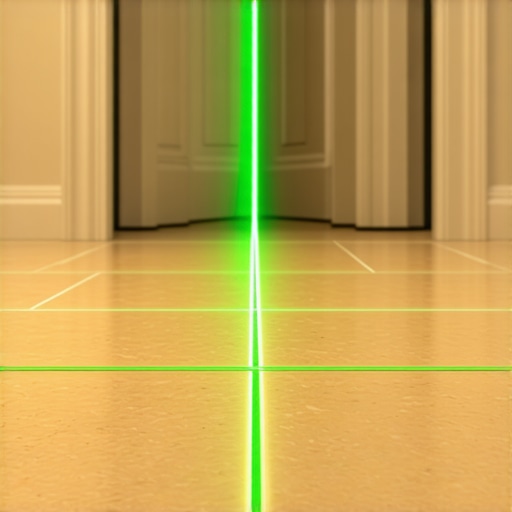 I predict that in the next few years, we’re going to see a massive surge in ‘smart’ underlayments—sensors built into the floor that can detect a slow pipe leak before it ever reaches your subfloor. We are already seeing the beginning of this with connected home systems, and it’s going to change the expert flooring installation tips for 2025 from ‘how to fix a leak’ to ‘how to prevent it entirely.’ If you take away one thing from my experiences, let it be this: buy or rent a 360-degree green beam laser level. It’s the only way to ensure your baseboard styles stay perfectly aligned across a whole floor, especially if you live in an older house that has settled unevenly. You’ll thank me when your miters actually line up without needing a gallon of wood filler.
Hard-Won Truths from a Decade in the Dust
After years of hands-on experience, I’ve realized that the most expensive tool you own is your ego. Early on, I thought I could outsmart the laws of physics with expensive sealants, but gravity always wins. If your shower doesn’t drain properly, it’s not a ‘minor issue’—it’s a total redo. I’ve learned that a guest’s first impression of your home is often built on the details you thought they wouldn’t notice, like how baseboard styles meet the floor or the actual tension of a well-stretched carpet. Here is what I know for sure: first, a subfloor that is ‘mostly level’ is actually a trap designed to fail. Second, your durable flooring installation depends entirely on what happens before the pretty tile goes down. Finally, always trust your moisture meter more than your eyes; concrete can look bone-dry while holding enough vapor to delaminate a whole floor within months.
What Stays in My Truck on Every Job
I don’t believe in buying every gadget at the hardware store, but there are four things I never leave behind. First is the 360-degree green beam laser level; it is the only way to avoid common flooring installation mistakes when you’re working across multiple rooms. Second, the TCNA Handbook is my absolute authority on tile standards. Third, I always keep a high-grade moisture meter for the moisture meter test for concrete subfloors—it’s the only way to sleep soundly after the job is done. Lastly, if I’m touching a bedroom, the power stretcher is non-negotiable. Using a knee-kicker alone is like trying to tighten a guitar string with your fingers; it just won’t stay in tune for long.
#IMAGE_PLACEHOLDER_A#
Stop Planning and Start Setting Your First Row
The transition from researching to doing is where the real magic happens. It’s okay to be nervous about that first bag of mortar or that first cut on an expensive wood plank. Every pro you see today started with a slightly crooked cut or a messy caulk line at some point. The difference between a DIY project and a professional finish is simply the willingness to slow down and double-check your work before it’s permanent. With these expert flooring installation tips for 2025 in your pocket, you have the foundation to build something that lasts decades. Which part of the ‘Slope-Check’ Tactic are you most nervous about trying in your own shower? Let me know below!