

I remember the first time I felt it. It was 3:00 AM, and I was shuffling to the kitchen for a glass of water. Suddenly, my heel caught on a sharp, raised ridge that definitely hadn’t been there when I finished the install two months prior. I flipped on the light, and there they were: little “tents” at the short ends of my laminate planks. I had worked so hard to avoid common flooring installation mistakes, yet my living room looked like a topographical map of the Rockies. It was heartbreaking. I felt like a failure because I thought I had followed the instructions to the letter. But laminate is a living, breathing thing—or at least it acts like one. Today, I’m going to show you exactly why those ends are lifting and how you can stop the pressure before your floor snaps for good.
Those Ridges Are Actually Your Floor Screaming for Help
Crowning at the short ends—where the narrow parts of the boards meet—is a classic sign of a floor under immense pressure. Think of it like a bridge that wasn’t built to handle heat expansion. When there’s no room to grow, the boards have nowhere to go but up. I learned the hard way that the expansion gap rule for heavy kitchen islands on laminate isn’t just a suggestion; it’s a survival requirement for your home. In my early DIY days, I made the mistake of thinking a quarter-inch gap was plenty. It wasn’t. During a particularly humid Michigan summer, that floor expanded so much it hit the wall and started buckling at the weakest points—the short joints. If you are seeing this, your floor is literally trying to grow larger than the room it is in. You might even hear it; if it’s accompanied by noise, you might want to investigate why your laminate floor is making a popping sound too.
Is your laminate floor actually unsalvageable?
You might be panicking, thinking you need to rip the whole thing up and start over. I’ve been there, staring at the floor and wondering if I should have just stuck to a simple carpet install. But here’s the good news: most crowning issues are reversible if you catch them before the locking mechanism snaps. In my house, I had wedged the boards too tight against the door casings because I wanted a “clean” look. I didn’t realize that using the under-cut move was the right way to maintain that gap while keeping it hidden. According to the North American Laminate Flooring Association (NALFA), laminate flooring can expand and contract significantly based on the relative humidity of the environment. Even a small shift in moisture levels can turn a flat floor into a series of peaks. Have you noticed your floor joints lifting during a specific season, or did it happen suddenly after a humid week? Knowing when it started is the first step to fixing the pressure. Now, let’s look at how to find the exact pinch point that’s causing your floor to rebel.
Find the Pinch Point That Is Killing Your Floor
To get that pressure off the joints, you have to find where the floor is hitting the ‘brakes.’ Imagine your floor is a giant sheet of ice on a pond. If the pond shrinks or the ice expands, it has to crack or buckle. Your laminate is doing exactly that. First, grab a pry bar. I learned that using the pry bar secret for removing baseboards without damaging the drywall is the only way to do this without creating a second project for yourself. Once those boards are off, look at the gap between the flooring and the wall studs. If the laminate is touching the wall at any point, that is your ‘pinch point.’ Even a single nail driven through the laminate into the subfloor can act like an anchor, causing the rest of the floor to buckle around it. 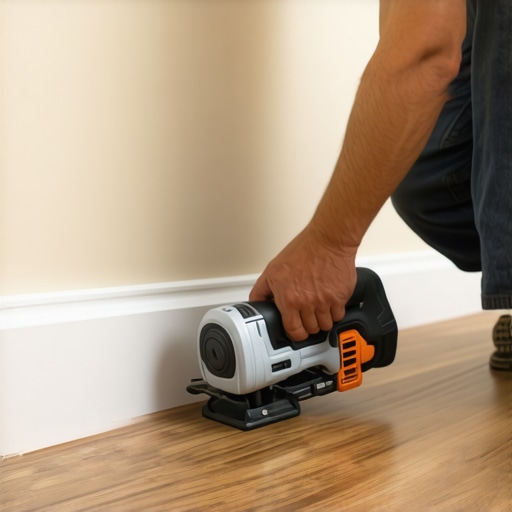
The T-Molding Secret for Those Miles of Laminate
I once spent four hours in a client’s hallway trying to figure out why the center was peaking. It turned out they had installed a heavy transition strip and screwed it directly through the laminate into the concrete. The floor could not move. I had to pull it all up and restart with step-by-step flooring installation logic. If your run is longer than 30 feet, you absolutely need the T-molding secret for long runs of laminate flooring. Without that break, the cumulative expansion is just too much for the locking systems to hold. It is like trying to keep a 100-car train on the tracks without any flexible couplings between the cars; eventually, something is going to derail at the weakest link.
Trim Your Way to a Flat Surface Again
If the floor is already buckled, you might need to trim the edges while it is still on the ground. A multi-tool (oscillating saw) is your best friend here. Carefully zip off about a quarter-inch of the laminate where it hits the wall. You will often hear a literal ‘pop’ or ‘sigh’ from the wood as the tension releases and the floor settles back down. After you have cleared the space, make sure you use the spacer block rule for consistent gaps when resetting your perimeter. While you have the baseboards off, it is the perfect time to think about an upgrade. Choosing baseboard styles that elevate your interior design can actually help hide larger expansion gaps. For example, a thicker baseboard allows you to leave a 1/2-inch gap for the floor to breathe without needing ugly shoe molding later. It is about working smarter to ensure the floor stays flat through every season.
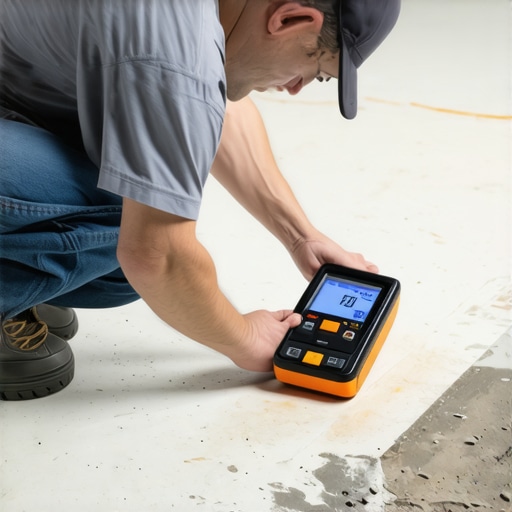
We’ve all heard the advice to ‘acclimate your floor,’ but here’s where most DIYers—and even some pros—get it completely wrong. They think sitting the boxes in the living room for 48 hours is a magic spell that prevents expansion. In reality, acclimation is a measurement, not a timer. If the humidity in your home during the install is 30% but it jumps to 60% in the summer, those ‘acclimated’ boards are still going to swell and peak. I’ve seen beautiful installs fail because the HVAC wasn’t running, or because the installer didn’t realize why we never skip the subfloor moisture test on concrete before the first plank even drops. If you aren’t testing the moisture content of your subfloor and comparing it to your planks, you’re just guessing.
Stop Treating Acclimation Like a Timer
The industry standard, often cited by groups like the National Wood Flooring Association (NWFA), emphasizes that the subfloor must be flat within 3/16 inch in a 10-foot radius. Most people skip the leveling phase, thinking the underlayment will hide the dips. It won’t. In fact, a dip in the subfloor causes the planks to flex every time you walk on them, which eventually snaps the locking mechanism. This is why your vinyl plank floor is telegraphing subfloor bumps or why your laminate joints feel soft. To fix this, you should master the self-leveler move for perfectly flat vinyl installs. It’s an extra day of work, but it’s the difference between a floor that lasts twenty years and one that fails in two.
Does Waterproof Really Mean Worry-Free?
Here is a sophisticated trap: the ‘waterproof’ label on modern laminate and LVP. Many homeowners assume this means they can ignore the moisture barrier move for concrete slabs. While the planks themselves might be waterproof, the moisture coming up from a concrete slab isn’t trying to rot the plank—it’s building up hydrostatic pressure that can push the joints apart or create mold underneath. I’ve walked into homes where the ‘waterproof’ floor was literally floating on a layer of vapor. Always use a 6-mil poly film if you are over concrete, regardless of what the box says about ‘integrated underlayment.’ This nuance separates the amateurs from the experts. Even when shifting gears to other rooms, the same level of precision is required. For instance, in a bedroom, you might fall for the knee kicker mistake that ruins luxury carpets. For a truly professional finish, you must use the power stretcher rule for large living room carpets. Have you ever fallen into this trap or noticed your ‘waterproof’ floor acting strange? Let me know in the comments. Let’s make sure your next project doesn’t just look good, but stays flat forever.
I realized early on that a beautiful install is only half the battle. If you aren’t protecting that investment with the right gear, you’re basically burning money. My go-to tool—the one I never step onto a job site without—is a high-quality pinless moisture meter. While many DIYers rely on the ‘touch test,’ the National Wood Flooring Association (NWFA) explicitly states in their Technical Publication No. A100 that subfloor moisture content must be precisely measured and documented. For laminate and LVP, staying within the manufacturer’s specified range is the only way to avoid the heartbreak of peaking joints. If you’re serious about your home’s value, stop guessing and start measuring. Knowing your numbers is the ultimate guide to durable flooring installation for a stylish home that actually lasts.
The Tool That Actually Tells the Truth
When I’m working on a project, I’ve found that the quality of your cuts dictates the longevity of the seams. I always follow the stay-sharp blade rule for cutting luxury vinyl. A dull blade doesn’t just make the job harder; it creates microscopic burrs in the locking mechanism that prevent a truly airtight seal. These tiny gaps are where moisture and dust eventually settle, leading to those annoying creaks. If you want to keep your floor pristine, you have to think about the microscopic level. This is especially true when you are working around complex areas like bathrooms. If you notice things are already starting to degrade, you’ll need to decide on shower repairs: when to fix vs replace for longevity. Maintenance isn’t just about cleaning; it’s about ensuring the structural integrity remains intact from day one.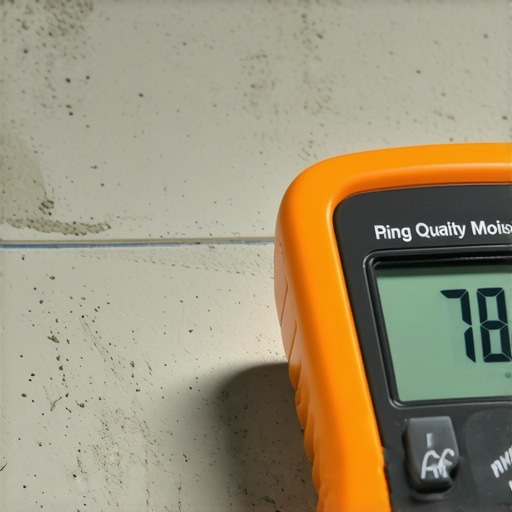
Why Your Vacuum is Better Than Your Mop
Most people reach for a wet mop the second they see a footprint on their laminate. Stop right there. Liquid is the enemy of the core board. Instead, I’ve perfected the vacuum seal trick for cleaning dust out of floor grooves. By using a specialized soft-brush attachment and a specific angle, you can pull out the grit that acts like sandpaper in your joints. This grit is what causes the protective wear layer to break down prematurely. Looking ahead, I predict we will see a massive shift toward modular flooring systems where individual planks can be replaced without dismantling the entire room—think of it as ‘plug-and-play’ for your home. We are already seeing the beginnings of this in top trends in installation for 2025.
How do I keep my shower looking brand new?
The secret to a long-lasting shower isn’t some expensive chemical cleaner; it’s the quality of the original silicone work. I always use the blue tape secret for professional shower silicone lines every time. When the silicone is applied perfectly, there are no ‘lips’ or ‘ridges’ for mold to take hold. This simple step prevents the need for a full ultimate shower renovation guide encounter every five years. If you really want to level up your DIY game, try using a moisture-curing sealant instead of standard hardware store caulk. It’s an advanced move, but it creates a bond that is practically bulletproof. Go ahead and try the blue tape trick on your next bathroom touch-up—it will change your life.I remember the first time I felt it. It was 3:00 AM, and I was shuffling to the kitchen for a glass of water. Suddenly, my heel caught on a sharp, raised ridge that definitely hadn’t been there when I finished the install two months prior. I flipped on the light, and there they were: little “tents” at the short ends of my laminate planks. I had worked so hard to avoid common flooring installation mistakes, yet my living room looked like a topographical map of the Rockies. It was heartbreaking. I felt like a failure because I thought I had followed the instructions to the letter. But laminate is a living, breathing thing—or at least it acts like one. Today, I’m going to show you exactly why those ends are lifting and how you can stop the pressure before your floor snaps for good.
Those Ridges Are Actually Your Floor Screaming for Help
Crowning at the short ends—where the narrow parts of the boards meet—is a classic sign of a floor under immense pressure. Think of it like a bridge that wasn’t built to handle heat expansion. When there’s no room to grow, the boards have nowhere to go but up. I learned the hard way that the expansion gap rule for heavy kitchen islands on laminate isn’t just a suggestion; it’s a survival requirement for your home. In my early DIY days, I made the mistake of thinking a quarter-inch gap was plenty. It wasn’t. During a particularly humid Michigan summer, that floor expanded so much it hit the wall and started buckling at the weakest points—the short joints. If you are seeing this, your floor is literally trying to grow larger than the room it is in. You might even hear it; if it’s accompanied by noise, you might want to investigate why your laminate floor is making a popping sound too.
Is your laminate floor actually unsalvageable?
You might be panicking, thinking you need to rip the whole thing up and start over. I’ve been there, staring at the floor and wondering if I should have just stuck to a simple carpet install. But here’s the good news: most crowning issues are reversible if you catch them before the locking mechanism snaps. In my house, I had wedged the boards too tight against the door casings because I wanted a “clean” look. I didn’t realize that using the under-cut move was the right way to maintain that gap while keeping it hidden. According to the North American Laminate Flooring Association (NALFA), laminate flooring can expand and contract significantly based on the relative humidity of the environment. Even a small shift in moisture levels can turn a flat floor into a series of peaks. Have you noticed your floor joints lifting during a specific season, or did it happen suddenly after a humid week? Knowing when it started is the first step to fixing the pressure. Now, let’s look at how to find the exact pinch point that’s causing your floor to rebel.
Find the Pinch Point That Is Killing Your Floor
To get that pressure off the joints, you have to find where the floor is hitting the ‘brakes.’ Imagine your floor is a giant sheet of ice on a pond. If the pond shrinks or the ice expands, it has to crack or buckle. Your laminate is doing exactly that. First, grab a pry bar. I learned that using the pry bar secret for removing baseboards without damaging the drywall is the only way to do this without creating a second project for yourself. Once those boards are off, look at the gap between the flooring and the wall studs. If the laminate is touching the wall at any point, that is your ‘pinch point.’ Even a single nail driven through the laminate into the subfloor can act like an anchor, causing the rest of the floor to buckle around it.
The T-Molding Secret for Those Miles of Laminate
I once spent four hours in a client’s hallway trying to figure out why the center was peaking. It turned out they had installed a heavy transition strip and screwed it directly through the laminate into the concrete. The floor could not move. I had to pull it all up and restart with step-by-step flooring installation logic. If your run is longer than 30 feet, you absolutely need the T-molding secret for long runs of laminate flooring. Without that break, the cumulative expansion is just too much for the locking systems to hold. It is like trying to keep a 100-car train on the tracks without any flexible couplings between the cars; eventually, something is going to derail at the weakest link.
Trim Your Way to a Flat Surface Again
If the floor is already buckled, you might need to trim the edges while it is still on the ground. A multi-tool (oscillating saw) is your best friend here. Carefully zip off about a quarter-inch of the laminate where it hits the wall. You will often hear a literal ‘pop’ or ‘sigh’ from the wood as the tension releases and the floor settles back down. After you have cleared the space, make sure you use the spacer block rule for consistent gaps when resetting your perimeter. While you have the baseboards off, it is the perfect time to think about an upgrade. Choosing baseboard styles that elevate your interior design can actually help hide larger expansion gaps. For example, a thicker baseboard allows you to leave a 1/2-inch gap for the floor to breathe without needing ugly shoe molding later. It is about working smarter to ensure the floor stays flat through every season.
We’ve all heard the advice to ‘acclimate your floor,’ but here’s where most DIYers—and even some pros—get it completely wrong. They think sitting the boxes in the living room for 48 hours is a magic spell that prevents expansion. In reality, acclimation is a measurement, not a timer. If the humidity in your home during the install is 30% but it jumps to 60% in the summer, those ‘acclimated’ boards are still going to swell and peak. I’ve seen beautiful installs fail because the HVAC wasn’t running, or because the installer didn’t realize why we never skip the subfloor moisture test on concrete before the first plank even drops. If you aren’t testing the moisture content of your subfloor and comparing it to your planks, you’re just guessing.
Stop Treating Acclimation Like a Timer
The industry standard, often cited by groups like the National Wood Flooring Association (NWFA), emphasizes that the subfloor must be flat within 3/16 inch in a 10-foot radius. Most people skip the leveling phase, thinking the underlayment will hide the dips. It won’t. In fact, a dip in the subfloor causes the planks to flex every time you walk on them, which eventually snaps the locking mechanism. This is why your vinyl plank floor is telegraphing subfloor bumps or why your laminate joints feel soft. To fix this, you should master the self-leveler move for perfectly flat vinyl installs. It’s an extra day of work, but it’s the difference between a floor that lasts twenty years and one that fails in two.
Does Waterproof Really Mean Worry-Free?
Here is a sophisticated trap: the ‘waterproof’ label on modern laminate and LVP. Many homeowners assume this means they can ignore the moisture barrier move for concrete slabs. While the planks themselves might be waterproof, the moisture coming up from a concrete slab isn’t trying to rot the plank—it’s building up hydrostatic pressure that can push the joints apart or create mold underneath. I’ve walked into homes where the ‘waterproof’ floor was literally floating on a layer of vapor. Always use a 6-mil poly film if you are over concrete, regardless of what the box says about ‘integrated underlayment.’ This nuance separates the amateurs from the experts. Even when shifting gears to other rooms, the same level of precision is required. For instance, in a bedroom, you might fall for the knee kicker mistake that ruins luxury carpets. For a truly professional finish, you must use the power stretcher rule for large living room carpets. Have you ever fallen into this trap or noticed your ‘waterproof’ floor acting strange? Let me know in the comments. Let’s make sure your next project doesn’t just look good, but stays flat forever.
I realized early on that a beautiful install is only half the battle. If you aren’t protecting that investment with the right gear, you’re basically burning money. My go-to tool—the one I never step onto a job site without—is a high-quality pinless moisture meter. While many DIYers rely on the ‘touch test,’ the National Wood Flooring Association (NWFA) explicitly states in their Technical Publication No. A100 that subfloor moisture content must be precisely measured and documented. For laminate and LVP, staying within the manufacturer’s specified range is the only way to avoid the heartbreak of peaking joints. If you’re serious about your home’s value, stop guessing and start measuring. Knowing your numbers is the ultimate guide to durable flooring installation for a stylish home that actually lasts.
The Tool That Actually Tells the Truth
When I’m working on a project, I’ve found that the quality of your cuts dictates the longevity of the seams. I always follow the stay-sharp blade rule for cutting luxury vinyl. A dull blade doesn’t just make the job harder; it creates microscopic burrs in the locking mechanism that prevent a truly airtight seal. These tiny gaps are where moisture and dust eventually settle, leading to those annoying creaks. If you want to keep your floor pristine, you have to think about the microscopic level. This is especially true when you are working around complex areas like bathrooms. If you notice things are already starting to degrade, you’ll need to decide on shower repairs: when to fix vs replace for longevity. Maintenance isn’t just about cleaning; it’s about ensuring the structural integrity remains intact from day one.
Why Your Vacuum is Better Than Your Mop
Most people reach for a wet mop the second they see a footprint on their laminate. Stop right there. Liquid is the enemy of the core board. Instead, I’ve perfected the vacuum seal trick for cleaning dust out of floor grooves. By using a specialized soft-brush attachment and a specific angle, you can pull out the grit that acts like sandpaper in your joints. This grit is what causes the protective wear layer to break down prematurely. Looking ahead, I predict we will see a massive shift toward modular flooring systems where individual planks can be replaced without dismantling the entire room—think of it as ‘plug-and-play’ for your home. We are already seeing the beginnings of this in top trends in installation for 2025.
How do I keep my shower looking brand new?
The secret to a long-lasting shower isn’t some expensive chemical cleaner; it’s the quality of the original silicone work. I always use the blue tape secret for professional shower silicone lines every time. When the silicone is applied perfectly, there are no ‘lips’ or ‘ridges’ for mold to take hold. This simple step prevents the need for a full ultimate shower renovation guide encounter every five years. If you really want to level up your DIY game, try using a moisture-curing sealant instead of standard hardware store caulk. It’s an advanced move, but it creates a bond that is practically bulletproof. Go ahead and try the blue tape trick on your next bathroom touch-up—it will change your life.
Lessons Bought with Sweat and Swollen Planks
I’ve learned that the biggest enemy of a flat floor isn’t the material itself, but our own impatience. One hard lesson I had early on was realizing that the weight of a heavy bookshelf can pin a floor down just as firmly as a nail, preventing the expansion we carefully planned for. Another lightbulb moment? Always vacuum the subfloor three times. Even a tiny pebble trapped in a locking joint will eventually cause a crunching sound that drives you crazy. Finally, never trust your eyes when a moisture meter can give you the truth; if you’re looking to stay ahead of the curve, keep an eye on top trends in installation for 2025 to see how newer materials handle these common stress points.
Tools That Saved My Knees and My Sanity
If you are building your toolkit, start with these essentials. First, a high-quality tapping block—not just a scrap of wood—will prevent you from damaging the delicate tongues of your planks. Second, I swear by the oscillating multi-tool for trimming door casings and baseboards in place when you need to release pressure. Third, for those looking to refresh their space, understanding baseboard trends in 2025 fresh styles for every room can help you choose the right profile to hide those necessary 1/2-inch expansion gaps. Lastly, a simple baseboards makeover is often the most cost-effective way to hide the scars of a pressure-release repair without needing a full renovation.
Take the First Step Toward a Flawless Floor
Now that you know how to spot the pinch points and release the built-up tension, you are already ahead of most weekend warriors. Remember, every master was once a beginner who accidentally buckled a floor. By following a guide to durable flooring installation for a stylish home, you aren’t just laying planks; you’re building a foundation for your life. Don’t be afraid of the expansion gap—it is your floor’s best friend. Have you ever had a floor start peaking in the middle of a room or noticed mysterious ridges? Let me know your experience in the comments below.