

I still remember the feeling of pride as I clicked that last vinyl plank into place in my kitchen. I’d spent all weekend on it, and it looked like a million bucks. Then, I walked across the room to grab a celebratory beer. Click. Pop. Crunch. It wasn’t the beer opening; it was my floor. Every step felt like I was walking on a bag of stale potato chips. I had ignored the subfloor because it looked ‘flat enough’ to my naked eye. That arrogance cost me an entire week of re-work and a lot of wasted material. If you’ve ever wondered why your vinyl plank floors are making a clicking sound, I can tell you from painful experience: your subfloor is lying to you. [IMAGE_PLACEHOLDER]
The Sound That Still Haunts My DIY Dreams
Most of us focus on the pretty part—the wood grain, the color, the texture. But the real magic happens in the ugly gray stuff underneath. When I first started out, I thought flooring installation was just about the top layer. I was wrong. A subfloor that’s even slightly out of whack will cause your luxury vinyl to flex, and that constant movement eventually snaps the locking mechanisms. That’s when the gaps start to show up. I once made the mistake of thinking a bit of extra underlayment would hide the dips. It didn’t. In fact, 4 subfloor prep mistakes that make new vinyl planks sound hollow usually start with the phrase ‘I’ll just fix it with thicker padding.’
Is self-leveler actually worth the mess?
I get the skepticism. Pouring a watery bag of cement into your living room feels like a recipe for disaster. You’re worried about it leaking through the floorboards or making a bigger mess than you started with. But here is the reality: the industry standard for most floating floors is a deviation of no more than 3/16 of an inch over a 10-foot span. According to the National Wood Flooring Association (NWFA), subfloor prep is the single most important factor in the longevity of any floor. Without that ‘self-leveler move,’ you’re essentially building a house on sand. If your floor isn’t flat, it will fail. It’s not a matter of if, but when. Have you ever felt that annoying ‘bounce’ under your feet and just tried to ignore it? Trust me, your floor won’t let you ignore it for long. We are going to dive into exactly how to execute this move without turning your house into a construction zone.
Prepping the stage for a flat finish
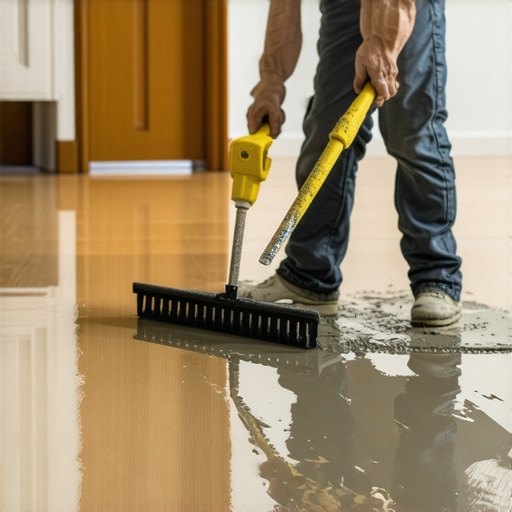
Before you even touch a bag of leveler, you have to realize that this stuff is basically liquid gravity. If there is a hole the size of a dime in your subfloor, the leveler will find it and escape. I learned this the hard way during a kitchen remodel when I ignored a small gap near the pantry. Half an hour later, I found a gray stalagmite growing on my lawnmower in the garage below. You must seal every perimeter gap and knot-hole with spray foam or caulk. This isn’t just about saving material; it’s about structural integrity. If the mix drains away, you’ll end up with a crater that’s harder to fix than the original dip. This is often why your self-leveling compound is cracking before the floor goes down—the moisture escapes too fast into the wood or through a leak.
Seal the wood to save the floor
Think of your wood subfloor like a giant sponge. If you pour wet cement directly onto it, the wood will suck the water out of the mix faster than you can spread it. This ‘flash drying’ ruins the bond. You need to apply a primer—it’s the glue that holds your floor’s future together. I usually roll it on until the wood looks ‘wet’ but not puddled. This ensures the leveler flows smoothly across the surface instead of grabbing and clumping like wet sand.
How to find the hidden valleys
You can’t fix what you can’t see. I use a ten-foot straightedge or a simple piece of mason’s string pulled tight across the room. If you can slide a stack of three pennies under the string, that spot is too low. This is the ‘penny rule’ for flats, and it’s much more reliable than your eyes. Once you’ve marked your low spots with a pencil, you’re ready for the main event. If you skip this, you’re just guessing, and guessing is flooring installation mistakes to avoid for a seamless look 101.
Mix it thin but not watery
Mixing is where most people panic. You need a high-torque drill and a mixing paddle. The consistency should be like heavy cream or pancake batter. If it’s too thick, it won’t ‘self-level’ and you’ll be left with ridges. If it’s too thin, it loses its strength. When I’m working alone, I mix two bags at a time so I can maintain a ‘wet edge.’ If one batch starts to dry before the next one hits it, you’ll get a visible seam that will eventually result in you wondering how to fix a hollow sound under your vinyl plank floor.
Spread and feather with a gauge rake
Don’t just pour and walk away. Use a gauge rake or a large flat trowel to push the material into the corners. You want to ‘feather’ the edges where the leveler meets the high spots of the floor, creating a ramp so gradual that the vinyl planks won’t even feel it. Once it’s down, leave it alone for at least 24 hours. Walking on it too soon is a death sentence for the finish. Later, when you start the actual layout, remember that the block and hammer move for tight vinyl floor joints only works if the surface below is as flat as a billiard table.
Stop believing the thick padding lie
If you think you’re doing yourself a favor by buying that 1/2-inch thick ‘ultra-plush’ underlayment for your vinyl planks, you’re actually setting a trap for your future self. Most homeowners believe more cushion equals more luxury, but in the world of floating floors, ‘cushion’ is often just another word for ‘vertical movement.’ When you step on a plank that has too much give beneath it, you are putting immense pressure on the tongue-and-groove joint. According to the North American Laminate Flooring Association (NALFA), using an underlayment that exceeds the manufacturer’s thickness specification can void your warranty and lead to catastrophic joint failure. I once saw a beautiful $5,000 floor ruined because the owner wanted it to ‘feel like a cloud.’ Instead, it felt like a trampoline that eventually snapped its own spine. This is a common nuance often missed even in carpet install secrets where density matters more than thickness.
The structural perimeter trap
This leads to a massive mistake I see in both step-by-step flooring installation and long-term maintenance: ignoring the structural perimeter. People obsess over the center of the room but forget how the edges interact with the walls. If you don’t account for how the floor ‘breathes’ near heat sources, you’ll find that vinyl flooring separates near vents almost every single time. The localized heat causes the material to expand at a different rate than the rest of the room, creating a ‘pull’ that the locking system can’t handle. It’s a nuance that separates the pros from the ‘weekend warriors.’ Have you ever fallen into this trap? Let me know in the comments.

Why do my baseboards pull away from the floor after a month?
It’s a frustrating sight: you spend hours getting your trim perfect, only to see a 1/8-inch gap appear between the wood and the floor weeks later. Most DIYers assume the floor settled, but the truth is often that the baseboard was pinned too tight to the subfloor. You have to let the floor ‘float’ beneath the trim. If you’re struggling with corners, using the back cut secret for tight baseboard outside corners is great for aesthetics, but the mechanical installation is what determines longevity. If you nail the baseboard into the floor rather than the wall studs, you’ve essentially locked the ‘floating’ floor in place, causing it to buckle elsewhere. Whether you’re following baseboard trends in 2025 or updating a classic ranch-style home, the physics remain the same. Avoid the stair-step pattern mistake that weakens vinyl joints by ensuring your first and last rows have the room they need to move. If you don’t, the floor will eventually push the baseboard right off the wall or buckle in the middle of your hallway.
The one tool that separates pros from pretenders
After a decade of DIY, I’ve learned that the difference between a job that looks ‘homemade’ and one that looks ‘architectural’ is usually a $15 piece of plastic. I used to spend hours trying to cut baseboards to fit against wavy drywall, only to end up with gaps I’d have to fill with a mountain of caulk. Then I found the scribing tool every diyer needs for tight baseboards. It allows you to trace the literal curve of your wall onto the wood. It’s the same logic I use for the under-cut move for fitting flooring perfectly under door casings. You aren’t forcing the material to fit; you’re shaping it to the reality of your home’s imperfections. I personally never walk onto a job site without a high-quality oscillating multi-tool for those door jambs—it’s the only way to get that ‘slotted in’ look that makes people ask if you hired a pro.
How do I keep my flooring joints tight over time?
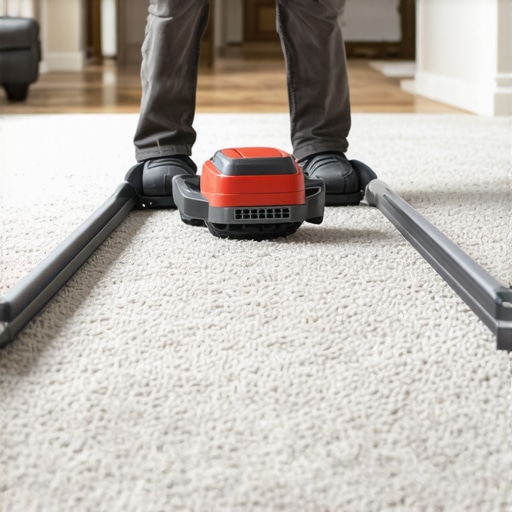
Maintenance isn’t just about mopping; it’s about structural vigilance. For vinyl and laminate, I swear by a vacuum with a soft brush attachment. Grit is the ultimate enemy of your locking system. If sand gets into those joints, it acts like sandpaper every time you walk across the room, grinding down the PVC or HDF core until the floor starts to click and separate. If you’re dealing with carpet, the rule is even stricter. According to the Carpet and Rug Institute (CRI) 105 Standard for Residential Carpet Installation, a power stretcher must be used on every installation, regardless of room size. If you or your contractor only used a knee kicker, your carpet will inevitably develop ripples within two years. I always tell people to follow the power stretcher rule for large living room carpets to ensure that tension stays permanent. It’s much harder to fix a ripple later than it is to stretch it right the first time.
The future of flooring is modular and sustainable
Looking ahead, we are seeing a massive shift toward circular economies in home renovation. As we look at transform-your-flooring-top-trends-in-installation-for-2025, the focus isn’t just on looks, but on ‘deconstructability.’ We’re moving toward floors that can be easily unclicked and recycled without ending up in a landfill. This means the precision of your initial install is even more important because these materials are designed to be moved and reused. Even in the bathroom, we are moving away from ‘patch-job’ mentality and toward better shower-repairs-when-to-fix-vs-replace-for-longevity. Don’t be afraid to invest in high-quality transitions early on. Learning how to transition from thick carpet to thin vinyl without a lip is a small skill that adds massive resale value because it proves the home was cared for by someone who knew the physics of the house. I challenge you: on your next project, don’t just ‘eyeball’ the wall—get a scribe and see how much better that baseboard fits. You’ll never go back to caulk-heavy corners again.
The Hardest Lessons My Knees and Wallet Ever Had to Learn
After years of trial and error, I’ve realized that the most expensive mistake you can make is rushing the invisible steps. If I could go back and talk to my younger self, I’d emphasize that patience is your most valuable tool. I once tried to lay planks over leveler that was ‘mostly’ dry, only to have the moisture trap itself and ruin the adhesive. Always wait the full 24 hours. Another epiphany was the importance of lighting; if you aren’t using a side-light to spot shadows on your subfloor, you aren’t actually seeing the dips. Finally, never settle for ‘good enough’ when it comes to the perimeter. If you find yourself saying ‘the trim will cover that gap,’ you are likely ignoring a structural issue that will cause a click later. Precision in your step-by-step flooring installation pays dividends in silence and durability for decades.
My Go-To Gear for Professional-Grade Finishes
You don’t need a warehouse of tools, but you do need these four essentials. First, a dedicated scribing tool is non-negotiable for a baseboards makeover that actually looks high-end. Second, for any carpet project, ignore the temptation to just use a knee-kicker; following the power stretcher rule for large living room carpets is the only way to prevent ripples. Third, a high-quality 10-foot straightedge is your diagnostic doctor—it tells you exactly where the subfloor is ‘lying’ to you. Lastly, I always keep a bottle of moisture-wicking primer on hand to ensure that self-leveler bonds like iron to the wood beneath it.
Your Path to a Floor That Doesn’t Make a Sound
Walking across a newly finished room should be a silent, solid experience that brings a sense of accomplishment, not a chorus of clicks and pops. By taking the time to master the subfloor and respecting the physics of your materials, you are doing more than just ‘renovating’—you are building a foundation for your home’s future. Don’t be intimidated by the technical specs; just take it one square foot at a time. This level of care in your flooring installation is what separates a temporary fix from a lifetime investment. If you have any specific questions about your unique layout or run into a snag, feel free to contact us for guidance. Have you ever pulled up old flooring only to find a ‘surprise’ underneath that completely changed your plans? Let me know in the comments below!