

I remember kneeling on my hands and knees in my first fixer-upper, rolling out what I thought was going to be a flawless flooring job, and then—thunk. My knee hit a hollow spot that felt like a secret trapdoor. It wasn’t a trapdoor, of course. It was a massive, two-inch dip in the plywood that I had conveniently ignored during the demolition phase because I was too tired to deal with it. I thought the padding would hide it. I was wrong. That one little oversight turned into a squeaky, bouncy mess that mocked me every time I walked to the kitchen. Dealing with a sagging floor is frustrating, but I’ve learned the hard way that you don’t always have to rip the whole house apart to fix it.
Stop Ignoring the Dip Before It Ruins Your New Floor
When you are deep into expert flooring installation, a dip in the subfloor feels like a roadblock you just don’t have time for. But if you try to bridge that gap with rigid planks or even thick carpet, you are asking for trouble. I once made the mistake of thinking I could just ‘float’ some vinyl over a valley in the hallway. Within three months, I was searching for answers on why your vinyl plank floor is clicking when you walk. The reality is that the floor needs a solid foundation to rest on. If there is air under your flooring, the tongue-and-groove joints will eventually snap under the pressure of your footsteps. According to the National Wood Flooring Association (NWFA), a subfloor should be flat to within 3/16 of an inch over a 10-foot radius to ensure long-term stability. If you’re past that mark, it’s time to stop the denial and start the repair.
Is this fix really going to hold up over time?
I get it. You’re worried that adding layers of compound or shims on top of an old subfloor is just a ‘band-aid’ fix. You might be thinking that the only real way to sleep at night is to rip up the old sheets and sister the joists. While that is the gold standard for structural sagging, most of the dips we encounter are just settled plywood or minor joist shrinkage. Using the self-leveler move for perfectly flat vinyl installs is a game-changer that can save you three days of back-breaking labor. We are talking about filling the void, not rebuilding the foundation. Today, I want to show you how to identify if your dip is a simple ‘valley’ or a structural ‘sinkhole’ and how to fill it so your carpet install secrets stay secret. Have you ever walked across a room and felt like you were suddenly stepping into a hole? Tell me about your most annoying floor dip in the comments—I’ve seen some doozies!
Grab Your Straight Edge and Map the Low Spots
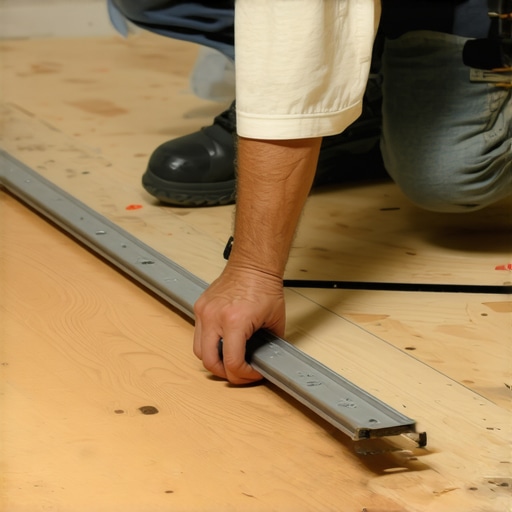
Think of your subfloor like a topography map; those invisible valleys are exactly what cause your finished floor to fail. To find them, you need a six-foot or ten-foot straight edge—a level or even a perfectly straight 2×4 will work in a pinch. Lay it across the floor and look for light peeking through underneath. If you see a gap larger than 3/16 of an inch, you’ve found the culprit. I remember working on an old 1940s colonial where the hallway felt like a gentle rolling wave. I ignored it at first, but once the light hit the new planks, the floor looked like a funhouse mirror because I didn’t realize why your vinyl plank floor is telegraphing subfloor bumps so aggressively. You have to mark the perimeter of every dip with a pencil so you know exactly where your filler needs to go.
Stop the Squeaks Before You Seal Them In
Before you even think about pouring a leveling compound, you have to address the noise. A dip is often a sign of a loose subfloor panel rubbing against a joist. If you pour leveler over a squeaky spot, the movement will eventually crack the dried compound into a powdery mess. I use the soap bottle trick for finding hidden subfloor squeaks to pinpoint the exact location. Drive a few 2-inch flooring screws into the joists to pull that plywood tight. It’s the cheapest insurance policy you’ll ever buy for your home.
The Self-Leveler Move for Deep Valleys
When the dip is significant, liquid gold—also known as self-leveling underlayment—is your best friend. But here is where most DIYers trip up: they skip the primer. Plywood is incredibly thirsty. If you pour leveler directly onto dry wood, the plywood will suck the moisture out of the mix before it has a chance to flow, leaving you with a chunky, unworkable pile of grit. This is a common reason why your floor leveler is cracking over plywood just weeks after the job is done. Brush on a high-quality primer, let it get tacky, and then pour. I once tried to ‘wing it’ without primer in a small bathroom, and within ten minutes, I was frantically trying to scrape up a half-cured mountain of sludge with a putty knife. It was a nightmare. Now, I always use a spiked roller to pop air bubbles and help the mixture find its own level.
Bridge the Gap for Carpets and Baseboards
If you are prepping for a carpet install, you have a bit more wiggle room, but large dips will still cause the padding to bottom out over time. For dips near the perimeter of the room, you also have to consider your trim. A sagging floor leaves a massive gap under your molding that even the thickest caulk can’t hide. I often use the wood shim secret for baseboards on uneven slabs to support the trim while I work, but the real fix is getting that floor flat first. If you’re working in a basement, don’t forget to check the moisture meter requirement for basement flooring jobs before applying any patches, as trapped dampness will ruin your hard work from the bottom up.
While most homeowners focus on the color of the planks or the softness of the pile, the real expertise lies in what you can’t see. I used to think that the softer the cushion, the better the carpet. It sounds logical, right? But this is one of those common traps where ‘more’ is actually ‘less.’ If you choose a pad that is too thick or too soft, it creates a trampoline effect that pulls on the carpet’s backing every time you take a step. This lead to a frustrating phenomenon why your carpet pad feels crunchy under your feet as the cells of the foam break down prematurely. According to the Carpet and Rug Institute (CRI) 105 standards, residential padding should generally not exceed 7/16 of an inch for most cut-pile carpets. Anything more actually shortens the life of your floor by over-stressing the seams.
Is my installer cutting corners by skipping the power stretcher?
In short: yes. If you see an installer walking around with just a knee kicker for a 20-foot living room, they are doing it wrong. A knee kicker is meant for positioning and small adjustments, not for providing the tension required to keep a floor flat for a decade. This is precisely why your carpet is buckling only three years later. To avoid those unsightly ripples, the power stretcher rule for large living room carpets is non-negotiable. It uses mechanical leverage to pull the carpet taut from wall to wall, ensuring it stays put even when the humidity shifts. Have you ever fallen into this trap where a ‘pro’ finished a room in record time only for it to look like a sea of waves a year later? Let me know in the comments.
Stop Trying to Fix Bad Miters With Caulk
Moving from the floor to the walls, the nuance of baseboards often separates the amateurs from the masters. I’ve seen people try to hide massive gaps in outside corners with a half-tube of painter’s caulk, only to have it crack and turn yellow six months later. The ‘oops’ factor here is relying on the wall to be square. It never is. Instead of a standard 45-degree cut, I always use the back bevel move for tight baseboard miters. By shaving the back of the joint, you allow the front edges to meet perfectly even if the drywall has a massive glob of mud behind it. For inside corners, forget the miter saw entirely. Using the inside corner cope for perfect baseboard installs ensures that when the house settles, the joint stays tight instead of opening up like a hungry mouth.
The Invisible Failure of Modern Showers
If you are tackling a bathroom, the biggest nuance is the ‘false sense of security’ provided by waterproof backer boards. People think that because the board is waterproof, the shower is waterproof. That couldn’t be further from the truth. Water finds the screws and the seams. This is why your shower niche keeps leaking through the bathroom wall despite your best efforts. I never set a single tile without the liquid membrane move for fail-proof shower pans, which creates a continuous, rubberized bathtub-like seal under your tile. Always finish the build with a stop shower pan leaks with the flood test requirement—plug the drain and let it sit for 24 hours. If the water level drops even an eighth of an inch, you’ve got a problem that no amount of grout can fix. It’s better to find out now than when your kitchen ceiling starts dripping.
Once the dust settles and the last piece of trim is snapped into place, you enter the most overlooked phase of the project: the long game. I’ve seen stunning $20,000 installations look like a disaster within two years because the homeowner didn’t have a plan for upkeep. It starts with the tools you keep in your garage. I’m a bit of a fanatic about my gear, specifically when it comes to cutting. Using the stay sharp blade rule for cutting luxury vinyl isn’t just about making the work easier; it’s about preventing micro-frays in the wear layer that trap dirt and moisture. I personally swear by carbide-tipped 80-tooth blades for my miter saw. If you see smoke or smell burning wood, stop immediately. A dull blade doesn’t cut; it crushes, and that structural damage at the seam is where your floor will first start to fail.
How do I keep these surfaces looking brand new for years?
Maintenance isn’t just about a weekly mop. For hardwood, the biggest threat is friction. I tell every client that they need to stop hardwood scratches with the felt pad routine before they even move the sofa back into the room. According to the Carpet and Rug Institute (CRI) 204 standards for commercial maintenance, even high-traffic carpet requires a deep extraction every 12 to 18 months to remove the abrasive soil that acts like sandpaper on the fibers. If you’ve already got a few battle scars from the move, don’t panic. You can often use the iron and towel trick for fixing carpet dents to revive crushed fibers, and a similar heat-based method works for minor hardwood dings too. For those deep grooves in textured LVP, I always recommend the vacuum seal trick for cleaning dust out of floor grooves to prevent buildup that ruins the aesthetic.
Looking ahead, the flooring world is moving toward ‘biophilic’ designs and integrated tech. I predict that within five years, we will see moisture-sensing underlayments as standard in every expert flooring installation. We are already seeing ‘smart’ tiles that can detect leaks behind a shower wall. Until that becomes affordable, your best defense is still a perfect seal. I never finish a bathroom without the masking tape trick for clean silicone joints. It ensures that the water stays in the pan and out of your subfloor. If you really want to level up your DIY game, go grab a high-quality moisture meter today. It’s the one tool that has saved me more money than any other by telling me when a slab is actually ready for a finish. My challenge to you: go check the felt pads on your dining chairs tonight. If they are worn through or missing, you’re currently sanding your floors every time you sit down for dinner. Replace them now and save yourself a massive refinishing bill later!
Hard Lessons from the Subfloor Trenches
Over the years, I’ve learned that the smallest shortcuts usually lead to the biggest headaches. One lightbulb moment happened when I realized that most of my call-backs weren’t due to the product, but the prep work. For instance, why we never skip the subfloor moisture test on concrete became my golden rule after a laminate job literally puffed up overnight because of invisible rising dampness. I also stopped relying on my knees so much after learning about the knee kicker mistake that ruins luxury carpets; a power stretcher is simply better for both the carpet and your joints. Finally, I’ll never forget the sound of a nail hitting copper—learning how to fix a baseboard nail that hit a water pipe immediately is a skill I hope you never need, but you should definitely have it in your back pocket.
The Gear That Never Leaves My Truck
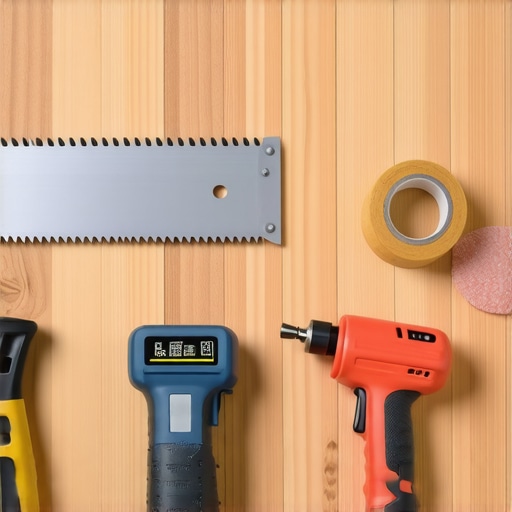
You don’t need a warehouse full of tools, but you do need the right ones for the high-stakes moments. I always keep a high-quality moisture meter handy, especially for the moisture meter requirement for basement flooring jobs, because guessing is just gambling with your renovation budget. For my finish work, the coping saw technique for flawless inside baseboard corners is the only way I can guarantee a tight joint even in a house with wonky walls. When it comes to tiling, I don’t trust my eyes alone anymore; the laser level move for perfectly horizontal shower tiles ensures that my first row is dead-on, which makes the rest of the wall a breeze. These aren’t just gadgets—they are the bridge between a DIY look and a professional finish.
Own Your Space One Plank at a Time
Taking on an expert flooring installation or a full bathroom renovation can feel overwhelming when you look at the total square footage. But remember, a great floor is built one plank, one tile, and one bead of caulk at a time. Don’t be afraid to slow down and check your work frequently. Whether you are applying carpet install secrets to your first bedroom or wrestling with a tricky corner, the pride of walking across a floor you laid yourself is worth every drop of sweat. You’ve got the knowledge now—it’s time to pick up the tools and make it happen. What’s the one flooring mistake you’re most afraid of making? Let’s talk about it in the comments below!