

I remember standing in the middle of my 1920s bungalow, staring down at what I’d done. I’d spent three days carefully fitting new red oak boards into the spot where an old radiator used to sit. From five feet away, it looked fine. But the moment the afternoon sun hit that corner, the illusion shattered. My new boards had tight, boring vertical lines, while the original floor boasted wild, swirling ‘cathedrals’ that looked like a thumbprint from nature herself. It looked like a cheap toupee on a luxury car. I’d missed the grain, and in the world of restoration, the grain is your entire reputation.
Stop Treating Your Hardwood Like a Generic Puzzle Piece
If you are looking at a hole in your floor right now, your first instinct is probably to run to the big-box store and grab a bundle of whatever species matches your receipt. Please, don’t do that yet. When I first started, I made the amateur mistake of assuming ‘Red Oak’ meant everything would just blend together once the stain hit. I was wrong. Wood is a living history, and if you don’t use the grain mapping secret for seamless hardwood floor patches, your repair will scream ‘DIY gone wrong’ every time you walk over it. To get this right, we need to talk about how the wood was actually sawn—whether it’s plain-sawn, quarter-sawn, or rift-sawn—because that determines how those fibers catch the light. You are not just laying wood; you are matching an era.
Will a Professional Really Notice if the Grain is Slightly Off?
Most people think they can hide a poor grain match with a dark stain. Trust me, you can’t. According to the USDA Forest Products Laboratory, wood is an anisotropic material, meaning its appearance and physical properties change based on the direction of the grain. This isn’t just about ‘looks’; it’s about how the wood moves. If your patch doesn’t match the orientation of the surrounding boards, you might end up with uneven expansion. Before you even pick up a saw, you should check out my step-by-step flooring installation guide to make sure your subfloor is ready for the surgery we are about to perform.
The Promise of a Seamless Restoration
Today, I’m going to show you how to look at a piece of raw lumber and ‘see’ the finished floor before you even buy it. We are going to solve the problem of the ‘eye-sore patch’ once and for all. You’ll learn how to identify the growth ring patterns in your existing floor and how to hunt for the perfect ‘donor’ boards that mimic those movements. We’ll also touch on why the acclimation test for avoiding hardwood floor gaps is the only way to ensure your hard work doesn’t shrink away two months later. Have you ever finished a repair only to realize the new boards look like they belong in a completely different house? Tell me about your flooring ‘Frankenstein’ moments in the comments—I’ve definitely had my share. Let’s make sure your next patch is actually invisible by following these flooring installation mistakes to avoid for a seamless look.
Look at the End Grain Before You Reach for Your Wallet
To make a patch disappear, you have to think like the sawyer who cut the tree eighty years ago. Grab a scrap piece of your existing floor or look at the cut ends of the boards you are replacing. If the growth rings are nearly vertical (roughly 90 degrees to the face), you are looking at quarter-sawn wood. If they are curvy and arched, that is plain-sawn. This is the foundation of the grain mapping secret for seamless hardwood floor patches. I once spent an entire Saturday morning at a lumber yard flipping through forty different bundles of red oak just to find three boards that had the right ‘flame’ pattern for a 1940s hallway. The yard manager thought I was crazy until I showed him the photo of the ‘Frankenstein’ patch I was trying to replace. Finding a match isn’t luck; it is a scavenger hunt.
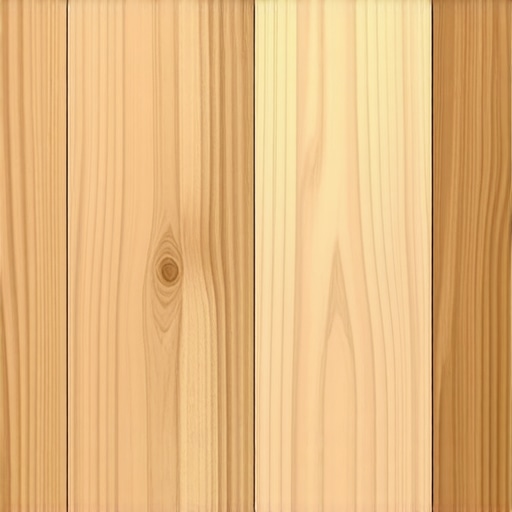
How to Hunt for the Perfect Donor Board
Do not just look at the species; look at the density of the lines. Old-growth timber has very tight rings because the trees grew slowly in crowded forests. Modern lumber often has wider gaps between the dark lines. If your home was built before 1950, you might need to visit a salvage yard or specifically request ‘select’ grade lumber to avoid the rustic knots that characterize cheaper modern bundles. This is where the acclimation test for avoiding hardwood floor gaps becomes your best friend. Even the perfect visual match will fail if the moisture content is not identical to the existing floor. If you are working with wider boards, you should also consider the glue-assist strategy for wide plank hardwood installs to keep that grain perfectly aligned and prevent cupping over time.
The Surgery Phase: Cutting and Prepping the Subfloor
Once you have found your ‘unicorn’ boards, the actual installation requires surgical precision. You are not just slapping wood down; you need to ensure the subfloor is rock solid. I always use the subfloor screw routine for stopping floor squeaks before the new boards go in. If the subfloor moves, the finish on your beautiful grain match will crack at the seams. When you make your final cuts, use a sharp carbide blade to prevent splintering—something that often happens when your engineered hardwood is splintering at the edges due to dull equipment. Also, remember to maintain the penny gap rule for hardwood expansion space around the perimeter. This prevents the boards from buckling and ruining the visual flow you have worked so hard to create. I remember a kitchen repair where I ignored the expansion gap and three weeks later, the center of the room literally lifted off the floor like a small mountain range because the wood had nowhere to go. Precision is always cheaper than a redo.
Many DIYers and even some pros believe that if you buy Northern Red Oak, it will always match the Northern Red Oak already on your floor. That is a myth that leads to heartbreak. In my years on the job, I have seen boards labeled as the exact same species that look like they came from different planets. This is because soil composition—specifically the mineral intake of the tree—drastically alters the tannin levels in the wood. If you ignore this, you will find that your patch reacts to stain completely differently than the surrounding area. To avoid this, I always do a ‘wet test’ with a bit of mineral spirits on a scrap piece to see the true undertone before the first nail is driven. Most people focus on the name on the bundle, but you need to focus on the chemistry of the lumber.
Why even identical species from the same mill can look like different colors under your LED lights?
This frustrating phenomenon is called metamerism. According to a technical report by the National Wood Flooring Association (NWFA), wood is an organic material that is highly reactive to the Color Rendering Index (CRI) of your home’s lighting. A patch that looks perfect under the high-intensity fluorescent lights of a lumber yard might turn a muddy pink or a sickly gray once it is in your living room. Before you commit to the install, check your donor boards in the actual room’s lighting at different times of the day. This is one of those flooring installation mistakes to avoid for a seamless look that separates the masters from the amateurs.
One of the biggest ‘oops’ moments comes from failing to distinguish between heartwood and sapwood. Heartwood is the older, darker, and more rot-resistant center of the tree, while sapwood is the outer, lighter, and more porous layer. If your existing floor is mostly heartwood and you patch it with sapwood donor boards, no amount of sanding or fancy finish will fix the density difference. The sapwood will drink up the stain like a sponge, becoming much darker than intended, while the heartwood will resist it. This is why the grain mapping secret for seamless hardwood floor patches is so vital; you have to match the wood’s maturity, not just its species. Have you ever fallen into this trap where you thought a stain would hide everything, only to have it highlight your mistakes instead? Let me know in the comments—I have definitely been there.
If you are working over a concrete slab, remember that moisture management is your silent partner. Utilizing the urethane glue secret for hardwood on concrete can help manage the vapor transmission that often causes why your hardwood floor finish is clouding over. Even the most beautiful grain match in the world won’t matter if the finish turns milky because you ignored the subfloor’s moisture levels. Always run the acclimation test for avoiding hardwood floor gaps to ensure your new boards are as stable as the old ones before you finalize the ‘surgery’.
Beyond the surgery itself, the longevity of your patch depends on the recovery period and the instruments you use to finish the job. Most DIYers think a random orbital sander is the solution to everything, but for a truly invisible blend, I always reach for a hand-held cabinet scraper first. Why? Because a sander can ‘dish out’ the softer springwood, leaving you with an uneven surface that is only visible once the light hits it. A scraper, when sharpened with a proper burnisher, shears the wood fibers cleanly, preserving the natural texture of that grain you spent so much time matching. It is the difference between a blurry photo and a 4K image.
Stop Using Power Sanders for the Final Blend
If you want that repair to disappear, you need to feel the wood. I personally use a pin-less moisture meter, like the Wagner Orion, before I even think about sanding. According to the National Wood Flooring Association (NWFA) Technical Manual on Jobsite Conditions, the moisture content between your new boards and the existing floor should typically be within 2% of each other for strip flooring. If you ignore this, you are just inviting gaps later. This is exactly why the acclimation test for avoiding hardwood floor gaps is the non-negotiable first step of any professional-grade repair. Even if you have followed the step-by-step flooring installation guide to the letter, moisture is the one variable that can ruin your reputation overnight.
How do I maintain my repaired floor so the seams never show?
Maintenance is not just about mopping; it is about climate control. Wood is a sponge. If you let your home’s humidity swing from 20% in the winter to 60% in the summer, those ‘invisible’ seams will eventually reveal themselves. I recommend keeping your home between 35% and 50% humidity year-round. For daily care, ditch the heavy waxes and wet mops. Follow the microfiber mist rule for cleaning matte floors to ensure you aren’t over-saturating the wood. To protect the finish near the patch, I always implement the felt pad routine for every piece of furniture in the room. This prevents those micro-scratches that catch the light and draw the eye straight to your repair area. If you start hearing noises near the patch, it might be time for the subfloor screw routine for stopping floor squeaks to tighten things back up from below.
What the Future of Flooring Restoration Looks Like
I predict that within the next five years, we will see the rise of AI-driven wood matching apps. Imagine taking a photo of your 1920s floor and having an algorithm scan thousands of lumber yard inventories to find the exact growth-ring density and tannin profile you need. We are already seeing high-end scanners that can help with the moisture meter requirement for basement flooring jobs by mapping subfloor dampness in 3D. But for now, your eyes and a sharp scraper are your best assets. My challenge to you: on your next repair, try hand-scraping the final blend instead of reaching for the 120-grit sandpaper. You will be amazed at how much deeper the grain looks when it has been sliced rather than abraded.
Hard Truths About Wood Matching That I Learned the Hard Way
First, stop believing that stain is a magic eraser. If the grain pattern is wrong, the stain will only highlight the structural difference between the old and new wood. I used to think I could sand my way out of a bad match, but I quickly realized that over-sanding just creates ‘dips’ that catch the light like a mirror. Another lightbulb moment for me was realizing that trees from the same forest can have different mineral contents; always perform a wet test with mineral spirits to see the wood’s true character before you install it. Finally, remember that old wood is more stable—if you’re patching an 80-year-old floor, your new boards need to be bone-dry, or they’ll shrink and leave a gap that no amount of wood filler can save.
The Gear That Makes an Invisible Patch Possible
I don’t step onto a job site without a pin-less moisture meter. It’s the only way to be sure that I’m following your guide to durable flooring installation for a stylish home by ensuring the wood is acclimated. I also swear by a high-quality hand scraper over a power sander for the final blend. While a sander can be aggressive, a scraper shears the fibers cleanly, which is essential for the grain mapping secret for seamless hardwood floor patches. I also recommend keeping a small high-CRI flashlight in your pocket to check for metamerism—how the light changes the wood’s color—at different angles. Lastly, build a relationship with a local architectural salvage yard; sometimes the only way to match old-growth grain is to buy a board that’s as old as your house.
Mastering the Art of the Invisible Restoration
Restoring a floor is a labor of love that turns a house back into a home. When you take the time to hunt for that perfect donor board and respect the natural growth patterns of the timber, you aren’t just doing a repair—you’re preserving history. It takes patience to avoid common flooring installation mistakes to avoid for a seamless look, but the result is a floor that looks like it was never touched. Whether you are following transform your flooring top trends in installation for 2025 or sticking to traditional methods, remember that the grain tells the story. Have you ever found a board that looked perfect at the lumber yard but stood out like a sore thumb once you got it home? Let me know about your matching struggles in the comments below!