

I remember the first time I noticed it. I was sliding across the kitchen floor in my socks—a classic Saturday morning move—when a tiny, razor-sharp sliver of white oak decided to introduce itself to the arch of my foot. Ouch. I looked down, expecting a loose piece of debris, but there it was: the edge of my beautiful engineered hardwood was fraying like an old pair of jeans. It’s heartbreaking to see an investment like that start to literally peel apart. You spend weeks picking the perfect shade, you meticulously plan your step-by-step flooring installation, and then, six months later, you’re dodging splinters. It feels like a betrayal of the promise of “durable” flooring. But here’s the truth: your floor isn’t necessarily a dud, it’s just reacting to its environment or a few missed steps in the process. Today, I’m going to walk you through exactly why those edges are lifting and how we can save your feet (and your sanity).
Your Floor Shouldn’t Feel Like a Pincushion
It’s a common frustration. I used to think that because engineered wood has a plywood core, it was invincible to the warping issues of solid wood. I was wrong. My biggest blunder? I skipped the acclimation test for avoiding hardwood floor gaps in a rush to finish a rental property. I thought the moisture levels in the air wouldn’t matter for “engineered” products because of those cross-layered cores. Two months later, the boards started expanding, pushing against each other until the top veneer layers—the “wear layer”—started to buckle and splinter at the edges. According to the National Wood Flooring Association (NWFA), the vast majority of flooring failures are related to moisture imbalances rather than manufacturing defects. If the subfloor is damp or the room is bone-dry from the heater, that wood is going to move, and the glue holding those layers together can only do so much. I’ve even seen cases where why your hardwood floors are crowning in the summer is the first red flag before the splintering even begins.
Is Engineered Hardwood Actually Worth the Money?
I get it. You’re looking at these little chips and wondering if you should have just gone with luxury vinyl or solid timber. You might even be worried that you’ve wasted thousands of dollars on a product that’s “fake” or low-quality. But don’t give up on it yet. When it’s handled correctly—meaning you’ve followed the expansion gap rule for heavy kitchen islands and kept your humidity stable—engineered hardwood is actually one of the best choices for modern homes. It offers a visual depth and warmth that LVP can’t touch. We just need to address the root causes: the cutting techniques, the cleaning habits, and the environmental factors. I once saw a DIYer use a dull saw blade, and every single cross-cut ended up jagged; it’s why I always emphasize the stay sharp blade rule even when working with tougher materials. Have you noticed your floor starting to catch on your mop lately, or is it just the high-traffic areas near the baseboard styles that elevate your interior design? Tell me in the comments, because I’ve likely been in your shoes (or your painful socks). We’re going to look at the no-sanding fix for scuffed hardwood floor finishes and other ways to tidy those edges without making the problem worse.
Stop the Damage Before It Spreads
If you ignore these tiny splinters, they turn into big gaps and eventually, delamination where the wood layer completely separates from the base. I’ve seen entire rooms ruined because a homeowner thought they could just “wait and see.” It’s much easier to fix a few rough edges now than to replace a whole hallway later. We also need to talk about the cleaning tools you’re using. If you’re using a steam mop or a soaking wet rag, you’re essentially injecting water into the most vulnerable part of the plank. I’ve found that switching to a dry-microfiber approach can stop the progression of edge rot almost immediately. We’ll also cover how to use a bit of wood glue and a toothpick—a trick I learned after a particularly messy install—to lay those splinters back down before they snag someone’s foot again.
Clean the Grooves Before You Close the Gaps
Before you even think about applying adhesive, you have to address the ‘debris trap’ living in those frayed edges. If you try to glue a splinter down over a layer of dust, it’s like trying to apply a band-aid to a sandy beach—it simply won’t hold. I always utilize the vacuum seal trick for cleaning dust out of floor grooves to ensure the bond is wood-to-wood. I remember a job in a drafty old colonial where I thought I could just blow the dust out with a quick puff; ten minutes later, the glue was a gritty, gray mess and the splinter popped right back up. Now, I use a narrow crevice tool and a stiff nylon brush to vibrate every microscopic grain out of the fibers before proceeding.
How to Glue Down a Lifting Veneer Without a Mess
Once the area is surgically clean, you need a high-quality wood glue and a simple toothpick. Don’t squirt the glue directly onto the floor; you’ll end up with a sticky puddle that ruins the finish. Instead, dab a bit of glue onto a piece of cardboard and use the toothpick to ‘paint’ the underside of the splinter. Press it down and immediately wipe away the squeeze-out with a damp (not soaking) microfiber cloth. For those tiny scuffs that haven’t quite become splinters yet, I often rely on the no-sanding fix for scuffed hardwood floor finishes to blend the repair seamlessly into the surrounding plank. This prevents the edges from catching on socks or mops in the future.

Stop the Structural Squeeze with Proper Anchoring
Fraying isn’t always about cleaning; often, it’s a symptom of a floor that’s being choked. If you have a heavy kitchen island sitting directly on top of your floating engineered floor without the right precautions, the boards can’t expand or contract. This pressure creates tension that forces the top veneer to delaminate at its weakest point: the edges. I saw this firsthand during a kitchen remodel where the homeowner bolted a granite-topped island straight through the planks. The resulting ‘buckle’ was subtle, but every edge in a three-foot radius began to fray. Using the island anchor tactic for kitchen islands in suffolk county remodels allows the floor to move freely around the fixed structure, which is the ultimate insurance policy for your veneer.
Shield Your Floor from Hidden Concrete Dampness
If you’re noticing fraying in a basement or on a ground-level slab, the culprit is likely moisture rising from below. Concrete is like a sponge; it holds water that eventually migrates upward, attacking the glue bond between the wear layer and the core of your flooring. During several projects, I’ve seen beautifully installed floors fall apart because the installer skipped the moisture barrier move for concrete slabs in livonia kitchen remodels. Without that 6-mil poly film, that engineered wood is constantly ‘cooking’ in high humidity from the subfloor. This causes the edges to swell and eventually chip away. To prevent this, always ensure you are using the spacer block rule for consistent gaps in hardwood installation to give the wood a ‘breathing’ room at the perimeter, reducing the physical stress on those vulnerable edge joints.
Sharp Blades Save More Than Just Your Time
Finally, consider how the floor was cut. If the installer used a blade with too few teeth or a dull edge, they likely created ‘micro-fractures’ in the veneer during the initial install. These tiny cracks are invisible at first but grow into full-blown splinters within months of foot traffic. Even though we usually talk about this for synthetic materials, the stay sharp blade rule for cutting luxury vinyl applies double to engineered wood. A clean, crisp cut means the factory-sealed edge remains intact, rather than being shredded into a thousand tiny points that are just waiting to catch on your next Saturday morning slide.
I’ve noticed a recurring theme in my years of renovating: most homeowners (and even some pros) focus so much on the visible surface that they completely ignore the physics happening underneath. We think that if a product is labeled ‘waterproof’ or ‘luxury,’ it’s essentially bulletproof. But the real expertise isn’t in the material itself; it’s in managing how that material interacts with the rigid parts of your home. Let’s dig deeper into the stuff that usually gets glossed over in the big-box store aisles.
Why Thick Carpet Padding Isn’t Always the Luxury It Seems
Everyone wants that ‘walking on a cloud’ feeling, so they naturally gravitate toward the thickest, softest carpet pad available. Here is the contrarian truth: a pad that is too thick or too soft will actually destroy your carpet’s lifespan. The Carpet and Rug Institute (CRI) notes that excessive thickness allows the carpet backing to flex too much under foot traffic, which leads to delamination and early wear. If you’re aiming for longevity, you want density over height. I’ve seen beautiful installs ruined because the homeowner insisted on a 1/2-inch plush pad, only to realize why your carpet is buckling only three years later. When the pad is too squishy, the carpet can’t stay hooked to the tack strips, and you end up with those ugly ripples. Instead, I always recommend sticking to the carpet install secrets of using a high-density 6lb to 8lb pad that supports the weave rather than just swallowing it.
Is Your ‘Waterproof’ Flooring Actually Failing from the Bottom Up?
This is the question that keeps DIYers up at night. You buy a 100% waterproof vinyl plank, thinking you can flood the room, but then the edges start to lift. The nuance most people miss is that ‘waterproof’ applies to the plank, not the installation. Moisture trapped under the floor has nowhere to go, creating a greenhouse effect that breeds mold and weakens the click-lock joints. This is why I’m obsessed with why we never skip the subfloor moisture test on concrete. If you don’t use a vapor barrier, that rising humidity will eventually cause the joints to fail, making it look like a manufacturing defect when it was really an environmental one. Have you ever fallen into this trap? Let me know in the comments, because I’ve seen this mistake cost people entire basements.
The Great Grout Myth in Modern Showers
There is a common belief that grout is what keeps your shower waterproof. In reality, grout is porous; it’s basically a hard sponge. The real waterproofing happens behind the tile. I see so many people trying to fix leaks by adding more grout, but that’s just putting a band-aid on a broken leg. If your shower is leaking, it’s likely because of why your shower curb is always the first part to fail—usually due to a punctured liner or poor slope. Professionals know that using the liquid membrane move for fail-proof shower pans is the only way to ensure the water stays where it belongs. 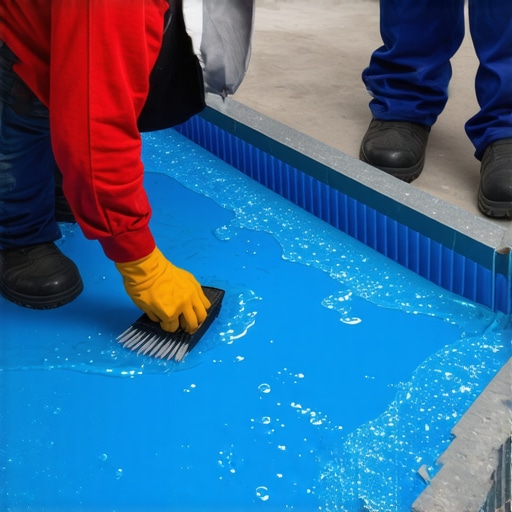
Stop Fighting Your Walls with Better Trim Tactics
Finally, let’s talk about those gaps between your baseboards and the wall. Most people just pump a gallon of caulk in there and call it a day. But if your walls are wavy, that caulk is going to crack within six months. The secret isn’t more filler; it’s understanding the inside corner cope for perfect baseboard installs. Coping allows the wood to move slightly without opening a visible gap. I also see people make the mistake of nailing baseboards straight into a water pipe because they didn’t check for studs. I always suggest the magnet hack for finding wall studs behind thick baseboards before you start firing that nail gun. It’s these tiny, non-obvious steps that separate a weekend project from a professional-grade renovation.
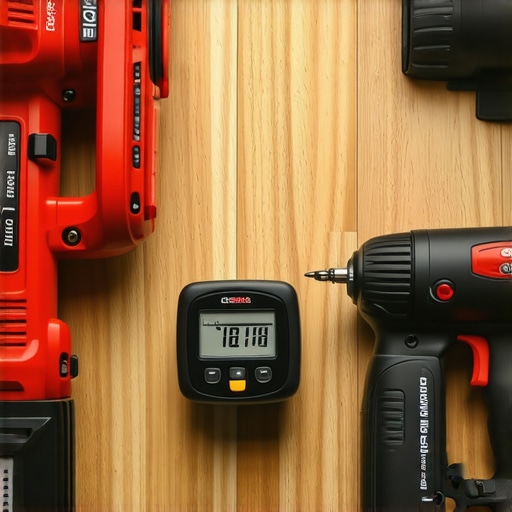
Now that we’ve untangled the mess of moisture and bad cuts, we have to talk about the physical toll this work takes on your home—and your toolkit. I’ve spent years collecting gadgets, but if you asked me to pick the three that actually saved my career, it wouldn’t be the fancy lasers. It would be my power stretcher, my oscillating multi-tool, and a high-quality moisture meter. Most DIYers try to get away with a knee kicker for carpet, but that’s a recipe for wrinkles in eighteen months. I always insist on the power stretcher rule for large living room carpets because it’s the only way to get the tension right. Without it, you’re just shifting the problem to the next season. When you’re scaling up from a single room to a whole-house project, these tools stop being luxuries and start being the only reason your back doesn’t give out by Tuesday.
The Gear That Separates Pros from Amateurs
For baseboards, I stopped using a standard hammer and finishing nails a decade ago. A 16-gauge finish nailer is great, but the real secret to those seamless runs is knowing the double-butt method for fixing wide baseboard gaps. It’s about how you join the pieces before they even touch the wall. And if you’re working on a budget, don’t skimp on the blade; follow expert-flooring-installation-tips-for-2025 by investing in a high-tooth-count carbide blade. It makes the difference between a splintered mess and a factory-edge finish. I’ve seen people try to save fifty bucks on a cheap blade only to ruin five hundred dollars worth of engineered oak in the first three cuts. It’s a painful lesson I’d rather you didn’t learn the hard way.
How do I maintain my flooring and showers for the next decade?
Maintenance isn’t just about cleaning; it’s about observation. For your bathroom, keep an eye on the transition points. According to the TCNA (Tile Council of North America) Handbook, mortar coverage in wet areas must be at least 95% to prevent water from pooling behind the tile. If you start seeing hairline cracks, you need to consult shower-repairs-when-to-fix-vs-replace-for-longevity before a small leak turns into a structural rot issue. For floors, seasonal humidity checks are your best friend. I keep a small hygrometer in my living room to make sure my hardwoods aren’t sitting in a desert all winter or a swamp all summer. If you’ve followed the step-by-step flooring installation process correctly, your main job now is just keeping the environment stable.
The Future of Home Maintenance and Modular Design
Looking ahead, I see a massive shift toward modularity. We’re moving away from permanent, ‘glue-it-down-forever’ mentalities and toward systems that can be repaired plank by plank or tile by tile. This is why I advocate for floating systems or click-lock vinyl where it makes sense—it’s about future-proofing. In 2025 and beyond, expect to see more smart sensors embedded in subfloors that can alert your phone if a pipe starts sweating under your kitchen island. It sounds like sci-fi, but for anyone who has ever lost a five-figure floor to a hidden leak, it’s a dream come true. For now, your best defense is a good offense: go buy a moisture meter today and check your concrete slab. It’s the single most important ‘advanced’ tip I can give you to prevent your investment from literally peeling away at the edges.
The Most Expensive Mistakes I Made So You Don’t Have To
Looking back at years of sawdust and sore knees, I’ve realized that the ‘shortcuts’ are usually the longest paths. I once thought that a high-end price tag meant the material was invincible, but even the best durable flooring installation will fail if you ignore the moisture levels in your subfloor. The ‘lightbulb moment’ for me was realizing that wood doesn’t just sit there; it breathes, and if it can’t breathe correctly because of a heavy island or lack of gaps, it will fight back by splintering.
Another hard lesson was the ‘caulk-it-all’ phase. I used to think I could hide any gap with a tube of silicone, but that only leads to messy maintenance later. Real professionals focus on mechanical fits—like mastering the inside corner cope for perfect baseboard installs—rather than relying on chemical fillers. Finally, never underestimate the power of a clean subfloor; even the smallest pebble can create a hollow sound or a ‘telegraph’ through your vinyl.
The Only Gear You Actually Need in Your Garage
You don’t need a warehouse full of tools, but you do need the right ones. I never start a carpet job without following the power stretcher rule for large living room carpets to ensure no ripples appear three years down the line. For wood and vinyl, I swear by a 100-tooth carbide blade to maintain the stay sharp blade rule, which is the only way to prevent those jagged edges we’ve been talking about. #IMAGE_PLACEHOLDER_E# Also, pick up a professional moisture meter; it’s the cheapest insurance policy for your home’s value. If you’re tackling a bathroom, always check shower-repairs-when-to-fix-vs-replace-for-longevity to see if your current setup is worth saving or if a full reset is needed.
Time to Turn Your Vision into Reality
The beauty of a home isn’t just in the expensive materials you choose, but in the care you take during the installation process. Whether you’re dealing with a frayed edge or a buckling carpet, remember that every fix is a chance to learn the ‘personality’ of your house. Your step-by-step flooring installation journey might have some splinters along the way, but with these pro techniques, you’re more than ready to handle them. Don’t let the fear of a mistake stop you from creating a space you love. Have you ever dealt with a splintering floor that just wouldn’t quit? Let me know in the comments below!