

It was a Tuesday morning in late January when I first noticed it. I was sipping my coffee, enjoying the blissful warmth radiating through my socks, when my eyes caught a sliver of darkness between two white oak planks. Then another. By the time I reached the kitchen, I realized my floor looked less like a seamless surface and more like a series of individual islands drifting apart. It felt like a punch in the gut. I had followed every tip for durable flooring installation for a stylish home, yet my boards were shrinking right before my eyes. Have you ever looked down at your beautiful investment and wondered why it’s suddenly riddled with cracks? If you’re nodding along, you aren’t alone, and you aren’t necessarily stuck with a ruined floor. Today, I’m going to peel back the subfloor and show you exactly why that cozy heat is playing tug-of-war with your wood and how we can bring those boards back together.
The Day My Dream Floor Started Pulling Apart
I’ll be the first to admit it: I made the classic rookie mistake. When I first installed my radiant system, I was so excited for the comfort that I ignored the moisture meter requirement because the wood felt “dry enough” to me. I thought that as long as I followed the penny gap rule for hardwood expansion space at the walls, the rest would take care of itself. I was wrong. Wood is a living, breathing material that reacts violently to sudden changes in temperature and humidity. According to the National Wood Flooring Association, wood is hygroscopic, meaning it is constantly trying to reach an equilibrium with the air around it. When you crank that underfloor heating, you aren’t just warming the room; you’re literally baking the moisture out of the cells of the wood, causing each plank to contract. It’s a physical reality that no amount of wishful thinking can change. When I saw my baseboard miters keep gapping in the winter alongside the floorboards, I knew I had a systemic humidity problem on my hands.
Is radiant heat actually a death sentence for real wood?
I get this question from my neighbors all the time. People fear that they have to choose between warm toes and a floor that doesn’t look like a picket fence. The short answer is no, but it requires a level of respect for the material that most of us forget during the excitement of a renovation. The struggle usually boils down to the width of the planks and the speed of the temperature change. If you went with wide planks without using a glue assist strategy for wide plank hardwood installs, you’ve essentially given those boards a free pass to move wherever they want. In this post, we are going to dive into how to manage your home’s micro-climate so your floor stays stable, even when the heating is on full blast. Stay tuned, because I’m going to share the specific humidifier settings that finally stopped my floor from moving.
Target 40% Humidity to Keep Your Boards Happy
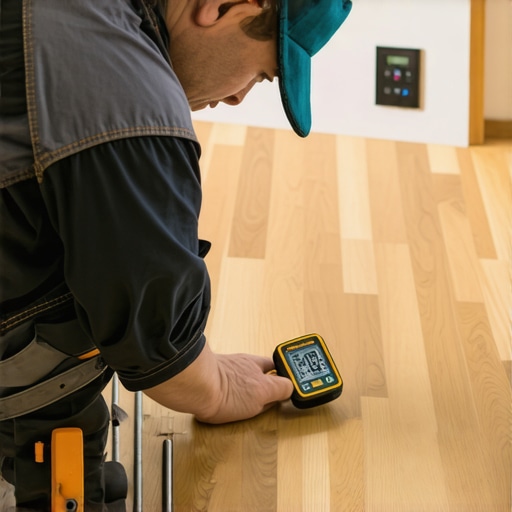
The biggest mistake most homeowners make is thinking the floor is a static object once it’s nailed down. To keep your wood from turning into a series of parched sponges, you must maintain a consistent relative humidity between 35% and 50%. I learned this the hard way during a job in a high-desert cabin where the dry air caused gaps wide enough to swallow a credit card within three weeks. I now refuse to start a step-by-step flooring installation from planning to perfect finish until the home’s HVAC system has been running for at least 72 hours and a digital hygrometer confirms the environment is stable. If your house feels like a desert, your floor will look like one. Investing in a whole-home steam humidifier is almost always cheaper than trying to repair $15,000 worth of separation-ruined walnut planks.
Anchor Wide Planks with a Bead of Urethane
If you’re installing anything wider than four inches over a heated subfloor, relying on nails alone is a recipe for disaster. As the radiant heat warms the wood, it can soften the fibers around the fastener, eventually allowing the board to pull free and shift. I always implement the glue assist strategy for wide plank hardwood installs to mitigate this. By applying a serpentine bead of high-quality, moisture-cured urethane adhesive to the back of each board, you create a flexible bond that moves with the wood while preventing the dramatic contraction that causes those ugly, dark gaps. I remember a specific install where we used 7-inch white oak; four years later, despite the homeowner keeping the heat cranked to 75 degrees, those seams are still tight because the glue acted like a mechanical shock absorber. It’s one of those flooring installation mistakes to avoid for a seamless look that separates the pros from the weekend warriors.
Protect Your Perimeter to Prevent Central Buckling
Your floor needs the freedom to move as a single unit, and that means it cannot be pinned tight against the drywall or the base plates. This is where the penny gap rule for hardwood expansion space becomes your best friend. I usually leave a minimum of a half-inch gap around the entire perimeter. If you skip this, the internal pressure from the wood trying to expand during the humid months will cause it to buckle or, paradoxically, pull apart even harder when the winter air dries it out. To hide these necessary gaps, you need to know how to choose the perfect baseboards for your homes style so you can cover that expansion space without accidentally nailing the flooring itself to the wall. When you see why your baseboard miters keep gapping in the winter, it’s often a tell-tale sign that the entire floor system is shifting because it wasn’t allowed to breathe properly at the edges from day one.
While managing humidity is the golden rule for hardwood, systemic floor failure often hides in the details we assume are ‘standard.’ Let’s dig deeper into the common myths that even experienced DIYers fall for. For instance, have you ever walked into a showroom and gravitated toward the thickest, squishiest carpet pad available? It feels like luxury underfoot, but in my experience, that is exactly where the trouble starts. Most people believe thicker is always better, but it is a classic trap. According to the Carpet and Rug Institute (CRI), a residential carpet pad should generally not exceed 7/16 of an inch. When a pad is too thick, it creates too much vertical movement, which eventually pulls the carpet off the tack strips and causes premature delamination of the backing. Understanding these carpet install secrets is what keeps a high-traffic area looking fresh for a decade instead of a few seasons. If you’ve noticed why your carpet pad is too thick for the tack strip, you’re already seeing the mechanical failure of the system.
Does your luxury shower have a hidden expiration date?
We often treat showers as static boxes of tile, but they are dynamic environments under constant thermal stress. One of the biggest advanced mistakes I see is the ‘hard joint’ error. Most people think that because grout is waterproof-ish, it should go in every corner. That is a myth. Every change of plane—where the wall meets the floor or where two walls meet—must be a ‘soft joint.’ By implementing the soft joint rule for shower wall corners, you use a 100% silicone sealant instead of grout. This allows the house to settle and the materials to expand without cracking the waterproof membrane behind the tile. I have seen beautiful $20,000 bathrooms gutted because a rigid grout line cracked, moisture seeped behind the tile, and the wall studs rotted away in silence. If you aren’t insisting on the flood test secret for guaranteed leak-proof showers before the first tile is even laid, you are gambling with your home’s infrastructure.
Why the scarf joint beats the butt joint every time
The same logic applies to your trim work. When homeowners tackle long runs of baseboard, they often just butt the two factory ends together and hope the wood filler hides the gap. It never does. Within one change of season, that joint will open up like a parched mouth. To achieve a professional, seamless look, you must use the scarf joint rule for long baseboard runs. By overlapping two 45-degree mitered ends, you create a mechanical overlap that remains invisible even when the wood shrinks. It’s a small nuance, but it’s the difference between a house that looks ‘flipped’ and a house that looks ‘crafted.’ Have you ever fallen into this trap? Let me know in the comments. Whether it’s choosing the wrong pad or skipping the moisture barrier, these tiny oversights define the lifespan of your renovation. If you’re currently planning a project, make sure to review our flooring installation mistakes to avoid for a seamless look to ensure your hard work stands the test of time.
I’ve learned that the difference between a “good” job and a “lifetime” job usually comes down to the gear you keep in your truck. If I could only keep one tool for the rest of my career, it wouldn’t be a hammer; it would be my Fein Multimaster oscillating tool. This isn’t just about making cuts; it’s about surgical precision. For example, when you’re dealing with a stone hearth, you need the zero clearance cut for flooring around stone fireplaces to make the wood look like it grew out of the rock. I’ve seen guys try to use a jigsaw, but you’ll never get that tight, professional finish without an oscillating tool that can get flush against the masonry. It’s also my secret weapon for when I need to know how to scribe a baseboard to a textured stone wall. Without it, you’re looking at huge gaps and messy caulk lines that scream “DIY disaster.”
How do I maintain my flooring and trim over the long haul?
The secret to a floor that stays quiet and tight isn’t just the initial install; it’s addressing the settling that every house does. About six months after any major project, I recommend a “sound check.” Walk every inch of the room. If you hear a chirp, don’t ignore it. I rely on the subfloor screw routine for stopping floor squeaks to nip those annoyances in the bud before they become permanent fixtures of your morning walk to the kitchen. For baseboards, if you notice movement, you can stop baseboard squeaks with the angled pin tactic. Maintenance is about being proactive. According to the TCNA (Tile Council of North America) Handbook, subfloor deflection is the leading cause of tile failure; keeping your subfloor structurally sound through periodic screw tightening can literally save your grout from crumbling.Looking ahead, I see the industry moving toward “smart surfaces.” We are already starting to see moisture-sensing underlayments that can send a notification to your phone the second a pipe leaks under your vanity. This will be a game-changer for transform your home expert flooring installation tips for 2025. Instead of discovering a leak when your boards warp, you’ll catch it when it’s a drip. For my carpet clients, I always suggest keeping a professional on speed dial for the power-stretcher move to fix loose carpet bubbles. As humidity fluctuates, even the best-installed carpet can relax, and a quick re-stretch can double its lifespan.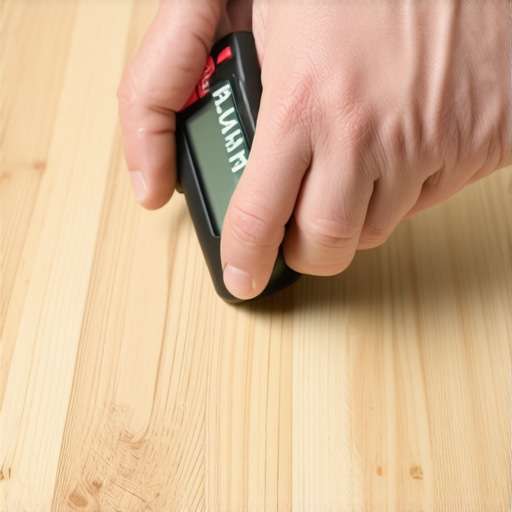 If you want to take your skills to the next level today, go out and buy a high-quality digital hygrometer. Start tracking the humidity in your home for a full week before you even touch a piece of trim. This one advanced move—monitoring your micro-climate—is the single most effective way to ensure your durable flooring installation for a stylish home stays exactly as beautiful as the day it was finished.
Lessons from the Jobs That Kept Me Awake at Night
Looking back at twenty years of sawdust and grout, I’ve realized that the most expensive mistakes aren’t the ones you make with your hands; they’re the ones you make with your ego. I used to think I could outsmart the weather, but nature always wins. Here are the hard truths I live by now:
- Respect the invisible: Moisture is your greatest enemy. I never skip the moisture meter requirement now, even on a ‘quick’ job.
- Transitions are where reputations are made: Most people focus on the middle of the floor, but the edges tell the story. Knowing how to hide a transition strip between carpet and tile separates a master from a novice.
- Plan for the worst-case scenario: When doing bathroom work, I always weigh shower repairs when to fix vs replace for longevity. Sometimes, a full gut is the only way to sleep soundly.
#IMAGE_PLACEHOLDER_E#
Gear That Actually Earns Its Spot in My Toolbox
You don’t need a massive workshop, but you do need gear that doesn’t lie to you. If you’re serious about a durable flooring installation for a stylish home, these are my non-negotiables:
- The Digital Hygrometer: This $20 tool is more important than your miter saw. It’s your early warning system for gapping.
- Moisture-Cured Urethane: If you’re doing wide planks, don’t just use wood glue; use the heavy-duty stuff I discussed in the urethane glue secret for hardwood on concrete.
- A Quality Power Stretcher: For any carpet install secrets, this is the tool that prevents wrinkles three years down the line.
Finish Your Project with Confidence
The first cut is always the scariest, but remember that every master was once a beginner who refused to quit. By paying attention to the micro-climate and using the transform your home expert flooring installation tips for 2025 we’ve covered, you are already ahead of 90% of the DIY crowd. You aren’t just laying boards or stretching fabric; you are building the foundation of your home’s comfort. Take your time, trust your measurements, and don’t be afraid to pull up a board if it doesn’t feel right. Have you ever encountered a gap in your floor that seemed to appear overnight? Let me know in the comments below!