

I’ll never forget the sound—or rather, the lack of it. Usually, when you test a new shower, there’s that satisfying gurgle of water disappearing into the pipes. But after my last big renovation, it was silent. Dead silent. I’d been so focused on making sure the step-by-step flooring installation looked perfect that I ignored the tiny piles of thinset dust migrating toward the drain. It’s a gut-punch. You think you’re done, but the real nightmare is just beginning beneath the tiles. If you’ve just finished a project and your water is backing up, you aren’t just dealing with hair and soap scum. You’re likely dealing with hardened grout, tile shards, or even drywall compound. Today, I’m going to show you exactly how to diagnose this mess and, more importantly, how to get that water flowing again without calling a plumber as your first move. [image_placeholder]
That Moment I Realized My Pipes Were Full of Rocks
It’s easy to get caught up in the aesthetics of a shower repair or a full remodel. You’re picking out the perfect tile and matching the grout, but nobody tells you that even a handful of dust can ruin your week. I made a massive mistake early in my career by thinking I could just ‘rinse’ the floor clean with a bucket of water. I thought I was being efficient; instead, I was hydrating the cementitious material and helping it settle into a solid plug at the P-trap. Most people don’t realize that grout is designed to cure even when submerged in water. According to the Plumbing-Heating-Cooling Contractors Association (PHCC), construction debris like heavy sediment and tile mortar can cause permanent damage to residential DWV (Drain-Waste-Vent) systems if they aren’t mechanically removed before they have a chance to set. This isn’t just a simple blockage; it’s basically like pouring liquid rock into your plumbing. It happens more often than you’d think, especially during the chaos of flooring installation mistakes that occur when contractors or DIYers get a bit too cavalier with the cleanup process.
Will a simple plunger actually solve the problem?
You might be tempted to grab that rubber plunger and start hacking away at the standing water, but here is the cold, hard truth: it probably won’t work for construction debris. If the clog is hardened thinset or sand, plunging only compresses the material tighter into the trap. You’re essentially compacting the ‘concrete’ you accidentally made. It feels hopeless when that water won’t budge, but I’ve been in those trenches. Have you ever finished a project only to find the most basic part—the drainage—completely failing you? It’s a specific kind of frustration, but we’re going to tackle it head-on by understanding what’s actually down there and how to fish it out before it becomes a permanent part of your home’s foundation.
Suck it Out Before You Wash it Down
The biggest mistake you can make is thinking more water will solve the problem. If you’ve got thinset or grout dust in the line, adding water is just finishing the chemistry project. Instead, your first tool should be a high-powered wet-dry vacuum. Think of your drain like a delicate surgical site; you want to extract the foreign objects, not push them deeper into the ‘arteries’ of your home. I remember a grueling job in a tight master bath where I spent two hours with a borescope and a modified vacuum hose. The previous crew had treated the drain like a trash can for their trowel notch secret leftovers. I eventually pulled out a three-inch plug of dried thinset that looked like a fossilized sausage. If I had used a plunger, I would have had to rip out the entire floor to reach the pipe. 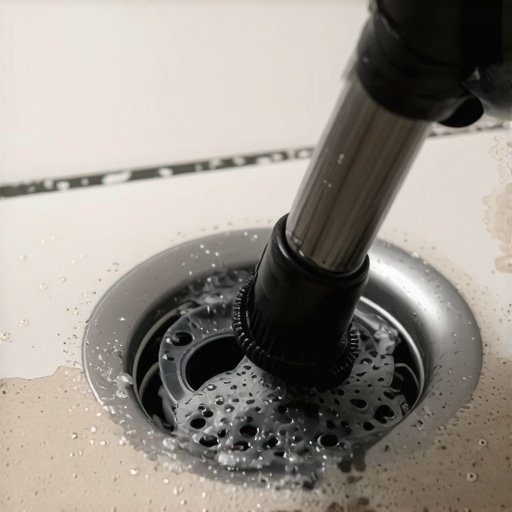
The Shop Vac Seal Technique
To get the most suction, you need an airtight seal. Take a wet rag and wrap it around the nozzle of your shop vac until it fits snugly into the drain opening. Hold it tight and turn the vacuum on. You’ll hear a high-pitched whine if it’s working. If you hear a thud followed by a rattle in the hose, congratulations—you just saved yourself a $400 plumbing bill. This is especially critical when dealing with the flush mount secret for integrated shower drains, where the tolerances are tight and any debris can ruin the aesthetic.
Fish for Rocks with a Custom Hook
If the vacuum isn’t enough, you’ve likely got a ‘grout snake’—a long, hardened piece of material that’s snagged on the P-trap. Grab a stiff wire coat hanger or a specialized grabbing tool. Straighten it out but leave a tiny, sharp hook at the end. Gently probe the drain. You aren’t looking to push; you’re looking to snag. This is a game of patience. It’s a lot like trying to repair a chipped ceramic tile in a shower; one wrong move and you’ve made the damage worse. When you feel something hard, hook it and pull slowly.
The Chemical Dissolve as a Last Resort
If the blockage is purely cement-based grout and it’s already hardened, you might need a sulfamic acid descaler. This isn’t your standard drain cleaner; it’s a mild acid used specifically for tile work. Follow the instructions to a tee. While the acid works, you can inspect other parts of your project to ensure no other flooring installation mistakes were made, like improper slope. After the acid sits, try the vacuum method again. Once you think the line is clear, perform the flood test secret for guaranteed leak-proof showers. Fill the base and watch the drainage rate. If it swirls and gulps, you’ve won. If it lingers, there’s still a ‘rock’ down there waiting to cause a backup during your first real shower.
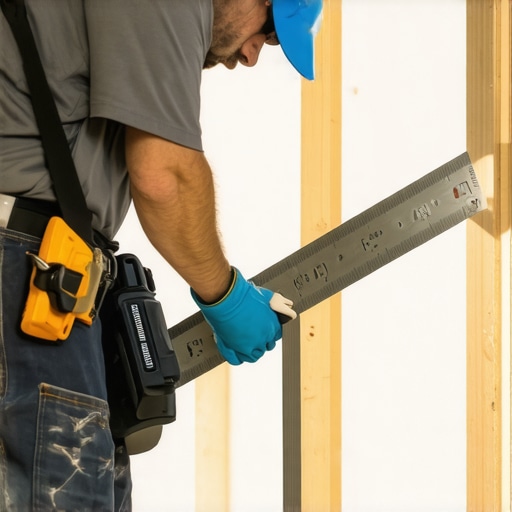
Everyone tells you that a level floor is the gold standard for a successful remodel, but here is a contrarian take that most big-box stores won’t share: level doesn’t matter nearly as much as flat. You can have a floor sloped at a noticeable two-degree angle that remains structural sound for decades, but a level floor with a 1/8-inch dip over six feet will cause your click-lock joints to snap and your grout to crumble within months. When you are deep into step-by-step flooring installation, you need to stop obsessing over the bubble in the level and start obsessing over the straight-edge. If you don’t address the ‘waves’ in your subfloor, you’re just building a house of cards.
The Pinning Trap That Ruins Baseboards and Floors
The most common mistake I see in high-end projects involves the interaction between the floor and the trim. Many DIYers—and even some ‘pros’—think they should push the baseboards down as hard as possible against the flooring to eliminate any visible gap. This is a recipe for disaster. By doing this, you are effectively ‘pinning’ the floor. Most flooring materials need to breathe. When you pin them down with heavy trim, you prevent natural expansion. This is exactly why your baseboard miters keep gapping in the winter; the floor is moving, and it’s taking your walls with it. Instead, you should use the silicon bead secret for waterproofing baseboards in bathrooms to create a flexible seal that allows for movement without the mechanical ‘pinning’ that destroys joints.
Why does my new carpet feel crunchy or hollow in the corners?
If you’ve just invested in a high-quality upgrade, finding a ‘crunchy’ sound near the walls is incredibly frustrating. Often, this isn’t a carpet defect; it’s an installation error where your carpet pad is too thick for the tack strip. When the pad is taller than the pins on the strip, the carpet can’t properly ‘bite’ into the wood. This leads to ripples later on. According to the National Wood Flooring Association (NWFA) and similar flooring institutes, subfloor preparation—including checking for moisture—is the single most ignored step in residential construction. I’ve seen $10,000 hardwood installs ruined because the installer skipped the moisture meter requirement for basement flooring jobs. The wood looks great for a month, then the ‘oops’ factor kicks in as the planks start to cup and peel away from the adhesive. Always remember: the finish is only as good as the invisible work beneath it. Have you ever fallen into this trap where you prioritized the ‘look’ over the prep work? Let me know in the comments.
Before you lay a single plank or tile, you must ensure the foundation is silent. I never start a job without performing the subfloor screw routine for stopping floor squeaks. A few dozen screws are cheaper than a lifetime of annoying floor noises. Whether you are learning carpet install secrets or trying to stagger vinyl plank ends for maximum strength, the goal is always the same: mitigate movement. When you control the movement, you control the longevity of the home.
The Gear That Separates Amateurs from Professionals
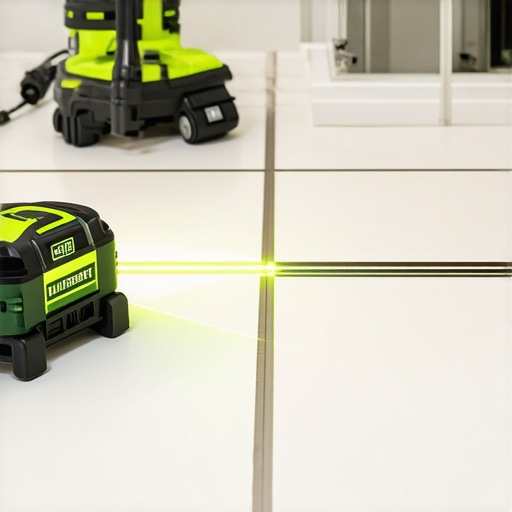
Once you’ve mastered the prep work, your results will only be as good as the tools you wield. I’m often asked why I carry a $400 laser level when a $20 bubble level exists. The answer is simple: precision doesn’t just look better, it installs faster. When I’m setting up a layout, I rely on the laser level hack for straight tile rows to ensure that the first tile in the bathroom perfectly aligns with the last tile in the hallway. It’s that level of foresight that prevents those awkward, sliver-sized cuts at the doorway that scream ‘DIY disaster.’
For those of you tackling soft surfaces, stop relying on a knee kicker. It’s a tool for small adjustments, not for a full room. I always use a power stretcher because the directional pull rule for power stretching carpet ensures the backing is under the correct amount of tension. If you skip this, you’ll be calling me back in two years to fix wrinkles. According to the Tile Council of North America (TCNA) Handbook, specifically under the EJ171 movement joint guidelines, failure to include expansion joints in large tile installations is the primary cause of ‘tenting’—where tiles literally pop off the floor. Don’t let your hard work be undone by basic physics.
How do I keep these surfaces looking new for ten years?
Maintenance isn’t about deep scrubbing once a year; it’s about the daily habits that prevent grit from acting like sandpaper on your finish. I swear by the microfiber mist rule for cleaning matte floors. Ditch the heavy bucket and the string mop—they just move dirty water into your grout lines. A light misting of a pH-neutral cleaner on a clean microfiber pad is all you need to maintain the factory seal. In the shower, the future is already here with the move toward accessibility. We are seeing a massive shift in homeowner preference toward the linear drain setup for barrier-free showers. Not only does it create a spa-like aesthetic, but it also eliminates the curb, which is the number one failure point for waterproofing in older homes. If you want to scale your skills, I challenge you to try the power stretcher move to fix loose carpet bubbles on your next project instead of reaching for the kicker. Your knees, and your clients, will thank you.
The Hardest Lesson I Learned About Construction Cleanup
Over the years, I have realized that the mess you can’t see is far more dangerous than the dust on the floor. I used to think that a quick sweep and a rinse would be enough, but I learned the hard way that construction debris behaves differently than everyday dirt. Here are the lightbulb moments that changed how I approach every project:
- Water is a catalyst, not a cleaner: Adding water to grout dust or thinset residue doesn’t wash it away; it activates the hardening process inside your pipes.
- Small shards lead to big blocks: Even a few pieces of tile or spacers dropped down a drain can act as a dam, catching hair and soap scum until you have a complete shutdown.
- Prevention is cheaper than a plumber: Always use a dedicated drain plug or a damp rag to seal openings before you even open a bag of mortar.
It is much easier to take ten minutes for protection than to spend ten hours trying to fish out a cement plug. This mindset is what separates a stressful DIY from a smooth expert flooring installation.
The Only Tools I Actually Trust for a Professional Finish
You don’t need a warehouse full of gadgets, but you do need the right heavy-hitters. For any drainage issues, I never start without a high-capacity wet-dry vacuum and a borescope camera to see what I’m up against. If you are moving into the final stages of your project, I highly recommend investing in a power stretcher if you are doing a carpet install; it prevents the wrinkles that make a new room look old. For layout precision, skip the tape measure and use a self-leveling laser. I also keep a stash of varied baseboard styles on hand to test how different profiles handle the transition between my new floor and the wall. These tools provide the accuracy that your eyes alone simply can’t match.
Take Pride in the Invisible Work
At the end of the day, a successful home project isn’t just about the beautiful tiles or the plush carpet you can see. It is about the integrity of the subfloor, the cleanliness of the pipes, and the precision of the prep work. Whether you are following a shower renovation guide or just refreshing a single room, don’t rush the steps that nobody will ever see. Those hidden details are what ensure your home stays functional and beautiful for the next twenty years. Don’t be afraid to take it slow—the results are worth the extra effort. Have you ever found a surprise ‘treasure’ like a lost tool or a hardened grout plug in your drain during a remodel? Let me know in the comments!