

I’ll never forget the morning I nearly spilled a full mug of dark roast all over my white hallway walls. It wasn’t because I was clumsy—at least, not entirely. It was that damn carpet ripple. It sat there, a tiny wave in the middle of the hall, just waiting to catch my toe. I’d installed it myself six months prior, feeling like a weekend warrior king. But by month seven, my hallway looked like a miniature obstacle course. It was embarrassing, frustrating, and honestly, a bit dangerous. If you’ve found yourself doing that weird little shuffle to avoid a hump in your flooring, I know exactly how you feel. We’re going to get that floor flat again.
Stop Tripping Over That Annoying Hallway Ripple
Early in my DIY journey, I made the classic mistake of thinking a knee kicker was enough for a long hallway. I thought if I just kicked hard enough, I could get the tension right. I was wrong. Hallways are unique beasts; they are narrow, high-traffic channels that act like a runway for your feet. According to data from the National Safety Council, falls are a leading cause of unintentional home injuries, and something as simple as a loose carpet edge can be the primary culprit. If you didn’t use a power stretcher during the initial carpet install, the backing eventually relaxes, and that’s when the bubbles start to rise. Have you noticed the ripples getting worse during the humid months, or is it a year-round struggle for you?
Is a professional re-stretch actually worth the hype?
You might be tempted to just live with it or try to tack it down with some extra staples. Please, don’t. While it seems like a minor cosmetic issue, a loose carpet wears out much faster because the fibers move and rub against the subfloor in ways they weren’t designed to. Taking the time to learn how to fix a carpet ripple properly—or hiring it out—can save you from having to replace the entire thing years too early. It’s about more than just aesthetics; it’s about making sure your investment lasts.
Hallways Take a Beating and Your Carpet Knows It
The hallway is the most abused part of your home. Think about it: you walk the same three-foot-wide path thousands of times a year. This concentrated traffic puts immense lateral pressure on the carpet fibers. If the carpet isn’t anchored perfectly to the tack strips, it has nowhere to go but up. Choosing the best carpet types for high traffic areas is half the battle, but even the most expensive wool blend will fail if the tension is loose. When I finally swallowed my pride and used a power stretcher, the difference was night and day. The carpet felt firmer underfoot and, more importantly, it stayed put. We’re going to look at why that tension is the secret sauce for a floor that doesn’t move when you do.
First, you have to clear the deck. You can’t stretch a carpet that’s pinned down by a heavy mahogany dresser. In my first attempt at a DIY stretch, I thought I could just work around a small bookshelf. Big mistake. The carpet bunched up against the legs, and I ended up with a permanent crease that never quite came out. Pull everything out of the hallway. If your baseboards are low and tight, you might need a baseboards makeover anyway, so consider removing them to get a cleaner stretch and tuck. Once the floor is clear, use a pair of pliers to gently lift the carpet off the tack strips at one end of the hallway. You only need to peel back enough to give the carpet ‘room to run’ when you apply the tension.
Setting Up the Power Stretcher for Maximum Tension
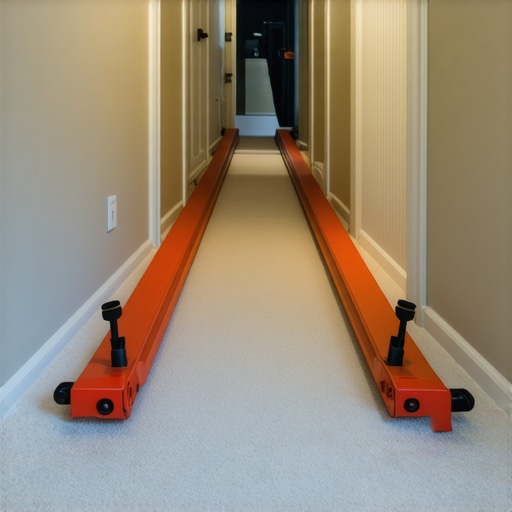
Now, let’s talk about the tool that actually does the work. A power stretcher is basically a long pole with a ‘head’ that has sharp teeth and a ‘tail’ that braces against the opposite wall. It’s like using a car jack for your floor. You aren’t just smoothing the carpet; you are physically elongating the backing. I once tried to shortcut this by following a guide on how to fix a carpet ripple without a power stretcher, and while that works for tiny surface bumps, it won’t save a high-traffic hallway. You need that mechanical leverage to pull the slack out of the entire length of the hall.
The Directional Pull Strategy
Set the tail of the stretcher against the baseboard at the far end—use a scrap piece of 2×4 to protect the wall from the pressure—and extend the tubes until the head reaches the rippled area. When you push down on the handle, you’ll feel the carpet tighten. This is where the directional pull rule for power stretching carpet becomes your best friend. You always want to stretch toward the corners and the long walls, not just in one straight line. Think of it like smoothing out a screen protector; you start from the center and push outward. If you just pull it straight, you’ll often find you’ve just moved the bubble six feet down the hall.
The Final Tuck and Trim
Once the carpet is pulled tight over the tack strips, use your knee kicker for the fine-tuning. This is one of those carpet install secrets that pros use to ensure the teeth really bite into the backing. After it’s hooked, you’ll have an inch or two of excess carpet climbing up the wall. Don’t panic. This is exactly what you want. It’s much better than being short. Use a sharp carpet knife to trim the excess, but leave about a quarter-inch. This extra bit gets tucked into the gap between the tack strip and the wall using a stair tool or a wide putty knife. If you’re working near stairs, you might need to employ the tuck and roll secret for carpet on bullnose steps to ensure the transition is seamless.
Avoid the Trimming Trap
Precision is everything here. One of the most common flooring installation mistakes to avoid is trimming the carpet too short. I did this in my own guest room once—I got overconfident with the blade and ended up with a gap that no amount of tucking could hide. I had to get creative with some extra-wide baseboards to cover my shame. Take your time with the blade, and always keep a fresh supply of sharp edges. A dull blade will tear the fibers rather than cutting the backing, leaving you with a frayed mess that looks like a cat used it for a scratching post.
Most homeowners assume that if they want a luxury feel, they should go for the thickest carpet padding available. In my experience, that is a recipe for disaster. If your pad is too plush, it creates a ‘trampoline effect’ that pulls the carpet right off the tack strips when you walk. I have seen countless DIYers wonder why your carpet pad is too-thick for the tack strip, and the answer is usually that the pad is physically taller than the pins meant to hold the carpet in place. According to the Carpet and Rug Institute (CRI) 104 and 105 standards, residential cushion should typically not exceed 7/16 of an inch for most residential cut-pile installations. Go thicker, and you are basically guaranteeing those ripples will return within a year, no matter how well you used that power stretcher. It is one of those carpet install secrets that distinguishes a pro from a weekend warrior.The ‘Oops’ factor often comes down to what you cannot see. Many people rush into a step-by-step flooring installation without checking for subfloor chemistry. I once laid a beautiful floor only to have it buckle six months later because I skipped the moisture test. This is why your concrete subfloor needs a calcium chloride test before you ever think about bringing in the material. Moisture is the silent killer of all flooring, and ‘eyeballing’ a dry slab is a rookie mistake that costs thousands. 
Why do your perfectly cut baseboard miters keep gapping?
You spend hours getting those 45-degree angles perfect, only to find a 1/8-inch gap by February. It is not usually your craftsmanship; it is the physics of the house. If you are not using the scarf joint rule for long baseboard runs, you are fighting a losing battle against wood expansion. Wood shrinks in the winter when the humidity drops, and those butt joints or simple miters are the first to show it. This is why your baseboard miters keep gapping in the winter, and the fix starts with acclimating your trim to the room’s environment for at least 72 hours before the first nail goes in. Similarly, in bathrooms, people think ‘waterproof’ materials are enough. But even the best tile job fails if the pan is not tested. I swear by the flood test secret for guaranteed leak-proof showers. If you are not plugging that drain and letting the pan sit full for 24 hours before tiling, you are just gambling with your subfloor’s life. Have you ever fallen into this trap? Let me know in the comments.
Play the Long Game with Your Flooring Maintenance
I’ve learned the hard way that the job isn’t finished when the last nail is driven. The true test of a carpet install or a shower renovation happens eighteen months later when the house has settled and the seasons have changed. To keep everything looking as sharp as day one, I swear by a few specific tools that most weekend warriors overlook. For instance, after you’ve mastered those carpet install secrets, you need to think about fiber integrity. The IICRC S100 Standard for Professional Carpet Cleaning specifically emphasizes that soil deeply embedded in the backing acts like sandpaper, grinding away at the very fibers you just stretched tight. If you aren’t using a high-quality vacuum with adjustable brush rolls, you’re essentially undoing your hard work every time you clean.
How do I maintain my flooring and shower seals over time?
Consistency is your best friend here. For your bathroom, don’t wait for a leak to start thinking about shower repairs. I make it a habit to inspect the silicone beads every six months. If you see even a tiny black speck of mold behind the caulk, it means water has found a way in. When it’s time to refresh those seals, I always use the blue tape trick for cleaning up silicone beads to ensure a factory-perfect finish that doesn’t just look good, but actually keeps the water where it belongs. For those of you with stone, remember that the deep seal tactic for porous natural stone showers isn’t a one-and-done deal; you should be re-testing the absorption of your stone annually to prevent permanent staining.
The Gear That Separates Amateurs from Professionals
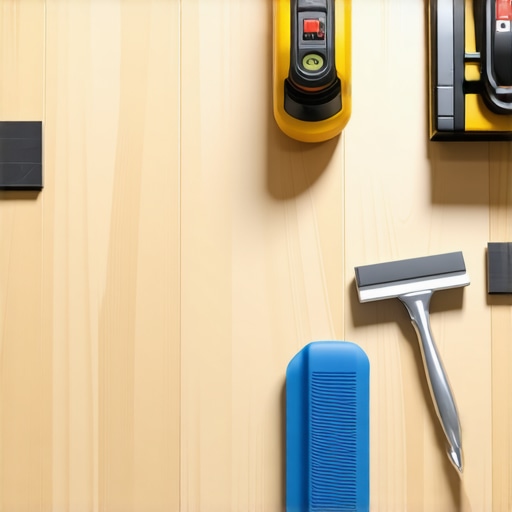
If you want to scale up your DIY game, you need to stop using the basic stuff. When I’m working on trim, I no longer guess where the wall curves. Using the block scribe secret for baseboards on brick walls changed my entire perspective on precision. It turns a frustrating afternoon into a thirty-minute victory. Also, pay attention to the floor line. A common reason why your painted baseboards are peeling at the floor line is the use of harsh chemicals during floor cleaning. I’ve switched entirely to the microfiber mist rule for cleaning matte floors because it uses minimal moisture, which protects both the finish of the floor and the longevity of your baseboard paint.
Looking ahead, I predict we are going to see a massive shift toward smart flooring. We are already seeing underlayments with built-in moisture sensors that can ping your phone if a pipe starts weeping under your luxury vinyl. This kind of tech will take the guesswork out of maintenance and could save homeowners thousands in remediation costs. For now, your best defense is a good offense. My challenge to you: Go into your bathroom this weekend and try that blue tape trick on one corner that’s looking a bit dingy. You’ll be amazed at how much a clean, professional bead of silicone can revitalize the whole room.
Hard Truths I Learned from a Few Failed Floor Renos
Looking back at my early projects, I realize I spent too much time worrying about the price of the material and not enough time on the physics of the installation. For instance, I used to think a knee kicker was enough for any room, but I eventually realized that without the mechanical leverage of a power stretcher, you aren’t really stretching—you’re just repositioning slack. I also learned that ignoring the ‘minor’ details like subfloor moisture or the orientation of the sun on your seams is a recipe for a redo. If you are starting from scratch, following a step-by-step flooring installation guide isn’t just for beginners; it’s a safeguard against your own ego. Finally, I’ve accepted that some of the best carpet install secrets aren’t about the tools themselves, but the patience you have while using them.
The Toolkit That Saves My Back and My Wallet
You don’t need a warehouse full of equipment, but you do need these essentials if you want professional results. First, never skip the laser level. Using the laser level hack for straight tile rows changed the way I look at alignment—it eliminates the ‘drift’ that ruins a layout. Second, get a dedicated microfiber system for your finished floors. I’ve found that the microfiber mist rule for cleaning matte floors keeps the finish from dulling and prevents moisture from seeping into those critical baseboard joints. Lastly, always keep a high-quality silicone on hand for your bathroom. Staying ahead of shower repairs is much cheaper than replacing a rotted subfloor.
Turn Your Hallway from a Trip Hazard into a Victory Lap
There is a specific kind of satisfaction that comes from walking across a floor that is perfectly flat and secure. It’s not just about the safety of your family or the value of your home; it’s about the pride of knowing you didn’t take the easy way out. Whether you are tackling a complex shower renovation or finishing up a tricky carpet install in a narrow hallway, remember that the quality of your home is built on these small, disciplined moments. You have the tools, you have the knowledge, and now you have the plan. Go ahead and fix that ripple—you’ll feel the difference with every step you take. Have you ever tried to stretch a carpet only to have the ripples come back within a few months? Let me know your story in the comments below!