

I will never forget the first time I tried to carpet my own basement stairs. I thought I was being clever, just wrapping the fabric over the nose and slapping some staples in like I was gift-wrapping a box. Halfway through, I stood back and realized my staircase looked less like a home feature and more like a series of lumpy, unmade beds. It was a complete disaster, and every time someone walked up those steps, I cringed at the loose fabric sagging under the tread. That lightbulb moment did not come until a flooring pro showed me the tuck-and-roll. It is that crisp, tight finish that makes the carpet look like it grew right out of the wood. Today, I am going to show you how to ditch the amateur wrap and finally get that high-end look yourself without the professional price tag.
Why Most DIY Stairs Look Like Lumpy Potatoes
The problem usually starts with fear. We are often afraid to pull the carpet too tight or cut too close to the riser, worried we will ruin the material. When I started out, I made the classic mistake of thinking the staples would do all the heavy lifting. They will not. If you do not master the tension, you end up with visible lines or sagging sections that wear out in months. Professional results rely on a specific tensioning technique where the carpet is tucked deep into the crotch of the stair and rolled tightly over the nose. This is not just about aesthetics, either. According to the Carpet and Rug Institute, properly installed carpet on stairs significantly reduces the risk of slips and falls by ensuring a stable, non-shifting surface underfoot. If your carpet is loose, it is a literal trip hazard waiting to happen.
Is this secret method actually worth the extra sweat?
You might be wondering if you can just get away with the standard step-down method and call it a day. Sure, you could. But if you have invested money in the right carpet for a cozy home, you do not want it looking cheap because of a lazy install. The tuck-and-roll gives you that contoured appearance that distinguishes a custom home from a quick flip. It takes more elbow grease, but the durability you gain—especially in high-traffic areas—is unbeatable. Have you ever looked at your stairs and felt like something was just off? Maybe the edges are not crisp, or the fabric feels hollow when you step on it? I want to hear about your biggest stair-flooring headache in the comments below.
The Tool Kit That Actually Makes a Difference
Before you even touch the carpet, you need to realize that a standard hammer and a prayer will not cut it. To get that tight tuck, you need a stair tool, often called a bolster. When I first started, I tried using a flat-head screwdriver. Huge mistake. I ended up piercing the backing and ruining a whole flight of high-traffic carpet before I even finished the third step. You want tools that help you achieve flawless results every time without damaging the delicate fibers. It is about finesse and the right leverage, not just brute force. Now that we have the right mindset, let us get into the grit of the actual technique.Before you even pull the carpet, you need your tack strips placed with surgical precision. I learned this the hard way on a split-level job where I thought I could skip the riser strips to save ten minutes. By the time I hit the third step, the carpet was shifting like a loose rug, and I had to rip everything out and start over. Now, I always place one strip on the tread about a half-inch from the riser and another on the riser itself, pointing down toward the tread. This creates a ‘V’ of teeth that grips the fabric from two angles. To ensure your project goes smoothly, follow a step-by-step flooring installation plan so you do not miss these small but vital prep tasks.
Put the Teeth to Work
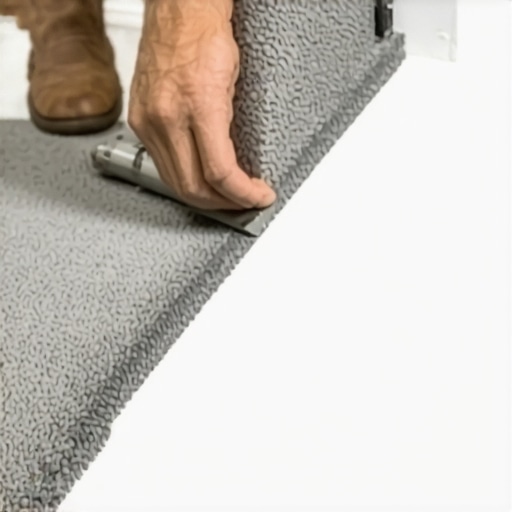
Start at the very bottom of the staircase. You want to staple the carpet to the floor at the base of the first riser, then pull it straight up. This is where the ‘tuck’ happens. Using your stair tool, you drive the carpet into the crotch where the riser meets the next tread. You are not just pushing it; you are wedging it. If you have ever wrestled with leveling a threshold between carpet and tile, you know how important that transition point is. On stairs, the ‘crotch’ is your transition. Once it is tucked tight, use a staple gun—preferably electric or pneumatic—to fire staples through the nap of the carpet directly into the wood. The goal is to hide the staple heads between the fibers so they disappear.
The Roll That Defines the Edge
Now comes the part that separates the pros from the hobbyists: the roll. Pull the carpet up over the tread and toward the next riser. This is not a gentle pull; you need to put your weight into it. I like to use a knee kicker here to get that extra inch of stretch. Hook the teeth of the kicker a few inches back from the nose and give it a firm bump with your quad. This forces the carpet over the edge, creating a crisp, sharp line. If you do not get this right, you will see those common flooring installation mistakes like rounded, mushy edges that make the stairs look dated.
Mastering the Stair Tool Wedge
The stair tool is your best friend for the ‘roll’ part of the tuck-and-roll. Once the carpet is stretched over the tread, you use the tool to shove the fabric into the gap under the nose of the next step. It is a rhythmic motion: stretch, tuck, staple, repeat. Think of it like wrapping a drum; the tighter the ‘skin,’ the better it performs. If you are dealing with tricky corners, the carpet tucker move can help you get those side edges flush against the stringers without leaving gaps.
Watch Your Alignment Every Single Time
One tiny tilt on the first step will turn into a massive slant by the tenth. I always use a small pencil mark on the center of each tread to ensure the carpet stays perfectly straight. This stair nose alignment trick is the only way to keep your pattern or pile direction from drifting. If the carpet starts to ‘vane’ or slant, you will end up with lopsided wear patterns that no amount of cleaning can fix.
While alignment is the skeleton of a good job, the nuance is what keeps it from falling apart in three years. One of the most common myths I hear from weekend warriors is that you should jam your baseboards tight against the subfloor before the carpet arrives. If you do that, you are setting yourself up for a world of pain. You actually need to leave a 3/8-inch gap between the bottom of the wood and the floor. This creates a pocket where the carpet can be tucked for that high-end, seamless look. Without it, you are forced to use quarter-round molding, which in my opinion, screams ‘I didn’t plan ahead.’ If you are looking to elevate your room, choosing the right baseboard styles includes planning for that tuck gap from day one.
Stop Shoving Your Baseboards Against the Subfloor
In my early days, I thought a tighter fit meant a more professional finish. I was wrong. When you don’t leave that gap, the carpet installer has nowhere to hide the rough edges of the backing. This often leads to the ‘Caulk Smear,’ a desperate attempt to hide gaps that eventually cracks and collects dust. It is one of those flooring installation mistakes that is almost impossible to fix once the paint is dry. If you have already made this mistake, you might need to use the back-cutting secret to adjust your trim pieces without ripping them all out. Have you ever fallen into this trap of making things too tight? Let me know in the comments because I have been there more times than I care to admit.
The Hidden Danger of Over-Stretching Your Carpet
Everyone tells you to pull the carpet tight, but there is such a thing as ‘too tight.’ While a knee kicker is great for stairs, over-tensioning the fabric can actually cause the tack strip to pull right out of the wood or, worse, cause the carpet fibers to ‘grin’—that is when you see the backing through the yarn. According to the Carpet and Rug Institute’s CRI 105 standards, improper stretching is the leading cause of premature carpet failure, but over-stretching on a narrow stair nose can actually weaken the structural integrity of the weave. You want a firm ‘drum-like’ feel, not a ‘guitar-string’ snap. Achieving flawless results every time is about finding that sweet spot of tension where the carpet stays put but the backing isn’t screaming for mercy.
Why does my carpet transition keep lifting at the doorway?
If you find yourself constantly tripping over the edge of your new install, the culprit isn’t usually the carpet; it is the transition strip. Most people use a cheap ‘tack-over’ metal bar that bends the moment a heavy suitcase rolls over it. To stop carpet transitions from tripping your guests, you need to use a Z-bar or a specialized transition that allows the carpet to be tucked and tensioned independently of the adjacent flooring. This is especially true if you are trying to level a threshold between carpet and tile. If you just ‘slap and staple’ at the doorway, you’ll end up with a carpet seam that looks like a speed bump. A professional-grade transition ensures that the tension we worked so hard to build on the stairs stays locked in all the way through the hallway.
Invest in a Power Stretcher or Prepare for Trouble
I used to think my quads were enough to get the job done, but after a week of knee-kicking my way through a three-story house, my joints were screaming. That is when I upgraded to a power stretcher. If you are doing anything larger than a small landing, the power stretcher vs knee kicker debate is over—the stretcher wins every time. It uses leverage against the opposite wall to pull the carpet to its absolute limit, ensuring those visible rows never appear. According to the IICRC S100 Standard for Professional Carpet Cleaning, improper tensioning during install is the primary reason why professional cleaners struggle with rippling during hot water extraction later. If the foundation is not tight, the long-term maintenance will be a nightmare.
The Miter Clamp is Your Secret Weapon for Trim
When I moved from the floor to the walls, I realized that baseboards are where the professional look truly lives or dies. I used to rely on just wood glue and a prayer, but now I never start a room without a dedicated miter clamp. Using the miter clamp secret for professional baseboard corners changed everything for me. It holds the two pieces of trim in a death grip while the glue dries, preventing that annoying gap creep that happens when you drive a nail in. It is the difference between a corner that looks like one solid piece of wood and one that looks like two sticks shoved together. This level of precision is vital when you are working with baseboard styles that elevate your interior design.
How do I keep my new flooring from looking trashed within a year?
Maintenance is the part of the job that never really ends. For showers, it comes down to protecting the porous materials. You need to know how to clean grout without stripping the sealer, or you will find yourself doing shower repairs far sooner than you planned. Harsh chemicals are the enemy; they eat the protective barrier and let mold move into the sub-layers. For carpets, the trick is high-quality padding. I have seen so many people spend a fortune on the top-layer fabric only to use a cheap recycled foam underneath. It is a recipe for disaster. Looking ahead, I predict we are going to see a massive shift toward smart subfloors with built-in moisture sensors that alert your phone if a pipe leaks behind your baseboards or under your shower pan. It sounds like sci-fi, but for anyone who has dealt with a ten-thousand dollar mold remediation, it is the future of a durable flooring installation for a stylish home. My challenge for you on your next project? Get yourself a set of miter clamps and see if your corners do not look one hundred percent better instantly.
The Brutal Reality of Carpet Tension I Had to Learn the Hard Way
If there is one thing I have learned after years of flooring, it is that your hands will lie to you. When you pull the carpet by hand, it feels tight, but the moment you walk on it, that tension vanishes. I used to think I could skip the heavy equipment on small landings, but that lead to the carpet coming loose in the hallway within six months. Another lightbulb moment was realizing that a dull utility blade is your worst enemy; it snags the fibers and leaves a fuzzy edge that no amount of tucking can hide. Most importantly, I learned that if you hear a squeak while you are laying the padding, stop everything. You need to fix that squeaky floor through the finished carpet area before the fabric goes down, or you will regret it every time you walk up to bed.
My Personal Tool Kit for a Professional-Grade Finish
I do not believe in buying every gadget in the aisle, but for a high-end carpet install, these three are non-negotiable for me. First, a heavy-duty stair tool with a wide blade ensures you do not puncture the backing. Second, I always carry a set of miter clamps; using the miter clamp secret for professional baseboard corners is the only way I have found to get those seamless returns on the side of the stringers. Finally, never underestimate a high-quality knee kicker with adjustable teeth depth. It allows you to grab the carpet without shredding the pile, which is vital when you are working with high-traffic carpet types that have a denser weave.
Your Journey Toward a Custom-Home Look Starts Here
Taking the time to master the tuck-and-roll method is about more than just avoiding a trip hazard; it is about the pride of looking at your stairs and knowing they look exactly like a professional crew did the work. It takes patience, a bit of sweat, and the right sequence of moves, but the result is a staircase that feels solid and looks integrated into your home’s design. Whether you are matching new treads to your existing baseboard styles or starting a full renovation, that crisp edge makes all the difference. Don’t be afraid to pull it tighter than you think is necessary—your future self will thank you for the durability. Have you ever tried to carpet a staircase only to end up with those frustrating lumpy edges? Let me know your biggest struggle in the comments below!