

I sat on my living room floor, staring at that top step for what felt like hours. I had spent three days meticulously laying down beautiful vinyl planks, but that final transition—the stair-nose—looked like a jagged tooth. It was not just off; it was aggressively crooked. I tried to convince myself that a bit of caulk or a cleverly placed rug would hide it, but we both know that is a lie we tell ourselves right before a guest trips. That was the moment I realized that flooring installation mistakes are not just about the flat surfaces; they live and die in the transitions. I have learned the hard way that if your stair-nose is not perfectly square to the riser and the tread, the whole staircase feels tilted every time you climb it.
Why Your Eyes Never Miss a Crooked Step
Most people think they can just eyeball the alignment and call it a day. I used to be one of them. But here is the thing: stairs are high-contrast areas. The shadow line created by the overhang acts like a giant highlighter for every mistake you have made. If that nose is even two millimeters out of parallel, your brain registers it as a safety hazard. It is not just about looks; it is about how your foot expects to land. When I first started, I ignored the stair-nose secret for durable vinyl staircases and ended up with a staircase that creaked and looked amateurish. It was a humbling lesson in patience.
Is this level of precision actually worth the hassle?
You might be wondering if obsessing over a fraction of an inch is overkill. I promise you, it is not. Experts at the National Wood Flooring Association (NWFA) emphasize that consistent tread depth and riser height are critical for preventing falls, as even small variations can disrupt the rhythm of a person’s gait. My mistake early on was thinking I could fix it later with trim. Spoiler alert: you cannot. Today, I am going to show you how to use a simple alignment trick that ensures every single nose sits perfectly flush and square. We are going to transform your home with expert flooring installation tips that actually work in the real world. Have you ever finished a project only to realize the very last piece was the one that ruined the look? Let me know in the comments if you have faced that same frustration. Let us get into the nitty-gritty of getting those lines straight.I learned the hard way that a staircase is only as good as the subfloor it sits on. Before you even think about opening a box of vinyl, you need to walk every inch of those treads. If you hear a peep, that is a future headache. I use the subfloor screw routine for stopping floor squeaks to anchor everything down. This is the foundation; if the tread moves, the nose eventually snaps its bond. If you have an older home where the wood has warped into a smile, you might need to know how to fix a loose stair tread without tearing it off before you proceed. Once that is solid, we move to the layout.
Why a Dry Fit Saves Your Entire Project
Most DIYers want to start gluing the moment they make a cut. Do not do it. You need to layout the entire run to see where your seams land. I remember a job where I forgot to account for the thickness of the riser material, and my final nose piece ended up with a tiny two-inch sliver of flooring behind it. It looked ridiculous. Now, I always dry-fit the nose first, then work backward toward the riser. Use the block and hammer hack for tight tongue and groove joints during this dry phase to ensure every piece is seated perfectly without damaging the edges.
The Spacer Method for Perfect Overhangs
To keep things square, I use a dummy riser. This is just a scrap piece of your riser material held against the vertical face. Your stair-nose should sit flush against this scrap. If there is a gap, your nose is crooked. I once spent four hours on a single flight of stairs in a crooked 1920s bungalow, shaving down the sub-tread with a power planer because the original wood was nearly half an inch out of square. It was messy and frustrating, but the result was a nose that did not have that dreaded wedge gap. This level of detail is what separates a weekend hack from a professional finish.
Locking the Nose in Place for Good
When you are finally ready to commit, the adhesive is everything. Unlike the rest of the floor which floats, the stair-nose is a structural safety element. It needs to be rock solid. Apply a heavy bead of construction adhesive to the sub-tread, then use the rubber mallet rule for locking vinyl planks to gently but firmly seat the nose into the adjacent flooring. You want to hear that satisfying click that signals a mechanical lock, while the glue handles the lateral stability. While you are at it, make sure you know how to stagger vinyl plank ends for maximum strength so that the pressure from people walking up the stairs does not cause a weak point right at the transition. This is not just about making it look pretty; it is about building a staircase that will not fall apart when your kids start treating it like a jungle gym.But stairs are just one part of the puzzle. Once you step off that final tread, the nuances of the surrounding floors and walls take over. Let’s dig deeper into the elements most DIYers—and even some pros—routinely overlook. Take baseboards, for instance. Conventional wisdom says you install them, caulk them, and then paint. I completely disagree. I’ve found that painting your baseboards before installing them is the only way to achieve a crisp, factory-like finish without getting a single drop of pigment on your brand-new flooring. It also saves you from the inevitable ‘oops’ of a shaky hand near the carpet line.
Why the ‘Good Enough’ Carpet Stretch Fails
Many homeowners believe that laying carpet is just about rolling it out and tucking it into the edges. This is a massive trap. The Carpet and Rug Institute (CRI) standards are very specific: a knee kicker is for positioning, but a power stretcher is mandatory for a lasting installation. If you skip the power stretcher, you aren’t just taking a shortcut; you are guaranteeing that your floor will develop carpet bubbles and ripples within 12 to 18 months. I’ve been called to far too many ‘repair’ jobs where the only issue was that the original installer relied on their knees instead of the proper tools.
Is a visible carpet seam always a sign of a bad job?
Not necessarily, but it often points to a lack of planning. Even the best joins can become a visible line in the morning light if the installer didn’t account for the direction of the windows. To combat this, I always use the double-cut method for invisible carpet seams, which ensures the backing of both pieces meets with surgical precision. It’s the difference between a floor that looks like one continuous piece and one that looks like a jigsaw puzzle.
The Hidden Mold Trap in Your Luxury Shower
Moving into the bathroom, the nuances become even more critical because mistakes here lead to structural damage. Everyone obsesses over modern shower designs, but they often ignore the physics of water. The Tile Council of North America (TCNA) requires that every horizontal surface—including niches and benches—must have a minimum 1/4-inch per foot slope toward the drain. If your niche is perfectly level, you aren’t being precise; you’re building a pond. That standing water is why your shower niche is growing mold behind the silicone. To avoid this, I never close up a wall without performing the flood test secret to verify that the waterproofing is actually doing its job.
Master the Seasonal Gap in Your Woodwork
Finally, let’s talk about the ‘phantom gap.’ You finish your baseboards, they look perfect, and then winter hits. Suddenly, every corner looks like it’s pulling apart. This happens because most people ignore the moisture content of the wood. You’ll see baseboard miters opening at the top because the wood shrunk as the heat kicked in. The fix? I use the scarf joint rule for long baseboard runs to allow for subtle movement without exposing the subwall. It’s these tiny, analytical adjustments that separate a hobbyist from a craftsman. Have you ever fallen into this trap of skipping the ‘invisible’ prep steps? Let me know in the comments.
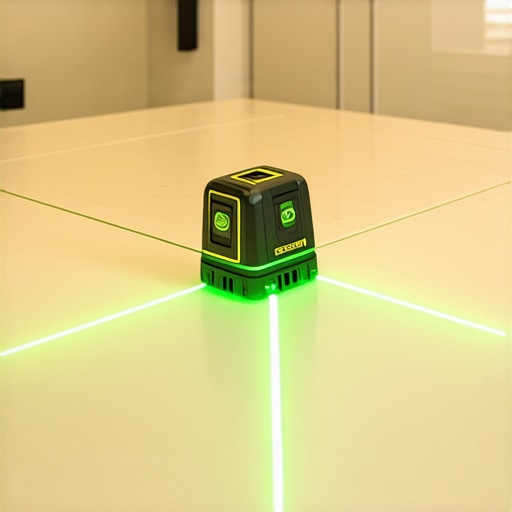
I’ve spent thousands of hours on my knees, and if there is one thing I’ve learned, it’s that your hands are only as good as the steel they hold. People ask me all the time if they should buy the cheap version of a tool for a one-off project. My answer is always the same: if the tool affects the precision of a joint or the seal of a waterproof layer, buy the best you can afford. For example, when I’m doing step-by-step flooring installation from planning to perfect finish, I never rely on a manual level. I use a self-leveling 360-degree green beam laser. Why green? Because red disappears in a sunlit room, and the laser level hack for straight tile rows is the only way to ensure your grout lines don’t slowly drift into a diagonal mess.
Why Your Steam Mop is Secretly Killing Your Floors
Even the most beautiful job can fail if you treat it like a rental. I’ve seen $10,000 hardwood floors ruined because someone used a steam mop. The heat and moisture are the enemies of wood and vinyl alike. For my own home, I stick to the microfiber mist rule for cleaning matte floors. It uses just enough moisture to lift dirt without soaking into the seams. If you have a shower, don’t wait for the grout to turn black. I tell everyone that shower repairs often start with simple negligence of the sealer. If you have natural stone, you need the deep seal tactic for porous natural stone showers to prevent permanent staining from body oils and hard water.
How do I keep my new installation from aging prematurely?
The secret to longevity is actually in the ‘give.’ Materials need to move. I always leave a penny gap rule for hardwood expansion space under the baseboards. If the floor can’t breathe, it will buckle. This is especially true as we see more extreme weather cycles. Looking ahead to 2025 and beyond, I see a massive shift toward ‘universal design.’ We are moving away from clunky curbs toward the linear drain setup for barrier-free showers. It’s a cleaner look and much easier to maintain as we age. According to the Schluter-Systems technical handbook, proper load distribution and integrated drainage systems are no longer ‘upgrades’—they are the baseline for a shower that lasts thirty years instead of five.
The Tools That Actually Stay in My Truck
If you want to step up your game, try the blue tape trick for cleaning up silicone beads. It’s an old pro move that makes your bathroom transitions look like they were done by a machine. It takes an extra ten minutes of prep but saves you an hour of scrubbing messy silicone off your new tiles. Trust me, your future self will thank you when you aren’t staring at a smeared mess every morning when you brush your teeth. Using expert flooring installation tips means thinking about the maintenance of the project before the first piece of trim is even cut.
The One Mistake That Taught Me More Than Ten Years of Practice
I used to think that speed was the mark of a pro, but I was wrong. The biggest ‘lightbulb moment’ of my career came when I realized that every single flooring failure I had to fix originated in the first ten minutes of the job. I once ignored a slight dip in a subfloor because I was in a rush, only to have the entire room start bouncing a month later. Now, I never skip the boring stuff. Whether it is ensuring you have enough carpet install secrets up your sleeve or double-checking the moisture in your concrete, the prep is the project. If you are working in a bathroom, I cannot stress enough how much the silicon bead secret for waterproofing baseboards in bathrooms will save your drywall from rotting from the bottom up. Trust the process, even when it feels slow.
The Three Resources I Consult Before Every Big Project
I don’t make a single cut without a plan, and I rely on a few specific standards to keep my work top-tier. First, I always keep the TCNA (Tile Council of North America) Handbook bookmarked for shower slopes; it is the gold standard for avoiding mold. Second, I constantly refine my trim work by practicing the inside cope method for beginners on scrap wood before touching the expensive mahogany or primed MDF. Finally, for those tricky staircases, I always revisit the tuck and roll secret for carpet on bullnose steps to ensure the padding is invisible and the transition is rock-solid. These aren’t just tips; they are the foundation of a home that doesn’t just look good on day one, but stays beautiful for a decade.
Your Home Deserves a Finish You Can Be Proud Of
At the end of the day, you are the one who has to walk these floors every morning. Don’t settle for ‘good enough’ when you have the tools and the knowledge to make it perfect. Taking that extra hour to scribe a board or re-stretch a carpet ripple is what transforms a house into a masterpiece. Your journey through flooring installation is a marathon, not a sprint, and every carefully placed plank is a testament to your hard work. Have you ever spent way too much time on a single stair-nose just to get it perfectly square? Let me know about your most challenging transition in the comments below!