

The afternoon sun was hitting my brand-new, satin-finish oak floor just right, and that’s when I saw it. A three-foot-long gouge from a stray pebble stuck in my kid’s sneaker. My heart sank. I’d spent weeks on that flooring project, and within forty-eight hours, it was “ruined.” Or so I thought. That was the moment I realized that my obsession with smooth, mirror-like surfaces was actually my biggest mistake. I’ve spent years helping folks pick the right materials, and I’ve learned that the quest for perfection often leads to the most frustration. If you’ve ever felt that pit in your stomach when a pet skids across the hallway, you’re in the right place. Today, I’m going to show you why a little bit of texture—specifically wire-brushing—is the ultimate insurance policy for your home. [image]
Stop Worrying About Every Single Scuff and Ding
The “secret” that high-end designers don’t always lead with is that texture is your best friend. After that disaster with the maple, I pivoted. I started looking into wire-brushed finishes, and it changed everything about how I approach a flooring installation. Wire-brushing involves using a wire head to pull out the soft grains from the top of the wood plank, leaving the hardest heartwood exposed and creating a subtle, rustic texture. Early in my career, I made the classic blunder of recommending high-gloss finishes for busy households. I thought it looked “expensive.” It was one of those flooring installation mistakes to avoid for a seamless look that I now warn everyone about. Why? Because a flat, shiny surface acts like a mirror for imperfections. Wire-brushed finishes, on the other hand, embrace the chaos. They already have a “distressed” vibe, so when a new scratch happens, it just blends into the existing grain. According to the National Wood Flooring Association, textured surfaces significantly reduce the visibility of topical scratches by diffusing light rather than reflecting it directly. This means those everyday marks effectively become part of the floor’s character rather than a glaring flaw.
Is wire-brushing actually worth the extra cost?
I get this question a lot from neighbors who are worried they’re just paying for a “trend.” Look, I’ve been there—staring at a quote and wondering if I’m being upsold. But here’s the reality: wire-brushed floors aren’t just about the look; they’re about longevity and your own sanity. If you’ve ever had to learn how to match wood grain when patching old hardwood floors, you know how hard it is to make a repair look invisible on a smooth floor. With a wire-brushed finish, the “repairs” are practically built-in. It hides the dirt, the pet hair, and yes, those inevitable scuffs from moving furniture. Have you ever finished a home project only to have it “ruined” by a pet or a dropped kitchen chair within the first week? I’d love to hear your “first scratch” horror stories—send me a message and let’s talk about if texture is the answer you’ve been looking for.
Get your subfloor flat or your finish won’t matter
When I installed a textured oak floor for a family with three Great Danes last spring, the stakes were high. They had previously dealt with a floor that looked like a skating rink after a week of paw traffic. The key to their success wasn’t just the wood itself, but how we treated the prep. Think of your subfloor like the chassis of a car; if it’s bent, the ride is going to be bumpy no matter how nice the seats are. If you have low spots, you absolutely must know how to level a subfloor dip without removing the old subfloor. I’ve seen countless DIYers pour self-leveler and later wonder why your floor leveler is cracking over plywood—usually, it’s because they skipped the primer or the lath. On that Great Dane job, we spent two full days just getting the subfloor within a 1/8-inch tolerance. It felt tedious, but it’s the only way to ensure those wire-brushed planks don’t “bridge” over a dip and creak every time a 120-pound dog walks by. #IMAGE_PLACE_HOLDER_B#
Master the expansion gap with a simple coin trick
Wood is a living thing. It breathes, expanding in the humid summer and shrinking when the heater kicks on in January. If you jam your textured planks tight against the wall, they’ll eventually “peak” or buckle, ruining that beautiful grain. I always use the penny gap rule for hardwood expansion space. A penny is roughly 1/16th of an inch, and stacking two of them against your spacers gives you a perfect, consistent 1/8-inch gap. It’s a low-tech solution that prevents high-stress repairs later. If you’re installing over a concrete slab, don’t forget the urethane glue secret for hardwood on concrete. Unlike water-based glues, urethane acts as a secondary moisture barrier and stays flexible, allowing the wood to move naturally without snapping the bond.
Lock those joints without damaging the texture
The beauty of wire-brushed wood is the surface, but that surface is also prone to splintering if you hit it directly with a mallet during the install. I learned this the hard way on a job in 2018 when I took a massive chunk out of a premium plank. Now, I exclusively use the block and hammer hack for tight tongue and groove joints. You use a scrap piece of the flooring as a tapping block to protect the “good” plank while focusing the force exactly where the tongue meets the groove. It’s like using a chisel—precision beats raw power every time.
Finish strong with miters that actually stay closed
Once the floor is down, the transition to the walls is where the pros are separated from the amateurs. Standard miters on baseboards are notorious for opening up at the top as the house settles or the wood moves. To keep things tight, I employ the back bevel move for tight baseboard miters. By cutting the back of the molding at a slight angle, you ensure the front edges touch first and stay locked together even if the wall isn’t perfectly square. It’s the difference between a gap you have to hide with layers of caulk and a joint that looks like it was carved from a single piece of wood.
Most homeowners—and even some self-proclaimed pros—think that once the floor is down, the hard part is over. That’s a dangerous mindset. I’ve seen more ten-thousand-dollar flooring jobs ruined by a five-dollar tube of the wrong caulk than I care to admit. Everyone tells you to just ‘fill the gaps,’ but over-sealing is the fastest way to a technical failure. For example, if you’re finishing off a bathroom, you might be tempted to go heavy on the sealant, but you must understand the painter caulk vs silicone guide for baseboards because using the wrong one means your paint will peel or crack in six months. Have you ever fallen into the ‘more is better’ trap? Let me know in the comments, because I’ve definitely been there.
The biggest myth I have to debunk daily is that tile and grout are waterproof. They aren’t. They are ‘water-shedding.’ If you aren’t performing the flood test secret for guaranteed leak-proof showers, you are essentially gambling with your subfloor. According to the Tile Council of North America (TCNA), the underlying membrane is the only thing standing between your shower and a rot-infested floor joist. I once had a client who skipped this step to save a day on the schedule; three months later, we were doing shower repairs when to fix vs replace for longevity because the water had bypassed the ‘waterproof’ grout and soaked the wall studs.
Why does my expensive carpet still have those annoying lines?
It’s not always a bad seam. One nuance beginners miss is ‘pile reversal’ or ‘shading.’ If your installer didn’t follow the directional pull rule for power stretching carpet, the light hits the fibers at different angles, making a perfect seam look like a glaring mistake. This is especially true if you didn’t check why your carpet seams are visible in morning light before the furniture was moved back in. A true expert knows that layout direction is just as important as the physical bond of the seam tape.
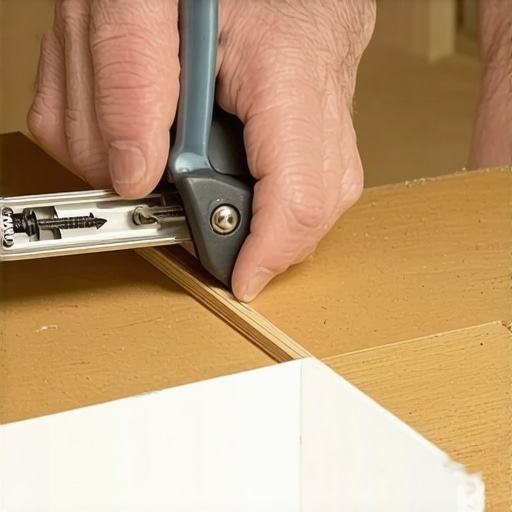
When it comes to the trim, please stop mitering your inside corners. Houses breathe, and those 45-degree cuts will open up the second the humidity drops. I always teach the inside cope method for beginners because a coped joint allows one piece to slide behind the other, keeping the joint tight even as the wood shrinks. And if you’re running long stretches, don’t just butt the ends together; use the scarf joint rule for long baseboard runs to hide the transition. If you’re struggling with those pesky gaps, you might want to look into why your baseboard miters are opening at the top—usually, it’s a sign the wall isn’t square, which is where the razor scribe method for baseboards on wavy drywall becomes your best friend. Small nuances like these are what separate a ‘DIY look’ from a professional flooring installation that actually lasts.
If you want to move from ‘good enough’ to ‘architectural quality,’ you need to stop guessing. I tell everyone that my most valuable tool isn’t a hammer; it’s my pinless moisture meter. Before I even think about a flooring installation, I’m checking the subfloor and the new planks. If the levels aren’t within 2% of each other, I don’t touch a single nail. It’s the same with showers; I use a laser level for every single row because your eyes will lie to you, but a red beam won’t. If you’re trying to keep things precise, the laser level hack for straight tile rows is the only way to avoid that ‘creeping’ grout line that ruins the look of a luxury bathroom.
How do I maintain my flooring and showers over time?
The biggest killer of a beautiful home isn’t wear; it’s the wrong cleaning chemicals. I’ve seen homeowners take a steam mop to a hardwood floor and practically cook the finish off. For wood, I swear by the microfiber mist rule for cleaning matte floors. You want just enough moisture to lift the dirt, but not enough to sit in the grain. For showers, it’s all about the ‘Soft Joint.’ I always tell people to check their corners every year. If the silicone is peeling, you need the blue tape trick for cleaning up silicone beads to get a pro-level replacement seal without the mess. 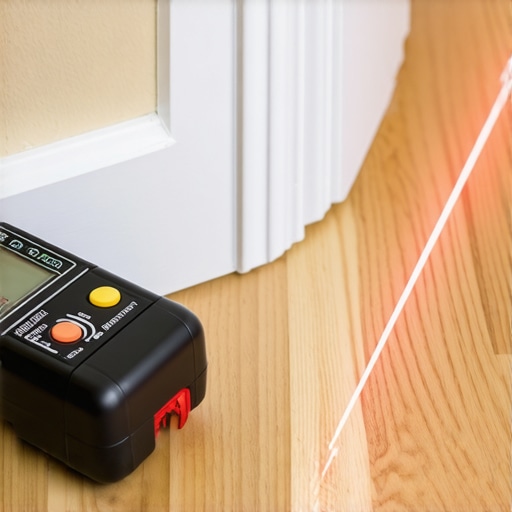
The three tools I never walk onto a job site without
For baseboards, I don’t use a standard miter saw for everything anymore. My secret weapon is an oscillating multi-tool with a Japanese-tooth blade. It allows for surgical precision when you’re doing the razor scribe method for baseboards on wavy drywall. It lets you shave off fractions of an inch that a big saw would just shatter. If you’re doing a full gut-job, remember that efficiency matters; why a 20 yard dumpster is the right move for hardwood tear outs becomes obvious the moment you realize how much space 500 square feet of old oak actually takes up.
What the future holds for home surfaces
Looking ahead, I see a massive shift toward ‘active’ moisture management. According to the Schluter-Systems technical data sheets, the industry is moving toward fully integrated waterproof systems that prioritize vapor management over simple topical blocking. In the next few years, expect to see more ‘smart’ leak detection sensors built directly into shower pans and under-floor systems. We’re moving away from just ‘fixing’ leaks to preventing them before they can even stain a ceiling. Next time you’re sealing a bathtub or a baseboard in a wet area, try the Blue Tape Trick I mentioned. It’s the single easiest way to make your work look like it was done by a 20-year veteran.
The Hardest Lessons I Learned From Every Squeaky Board
After a decade in the field, I’ve realized that a flawless flooring installation isn’t about avoiding mistakes—it’s about knowing how to handle them. I once spent sixteen hours trying to make a laminate floor look perfectly level on a sagging joist, only to have it pop the next morning. That taught me that the subfloor speaks first; if you don’t listen, you’ll pay for it in callbacks later. Another lightbulb moment came when I stopped trying to hide expansion gaps and started embracing them. Those gaps are the lungs of your floor, allowing it to survive the changing seasons. I’ve also learned that the ‘expensive’ look doesn’t come from the price of the plank, but from the precision of the trim. A perfectly executed back bevel move for tight baseboard miters does more for a room’s visual value than premium wood with sloppy corners ever could.
The Trusted Gear That Saves My Reputation Daily
I never show up to a job site without a few non-negotiables that make or break the final result. [image] First, a high-quality pinless moisture meter is your insurance policy against warping and gapping. Second, for anyone tackling tile, using the spacer block move for perfect tile alignment is a total game-changer for maintaining consistent grout lines on large format pieces. I also highly recommend keeping the TCNA Handbook close by; it’s the industry bible for ensuring your wet areas don’t turn into mold factories. Finally, for those finishing touches, never underestimate the power of a Japanese-tooth blade on an oscillating tool for those surgical-grade scribe cuts that standard saws just can’t reach.
Don’t Let the Fear of a Single Scratch Stop You
At the end of the day, your home is meant to be lived in, not just looked at. Whether you are navigating carpet install secrets or laying down 7-inch wide oak, the goal is to create a space that feels like you. Don’t be afraid to get your hands dirty and make that first cut. Every expert was once a beginner staring at a pile of boxes wondering where to start. Your next flooring installation is the perfect opportunity to turn your house into the home you’ve always wanted. Have you ever run into a subfloor surprise that nearly ruined your project? Let me know in the comments below.