

I stood there for twenty minutes, just staring at a single piece of porcelain. I’d already spent hours studying the ultimate shower renovation guide, but this curved cast iron tub was mocking me. My first attempt at fitting the tile was a total disaster—I tried to eyeball the curve, cut it straight, and figured I’d just “hide it with caulk.” I ended up with a jagged, ugly mess that looked like a beaver had chewed on the edge. It was embarrassing, and honestly, it’s a mistake I see all the time in DIY projects. But here’s the thing: you don’t have to settle for that “good enough” look that makes you cringe every time you step into the shower.
Stop Guessing and Start Scribing
Scribing is one of those skills that separates the weekend warriors from the pros, and it’s surprisingly simple once you stop overthinking it. Today, I’m going to walk you through the exact process I use to get a seamless fit between your wall tile and that tricky tub deck. We’ll talk about why the paper template method for complex tile cuts is your secret weapon and how to ensure you’re leaving just enough room for the soft joint rule for shower wall corners to keep everything waterproof and looking sharp. Trust me, if I can learn to do this without throwing my level across the room in frustration, so can you. It’s all about the preparation and having the right mindset before you even pick up the saw.
Is scribing actually worth the extra effort?
I get it. You’re tired, your back hurts from kneeling on the subfloor all day, and you just want to finish the shower and move on. You might be thinking, “Won’t a thick bead of silicone hide everything anyway?” Here is the cold, hard truth: silicone isn’t a structural fix for a bad cut. According to the Tile Council of North America (TCNA), grout and sealant joints are designed to handle movement, not to fill massive architectural gaps. When you have a gap wider than an eighth of an inch because of a bad cut, your sealant is much more likely to pull away or “sink” over time, leading to hidden leaks that rot your studs. It’s not just about aesthetics; it’s about protecting your home.
Why Your Caulk Gun Can’t Fix a Bad Cut
My biggest early mistake was thinking I could tile over a cast iron bathtub flange without accounting for the slight taper and curve in the tub’s design. I pushed the tile tight, but because the cut wasn’t scribed to the curve, it created a pivot point. The tile actually cracked a few weeks later when someone stepped into the tub and the house shifted just a fraction of an inch. That’s why we scribe. It’s not just about the “wow” factor when people see your work; it’s about the longevity of the installation. Have you ever tried to hide a bad tile cut with a mountain of caulk only to have it look worse than before? I want to hear about those “oops” moments you’ve had during a renovation. In the next section, we’re going to grab our compass, a fresh pencil, and our angle grinder to actually make those perfect cuts happen. It’s time to stop fearing the curve and start mastering it.
Set Your Tools Before You Make a Mess
To start, you need to dry-fit your tile. Hold it exactly where it will live on the wall, perfectly plumb and level. I cannot stress this enough: if the tile is tilted even a fraction of a degree, your scribe line will be completely inaccurate. This is where the laser level hack for straight tile rows becomes your best friend. I remember working on a small alcove shower where the tub was an old, warped cast iron beast. I tried to eyeball the cut, and it ended up looking like a gap-toothed smile. I had to rip out three expensive porcelain tiles because once the grout goes in, every mistake is magnified by ten. Don’t be like ‘Past Me.’
Let the Compass Do the Heavy Lifting
Once your tile is secured in its dry-fit position, take a simple carpenter’s compass. Set the width of the compass to the largest gap between the edge of the tile and the tub deck. Think of the compass as a record player needle; it needs to stay at a consistent angle to play the right tune. Keep the metal point of the compass pressed firmly against the bathtub surface and the pencil point on the tile. As you slide the metal point along the curve of the tub, the pencil will mirror that exact shape onto the tile surface. It’s a foolproof transfer of geometry as long as your hand is steady. 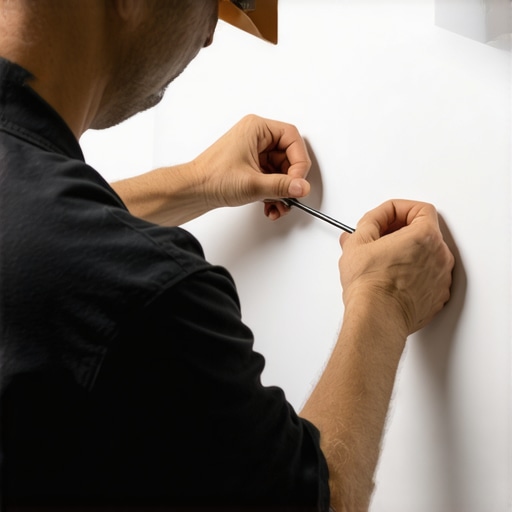
Why a Back-Bevel Saves Your Sanity
Now comes the actual surgery. Grab your angle grinder equipped with a continuous rim diamond blade. Instead of cutting straight down through the tile, you want to perform what’s called a ‘back-bevel.’ This involves tilting the grinder so you are removing more material from the back of the tile than the front. This technique creates a razor-sharp, clean top edge that meets the tub perfectly while leaving extra space for thinset and movement underneath. While you are prepping the install, don’t forget the back-buttering rule for large format wall tiles to ensure those edges stay bonded for life.
Clean Your Cut for a Professional Finish
After the cut is made, it will likely have some small chips or jagged bits. Use a diamond sanding pad (200-grit works wonders) to smooth the edge until it feels like factory-finished porcelain. You aren’t just doing this for looks; you are creating the necessary ‘shoulder’ for your sealant. This is the foundation of the soft joint rule for shower wall corners and tub transitions. You need a consistent 1/8th inch gap for the 100% silicone sealant to inhabit. If the tile is physically touching the tub, the pressure from the tub filling with water will eventually cause the tile to buckle or crack. To get that perfect bond, ensure you know how to mix thinset for the perfect peanut-butter consistency so the tile stays exactly where you placed it during the final set.It’s a common myth that a waterproof membrane makes a shower invincible. In reality, the most expensive membrane in the world can’t compensate for a subfloor that bounces. I once consulted on a project where the homeowner followed the ultimate shower renovation guide to a T, but skipped the most boring part: reinforcing the joists. They ended up with hairline cracks in the corner because they ignored why your floor joists need blocking before tile installation. When you stand in that shower, you are putting 150 to 200 pounds of concentrated pressure on a small area; if the wood beneath it gives, the tile above it must break.
Is a flood test truly mandatory if the kit is pre-sloped?
Every pro I know says yes. According to the Tile Council of North America (TCNA) handbook, a 24-hour flood test is the only definitive way to ensure your pan and drain assembly are integrated correctly. Most DIYers skip this because they’re in a rush, but that is the ‘trap’ that leads to thousands in mold remediation. If you skip the flood test secret for guaranteed leak-proof showers, you are essentially gambling that your thinset and plumbing are perfect.
Avoid the sinking shower base nightmare
Another hidden nuance is the substrate for the base itself. If you’re using a foam tray, you need a perfectly level subfloor. If it’s even slightly off, you’ll find why your shower base is sinking into the floor over time. I personally prefer the dry pack method for a level shower base because it allows you to customize the pitch and creates a rock-solid foundation that foam just can’t match. 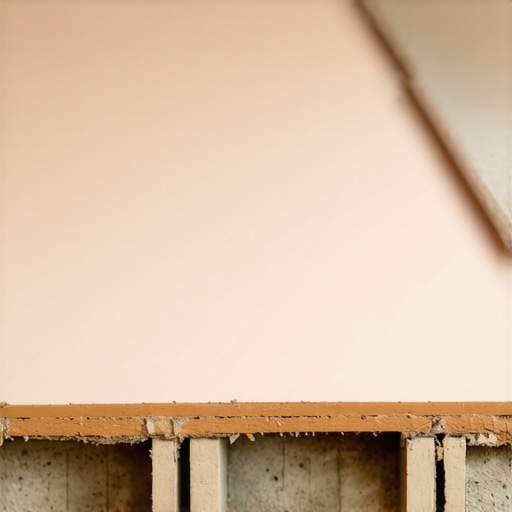 This brings us back to the transition at the floor. If you’re moving from a tile shower to a luxury vinyl or hardwood floor, don’t make the mistake of running the flooring tight against the curb. You must understand why you need a perimeter expansion gap for vinyl planks to prevent buckling when humidity changes. That’s why the soft joint rule for shower wall corners and transitions isn’t a suggestion—it’s a requirement for any plane change. Have you ever fallen into this trap where you thought the waterproofing or the floor fit was ‘good enough’ only to see a failure later? Let me know in the comments.
The One Tool That Actually Saves Your Baseboards
I used to think a miter saw was the only way to handle trim, but then I discovered the oscillating multi-tool. It changed everything for my baseboard and flooring transitions. If you have ever tried to slide a new piece of luxury vinyl under an existing door casing, you know the struggle. Instead of hacking away with a chisel, the multi-tool allows for surgical precision. This is essential when you are learning the inside cope method for beginners because it lets you trim back those tiny slivers of wood that prevent a tight fit. In my experience, a tool like the Bosch StarlockMax isn’t just a luxury; it’s the difference between a project that looks DIY and one that looks like it was handled by a master carpenter. I’ve seen so many people ruin expensive trim because they didn’t have the right blade for the job.
How do I maintain my new flooring and tile over time?
Maintenance isn’t just about a weekly mop; it’s about understanding the chemistry of your surfaces. For example, if you’ve spent weeks perfecting your bathroom, you need to stay on top of shower repairs: when to fix vs replace for longevity to ensure moisture isn’t creeping into the subfloor. I always recommend a pH-neutral cleaner. Many homeowners reach for vinegar, thinking it’s a ‘natural’ miracle worker, but the acidity will eventually eat away at your grout and the finish of your baseboards. For those with trendy matte finishes, I live by the microfiber mist rule for cleaning matte floors. It prevents the streaking that drives everyone crazy under high-output LED lighting. 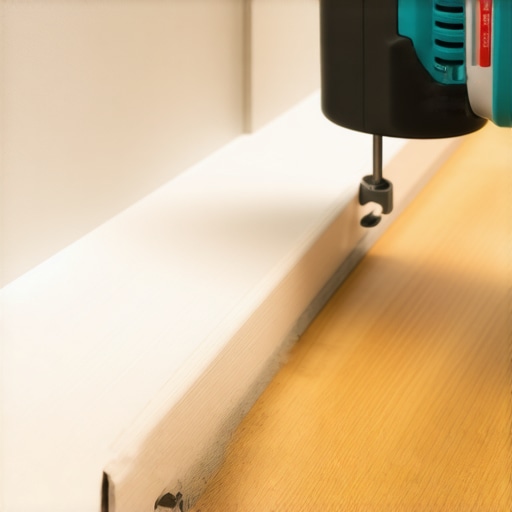
Stop Using Vinegar on Your New Floors
Seriously, stop. The National Tile Contractors Association (NTCA) specifically warns against using harsh acids or bleach on grout and stone because it breaks down the integrity of the sealant. Once that seal is gone, your beautiful white grout becomes a magnet for dirt. This is often why your caulked baseboards are cracking within weeks—the moisture from improper cleaning gets into the joints and causes the wood or MDF to swell and shrink. If you want to stay ahead of the curve, keep an eye on baseboard trends in 2025: fresh styles for every room, which are moving toward more durable, moisture-resistant composite materials that handle high-traffic cleaning much better than old-school pine.
Where the Industry is Heading
I predict we are going to see a massive shift toward ‘smart’ maintenance—flooring systems that have built-in antimicrobial properties and grout that is essentially a flexible resin. This will make the ‘soft joint’ even more critical as homes are built tighter and settle more significantly. If you are currently in the middle of a project, my best advice is to master the back-cutting secret for baseboard miters right now. It is a small skill that prevents those ugly gaps from appearing six months down the line when the air dries out. Give that back-cutting technique a try on your next corner; it will save you hours of caulking and wood filler. Trust the process, and don’t take shortcuts on the tools that provide the precision your home deserves.
The Expensive Reality of Choosing Speed Over Precision
If there is one thing I’ve learned from years on the subfloor, it’s that your house is a living, breathing entity. It expands in the summer and shrinks in the winter. When you try to force a “perfect” tight fit without a soft joint, you aren’t being precise; you’re being stubborn. I once saw a beautiful step-by-step flooring installation ruined because the homeowner didn’t leave that 1/8-inch gap. The floor buckled, and they had to rip out three rows of planks. Remember: precision isn’t about the absence of space; it’s about the control of it. You also have to realize that your walls are almost never truly square. Instead of fighting the house, learn to work with its flaws using the scribe and the cope. These small adjustments are what keep your durable flooring installation looking crisp for decades rather than months.
#IMAGE_PLACE_HOLDER_E#
What I Keep in My Truck for Every Trim Job
You don’t need a massive workshop to get pro results, but you do need tools that don’t fight you. For baseboards, I never start a job without a high-quality oscillating multi-tool for those tricky undercuts. I also recommend checking out baseboard styles that elevate your interior design to ensure your hardware matches your aesthetic. For showers, a set of diamond hand-sanding pads is non-negotiable. They turn a “good enough” cut into a “how did they do that?” edge. If you’re looking for inspiration on the overall look, these shower renovation ideas can help you visualize how a clean scribe line brings the whole room together. Finally, always have a fresh pack of 100% silicone sealant; it is the only thing that will survive the movement between your tile and the tub.
Turn Your Renovation Anxiety Into Professional Pride
It’s easy to feel overwhelmed when you’re staring at a pile of expensive materials and a complex curve, but remember that every pro started exactly where you are. Taking the time to do a baseboards makeover or a full shower rebuild is an investment in your home’s future. Don’t rush the scribe, and don’t skip the dry fit. When you finally lay that last piece of tile and see that seamless transition, the frustration of the learning curve will vanish. You’ve got the knowledge, you’ve got the tools—now go make that first cut. Have you ever run into a corner or a curve that felt absolutely impossible to tile? Let me know in the comments how you handled it!