

I remember the exact moment my heart skipped a beat. I was half-awake, stepping into my master shower on a rainy Tuesday morning, and I felt it. Not the warm spray of water, but a sickening, spongy *give* under my right heel. It wasn’t just a creak; it was the unmistakable feeling of a heavy fiberglass pan dipping toward the center of the earth. I stood there, frozen, thinking about the thousands I’d just spent on my ‘dream’ bathroom. I’d ignored the small stuff during the flooring installation phase, assuming the subfloor was ‘good enough.’ It wasn’t. That tiny dip was the start of a massive headache that eventually led me to rip out three rows of subway tile just to see what was happening underneath. Today, I’m going to share exactly why this happens so you don’t end up where I was—staring at a cracked drain and a wet basement ceiling.
That Sinking Feeling Isn’t Just in Your Head
If your shower base feels like a trampoline, you’ve got a structural support problem. When I first started DIYing, I made the rookie mistake of thinking a manufacturer’s ‘self-supporting’ base meant I could just plop it onto the plywood and call it a day. I was wrong. The reality is that even the sturdiest acrylic or fiberglass pans need a solid foundation to handle the weight of a human plus the weight of the water. If there’s even a 1/8-inch gap between the pan and the floor, you’re looking at one of the most common flooring installation mistakes in the book. According to the National Kitchen & Bath Association, subfloor deflection—the technical term for ‘bounciness’—is the leading cause of shower enclosure failure. Without a rigid base, every step you take puts immense pressure on your plumbing connections. Eventually, something has to snap.
Is a little bit of floor flex really worth the repair cost?
You might be tempted to just run a thicker bead of silicone around the bottom and hope for the best. I tried that. It lasted about two weeks before the movement tore the caulk right off the wall. The truth is, ignoring a sinking base is like ignoring a leak in a boat; it’s only a matter of time before you’re underwater. I’ve learned that why your floor joists need blocking is a conversation you need to have before you ever set the pan. If your joists are spaced too far apart or if they’ve been notched by a plumber who was a little too aggressive with his saw, your shower is doomed from the start. Have you ever felt that weird ‘squish’ while you were lathering up? If so, you need to check your shower repairs options sooner rather than later.
Why Your Foundation is Failing You
The most frequent culprit I see is the lack of a proper mortar bed. Many installers skip this because it’s messy and takes extra time. But the the dry pack method for a level shower base is the only way to ensure 100% contact between the pan and the floor. When I finally pulled my old base out, I found a cavernous void where the support should have been. Every time I stepped in, the plastic was literally stretching to reach the floor. To keep your bathroom from turning into a disaster zone, you need to ensure your the flood test secret isn’t the only thing standing between you and a mold problem. If you are planning an ultimate shower renovation, let’s make sure we build it on a rock-solid foundation first.To get that rock-solid feel, you have to treat your subfloor like a surgical site. I remember a project in a 1920s bungalow where the joists were notched so deep for old plumbing that the whole bathroom floor felt like a diving board. We didn’t just add plywood; we went underneath and added solid blocking between every single joist. If you skip this, your tile is guaranteed to crack. This is where why your floor joists need blocking becomes the most important part of your weekend. Without that rigidity, the most expensive shower enclosures will eventually leak at the seams because the pan is constantly shifting under your weight.
Stiffen the Floor Before You Start
You can’t build a skyscraper on sand, and you can’t put a 300-pound shower setup on a bouncy floor. Before you even think about the drain, jump on the subfloor. If you see your coffee mug ripple on the other side of the room, you need more support. I once tried to ‘fix’ a bouncy floor by just adding an extra layer of 1/4-inch plywood to a client’s bathroom. It did nothing. I ended up having to crawl into a spider-infested crawlspace to sister the joists properly. Learn from my misery: use 3/4-inch exterior grade plywood and ensure it’s glued and screwed every six inches along the joists. This is the first step in a successful flooring installation project.
Mix Your Mortar to a Perfect Consistency
The ‘self-supporting’ legs on many shower pans are a lie. They are points of failure, not points of support. To fix this, you need a mortar bed. Think of it like a custom-molded glove for the bottom of your shower. You want to follow the dry pack method for a level shower base to create a base that won’t shrink or crack. When you’re ready to mix, you’re looking for a specific texture. If it’s too runny, the pan will sink; if it’s too dry, it won’t bond. I always tell my crew to aim for ‘damp sand’—if you squeeze a handful, it should hold its shape without dripping water. Learning how to mix thinset for the perfect peanut butter consistency is a skill that translates across all tile work, ensuring your base stays put for decades. 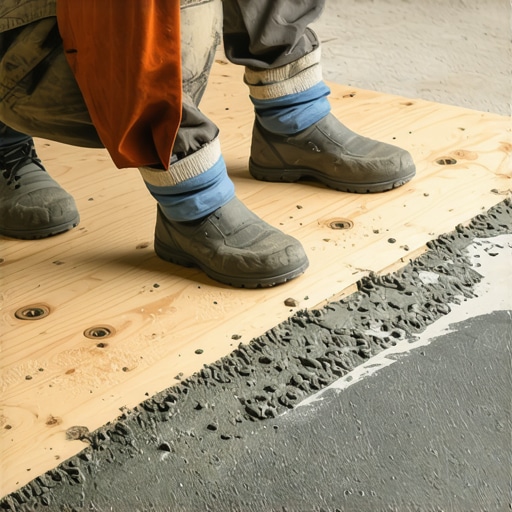
Perform a Dry Fit Before the Mess Starts
Nothing ruins a Saturday faster than having a pile of wet mortar on the floor and realizing your drain pipe is half an inch off. I’ve been there, frantically hacking at a subfloor with a reciprocating saw while the mortar started to skin over. It’s a nightmare. Always perform the dry fit test for shower drain alignment. Set the pan, check it for level in both directions, and mark the drain location on the floor. If you need to shim the pan to get it level, do it now, not when you’re wrestling with a 60-pound slab of acrylic that is rapidly sticking to the floor.
Seal the Vulnerable Corners
Once the base is set and level, the real work begins at the transitions. Water is lazy; it will always take the path of least resistance, which is usually right through the corners where the pan meets the wall. This is where most flooring installation mistakes happen. I use a dedicated waterproofing membrane and apply the overlap trick for waterproofing shower corners. By overlapping your vertical and horizontal seals by at least two inches, you create a redundant barrier that prevents a single pinhole from ruining your subfloor. Think of it like shingles on a roof—everything needs to shed water downward and away from the structural wood.Even with the corners sealed and the mortar set, there is a layer of complexity most DIYers—and even some pros—conveniently ignore. We talk about ‘waterproofing’ like it’s a suit of armor, but water isn’t just a liquid; it’s a gas. Everyone says that as long as the membrane is continuous, you’re safe. In my experience, that’s a dangerous oversimplification. The Tile Council of North America (TCNA) warns that vapor transmission can move through seemingly solid materials, leading to what I call the vapor trap mistake. If you trap moisture between a non-breathable membrane and a wooden subfloor without proper ventilation or a secondary barrier, you’re just creating a slow-motion rot chamber. You might not see it for five years, but when you do, it’ll be a total loss.
Waterproof Membranes Aren’t a Magic Shield
Most people assume that more is always better. They layer products from three different manufacturers, thinking they’re being extra safe. This is a massive ‘oops’ factor. Chemical compatibility is real. I’ve seen high-end modified thinsets fail to bond because they were applied over a membrane they weren’t designed for. If you’re working on a bathroom, don’t forget the baseboards. I always use the silicon bead secret for waterproofing baseboards in bathrooms. It’s a tiny detail, but it prevents the bottom of your trim from acting like a wick every time someone splashes out of the tub.
Can a Scarf Joint Actually Prevent Winter Gaps?
If you’re running long lengths of trim, you’ve probably been told to just butt the ends together and caulk the gap. That is amateur hour. In high-end work, we use the scarf joint rule for long baseboard runs. By overlapping the boards at a 45-degree angle, you ensure that when the wood inevitably shrinks in the winter, you don’t end up with a quarter-inch black hole in the middle of your wall. It’s about managing the movement, not pretending it won’t happen. If you want that perfect look, you also need to master the back-cutting secret for baseboard miters to get those tight, ‘jewelry-box’ corners. 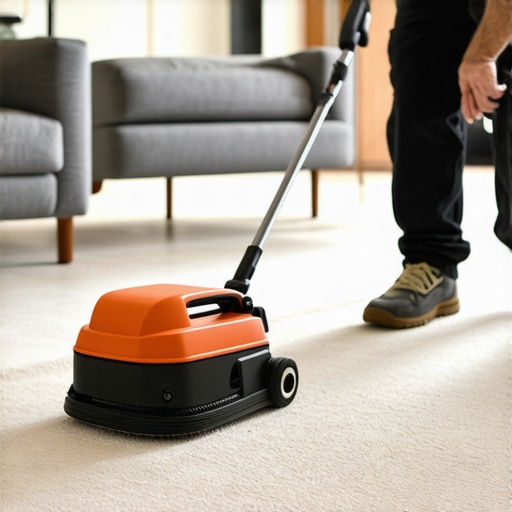
The Wrong Carpet Pad Kills Your Warranty
Let’s pivot to the living room, where the mistakes are just as expensive. Most homeowners think the ‘softest’ pad is the best pad. Wrong. A pad that is too soft or too thick allows the carpet backing to flex too much, which leads to delamination. I’ve seen people wonder why your carpet pad is too thick for the tack strip, and the answer is usually that they bought the ‘luxury’ upgrade that actually voids the carpet’s wear warranty. If the pad doesn’t allow the tack strip to grip the backing properly, you’ll be calling someone for the power stretcher move to fix loose carpet bubbles within eighteen months.
Stop Trusting the Knee Kicker Alone
The biggest myth in soft flooring is that a knee kicker is sufficient for a whole room. It’s not. A knee kicker is for positioning; a power stretcher is for the actual install. If your installer shows up with only a small tool bag and no long poles, send them home. Without a power stretcher, the carpet isn’t truly tight, and it will eventually ripple. These carpet install secrets are the difference between a floor that looks good today and one that looks good in a decade. Have you ever fallen into this trap? Let me know in the comments.
Humidity Controls Your Floor’s Lifespan
Maintenance isn’t just about running a vacuum; it’s about being the ‘humidity manager’ of your own home. I tell all my clients that the climate inside is just as important as the materials they choose. According to the NWFA (National Wood Flooring Association) Technical Manual Section 1, wood flooring performs best when the relative humidity is kept between 30% and 50% year-round. Deviate from that range, and you’re practically inviting your expensive planks to cup or gap. Similarly, when you’re cleaning, put away the heavy-duty chemical sprays. I’ve seen more high-end finishes etched by ‘natural’ vinegar solutions than by actual foot traffic. Instead, follow the microfiber mist rule for cleaning matte floors—it’s designed to protect the factory seal while lifting more debris than a traditional wet mop ever could.
Green Lasers Save You Hours of Frustration
One tool I never walk onto a job site without is my 360-degree green beam laser level. Why? Because the human eye is remarkably easy to trick. You might think your starting wall is straight, but by the time you reach the other side of a twenty-foot room, you could be two inches off. Using the laser level hack for straight tile rows ensures that your layout is dead-on from the first tile to the last. It’s the difference between a professional-looking finish and a DIY disaster that looks crooked the moment you stand back to admire it. 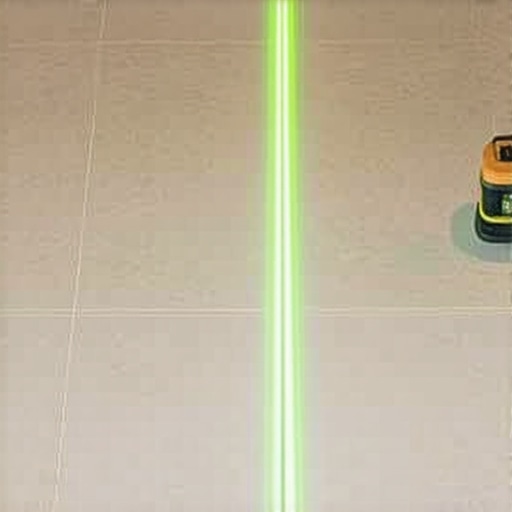
How do I maintain my shower and floors over time?
It really comes down to a consistent ‘perimeter check.’ Once every few months, run your fingers along the baseboards and the shower transitions. If you notice why your caulked baseboards are cracking within weeks, don’t just layer more silicone on top. You need to remove the old sealant entirely to get a fresh bond. In the shower, movement is inevitable, which is why sticking to the soft joint rule for shower wall corners is vital. Silicone, not grout, is what keeps those corners waterproof when the house shifts. If a single tile does crack, knowing how to replace a single broken tile without total demo can save you thousands of dollars in replacement costs.
Undercut Your Way to Professional Seams
Undercutting door jambs is another area where the right equipment makes the professional. If you’ve ever looked at a doorway and wondered why your door jamb undercuts are too high, you probably tried to eyeball it with a handsaw. I always use a dedicated power undercut saw with a carbide blade to ensure the plank or tile slides in perfectly with zero gap. It’s a niche tool, but for professional results, it’s non-negotiable. It eliminates the need for messy caulk or trim at the door, giving you that ‘built-in’ look that clients pay a premium for.
Smart Sensors are the Future of Home Protection
Looking at the horizon, I see the industry moving toward much more proactive protection. I predict that transform your flooring top trends in installation for 2025 will be dominated by smart moisture-sensing underlayments. These systems will be able to alert your smartphone the second a leak starts behind a shower niche or under a hardwood run, long before you see a wet spot on your ceiling. It’s a game-changer for high-end shower enclosures. For now, focus on the fundamentals. I want you to try the laser level hack for straight tile rows on your next project—it’s the single most effective way to upgrade your skill set from intermediate to expert.
The Brutal Truths Only a Demo Hammer Can Teach
After years of tearing out failed projects, I’ve realized that most disasters stem from a desire to save twenty minutes on a Tuesday. The hardest lesson I ever learned was that ‘good enough’ is just a countdown to a repair. When I ignored structural support, I wasn’t saving time; I was just postponing a flooring installation failure. Now, I never skip the small stuff, like why your floor joists need blocking before tile installation, because that extra hour of work prevents a decade of creaks. I’ve also learned that manufacturer instructions are a baseline, not a ceiling. For example, even if a carpet pad says it’s ‘universal,’ I always double-check why your carpet pad is too thick for the tack strip before laying a single yard. Finally, remember that the subfloor is the boss; if it’s not level, your finish will never be perfect, so don’t overlook flooring installation mistakes to avoid for a seamless look during the prep phase.
#IMAGE_PLACEHOLDER_E#
The Tools That Rescued My Reputation
I don’t believe in buying every gadget at the hardware store, but there are three things I won’t work without. First is a high-quality oscillating tool for clean undercuts; it prevents why your door jamb undercuts are too high from ruining your aesthetic. Second, a cross-line laser is non-negotiable for keeping everything from tile to baseboards straight; the laser level hack for straight tile rows is the easiest way to look like a pro. Third, keep a dedicated scribe tool handy. Whether you are fitting vinyl to a fireplace or mastering the back-cutting secret for baseboard miters, precision in the cuts is what separates a DIY job from a masterpiece.
Why Your Home Deserves This Extra Effort
Stepping onto a solid, beautiful floor every morning isn’t just about home value; it’s about the peace of mind that comes from knowing it was done right. It can be intimidating to start, but when you follow a step-by-step flooring installation from planning to perfect finish, you’re building a foundation for your family’s life. Don’t be afraid to slow down and get the details right. Your future self—the one not dealing with leaks or loose carpet—will thank you for the extra effort today. Have you ever found a surprise under your old flooring that almost made you quit? Let me know in the comments below!