

I will never forget the sound of water dripping inside my kitchen ceiling at half-past midnight. It was a rhythmic, soul-crushing tap-tap-tap that told me my brand-new, barrier-free master suite was actually a leaking sieve. I had spent weeks obsessing over the aesthetic, browsing shower renovation ideas for a luxury feel, but I had completely ignored the invisible physics of water. I made the classic mistake of thinking a standard waterproofing kit was enough for a floor with zero threshold. It wasn’t. That soggy drywall was my expensive lesson in why the double-membrane tactic isn’t just a fancy extra—it is the only way I will build a curbless shower today.
Why One Layer Fails When the Curb Disappears
When you remove the 4-inch curb from a shower, you are not just making it look sleek; you are removing the safety bucket that catches overflow. In a traditional setup, you have room for error. In a curbless design, the entire bathroom floor effectively becomes part of the wet zone’s potential splash-out area. Early in my career, I ignored the flooring installation mistakes to avoid and treated the transition like a normal doorway. I learned the hard way that water is a persistent detective; it will find the smallest pinhole in your thin-set or the tiniest gap in your tape. The double-membrane tactic involves a primary liner—often a heavy-duty pan liner or a liquid-applied membrane—topped by a secondary, surface-applied sheet membrane. This creates a redundant seal. If moisture gets past your grout or your first line of defense, it hits a secondary barrier before it ever touches your subfloor. This is especially vital when you are dealing with a linear drain setup for barrier-free showers, where the water is directed toward one specific edge of the room.
Is all this extra work actually worth the time?
You might be thinking that since you are already using top-tier materials, doing the job twice is overkill. I get it. Time is money, and membranes are not cheap. However, the Tile Council of North America (TCNA) emphasizes that proper substrate preparation and moisture management are the most critical factors in preventing catastrophic water damage in wet areas. By doubling up, you are essentially decoupling the tile from the house’s natural shifts while ensuring 100% moisture containment. I once tried to skip this on a small guest bath, and within two years, the baseboards were peeling at the floor line because of invisible wicking. Never again. Today, we are going to walk through how to execute this properly so you can sleep through the night without checking your kitchen ceiling. We will look at how this integrates with the low-profile transition trick for wheelchair access and why your flood test secret is the only way to prove you have done it right. Have you ever had a project look perfect on the surface, only to find a disaster hiding underneath months later? Send me a message through the contact page—I would love to hear how you handled it.
Setting the Slope Before the First Layer Hits the Floor
Setting the foundation begins with the slope, and you can’t just eye-ball it. I use the dry pack method for a level shower base to ensure every drop of water finds its way to the drain rather than pooling in a corner. In a curbless environment, that slope has to start further back into the main bathroom area than you might think. The trick here is the consistency of your mud. I remember a project in a tight condo where I rushed the mix, and by the next morning, I could hear a hollow ‘thump’ when I stepped on it because it hadn’t bonded to the subfloor properly. I had to rip it all out and start over. Now, I follow the rules for how to mix thinset for the perfect peanut butter consistency every single time to ensure the base is rock solid before the first membrane even leaves the bucket.
Integrating the Drain for a Flush Finish
In a curbless setup, your drain is your best friend or your worst enemy. If the drain sits too high, you have a trip hazard; too low, and you’ll have a puddle. I always aim for the flush mount secret for integrated shower drains. This involves recessing the drain flange into the subfloor so the membrane can lay perfectly flat across the transition. When I was first starting out, I tried to build up the tile around a proud drain, and it looked like a volcano. It was a disaster for water flow and an eyesore for the client. Recessing the flange allows that primary membrane to create a continuous, uninterrupted seal right into the throat of the plumbing.
Installing the Primary Barrier and Why It Matters
Once the slope is set and the drain is integrated, I apply the first line of defense. This is usually a heavy-duty sheet or a high-build liquid membrane that extends at least 6 inches up the walls and at least 2 feet outside the shower opening. This is where most people fail. They stop right at the glass line. But remember, water wicks. I use the underlayment tape move for moisture barriers at every single seam. 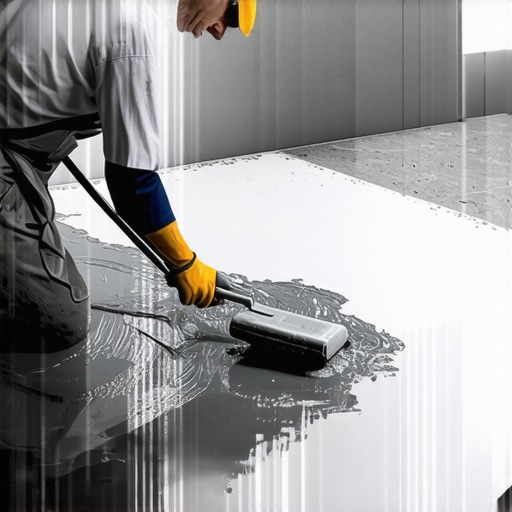 This ensures that even if the house settles—which it will—the membrane has enough flexibility to bridge small gaps without tearing.
The Overlap That Actually Saves Your Subfloor
After the primary layer is cured, I come in with the secondary surface-applied membrane. This is usually a fleece-backed sheet that the tile bonds to directly. The magic is in the overlap. I always use the overlap trick for waterproofing shower corners, ensuring that the top layer overlaps the bottom by at least 2 inches with a dedicated sealing adhesive. I once saw a ‘pro’ install these butt-jointed, thinking the thinset would act as the seal. Six months later, the guest room next door had damp carpet because water had traveled right through that seam. By doubling up and overlapping, you are creating a shingle effect where gravity and physics are working for you, not against you.
Managing the High-Stakes Transition Zone
The most vulnerable spot in any curbless shower is the invisible line where the shower ends and the bathroom begins. To keep this area lean and mean, you need to avoid common flooring installation mistakes to avoid like build-up from too much thinset. I use a specific notch trowel to keep the bed thin but the coverage 100%. This is also where I pay close attention to the soft joint rule for shower wall corners. Every change in plane needs a flexible sealant, not grout. If you use grout at the floor-to-wall transition or at the curbless entry, it will crack within weeks, and that crack is an open door for moisture to bypass your secondary membrane and sit on your primary layer. If it sits there long enough, it will eventually find a way out.
The Myth of the ‘More is Better’ Sealant Application
You have likely heard the old-school advice to just ‘caulk the heck out of it’ if you are worried about a leak. In my experience, that is exactly how you trap moisture where it shouldn’t be. When you are dealing with a barrier-free transition, an over-application of sealant can actually create a dam that prevents water from reaching the drain, forcing it to sit against your grout lines until they saturate. This is a common flooring installation mistake to avoid if you want a system that breathes. Instead of a thick mountain of silicone, I rely on the precision of the silicon bead secret for waterproofing baseboards in bathrooms. It is about the placement, not the volume. A thin, strategic bead at the change of plane ensures that moisture is deflected back toward the slope rather than being held captive against the subfloor.
Why does your ‘leak-proof’ shower still cause baseboard rot?
Even with a double-membrane setup, I’ve seen homeowners pull back their trim two years later only to find black mold. This happens because of capillary action—the ability of water to ‘climb’ through porous materials like thinset or unsealed grout. If your secondary membrane doesn’t wrap perfectly into the bathroom floor, the water travels horizontally under the tile through the adhesive layer itself. This is almost always why your painted baseboards are peeling at the floor line. To prevent this, your waterproofing must be a continuous ‘bathtub’ that extends beyond the glass splash zone. 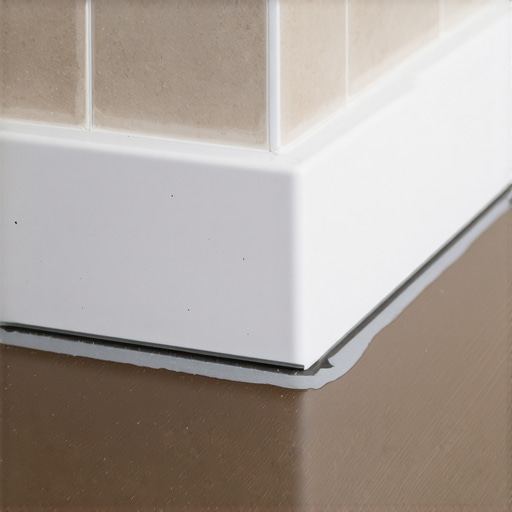
Stop trusting the subfloor just because it looks flat
The biggest ‘trap’ in curbless design isn’t the waterproofing—it’s the deflection. Most pros think if the floor doesn’t squeak, it is ready for tile. However, the Tile Council of North America (TCNA) and ANSI A108.01 standards are very clear: your subfloor must meet a minimum stiffness (L/360 for ceramic, L/720 for natural stone) to prevent the tiny vibrations that snap a waterproof seal over time. If your joists flex even a fraction of an inch when you walk, that double membrane will eventually shear. I always perform the subfloor screw routine for stopping floor squeaks and often realize why your floor joists need blocking before tile installation is the only way to guarantee the floor is rigid enough for a curbless entry. Without this structural ‘overkill,’ your ‘leak-proof’ system is just a ticking time bomb.
The Final Test Before Thinset Hits the Floor
I never, ever install a single tile until I’ve performed the flood test secret for guaranteed leak-proof showers. You might think you can see a leak with your eyes, but you can’t see a slow weep that takes 24 hours to manifest. If the water level drops even an eighth of an inch overnight, you have a problem in your membrane or your drain integration. I’ve seen guys skip this to save a day on the schedule, only to spend a week doing a tear-out a month later. Have you ever fallen into this trap of rushing the ‘invisible’ steps because the client was pushing for a finish? Let me know in the comments—I’d love to hear how you handled the conversation when things went sideways.Once you pass that flood test, you are in the home stretch, but this is where the real craftsmanship shows. I do not just walk away and hope for the best; I use a specific kit of gear to ensure the aesthetic matches the engineering. For instance, I never install a single piece of trim without my 360-degree green beam laser. It is the only way to ensure your baseboard styles that elevate your interior design actually run level across a room where the floor is intentionally sloped. If you follow the wall line, your baseboards will look like a rollercoaster. Instead, I scribe the bottom of the board to the floor while keeping the top edge laser-straight. It is tedious, but it is the difference between a basic DIY job and a high-end luxury renovation.
The Gear That Separates Amateurs From Pros
In my experience, the tool you choose for the transition is just as important as the tile itself. When I am moving from a wet zone to a carpeted bedroom, I rely on carpet install secrets like the power stretcher to ensure the tension is perfect right up against the tile edge. For the tile itself, I have moved away from standard spacers in favor of mechanical leveling systems. These ensure that even large-format tiles stay perfectly flat as the thinset cures, preventing the ‘lippage’ that can ruin a curbless entry. If you are dealing with hardwood transitions, I highly recommend using the urethane glue secret for hardwood on concrete. It provides a moisture barrier and a flexible bond that allows the wood to move without snapping your grout lines.
How do I keep these high-end finishes looking new?
The biggest threat to a curbless shower or a high-end floor isn’t the water—it is the wrong cleaning routine. I have seen thousands of dollars worth of work ruined because a homeowner used harsh acidic cleaners on natural stone or a soaking wet mop on laminate. I always tell my clients to follow the microfiber mist rule for cleaning matte floors. It is about minimal moisture and neutral pH cleaners. According to the IICRC (Institute of Inspection, Cleaning and Restoration Certification) S100 standard, improper chemical use and over-wetting are the leading causes of premature floor degradation and mold growth. For carpeted areas nearby, selecting the best carpet types for high traffic areas in 2025 is half the battle, but the other half is maintaining the fibers. If you ever spot a small snag or a localized heat mark, utilizing the iron burn repair for small carpet scars logic can help you trim and blend the area before it unravells. 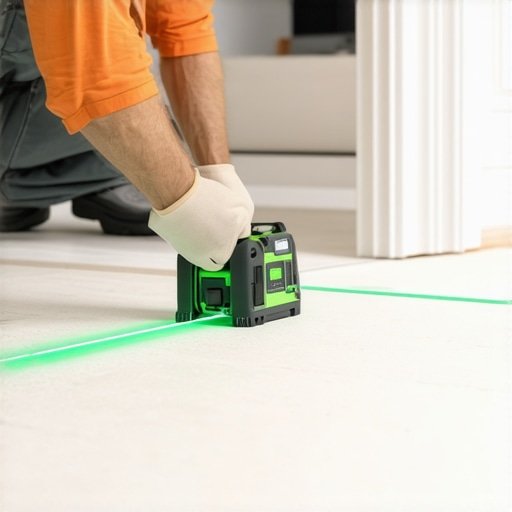
Smart Sensors and the Death of the Hidden Leak
I predict that over the next few years, we are going to see ‘smart’ waterproofing systems become the industry standard. We are already seeing prototypes of moisture sensors that can be embedded behind the tile to alert your phone the second a leak is detected. This will be a game-changer for shower repairs when to fix vs replace decisions because you will catch a pinhole leak years before it rots your subfloor. While the technology is evolving, the principles of a solid installation remain the same. If you want to take your work to the next level right now, stop using bulky transition strips and start mastering the low-profile transition trick for wheelchair access. It requires more subfloor prep, but the result is a seamless, professional look that clients will pay a premium for. Try implementing a 360-degree laser on your next baseboard run—it will change how you view ‘straight’ lines forever.
The Hard Truth About Going Curb-Free and Staying Dry
One thing nobody tells you is that your bathroom floor is now a wet-room-lite. Even if you are not showering in the middle of the room, steam and overspray will settle on every surface. I have seen subfloors rot three feet away from the drain because a contractor did not realize that standard grout acts like a wick, pulling moisture horizontally through the thinset bed. If you are looking for tips for a spa-like shower experience, remember that true luxury is the peace of mind knowing you will not have to deal with costly shower repairs in five years. Additionally, your subfloor must be incredibly rigid; any flex in the joists acts as a shear force that can eventually delaminate the bond between your primary and secondary membranes.
The Gear and Guides That Keep My Projects Bone Dry
I rely heavily on the TCNA Handbook for all substrate requirements—it is the definitive word on tile physics. Beyond the manuals, I swear by a 360-degree green beam laser to ensure that even though the floor is diving toward the drain, your trim remains visually perfect. For the best bond at the threshold, I follow a step-by-step flooring installation from planning to perfect finish to make sure the transition does not become a trip hazard. If you are joining wood to tile nearby, use the urethane glue secret for hardwood on concrete to provide a flexible moisture barrier that protects your organic flooring. #IMAGE_PLACEHOLDER_E#
Start Your Journey Toward a Truly Seamless Bathroom
Building a barrier-free shower is a high-stakes game, but the reward is a sleek, accessible, and modern home that adds significant long-term value. Whether you are browsing the latest baseboard trends in 2025 or finalizing your layout, remember that the invisible steps are the ones that dictate success. Start your next project with the ultimate shower renovation guide and build with the confidence that your design is as watertight as it is beautiful. Have you ever encountered a hidden leak that ruined your subfloor, or are you preparing to install your first curbless shower? Let me know your biggest concerns in the comments below!