

I was standing there, admiring my brand-new ‘spa-like’ renovation, when the silence was broken by a sound no homeowner ever wants to hear: the screech of 100 pounds of tempered glass grinding against a porcelain curb. I’d spent weeks researching creating a spa-like shower experience, but I completely ignored the physics behind the door itself. I thought a few standard screws and some hope would hold it up. I was wrong. My gorgeous frameless door was sagging because I hadn’t followed what I now call the ‘Solid-Shoulder’ rule. [IMAGE_PLACEHOLDER] It’s a hard lesson I learned so you don’t have to, and it’s the difference between a door that glides like silk and one that eventually shatters or fails. If you’ve ever noticed why your shower door is dragging on the tile floor, you’re likely already dealing with a support failure.
Why a Sagging Shower Door is a Homeowner’s Nightmare
Most of us focus on the aesthetics—the hardware finish, the glass thickness, or the tile pattern. But a heavy glass door is a literal beast. According to industry standards, such as those from the National Kitchen & Bath Association, 1/2-inch architectural glass weighs approximately 6.4 pounds per square foot. That means a standard door can easily tip the scales at over 100 pounds. Without a ‘solid shoulder’—essentially doubled-up studs or solid blocking directly behind the hinges—that weight will eventually pull your screws right out of the wall. I made the amateur mistake of trusting a single, slightly warped 2×4. It didn’t end well. This isn’t just about a door that won’t close; it’s about the safety of your family.
Is all this extra structural work actually necessary?
You might be thinking that your contractor said it’s ‘fine’ or that the anchors included in the box look sturdy enough. I’ll be honest: they almost never are for frameless setups. When you’re dealing with expert tips for modern bathroom makeovers, the structural integrity behind the tile is more important than the tile itself. Have you ever felt your shower door wobble or seen a gap widening at the top? If so, drop a comment or reach out, because your wall might be screaming for help.
The Hidden Support Your Bathroom Walls Are Missing
The ‘Solid-Shoulder’ rule means you ensure there is a continuous, vertical path of solid wood from the floor to the top of the door hinge. This isn’t just a safety precaution; it’s what ensures your investment lasts for twenty years instead of two. When we talk about modern designs for a luxury feel, we have to talk about the ‘bones’ of the room. Without that extra blocking, the vibration of the door opening and closing creates a pivot point that slowly destroys your grout and waterproofing. Trust me, opening up a wall to fix a sag is much more expensive than doing it right the first time.
Fix the Skeleton Before Dressing the Body
To build a ‘Solid-Shoulder,’ you need to think of your wall framing like a structural bridge. Instead of a single 2×4, you should sister two or three studs together at the exact location where the door hinges will bolt. Think of it as creating a wooden pillar within the wall. If you are already seeing issues with your current setup, you might need to evaluate shower repairs: when to fix vs. replace for longevity to decide if a total tear-down is necessary. This isn’t just about strength; it is about providing a wide enough target for your screws so that if the tile layout shifts slightly, you aren’t hitting the edge of a single stud and splitting the wood.
Double Up Your Studs for Maximum Grip
Start by identifying the ‘strike side’ and the ‘hinge side.’ On the hinge side, install a full-length 2×4 directly next to your king stud. This ‘sister stud’ should be glued and screwed to the original. This prevents the wall from twisting under the cantilevered weight of the glass. If you are using massive slabs, ensure you are following the full-bed mortar rule for large format shower tiles to prevent the glass weight from cracking the tile surface due to hollow spots.
That Time I Ignored the Structural Math
I once did a ‘quick refresh’ for a neighbor who insisted the existing studs were stiff enough. Three months later, a hairline crack appeared in the grout line near the top hinge. I had to pull three rows of custom 12×24 tile—destroying them in the process—just to add a five-dollar piece of blocking I should have installed from the start. I learned the hard way that a wall is only as good as what is behind the tile. Now, I never trust a wall I haven’t seen naked. 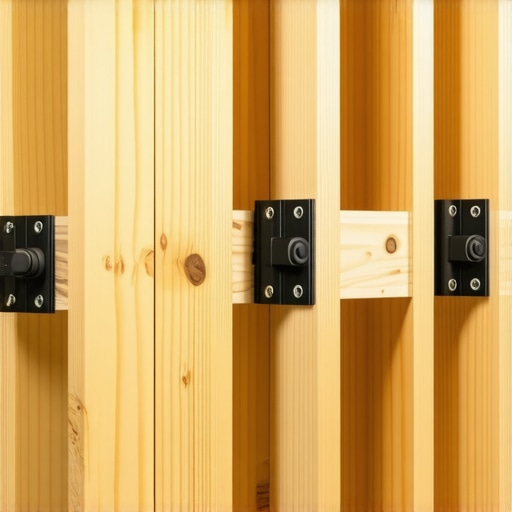
Precision Alignment Starts with the Right Tools
Once the framing is reinforced, the next step is ensuring your hinges are perfectly vertical. Even a one-degree tilt will cause the door to swing open or shut on its own, a phenomenon pros call ‘ghosting.’ Use a high-quality tool and check out the laser level move for perfectly horizontal shower tiles to ensure your hinge marks are dead-on. If the wall is even slightly out of plumb, your ‘Solid-Shoulder’ will help you compensate by allowing you to shim the hinge without losing screw depth.
Stop the Water Before It Starts
A heavy door creates significant vibration every time it latches. This vibration is the enemy of waterproofing. When you finally install the door, you must use the bead and smooth strategy for shower corners around the hinge plates. This ensures that water doesn’t migrate through the screw holes into your new structural blocking. Also, pay close attention to the base; a door that drags will eventually ruin your curb. You must respect the curb slope requirement for waterproof shower pans to keep the water inside the enclosure and ensure the door has enough clearance to swing freely without catching on the tile edge.
Let’s take the logic of the ‘Solid-Shoulder’ rule from the shower wall and apply it to the rest of the room, because this ‘structural first’ mindset is exactly where most DIYers—and even some seasoned pros—miss the mark. A common myth I hear is that modern ‘waterproof’ flooring, like luxury vinyl plank (LVP), is essentially indestructible. People think they can just slap it down over any surface and forget it. But if you don’t account for subfloor prep, you are building on a foundation of sand. If you have ever wondered why your vinyl plank floor is clicking when you walk, it is rarely a defect in the product; it is almost always a subfloor deflection issue that should have been leveled before the first plank was laid.
The Critical Gap Most Installers Ignore
The ‘Oops’ factor in most renovations happens at the transition points. Baseboards are the most common victim of ‘good enough’ syndrome. Most homeowners think you just nail them in and caulk the top, but they completely ignore the bottom edge. In a bathroom environment, ignoring the floor-to-baseboard joint is a slow-motion recipe for rot. I always advocate for the silicon bead secret for waterproofing baseboards in bathrooms. Without this invisible barrier, mop water or a splash from the tub wicks up into the drywall behind the board, leading to mold you won’t see until it’s too late. 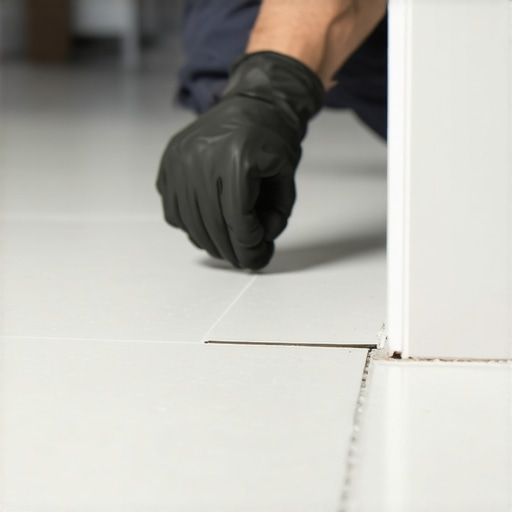
Why Tight Miters Fail in the Winter
Here is where I disagree with the ‘tight-is-right’ crowd. Everyone wants their trim joints to look like a single piece of wood, but wood is a living material that breathes. If you cut your miters at a perfect 45 degrees without accounting for seasonal humidity, you will eventually see why your baseboard miters keep gapping in the winter. According to guidelines from the National Wood Flooring Association (NWFA), proper acclimation and moisture testing are the only ways to prevent these structural shifts. To combat this, I use the back-bevel move for tight baseboard miters, which allows the front edge to stay locked even when the back of the wood expands or contracts slightly.
Why does your new carpet look like it is growing waves?
If you see ripples in your carpet a few years after installation, it is usually because the installer relied on a knee-kicker rather than a mechanical power stretcher. The Carpet and Rug Institute (CRI) standards are clear: a power stretcher is mandatory for a professional-grade stretch. If you are hunting for carpet install secrets for achieving flawless results, understand that the power stretcher isn’t just a fancy tool; it’s the only thing keeping your floor flat. These nuances are the difference between a project that looks good on camera for a week and one that stays solid for a decade. Avoiding flooring installation mistakes for a seamless look requires looking past the surface and into the mechanics of the materials. Have you ever noticed your baseboards pulling away or your floor making weird noises? Let me know in the comments—I’d love to help you troubleshoot your specific situation.
When you finish a renovation, it feels like the work is done, but the real test of quality is how that room behaves three years from now. I’ve found that the difference between a pro and a weekend warrior isn’t just talent; it’s the specific kit they carry. If you want your work to stand the test of time, you have to stop guessing. For instance, I never start a basement project without a digital hygrometer. Following the moisture meter requirement for basement flooring jobs is the only way to know if your subfloor is actually ready for a vapor barrier. If you skip this, you’re just waiting for your floors to buckle or mold to bloom.
Put Down the Tape Measure and Buy a Laser Level
I used to pride myself on my bubble level skills, but I was living in the dark ages. For a shower project, a 360-degree green beam laser is non-negotiable. It allows you to project a perfect grid across every wall simultaneously. This is how you ensure that the laser level move for perfectly horizontal shower tiles results in a layout that doesn’t look like it’s sliding downhill by the time you reach the ceiling. This level of precision is also what makes expert tips for modern bathroom makeovers actually work in the real world. According to the Tile Council of North America (TCNA) Handbook, maintaining a consistent 1/16-inch per foot slope is critical for drainage, and you simply cannot eyeball that kind of accuracy.
How can I keep my shower and floors in peak condition?
Maintenance isn’t just about cleaning; it’s about preservation. For natural stone, you should be doing a water-drop test every six months. If the water doesn’t bead up, it’s time to reapply a sealer. I personally swear by the deep seal tactic for porous natural stone showers to prevent the stone from drinking in body oils and soap scum. On the flooring side, if you are dealing with carpet, don’t just vacuum; check your seams. If you notice any lifting, you need to learn how to patch a carpet seam that is coming apart before the fraying becomes permanent. Small fixes now prevent a full shower repair or floor replacement later. 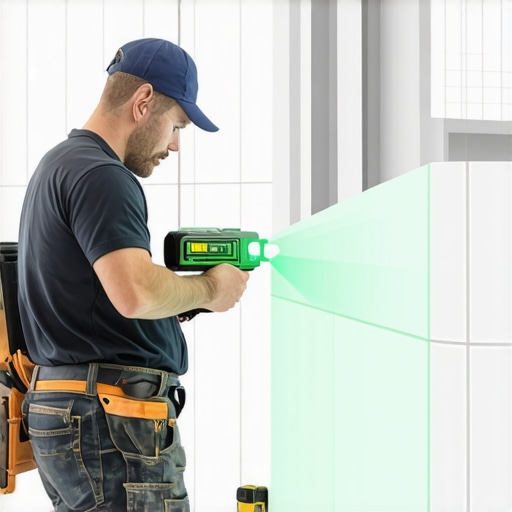
The Future of Flooring is Smart and Seamless
Looking ahead, the industry is moving toward ‘intelligent’ installations. We are starting to see subfloor sensors that can alert your smartphone to a leak under your luxury vinyl or behind your baseboards before you ever smell the rot. Even without high-tech sensors, the trend is moving toward larger, more seamless surfaces. To keep up, you need to master the stay-sharp blade rule for cutting luxury vinyl, because as planks get bigger, any jagged edge becomes a glaring eyesore. I predict that within five years, we’ll be using augmented reality apps to template our tile around toilet flanges with zero waste. For now, my best advice is to embrace the ‘silicon wash.’ If you haven’t tried the silicone wash trick for easy grout cleanup, do it on your next backsplash—it will change your life and save your cuticles. Go grab a high-quality sealant and try this on a small corner today; you’ll never go back to the old messy way of wiping down joints.
Hard Truths About What’s Really Holding Your Bathroom Together
Looking back at years of sawdust and grout, the biggest lightbulb moment wasn’t about the finish—it was about the hidden physics of the room. First, “waterproof” is a marketing term, not a physical law; if your framing moves, your seal will eventually break. Second, if you don’t over-engineer your hinge supports today, you will pay for it in cracked tiles tomorrow. I have realized that a successful shower renovation is truly built from the inside out. Finally, never trust a subfloor that hasn’t been checked with a straight-edge; even the most expensive planks will fail over a 1/8-inch dip. [IMAGE_PLACEHOLDER_FINAL]
My Personal Rig for Results That Last Decades
I don’t step onto a job site without a few specific items that have saved my reputation. I always use a digital moisture meter because ignoring the moisture meter requirement for basement flooring jobs is a recipe for disaster. I also rely heavily on a 360-degree laser level to keep my lines dead-on across the entire room. For that high-end finish on your trim, mastering the inside corner cope for perfect baseboard installs is the only way to handle house settling without visible gaps. These aren’t just luxury items; they are the essentials for any serious craftsman.
Your Journey Beyond the Studs and Tile
Every professional was once a beginner staring at a pile of materials and wondering where to start. Don’t let the fear of a mistake stop you from creating a space you love. Take it slow, verify your measurements twice, and always prioritize the structural “bones” over the pretty “skin.” Whether you are following a step-by-step flooring installation guide or reinforcing a heavy glass door, your attention to detail is what makes the project last. Have you ever noticed your shower door starting to sag or catch on the floor? Let me know your experience in the comments below!