

I remember standing at the top of my first major renovation project, looking down at a beautiful flight of raw oak stairs. I had spent days sanding the treads to perfection, but when it came time to install the transitions, I panicked. I thought I could just butt a standard plank up against the edge and call it a day. The result? A jagged, ugly edge that caught every sock and eventually splintered under the weight of my morning coffee runs. It was a visceral failure. That gap didn’t just look bad; it felt like a trap. I realized then that the stair-nose isn’t just a trim piece—it is the structural anchor of the entire staircase.
The Mistake That Cost Me a Weekend of Ripping Out Wood
Early in my career, I made the classic blunder of ignoring the subfloor. I didn’t think about how the transition would sit against the riser. I just nailed it down. Within a month, the wood started to move because I hadn’t followed the the spacer block rule for consistent gaps, and the expansion killed the joint. Today, I want to show you the specific tactic I use for solid hardwood steps that ensures your edges are flush, safe, and built to last for decades. We are solving the problem of the ‘bouncy nose’ and that annoying gap that appears when your wood acclimates.
Is a custom-milled stair nose really that important?
I get asked this all the time by homeowners who want to save a few bucks. They wonder if they can just use a metal transition or a cheap wrap-around. The short answer? Only if you want it to look like a temporary fix. Solid wood requires a specific mechanical bond. According to the National Wood Flooring Association (NWFA), the stair nosing is the most high-traffic area of any floor, and improper fastening can lead to structural failure under the pressure of a descending adult. If you want a step-by-step flooring installation that actually holds up, you cannot skip the specialized stair-nose tactic.
Why Your Staircase Screams Amateur Hour Without This Move
It all comes down to the overhang and the riser fit. If your nose is too shallow, your foot won’t have enough purchase; too deep, and it becomes a trip hazard. I once had a client whose previous contractor used the wrong depth, and they actually had to use the iron and towel fix for dents just to hide the damage from people constantly kicking the edge. We also have to be mindful of how the environment affects the wood. If you don’t account for humidity, you might find why your hardwood floors are crowning applies to your stairs too, pushing that nose right off the tread. Have you ever stepped on a stair and felt the front edge ‘give’ just a tiny bit? That is exactly what we are going to eliminate today by mastering the glue-and-nail sequence that pros use. Have you ever tried to install your own stair treads only to have them squeak or gap after the first winter?The secret to a silent, rock-solid staircase is a two-pronged attack: mechanical fasteners and high-performance adhesives. If you rely on nails alone, the wood will eventually win. Wood is a living material; it breathes and moves with the seasons. When you step on the edge of a tread, you are exerting hundreds of pounds of localized pressure. Over time, that pressure will ‘wallop’ out the nail holes, leading to a soul-crushing squeak. This is why I always use the glue-assist method for wide plank hardwood floors even when I am working with standard stair components.
Ditch the Nails-Only Approach for a Glue-Assist
I learned this lesson the hard way on a coastal renovation in July. I was rushing and thought the finish nails would be enough to hold the oak nose against the subfloor. Three weeks later, after the humidity spiked, the homeowner called me because the nose had physically sheared the nails and shifted a quarter inch. It was a mess. Now, I apply a serpentine bead of urethane-based construction adhesive to the subfloor before the nose ever touches the wood. This adhesive acts like a shock absorber, distributing the weight of every footfall across the entire surface area rather than just the three or four points where the nails penetrate. 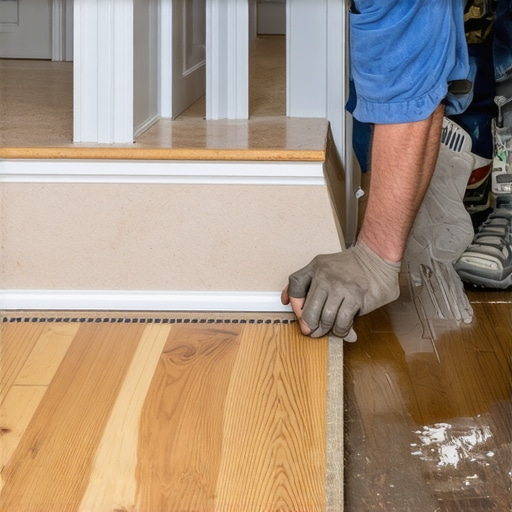
Why Your Subfloor Moisture Level is Non-Negotiable
Before you even open your tube of glue, you have to know what you are sticking it to. If your subfloor is damp, your adhesive won’t bond, and your wood will cup. I’ve seen beautiful white oak turn into a series of mini-canoes because the installer ignored the signs of a damp crawlspace or a fresh slab. This is one of the most common flooring installation mistakes to avoid for a seamless look. I never start the process without a pin-style meter in hand. Understanding why we never skip the subfloor moisture test on concrete or wood is the difference between a floor that lasts fifty years and one that fails in five. If your readings are high, stop. Let the house acclimate.
How to Marry the Nose to the Plank Without a Visible Gap
The transition between the stair nose and the first flooring plank is where the ‘pro’ look is either made or broken. You want a joint so tight it looks like a single piece of wood. To achieve this, I use a variation of the block and hammer move for tight vinyl floor joints adapted for hardwood. I use a sacrificial scrap of flooring to tap the first row into the groove of the stair nose. This ensures I don’t mar the actual finish of the wood I’m installing. If you feel any bounce or hear a ‘clack’ when you tap it, you likely have a high spot on the subfloor that needs to be sanded down. Ignoring a high spot is a recipe for disaster; it’s exactly how to fix a hollow sound under your vinyl plank floor before it even becomes a problem. Think of the subfloor as the foundation of a house; if the foundation is crooked, the roof will never sit right. By ensuring the subfloor is perfectly flat, the stair nose sits flush against the riser, creating a seamless vertical-to-horizontal transition.
While most homeowners focus on the wide-open spaces of a new floor, the real technical battle is won or lost at the thresholds. Most people assume that the transition strips provided in those pre-finished kits are a ‘set it and forget it’ solution. In my experience, relying solely on the plastic tracks provided by manufacturers is a recipe for a call-back within six months. Those tracks are designed for speed, not for the heavy lateral force of a vacuum cleaner hitting them or a person pivoting as they walk through a doorway. I’ve seen dozens of cases where these tracks simply snap or work themselves loose from the subfloor.
Stop Trusting Those Flimsy Plastic Track Inserts
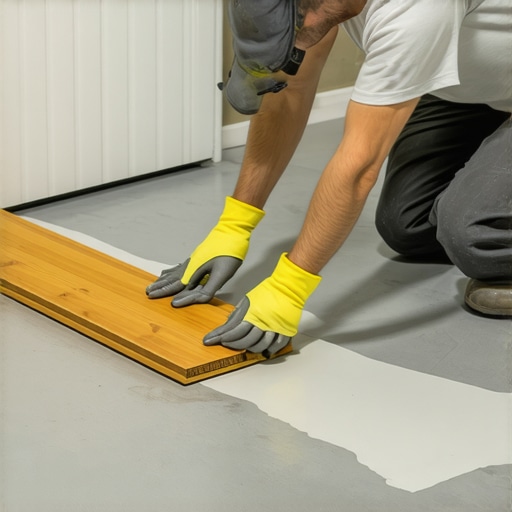
If you want a transition that actually stays put, you need to ditch the track and adopt the double glue method for high traffic vinyl plank transitions. This involves using both a high-tack construction adhesive and a secondary mechanical bond. For concrete, this means drilling and plugging; for wood, it means a discreetly placed trim nail. The industry standard from the National Wood Flooring Association (NWFA) explicitly states that transitions must allow for expansion while remaining structurally sound, yet many DIYers pin them so tight that the floor can’t breathe. This leads to the ‘Ghost Gap’—where the flooring pulls away from the transition in the winter, leaving an unsightly line that collects dirt and debris.
Why do transitions keep popping loose on concrete slabs?
The number one reason for failure on slabs is a lack of moisture awareness combined with the wrong adhesive choice. Concrete is a sponge, and even if it looks dry, it is constantly releasing vapor. If you use a standard wood glue, the moisture from the slab will eventually emulsify it, and the strip will simply lift. This is exactly why your floor transitions keep popping loose on concrete slabs and why I always recommend a hybrid polymer adhesive that is moisture-cured. It creates a waterproof bond that won’t degrade when the humidity rises in the summer.
The Trap of the Oversized Transition
Another common mistake is choosing a transition that is too ‘beefy’ for the space. When you are learning how to transition from thick carpet to thin vinyl without a lip, the instinct is to buy a wide T-molding. However, a wider profile actually increases the leverage placed on the adhesive every time you step on the edge. I prefer to plane down the underside of a custom reducer to create a lower profile that sits flush. This reduces the trip hazard and ensures the weight is distributed vertically rather than at an angle. I once had to go back to a job because a client’s Roomba kept getting stuck on a high-profile reducer; it was a painful lesson in why lower is always better.
You also have to be careful about how you align these pieces during a full home remodel. If you are working in the bathroom, I always suggest using the transition strip move for carpet to bathroom tile to ensure there is a clear break for moisture protection. Forgetting to seal the edge of the wood where it meets the tile transition is a classic ‘oops’ factor that leads to black mold at the doorway. Have you ever fallen into this trap of a popping or squeaking transition strip? Let me know in the comments. If you are still in the planning phase, make sure you check out step-by-step flooring installation guides that cover these thresholds in detail before you start cutting your expensive planks.
I’ve spent years refining my toolkit, and if there is one thing I’ve learned, it’s that your results are only as good as your precision instruments. For example, I stopped using cheap hardware store moisture meters years ago. Now, I rely on the Wagner Orion series. As the technical experts at Wagner Meters point out, knowing the equilibrium moisture content (EMC) is the only way to guarantee that your wood won’t shrink or swell after you leave. This level of detail is why I insist on why we never skip the subfloor moisture test on concrete before any major install. It’s about more than just the wood; it’s about the science of the bond and ensuring that your adhesive doesn’t fail before the warranty even kicks in.
The Gear I Never Leave in the Van
When it comes to carpet, the difference between a floor that lasts and one that ripples is a power stretcher. I’ve seen too many ‘pros’ try to get away with just a knee kicker, which only stretches the carpet a fraction of what is required. Following the power stretcher rule for large living room carpets is the only way to ensure the backing is properly tensioned against the tack strips. Without that mechanical tension, the fibers will lose their structure as the latex backing relaxes. For staircases, I take it a step further by using the stay-put glue strategy for carpet on stairs, which prevents the fabric from shifting under the heavy lateral force of someone descending the steps. If you are working with vinyl, remember the stay-sharp blade rule for cutting luxury vinyl. I change my utility blade every 50 linear feet because a dull blade creates micro-fractures in the wear layer that eventually lead to delamination and unsightly white edges at the seams. 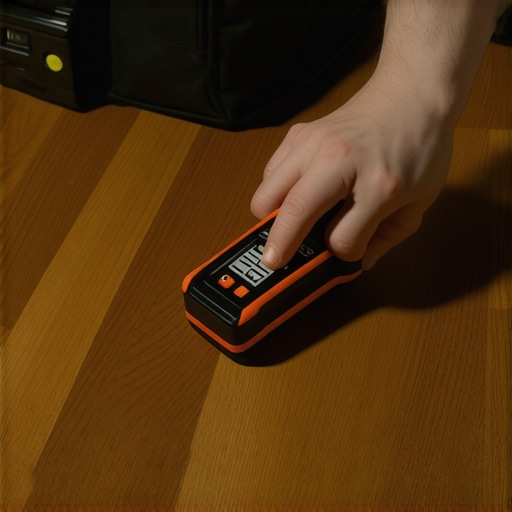
How do I maintain my flooring and shower over time?
Maintenance isn’t just about cleaning; it’s about proactive inspection. For showers, I always tell my clients to check the silicone joints every six months. Water is patient, and it will find even the smallest crack in the grout or caulk. Knowing shower repairs when to fix vs replace for longevity can save you thousands in structural rot later. On the flooring side, skip the steam mops. Steam is the enemy of any wood, laminate, or vinyl plank because it forces moisture into the joints. Instead, use the vacuum seal trick for cleaning dust out of floor grooves to keep grit from acting like sandpaper on your finish.
Why Smart Materials are the Future of Home Remodels
Looking forward to 2025 and beyond, I predict we are going to see a massive shift toward ‘smart’ underlayments that can detect moisture leaks before they reach the surface. We are already seeing the beginning of this with high-performance membranes and reactive adhesives that change color when moisture levels are too high. If you are planning a remodel, don’t just think about what looks good today—think about the hidden systems that will protect that investment for the next thirty years. I highly recommend you try the ‘blue tape’ method for your next silicone job to see how a small, disciplined detail makes a world of difference. Your home deserves that level of care.
What Nobody Tells You About Those Last Three Feet of Flooring
After years of being in the trenches, I’ve realized that the center of the room is easy; it’s the edges where your reputation is made. One of my biggest lightbulb moments was realizing that wood doesn’t just expand—it exerts physical force. If you don’t respect the expansion gap, it can literally shift your baseboards. Another hard lesson? The color of your transition matters less than the height profile. A perfectly matched color on a trip hazard is still a failure. Finally, always buy 15% more transition material than you think you need. You will inevitably miscut one 45-degree angle on a Friday afternoon when the supply house is already closed.
The Precision Kit I Never Leave Behind
If you want to move from amateur results to professional-grade finishes, you need to invest in the science of the bond. I never start a job without my moisture meter because it eliminates the guessing game that leads to why your hardwood floors are crowning. For my adhesive, I only use moisture-cured urethane because it stays flexible for decades, allowing the wood to breathe. I also recommend keeping a dedicated set of non-marring white rubber mallets that won’t leave scuff marks on pre-finished planks. For those tricky wall joints, I always fall back on the coping saw technique for flawless inside baseboard corners to ensure the transition looks seamless against the wall.
Mastering the Art of the Invisible Joint
At the end of the day, a successful flooring installation is about the patience you show in the final hour. It is tempting to rush when the finish line is in sight, but those thresholds are what you and your guests will see and feel every single day. Don’t be afraid of the technical details; embrace the glue-assist methods, the moisture tests, and the precision micro-cuts. You have the knowledge now to create a space that isn’t just beautiful, but structurally sound for the next generation. Which part of your staircase or transition layout is giving you the most headache right now? Let me know in the comments below!